Table of Contents
Advertisement
Advertisement
Table of Contents
Troubleshooting

Related Manuals for DeLonghi ECAM22.36X


Summary of Contents for DeLonghi ECAM22.36X
- Page 1 De’Longhi Appliances via Seitz, 47 31100 Treviso Italia...
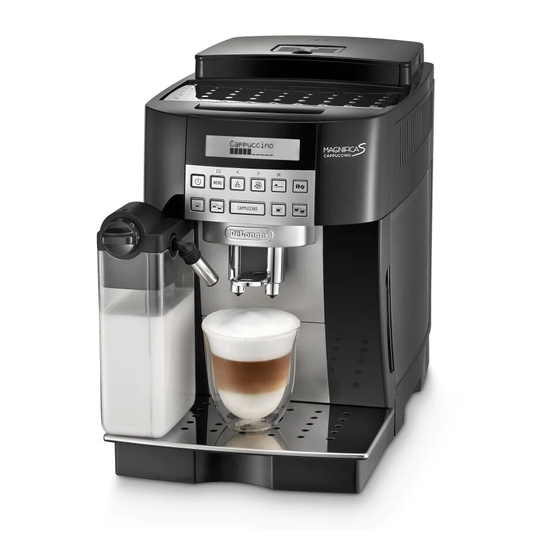
- Page 2 ECAM22.36X BEAN TO CUP ESPRESSO AND CAPPUCCINO MACHINE Instruction for use...
- Page 3 page 6 D2 D2...
-
Page 7: Table Of Contents
CONTENTS MAKING CAPPUCCINO AND MILK BASED DRINKS 12 Filling and attaching the milk container ......12 INTRODUCTION ..........7 Adjusting the amount of froth ........13 Symbols used in these instructions ........7 Making cappuccino ............13 Letters in brackets ............7 Making frothed milk only (without coffee) .... -
Page 8: Introduction
INTRODUCTION • Unplug directly from the plug only. Never pull the power cable as you could damage it. Thank you for choosing this automatic espresso and cappuccino • To disconnect the appliance completely, unplug it from the machine. mains socket. We hope you enjoy using your new appliance. -
Page 9: Instruction For Use
Description of the control panel This is a household appliance only. (page 2 - B ) It is not intended to be used in: A number of buttons on the panel have a double function. This is • staff kitchen areas in shops, offices and indicated in brackets in the description. -
Page 10: Before Use
BEFORE USE mains electricity supply (fig. 1). Make sure the main switch at the back of the appliance is pressed (fig. 2). Checking the appliance You must first choose the language (the languages scroll After removing the packaging, make sure the product is com- through at intervals of about 3 seconds): plete and undamaged and that all accessories are present. -
Page 11: Turning The Appliance Off
TURNING THE APPLIANCE OFF Please note : Whenever the coffee machine is turned off after being used to To enable this function, the time must already be set correctly. make coffee, it performs an automatic rinse cycle. 1. Press the MENU button to enter the menu; Danger of burns! 2. -
Page 12: Setting Water Hardness
how many coffees have been made; Please note : how many times the machine has been descaled; When in energy saving mode, a few seconds may elapse before the total number of litres of water delivered; the first coffee is delivered as the appliance must heat up again. how many times the water filter has been replaced;... -
Page 13: Tips For A Hotter Coffee
If the coffee is delivered too slowly • At the end of delivery, to increase the quantity of coffee in or not at all, turn one click clockwise. the cup, within 3 seconds, press and hold one of the coffee For fuller bodied creamier coffee, turn buttons. -
Page 14: Adjusting The Amount Of Froth
15). Each mark on the side of the container corresponds to • If during delivery you want to stop making milk or coffee, 100 ml of milk. press the CAPPUCCINO button twice. • At the end of delivery, to increase the quantity of milk or Please note! coffee in the cup, within 3 seconds, press and hold the CAP- •... -
Page 15: Programming The Quantity Of Coffee And Milk In The Cup For Cappuccino Or Milk
Programming the quantity of coffee and milk in CLEANING the cup for cappuccino or milk Important! The appliance is set by default to automatically deliver standard • Do not use solvents, abrasive detergents or alcohol to clean quantities. To change these quantities, proceed as follows: the appliance. -
Page 16: Cleaning The Water Tank
Cleaning the inside of the coffee maker 6. Clean coffee residues from the support where the infuser rests. Danger of electric shock! 7. After cleaning, replace the infuser by sliding it onto the Before cleaning internal parts, the machine must be turned off internal support (fig. -
Page 17: Cleaning The Hot Water/Steam Nozzle
to the procedure to follow in the event of contact with the skin and eyes. • You should use De’Longhi descaler only. Using unsuitable descaler and/or performing descaling incorrectly may re- sult in faults not covered by the manufacturer’s guarantee. 1. -
Page 18: Setting Water Hardness
The machine can also be programmed according to the hardness 3. To activate the filter, run tap water through the hole in the of the mains water in the various regions so that the machine filter as shown in the figure until water comes out of the needs to be descaled less often. -
Page 19: Displayed Message
11. After delivery, the appliance returns automatically to the The appliance complies with the following EC “Ready for coffee” position. directives: The new filter is now active and you can use the coffee machine. • Low Voltage Directive 2006/95/EC and subsequent Removing the filter amendments;... - Page 20 GROUND TOO FINE ADJUST The grinding is too fine and the coffee is deli- epeat coffee delivery and turn the grinding MILL vered too slowly or not at all. adjustment dial (fig. 8) one click clockwise to- wards “7” while the coffee mill is in operation. If after making at least 2 coffees delivery is still too slow, repeat the correction procedure, turning the grinding adjustment dial another...
-
Page 21: Troubleshooting
TROUBLESHOOTING Below is a list of some of the possible malfunctions. If the problem cannot be resolved as described, contact customer services. PROBLEM POSSIBLE CAUSE SOLUTION The coffee is not hot. The cups were not preheated. Warm the cups by rinsing them with hot water. (N.B. -
Page 22: Electrical Connection (Uk Only)
The appliance does not come It is not plugged into the mains socket. Plug into the mains socket. The main switch (A8) is not turned on. Press the main switch (fig. 1). The infuser cannot be The appliance has not been turned off correctly Turn the appliance off by pressing the extracted button (page 10).
Need help?
Do you have a question about the ECAM22.36X and is the answer not in the manual?
Questions and answers