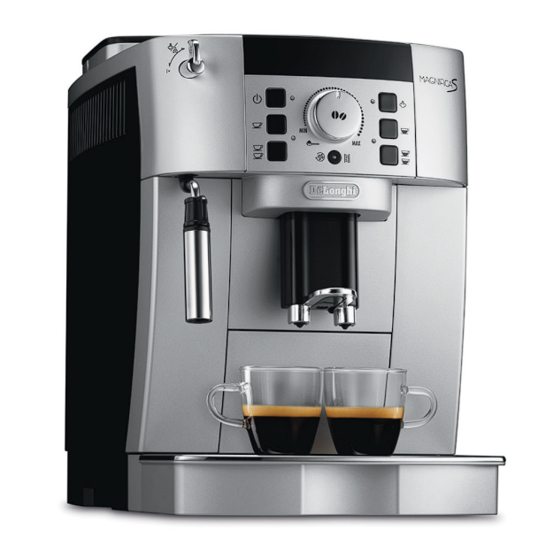
DeLonghi ECAM21.11 Series Instructions For Use Manual

DeLonghi ECAM21.11 Series Instructions For Use Manual

Bean to cup espresso and cappuccino machine
Hide thumbs Also See for ECAM21.11 Series:

Advertisement

Quick Links

ECAM20.11X - 21.11X - 22.11X
BEAN TO CUP ESPRESSO
AND CAPPUCCINO
MACHINE
Instruction for use

Advertisement

Table of Contents
loading

Summary of Contents for DeLonghi ECAM21.11 Series

  • Page 1 ECAM20.11X - 21.11X - 22.11X BEAN TO CUP ESPRESSO AND CAPPUCCINO MACHINE Instruction for use...
  • Page 2 page 6...
  • Page 4 0,5 L...
  • Page 6: Table Of Contents

    CONTENTS CLEANING ............13 Cleaning the drip tray and condensate tray ....13 INTRODUCTION ..........7 Cleaning the inside of the coffee maker ......14 Symbols used in these instructions ........7 Cleaning the water tank ..........14 Letters in brackets ............7 Cleaning the coffee spouts ..........
  • Page 7: Introduction

    INTRODUCTION • Unplug directly from the plug only. Never pull the power cable as you could damage it. Thank you for choosing this automatic espresso and cappuccino • To disconnect the appliance completely, unplug it from the machine. mains socket. We hope you enjoy using your new appliance.
  • Page 8: Instruction For Use

    Description of the control panel This is a household appliance only. (page 2 - B ) It is not intended to be used in: B1. Lights • staff kitchen areas in shops, offices and button: turns the appliance on and off. other working environments;...
  • Page 9: Before Use

    Light flashing: the appliance must be descaled • You should customise water hardness as soon as possible (see the section “Descaling”). following the Instruction for use in the section “Setting Light on steadily: the appliance is performing a water hardness (page 15). descaling cycle.
  • Page 10: Turning The Appliance Off

    TURNING THE APPLIANCE OFF 3. To re-enable the mode, press the ECO button (on the left of the dial) again. The ECO light comes on steadily. Whenever the coffee machine is turned off after being used to 4. Press the button (on the right of the dial) to confirm make coffee, it performs an automatic rinse cycle.
  • Page 11: Removing And Replacing The Filter

    Removing and replacing the filter Adjusting the coffee mill After two months (see date indicator) or when the appliance The coffee mill is set by default to prepare coffee correctly and has not been used for 3 weeks, you should remove the filter and should not require regulating initially.
  • Page 12: Making Coffee Using Coffee Beans

    Making coffee using coffee beans Making coffee using pre-ground coffee Important! Important! Do not use caramelised or candied coffee beans as they could • Never add pre-ground coffee stick to the coffee mill and make it unusable. when the machine is off or it could spread through the inside 1.
  • Page 13: Cleaning The Cappuccino Maker After Use

    CLEANING 6. To obtain a creamier froth, rotate the container with slow upward movements. You should not deliver steam for more Important! than 3 minutes at a time. • Do not use solvents, abrasive detergents or alcohol to clean 7. When you have obtained the required froth, stop steam the appliance.
  • Page 14: Cleaning The Inside Of The Coffee Maker

    7. After cleaning, replace the infuser by sliding it onto the Cleaning the inside of the coffee maker internal support (fig. 33), then push the PUSH symbol fully Danger of electric shock! in until it clicks into place. Before cleaning internal parts, the machine must be turned off Infuser support (see “Turning off”) and unplugged from the mains power sup- ply.
  • Page 15: Setting Water Hardness

    Measuring water hardness 2. Empty the water tank (A12) and remove the softener filter, if present. 1. Remove the “TOTAL HARDNESS TEST” indicator paper from 3. Pour the descaler into the tank up to the level A (corre- its pack (attached to the English instructions). sponding to a 100 ml pack) marked on the back of the tank 2.
  • Page 16: Explanation Of Lights

    DISPOSAL The appliance complies with the following EC directives: In compliance with European directive 2002/96/EC, the appliance must not be disposed of with hou- • Low Voltage Directive 2006/95/EC and subsequent amendments; sehold waste, but taken to an authorised waste sepa- •...
  • Page 17: Troubleshooting

    The machine must be descaled. The descaling procedure described in the sec- tion “Descaling” needs to be performed as soon as possible. FLASHING Too much coffee has been used. Select a milder taste or reduce the quantity of pre-ground coffee then make the coffee again. FLASHING The coffee beans have run out.
  • Page 18 The coffee is delivered too The coffee is ground too finely. Turn the grinding adjustment dial one click slowly or a drop at a time clockwise while the coffee mill is in operation (fig. 10). Continue one click at a time until cof- fee delivery is satisfactory.
  • Page 19: Electrical Connection (Uk Only)

    ELECTRICAL CONNECTION (UK ONLY) Before using this appliance ensure that the voltage indicated on the product corresponds with the main voltage in your home, if you are in any doubt about your supply contact your local electricity company. The flexible mains lead is supplied connected to a B.S. 1363 fused plug having a fuse of 13 amp capacity. Should this plug not fit the socket outlets in your home, it should be cut off and replaced with a suitable plug, following the proce- dure outlined below.
  • Page 20 De’Longhi Appliances via Seitz, 47 31100 Treviso Italia www.delonghi.com...

Table of Contents