
Related Manuals for DeLonghi MAGNIFICA S ECAM22.110.B S11


Summary of Contents for DeLonghi MAGNIFICA S ECAM22.110.B S11
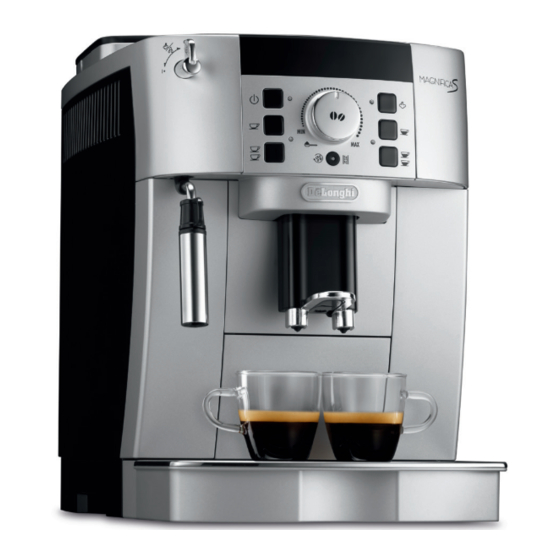
- Page 1 ECAM20.11X - 21.11X - 22.11X BEAN TO CUP ESPRESSO AND CAPPUCCINO MACHINE Instruction for use...
-
Page 4: Table Of Contents
CONTENTS 14. CLEANING..........14 14.1 Cleaning the machine .........14 1. FUNDAMENTAL SAFETY WARNINGS .....5 14.2 Cleaning the machine’s internal circuit ..14 14.3 Cleaning the coffee grounds container ..14 2. SAFETY WARNINGS ........6 14.4 Cleaning the drip tray and condensate tray .14 2.1 Symbols used in these instructions ....6 14.5 Cleaning the inside of the coffee machine ...15 2.2 Designated use ..........6... -
Page 5: Fundamental Safety Warnings
1. FUNDAMENTAL SAFETY WARNINGS • The appliance is not intended for use by persons (including children) with reduced physical, sensory or mental capabilities, or lack of experience and knowledge, unless they have been given supervision or instruction concerning use of the appliance by a person responsible for their safety. -
Page 6: Safety Warnings
instruction concerning use of the appliance in a safe way and if they understand the hazards involved. • Children shall not play with the appliance. • Always unplug the appliance when left unattended and before assembly, taking apart or cleaning. Surfaces marked with this symbol become hot during use (the symbol is present in certain models only). -
Page 7: Troubleshooting And Repairs
3.2 Troubleshooting and repairs button: to make 1 cup of long espresso coffee In the event of problems, first try and resolve them by reading button: to make 2 cups of long espresso coffee. the information given in the “20. Explanation of lights” and “19. Troubleshooting”... -
Page 8: Installing The Appliance
not use the appliance if it is visibly damaged. Contact De’Longhi Customer Services. 5.2 Installing the appliance Important! When you install the appliance, you should respect the follow- ing safety warnings: • The appliance could be damaged if the water it contains freezes. -
Page 9: Turning The Appliance On
softener filter (C4) as described in the section “10. WATER Important! SOFTENER FILTER”. If your model is not provided with a fil- To avoid damaging the appliance, do not place the main switch ter, you can request one from De’Longhi Customer Services. (fig. -
Page 10: Water Softener Filter (Certain Models Only)
4. Press the button (on the right of the dial) to confirm the selection. The ECO light goes off. Please note: When in energy saving mode, a few seconds may elapse before the first coffee is delivered as the appliance must heat up again. 10. -
Page 11: Selecting The Quantity Of Coffee In The Cup
appliance will grind and therefore the strength of the coffee obtained. Turn the dial to MIN for an extra mild coffee and to MAX for an extra strong coffee. Please note: • The first time you use the appliance, you will need to make Please note: a number of coffees to identify the correct dial position The grinding adjustment dial (A2) must only be turned when... -
Page 12: Making Coffee Using Coffee Beans
• set a hotter coffee temperature (see the section “Setting • At the end of delivery, to increase the quantity of coffee the temperature”). in the cup, just press one of the coffee icons (within 3 seconds). 11.6 Making coffee using coffee beans Please note: Important! For hotter coffee, see the section “11.5. -
Page 13: Making Cappuccino
12. MAKING CAPPUCCINO 12.1 Cleaning the cappuccino maker after use Always clean the cappuccino maker (A18) after use to avoid the Danger of burns! build-up of milk residues and prevent the spouts from clogging. During preparation steam is given off. Take care to avoid scalds. 1. -
Page 14: Cleaning
1. Place a container under the cappuccino maker (A18) (as • Remove the drip tray (A17) (fig. 24), empty and clean. close as possible to avoid splashes). 2. Turn the steam dial (A19) to the I position. Delivery begins. 3. Stop by turning the steam dial to the 0 position. Please note: If “Energy Saving”... -
Page 15: Cleaning The Inside Of The Coffee Machine
14.8 Cleaning the pre-ground coffee funnel 4. Replace the drip tray and grounds container. Check regularly (about once a month ) that the pre-ground 14.5 Cleaning the inside of the coffee machine coffee funnel (A6) is not blocked. If necessary, remove coffee deposits. -
Page 16: Descaling
2. Empty the drip tray (A17) and grounds container (A13) and Please note: put both back in the machine. If the infuser is difficult to insert, before insertion, adapt it to the 3. Empty the water tank (A9) completely and remove the right size by pressing the two levers shown in fig. -
Page 17: Setting Water Hardness
11. Place the container used to collect the descaler solution empty under the cappuccino maker and coffee spouts (fig. Level 1 36). 12. Turn the hot water/steam dial to the I position to begin Level 2 rinsing. Hot water is delivered first from the cappuccino maker, to continue and end with the coffee spouts. -
Page 18: Explanation Of Lights
19. EXPLANATION OF LIGHTS LIGHT DISPLAYED POSSIBLE CAUSE REMEDY The hot water/steam dial must be Turn the hot water/steam dial. turned (A19) Insufficient water in the tank (A9). Fill the tank with water and/or insert it correct- ly, pushing it as far as it will go until it clicks into place. - Page 19 LIGHT DISPLAYED POSSIBLE CAUSE REMEDY The "pre-ground coffee" function Place pre-ground coffee in the funnel or dese- has been selected without placing lect the “pre-ground” function. any pre-ground coffee in the fun- nel (A6). FLASHING The machine must be descaled. The descaling procedure described in the sec- tion “15.
-
Page 20: Troubleshooting
20. TROUBLESHOOTING Below is a list of some of the possible malfunctions. If the problem cannot be resolved as described, contact Customer Services. PROBLEM POSSIBLE CAUSE REMEDY The coffee is not hot. The cups were not preheated. Warm the cups by rinsing them with hot water. Please note: the hot water or rinse function can be used. - Page 24 De’Longhi Appliances via Seitz, 47 31100 Treviso Italia www.delonghi.com...
Need help?
Do you have a question about the MAGNIFICA S ECAM22.110.B S11 and is the answer not in the manual?
Questions and answers