Table of Contents
Advertisement
Quick Links
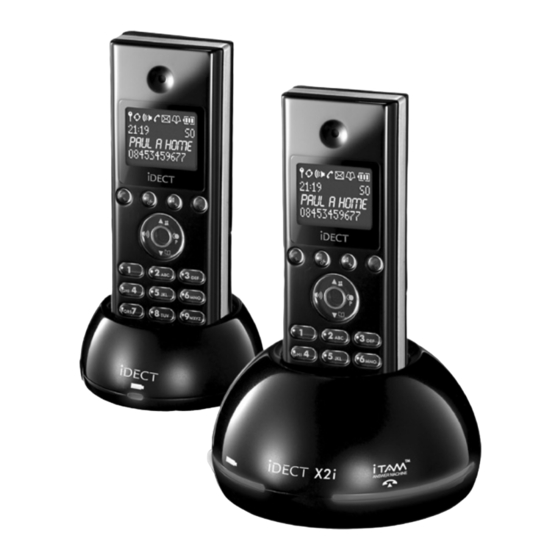
BINATONE " iDECT X2i System "
User Guide - Back Page
U
SER
iDECT X2i System
DIGITAL CORDLESS
TELEPHONE WITH
ANSWERING
MACHINE
Ver. 1, Jul 06 (BTP)
G
UIDE
THIS EQUIPMENT IS NOT DESIGNED FOR
MAKING EMERGENCY TELEPHONE CALLS
WHEN THE POWER FAILS. ALTERNATIVE
ARRANGEMENTS SHOULD BE MADE FOR
ACCESS TO DIAL EMERGENCY SERVICES.
Before operating this set,
please read these instructions carefully.
BINATONE " iDECT X2i System "
User Guide - Front Page
1)White background and black letters
2)Material: 60lb Book Paper
3) Size: 105mm(w) x 148mm(H) A6
Advertisement
Table of Contents

Related Manuals for iDect X2i System


Summary of Contents for iDect X2i System
- Page 1 ACCESS TO DIAL EMERGENCY SERVICES. Before operating this set, Ver. 1, Jul 06 (BTP) please read these instructions carefully. BINATONE “ iDECT X2i System ” BINATONE “ iDECT X2i System ” User Guide - Front Page User Guide - Back Page...
- Page 2 Important note — emergency calls The iDECT X2i is not designed for making emergency calls if the mains power fails. So you should make alternative arrangements for access to Emergency Services. (This means that you should also have a basic...
-
Page 3: Where To Find It
Press and hold for 2 seconds to turn the handset on and off. You may need the Recall function during a call if your iDECT X2i is connected to a PBX, or if you use BT’s Select Services. Last Number Redial... - Page 4 The handset’s number (if you The handset’s name have more than one handset on 02:21 (the default is HANDSET your iDECT X2i system) Call Duration. What the symbols mean Signal This lashes while the handset is trying to establish a link to the base unit If flashes while you’re on a call, move closer to the...
-
Page 5: Table Of Contents
Contents Read these notes first To call a stored number 19 To delete all Phone Book entries 21 Choosing a site for the base unit and charger pod 4 Caller Display Radio signals between handset and To check Caller Display records 23 base unit 4 To return a call 23 Mains power connection 4... - Page 6 To change the PIN: 45 Connection and conditions for use You can connect your iDECT X2i to a direct exchange line (DEL) — a line connected to a local exchange, with its own phone number; to an extension socket connected to a DEL; or to an extension on an approved compatible PBX.
-
Page 7: Read These Notes First
Other solid structures, like walls, may reduce the signal strength. Mains power IMPORTANT — The iDECT X2i base unit and charger connection pod must be used with the mains adapter supplied with the unit. Using any other adapter will result in non- compliance with EN60950, and will invalidate any approval given to this apparatus. -
Page 8: Installation And Set-Up
Use the telephone line the base unit cord supplied with your iDECT X2i — do not use any other telephone line cord Plug the mains adapter into a 230 V AC, 50 Hz mains socket, with the switch on... - Page 9 Color profile: Disabled Composite Default screen Installation and set-up Fit a battery pack in each handset A. Remove the battery compartment cover. B. Plug the battery connector into the socket at the top of the battery compartment. C. Place the battery in the compartment D.
- Page 10 Color profile: Disabled Composite Default screen Installation and set-up Charge the batteries for 15 hours Before you use the handset for the first time, it’s important to charge the batteries fully. The ‘battery charge level’ The handset ‘beeps’ when it’s correctly symbol blinks in position on the charging cradle.
-
Page 11: Before You Start
(base unit only); then pull it out by the unplugged cables. ■ NEVER use your iDECT X2i outdoors during a thunder- storm — unplug the base unit from the telephone line and the mains socket when there are storms in your area. -
Page 12: Switching On And Off
Color profile: Disabled Composite Default screen Switching on and off To switch the To switch the handset off (in case you need to save battery power when the handset is away handset on from the base unit): and off ◗ Press the HANG UP button and hold it for 2 seconds è... -
Page 13: Your Handset's Name
Composite Default screen Your handset’s name Before you start to use your iDECT X2i handset, especially if you have a multi-handset system, you’ll probably want to personalise the display with your name. The name can have up to 12 characters (including spaces). -
Page 14: Time And Day
Color profile: Disabled Composite Default screen Time and day To set the time and day: Press the MENU/OK button è Display shows Main Menu >Phonebook Press the â button ONCE è Display shows Main Menu >Clock & Alarm Press the MENU/OK button è... -
Page 15: Ringer Volume And Melody
Color profile: Disabled Composite Default screen Ringer volume and melody Handset Press the MENU/OK button ringer è Display shows Main Menu >Phonebook Press the â button TWICE è Display shows Main Menu >Personal Set Press the MENU/OK button è Display shows Personal Set >Handset Tones Press the MENU/OK button è... - Page 16 Color profile: Disabled Composite Default screen Ringer volume and melody Base unit Press the MENU/OK button è ringer Display shows Main Menu >Phonebook Press the â button TWICE è Display shows Main Menu >Personal set Press the MENU/OK button then the â button FIVE times è...
-
Page 17: Making And Answering Calls
Color profile: Disabled Composite Default screen Making and answering calls Using the The speakerphone lets you hear calls without holding speakerphone the handset to your ear. You can switch between speakerphone and earpiece mode during calls at any time by pressing the PHONE/SPEAKERPHONE button. -
Page 18: Earpiece Volume
Color profile: Disabled Composite Default screen Making and answering calls Earpiece During a call, to adjust the volume in the earpiece volume or speakerphone: ◗ Press the á or â button There are five volume levels. After you end the call, the volume will stay at the level you’ve set. -
Page 19: To Delete Redial Numbers
Color profile: Disabled Composite Default screen Making and answering calls To delete Press the Redial button redial numbers è Display shows Redial and the last number dialled Press the á or â buttons to choose the number from the last five numbers dialled Press the MENU/OK button è... -
Page 20: To Store A Redial Number In The Phone Book
Color profile: Disabled Composite Default screen Making and answering calls button, then the á or â To store a Press the Redial Redial number button until the number is displayed in the Phone Press the MENU/OK button Book è Display shows Redial >Copy to Phbk Press the MENU/OK button è... -
Page 21: Using The Phone Book
Color profile: Disabled Composite Default screen Using the Phone Book You can store up to 200 numbers in the Phone Book. Each number can have up to 24 digits, and can be stored with a name of up to 12 characters (including spaces). -
Page 22: To Call A Stored Number
Color profile: Disabled Composite Default screen Using the Phone Book To call a Press the Phone Book button stored number è The display shows the first entry in the Phone Book. Press the á or â button to go up or down the list to the number you want OR you can search by pressing a button on the numeric keypad for the first letter of the name,... - Page 23 Color profile: Disabled Composite Default screen Using the Phone Book To edit a Press the MENU/OK button TWICE Phone Book è Display shows Phonebook >New Entry entry Press the â button TWICE è The display shows Phonebook >Edit Entry Press the MENU/OK button and use the á or â...
-
Page 24: To Delete All Phone Book Entries
Color profile: Disabled Composite Default screen Using the Phone Book To delete a Press the MENU/OK button twice then the â button three times Phone Book entry è Display shows Phonebook >Delete Entry Press the MENU/OK button, then the á or â... -
Page 25: Caller Display
Caller Display lets you see the phone numbers of your callers on the handset’s display, before you answer. The iDECT X2i will store the numbers of the last 20 callers (whether or not you answered the call) so you can call them back later. -
Page 26: To Check Caller Display Records
Color profile: Disabled Composite Default screen Caller Display To check Press the Call Log Display button Caller Display è Display shows Call Log >Call List records Press the MENU/OK button è Display shows Call list > and the first entry in the list Press the á... -
Page 27: To Delete A Caller Display Record
Color profile: Disabled Composite Default screen Caller Display To delete a Use steps 1 to 3 (top of page 23) to display caller display the record to be deleted record Press the MENU button then the â button once è Display shows Call List >Delete Press the MENU/OK button to confirm... -
Page 28: Using A Multi-Handset System
Composite Default screen Using a multi-handset system If you have an iDECT X2i multi-handset system, you already have more than one handset registered to your base unit. You can register additional handsets — up to four per base unit. With two or more handsets, you can: ■... -
Page 29: To Answer An Intercom Call
Color profile: Disabled Composite Default screen Using a multi-handset system To answer an The ringing tune for intercom calls is different from that intercom call for outside calls. When someone makes an intercom call to you, your handset’s display shows INTERNAL FROM # with the number of the handset calling you. -
Page 30: To Shuttle Between Two Calls
Color profile: Disabled Composite Default screen Using a multi-handset system To shuttle When you have made or answered an outside between two call and then made an intercom call, you can calls shuttle from one to the other, like this: ◗... -
Page 31: New Call Tone
Color profile: Disabled Composite Default screen Using a multi-handset system New Call tone When you are on an intercom call and an outside call comes in, you’ll hear New Call tone to tell you that someone is calling you. To answer the outside call and end the intercom call: ◗... -
Page 32: Answering Machine Setup
Answering machine setup Answering machine setup The X2i is supplied with the answering machine switched on and set up to automatically answer a call after five rings. It will play a predefined message and will allow the caller to leave a message if they desire. There are a number of settings that can be adjusted to personalise the X2i's operation to suit your needs. -
Page 33: The Outgoing Message
Answering machine setup The outgoing The X2i is supplied with two predefined outgoing message messages (OGM). One is for use in ANSWER ONLY mode and one for use in ANSWER & RECORD mode. ■ Both of these can be replaced with your own pre- recorded message if you prefer. -
Page 34: Setting The Ring Delay
Answering machine setup Setting the You can adjust the number of rings that sound ring delay before the machine answers the call: Press the MENU/OK button ONCE then the á button ONCE è Display Shows Main Menu >Ans Machine Press the MENU/OK button ONCE then the â... -
Page 35: Call Screening
Answering machine setup Call Screening The call screening function allows you to listen to incoming messages as they are recorded so you can decide if you would like to take the call. ■ The X2i is supplied with call screening switched off. To switch call Press the MENU/OK button ONCE then the á... -
Page 36: Answering Machine Operation
Answering machine operation Answering machine operation 18:44 12/08 When the answering machine is switched on JANE the TAM icon on the handset display will come on steadily. 18:44 12/08 When the answering machine is recording a message the TAM icon will flash and the 08453459677 caller ID will be displayed ICM Recording... -
Page 37: Message Playback
Answering machine operation Message The X2i can a number of messages in its memory. The Playback messages will be available for replay until you delete them to make room for new messages. New messages that have not yet been 18:44 12/08 played are indicated by the TAM icon flashing and the New Message icon JANE... -
Page 38: To Play The Next New Message
Answering machine operation To play the Press the MENU/OK button ONCE and the â button ONCE next new message: è Display shows Play >Next Message Press the MENU/OK button ONCE è The next message will play To play the Press the MENU/OK button ONCE and the â... -
Page 39: Memo Recording
Answering machine operation Memo The X2i will allow you to record a memo Recording message that can be replayed later. This can be useful if you want to leave a message for other users of the phone. To record a Press the MENU/OK button ONCE then the á... -
Page 40: Remote Operation
Remote operation Remote operation The X2i will allow you to check your messages remotely from another phone. To use this function you must call using a tone dialling telephone and you will need to enter your X2i’s master PIN. The remote control function must be activated before it can be used, and will not function unless the master PIN has been changed from the default (see page 45). -
Page 41: To Play Messages Remotely
Remote operation To play Call your telephone number and wait for the messages answering machine to answer remotely: è You will hear a voice prompt Within 4 seconds enter your master PIN followed by è You will hear a long confirmation beep. Any new messages will be played immediately. -
Page 42: Custom Settings
Custom settings The iDECT X2i can be customised to suit your preferences in a number of ways. Some of these functions have been covered earlier in this User Guide. This section is a roundup of items that have not yet been mentioned. - Page 43 Color profile: Disabled Composite Default screen Custom settings Key beep To turn off the key beep tone: Press the MENU/OK button ONCE and the â button TWICE è Display shows Main Menu >Personal Set Press the MENU/OK button Display shows Personal Set >Handset Tones Press the MENU/OK button ONCE and the â...
- Page 44 Color profile: Disabled Composite Default screen Custom settings Auto-answer With auto-answer turned on, you can answer an incoming call by simply lifting the handset from its place on the base unit or charger pod. To turn auto-answer on and off: Press the MENU/OK button and the â...
-
Page 45: Registration
Color profile: Disabled Composite Default screen Custom settings Auto-hang up With auto-hang up turned on, you can end a call by putting the handset back in place on the base unit or charger pod. To turn auto-answer on and off: Press the MENU/OK button and the â... - Page 46 Color profile: Disabled Composite Default screen Custom settings Display To change the language on the display: language Press the MENU/OK button and the â button TWICE è Display shows Main Menu >Personal Set Press the MENU/OK button ONCE and the â...
- Page 47 Color profile: Disabled Composite Default screen Custom settings Using reset The Reset command will restore the iDECT X2i to its factory default settings. Use Reset with care because it will clear the phone book, Caller ID and Redial memories. To reset all Press the MENU button è...
-
Page 48: To Change The Pin
Color profile: Disabled Composite Default screen Custom settings The master The Master PIN (personal identity number, or security code) is required when handsets are registered and deregistered, and when important changes to the settings are made. The default setting for the PIN is 0000. To protect your handset’s settings, we recommend that you change it to a four-digit number you’ll easily remember. -
Page 49: Setting The Alarm
Default screen Custom settings Setting the The iDECT X2i can provide a one off or a regular daily Alarm alarm signal. When the alarm time is reached the LCD backlight will blink and you will hear the alarm tone for one minute. - Page 50 Color profile: Disabled Composite Default screen Custom settings Selecting an You can choose from three different alarm alarm tone tones: Press the MENU button è The display shows Main Menu >Phonebook Press the â button ONCE è The display shows Main Menu >Clock &...
-
Page 51: Troubleshooting
Color profile: Disabled Composite Default screen Troubleshooting The iDECT X2i must be serviced by trained engineers. NEVER attempt any repairs or adjustments yourself — you could make the problem worse and invalidate the Guarantee. ALWAYS check ■ you have followed all the steps listed on pages 5 to 7... - Page 52 — not just for charging the batteries. Make sure you’re using the telephone line cable that was supplied with your iDECT X2i. Other telephone line cables might not work. Check that the total REN value of all equipment connected to your telephone line is no more than 4 (see page 3).
- Page 53 Color profile: Disabled Composite Default screen Troubleshooting You’ll get the best results if you site the base unit as high as possible. For example, in a two-storey house, the first-floor landing is an ideal place for the base unit. “My call was cut Move the handset closer to the base unit before you try off when I went again to make a call.
- Page 54 ALWAYS use the batteries supplied with your iDECT X2i — other batteries may burst, causing damage. PBX use “The Recall You may need to change the recall signal length from its default of 100 ms.
- Page 55 If the fault persists … Disconnect all other instruments connected to the same line as the iDECT X2i and see whether you can make a call. Disconnect the base unit from the telephone line and plug a different phone into the master telephone socket.
-
Page 56: Cleaning And Care
Cleaning and care ■ Do not clean any part of your iDECT X2i with benzene, thinner or other solvent chemicals — this may cause permanent damage which is not covered by the Guar- antee. When necessary, clean it with a damp cloth. -
Page 57: Guarantee And Service
Guarantee Pack up all parts of your iDECT X2i, using the original packaging. Remember to include the mains adapter Return the unit to the shop where you bought it, making sure you take your sales receipt... -
Page 58: Technical Details
Color profile: Disabled Composite Default screen Technical details Standard Digital Enhanced Cordless Telecommunications (DECT) Frequency range 1.88 to 1.9 GHz (bandwidth = 20 MHz) Channel bandwidth 1.728 MHz Operating range up to 300 m outdoors; up to 50 m indoors Operating time standby: 100 hours approx. -
Page 59: Registering New Handsets
Registering new handsets Registering new handsets The handset(s) supplied with your iDECT X2i base unit are already registered to it, so you don’t need to register them. But if you’ve bought extra handsets separately, you’ll need to register them. Each iDECT X2i base unit can be registered to up to four handsets. -
Page 60: To De-Register A Handset
Color profile: Disabled Composite Default screen Registration If registration has failed, the handset’s display will show failed? for a few seconds then return to REGISTRATION FAILED standby mode. If this happens, try again, making sure you don’t leave too long between steps. If you still can’t register the handset, contact the Help Line for advice. -
Page 61: Default Setting
Registering new handsets To register to Your iDECT X2i can be registered to any GAP- a different compatible base unit; or your can register other GAP- brand of base compatible handsets to your iDECT X2i base unit. unit But we do not guarantee that all features or display messages will be available using other manufacturers’... -
Page 62: Connection And Conditions For Use
Color profile: Disabled Composite Default screen Index answering a call, 14 handset settings, 39 - 47 answering an intercom call, installation, 5 - 7 intercom calls, 25 auto-answer, 41 interference, 4, 8 base unit ringer, 13 key beep, 40 batteries charging the handset’s language, 43 batteries, 7... - Page 63 Color profile: Disabled Composite Default screen Index registering handsets, 56 REN (ringer equivalence number), 3 ringer volume and melody base unit, 13 handset, 12 - 13 service information, 44 shuttling between calls, 27 signalling, 45 site for the base unit, 4 site for the charger pod, 4 switching on and off, 9 three-way conference, 27...
Need help?
Do you have a question about the X2i System and is the answer not in the manual?
Questions and answers