Table of Contents
Advertisement
Advertisement
Table of Contents

Subscribe to Our Youtube Channel
Related Manuals for iDect SOLO 5035+2


Summary of Contents for iDect SOLO 5035+2
- Page 2 TECHNICAL DETAILS Standard Digital Enhanced Cordless Telecommunication (DECT) Frequency range 1.88 to 1.9 GHz (bandwidth = 20 MHz) Channel bandwidth 1.728 MHz Operating time Standby Time: 7 days; Talk Time: 10 hours Battery charge time: 15 hours Electrical power Base unit power adapter: Ten Pao: S003IS0600050 Input 100-240V 50-60Hz;...
-
Page 3: Table Of Contents
Table of Contents IMPORTANT SAFETY INSTRUCTIONS ..........5 INSTALLING YOUR PHONE ..............9 Connecting the Base Station ............9 Installing and Charging the Rechargeable Batteries ....9 GETTING TO KNOW YOUR PHONE ..........11 Overview of the Handset, Base Station and Charging Cradle ... 11 Display Icons and Symbols ............ - Page 4 4.11 Initiate an Intercom Call ............22 4.12 Answer an External Call during an Intercom Call ....23 4.13 Initiate an Intercom during a Call ......... 24 4.14 Transfer an External Call to another Handset ...... 25 DIRECT ACCESS MEMORY ..............26 Add Direct Access Memory ............
- Page 5 8.1.1 Change the Time Format ..........36 8.1.2 Change the Date Format ..........36 Alarm Settings................37 8.2.1 Set the Alarm Tone ............38 PERSONAL SETTINGS ............... 39 Set the Ring Volume ..............39 Set the Ring Tone ..............39 Set the Key Beep ...............
- Page 6 11.4 Message Playback ..............49 11.5 Delete All Messages ............. 49 11.6 Outgoing Message (OGM) ........... 50 11.6.1 Record a Personalised Outgoing Message ...... 50 11.6.2 Listen to an Outgoing Message ........51 11.6.3 Delete a Personalised Outgoing Message ....... 51 11.7 Remote Access ..............
-
Page 7: Important Safety Instructions
IMPORTANT SAFETY INSTRUCTIONS Please follow these safety instructions when using your telephone equipment to reduce risk of fire, electric shock and injury: Read and understand all the instructions. Follow all warnings and instructions marked on the product. Unplug this product from the wall socket before cleaning. Do not use liquid cleaners or aerosol cleaners. - Page 8 Use only the supplied NiMH (Nickel Metal Hydride) batteries that came with your phone or an authorised replacement recommended by the manufacturer. There is a risk of explosion if you replace the battery with an incorrect battery type. The use of other battery types or non-rechargeable batteries/primary cells can be dangerous.
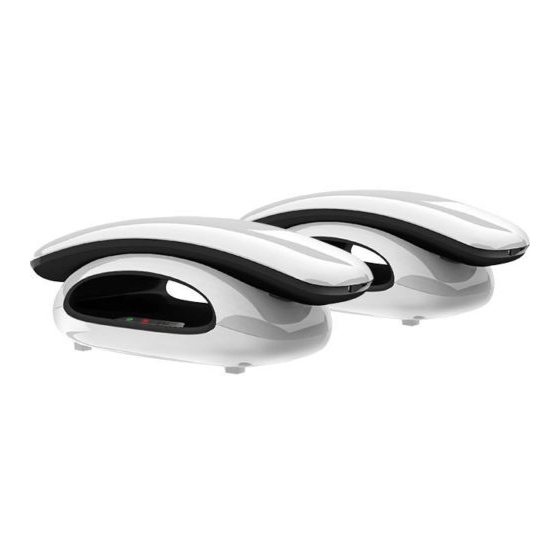
- Page 9 1 x Back Cover • 1 x Owner's manual Note: If you have purchased a SOLO 5035+2, SOLO 5035+1, you will also have the corresponding extra handset(s) and batteries, a charging cradle and a battery compartment cover for each extra handset.
- Page 10 Handset & Base Connection When purchased, all handsets are pre-registered to the base unit and should link to it when they are all powered up. To use your cordless handset and base unit together, ensure that you are within range. The signal between the handset and the base unit is in accordance with the normal standards for a DECT phone: Be aware that: >...
-
Page 11: Installing Your Phone
INSTALLING YOUR PHONE To the Connecting the Base Station To the mains telephone Plug the mains power cable and power socket line socket telephone line cord into the base station. Plug the power adapter into a 100 - 240Vac, 50 - 60Hz mains power socket, and the telephone line cord into a telephone line socket. - Page 12 If you have a broadband line If you connect your telephone to a line with a broadband connection, you will need to insert a micro-filter between the telephone and the telephone line; otherwise you may get interference between the telephone and the broadband, which could cause problems. In a home with broadband, every telephone must have a micro-filter connected, not just the one at the telephone point that your modem is connected to.
-
Page 13: Getting To Know Your Phone
GETTING TO KNOW YOUR PHONE Overview of the Handset, Base Station and Charging cradle Base station (top) Handset ⑮ ① ⑯ ② ③ ⑨ Base station (bottom) ④ ⑩ ⑤ ⑪ ⑩ ⑰ ⑫ ⑥ ⑬ ⑦ ⑭ ⑧... - Page 14 Charging cradle - for SOLO 5035+2,SOLO 5035+1 Models Only. EARPIECE ① LCD DISPLAY ② In standby mode, press to enter the Main Menu ③ list. Press to select an item, or to save an entry or setting. In menu mode, press to scroll up.
- Page 15 Press to cancel an action. ⑨ During pre-dialling, press to delete the last digit entered. During a call, press to mute the microphone, and press again to resume conversation. In menu mode, press to scroll down. ⑩ During a call, or message playback, press to decrease the volume.
-
Page 17: Display Icons And Symbols
Display Icons and Symbols The home screen gives you information on the current status of the phone. Icon Meaning Displays when the battery is almost empty. Displays when the battery is fully charged. Blinks (3s on / 1s off) when the battery is partly discharged. - Page 18 for a base. Displays when the answering machine is on. Flashes slowly when there are new answering machine message(s). Displays when the handset is in speaker mode. Turns on when confirmation of selection or programming is available. Turns on during phonebook editing mode to delete the last digit.
-
Page 19: Menu Map And Menu Navigation
Menu Map and Menu Navigation From the handset home screen, press to access PHONEBOOK, the first option in the Main Menu list. Press to go to other options in the menu list. Press to enter a sub-menu or function. Press to go back to the previous level. -
Page 20: Text And Number Entry
Text and Number Entry The following table shows you where each letter and punctuation character can be found, by using repeated presses of the alphanumeric keypad. This will be helpful when storing a name in the phonebook or renaming your handset. For example, to enter the name Tom: Press once... -
Page 21: Using Your Phone
USING YOUR PHONE Make a Call 4.1.1 Pre-dialling Enter the phone number (maximum 24 digits). If you make a mistake, press to delete the last entered number. Press to dial the phone number. 4.1.2 Direct Dialling Press Dial the number. Note: Press and then press to return to the home screen. -
Page 22: Call From The Phonebook
4.1.5 Call from the Phonebook Press in standby mode. Press to select the desired entry in the phonebook and then press to dial out the selected phonebook number. Answer and End a Call When the phone rings, press To end a conversation, press Warning: When the handset is ringing, please do not hold it too close to your ear as the volume of the ringing tone may damage your hearing. -
Page 23: Adjust Speaker Volume
Adjust Speaker Volume There are 5 levels of speaker volume. During a call, press to select from VOLUME 1 to VOLUME 5. • The current setting is shown. • When you end the call, the setting will remain at the last selected level. -
Page 24: To Lock/Unlock The Keypad
To Lock/Unlock the Keypad You can lock the keypad to avoid making calls or pressing the keys accidentally. In standby mode, press and hold for 1 second to lock the keypad. The handset displays KEYS LOCKED. • To turn the keypad lock off, press and hold again. -
Page 25: Answer An External Call During An Intercom Call
Note: You can cancel the intercom call before it is answered by pressing on the originating handset. If there is no answer from the called handset within one minute, the paging will be cancelled automatically. If no handset is registered to the base, 4 beeps will be heard and it will return to standby mode. -
Page 26: Initiate An Intercom During A Call
4.13 Initiate an Intercom during a Call You can intercom with another system handset during a call, or invite another system handset to join in a conference call with you and the external caller. During the call, press to put the external call on hold. •... -
Page 27: Transfer An External Call To Another Handset
4.14 Transfer an External Call to another Handset During the call, press to put the external call on hold. • Intercom is established immediately if there are only 2 registered handsets. • If there are more than 2 registered handsets, the handset numbers which are available for intercom will be displayed. -
Page 28: Direct Access Memory
DIRECT ACCESS MEMORY There are 2 direct access memories (Keys 1 & 2) in addition to the phonebook memory. A long press on the keys in standby mode will automatically dial the stored phone number. Add Direct Access Memory From the home screen, press Press to select PHONEBOOK. -
Page 29: Delete Direct Access Memory
Delete Direct Access Memory From the home screen, press Press to select PHONEBOOK. Press to DIRECT MEM. and then press select. Press to KEY 1 or KEY 2 and then press select. • NO NUMBER is displayed if it is empty. Otherwise, the stored name is displayed. -
Page 30: Phonebook
PHONEBOOK Each handset can store up to 100 phonebook entries. Each phonebook entry can have a maximum of 24 digits for the phone number and 12 characters for the name. Store a Contact in the Phonebook From the home screen, press Press again to select PHONEBOOK. -
Page 31: Access The Phonebook
Access the Phonebook From the home screen, press to open the phonebook list. Alternatively, from the home screen, you can press twice to select PHONEBOOK, then to LIST and again to open the phonebook list. Press to scroll through the list of entries The phonebook entries are listed in alphabetical order. -
Page 32: Delete A Phonebook Entry
A confirmation tone is played. • Press to return to standby mode. Delete a Phonebook Entry From the home screen, press Press again to select PHONEBOOK. Press to DELETE and then press to select. Press to select an entry you wish to delete and then press DELETE? is displayed. -
Page 33: Caller Display (Network Dependent)
CALLER DISPLAY (NETWORK DEPENDENT) If you have subscribed to the Calling Number Display (CND) service with your network service provider, the phone number of your caller will appear on the handset display when there is an incoming call and then stored in your Call Log. -
Page 34: Save A Call Log Entry Into The Phonebook
7.1.2 Save a Call Log Entry into the Phonebook From the home screen, press Press to select an entry and then press Press again to select SAVE NUMBER. Enter the name of the contact (maximum 12 characters) and then press to save. -
Page 35: Redial List
Redial List The redial list stores the last 5 numbers dialled. A maximum of 24 digits can be displayed for each entry. 7.2.1 Access the Redial List From the home screen, press Press to browse the redial list. • The last dialled number will appear first in the redial list. •... -
Page 36: Delete A Redial Number
7.2.4 Delete a Redial Number From the home screen, press Press to select an entry and then press Press to DELETE and then press to select. • DELETE? is displayed. Press again to confirm. • A confirmation tone is played. Press to return to standby mode. -
Page 37: Clock And Alarm Settings
CLOCK AND ALARM SETTINGS Date and Time Settings If you have subscribed to Calling Number Display (CND) service, the time and date settings will be automatically updated by the network when you receive an incoming call. You can also set the date and time manually. From the home screen, press Press to CLOCK&ALARM and then... -
Page 38: Change The Time Format
8.1.1 Change the Time Format The time can be displayed either as 12-hour or 24-hour. The default setting is 24 HOURS. From the home screen, press Press to CLOCK&ALARM and then to select. Press to SET FORMAT and then press to select. -
Page 39: Alarm Settings
Alarm Settings An alarm can be set on a handset, to sound at a set time only once or repeated each day. When an alarm is set, the alarm icon is shown on the handset display. When the alarm time is reached, the handset will sound an alarm for 1 minute, at the same volume setting as the handset ringer. -
Page 40: Set The Alarm Tone
8.2.1 Set the Alarm Tone You can select from 3 alarm melodies. From the home screen, press Press to CLOCK&ALARM and then press to select. Press to ALARM TONE and then press to select. Press to select the desired alarm tone (each tone will sound as it is selected) and then press to confirm. -
Page 41: Personal Settings
PERSONAL SETTINGS Your phone comes with a selection of settings that you can change to personalise your phone to the way you like it to work. Set the Ring Volume You can set the handset ringer volume from Level 1 to Level 4 or turn the ringer off. -
Page 42: Set The Key Beep
Set the Key Beep The handset emits a tone with each key press. You can choose to turn this tone on or off. The default setting is ON. From the home screen, press Press to PERSONAL SET and then press select. -
Page 43: Set The Display Language
Set the Display Language You can change the display language on your handset. The default setting is ENGLISH. From the home screen, press Press to PERSONAL SET and then press select. Press to LANGUAGE and then press to select. Press to select your preferred language and then press to confirm. -
Page 44: 10 Advanced Settings
10 ADVANCED SETTINGS 10.1 Handset Registration IMPORTANT: When you purchase your phone system, all handsets are already registered to your base, so you do not need to register them. Handset registration is only necessary when you buy extra handsets or if a handset has become faulty. -
Page 45: Deregister Your Handset
10.3 Deregister your Handset You can unregister the handset you are using. From the home screen, press Press to ADVANCED SET and then press to select. Press to UNREGISTER and then press to select. Enter the Master PIN and then press to confirm. -
Page 46: Change The Recall Time
10.5 Change the Recall Time You may need to press to send a Flash signal (also called Recall or Timed Break Recall) if you are connected to a PBX. You should normally leave the Recall Time at its default setting, Short (100ms), as this is the standard recall required in the telephone network. -
Page 47: Set The First Ring
10.6 Set the First Ring If you have subscribed to Calling Number Display (CND) service and do not wish to hear the phone ring before the caller identification is displayed, you can set the FIRST RING to OFF. From the home screen, press Press to ADVANCED SET and then press to select. -
Page 48: 11 Answering Machine
11 ANSWERING MACHINE Your phone includes a telephone answering machine that records unanswered calls when it is on. The answering machine can store up to 59 messages within the maximum recording time of approximately 30 minutes and each message can be up to 3 minutes long. When the answering machine is on, calls are answered after the set RING DELAY. -
Page 49: Answer Mode
11.2 Answer Mode The phone comes with two pre-recorded outgoing messages (OGM) for the respective answer modes: ANSWER ONLY and ANSW. &RECORD. By default, the answer mode is ANSW.&RECORD, which allows a caller to leave a message on the answering machine after hearing the announcement. -
Page 50: Activate/Deactivate Remote Access
incoming call on the fifth ring if you have no previous new messages and on the third ring if you do. When you call your answering machine to check messages, if it does not answer on the third ring, then you can hang up immediately, knowing that you have no new messages. -
Page 51: Message Playback
11.4 Message Playback When there are new messages on the answering machine, the tape icon flashes on the handset screen. From the home screen, press Press to ANSW MACHINE and press to select. Press to select PLAY. • Your messages will automatically playback through the handset’s speakerphone. -
Page 52: Outgoing Message (Ogm)
11.6 Outgoing Message (OGM) When the answering machine answers a call, the pre-recorded outgoing message is played to the caller unless you have recorded your own outgoing message. The phone comes with two pre-recorded outgoing messages (OGM) for the respective answer modes: ANSWER ONLY and ANSW. &RECORD. By default, the answer mode is ANSW.&RECORD, which allows a caller to leave a message on the answering machine after hearing the announcement. -
Page 53: Listen To An Outgoing Message
11.6.2 Listen to an Outgoing Message From the home screen, press Press to ANSW MACHINE and then press to select. Press to RECORD OGM and then press to select. Press to select ANSWER ONLY or ANSW.&RECORD and then press to confirm. Press to select PLAY. -
Page 54: Remote Access
11.7 Remote Access The phone lets you listen to the messages on your answering machine, or otherwise operate your answering machine by calling in to your answering machine from another touch-tone phone. You need to enter a remote access code (same as your Master PIN) to access your answering machine remotely. - Page 55 Use the keypad on the touch-tone phone to carry out the following operations: Keys Repeat the previous message. Playback messages. Skip to the next message. Delete the current message. Turn on the answering machine in ANSW. &RECORD mode. Stop message playback. Turn off the answering machine.
- Page 56 SOLO system Remote operation 1. Using a tone-dialling phone, dial your home number. 2. While your outgoing message is playing, press # key immediately. 3. Key in your Remote Access Code. (Default value is 0000.) For details on how to set a new code, see Change the Master PIN on page 43 of the User Guide.
- Page 57 Keys Repeat the previous message. Playback messages. Skip to the next message. Delete the current message. Turn on the answering machine in ANSW. &RECORD mode. Stop message playback. Turn off the answering machine.
-
Page 58: 12 Troubleshooting
12 TROUBLESHOOTING You have followed all the steps listed in the owner's manual to install and set up your telephone. Connectors are securely inserted into their sockets. Mains power for the base unit is switched on at the socket. ... - Page 59 “The phone does not ring” Check that the base unit’s mains power adapter is plugged in and power is switched on. The base unit needs mains power for normal operation of the phone – not just for charging the batteries. ...
- Page 60 Intercom and transfer “I can’t transfer a call” Make sure that the other handset is in range of the base unit. Make sure that you have entered the correct number for the other handset. Batteries “The handset’s battery cells are running low within an hour or two” ...
- Page 61 If the fault persists... Disconnect all other instruments connected to the same line and try to make a call. Disconnect the base unit from the telephone line and plug a different phone into the master telephone socket. Try making a call. If this works, the line is OK.
Need help?
Do you have a question about the SOLO 5035+2 and is the answer not in the manual?
Questions and answers