Table of Contents
Advertisement
Quick Links
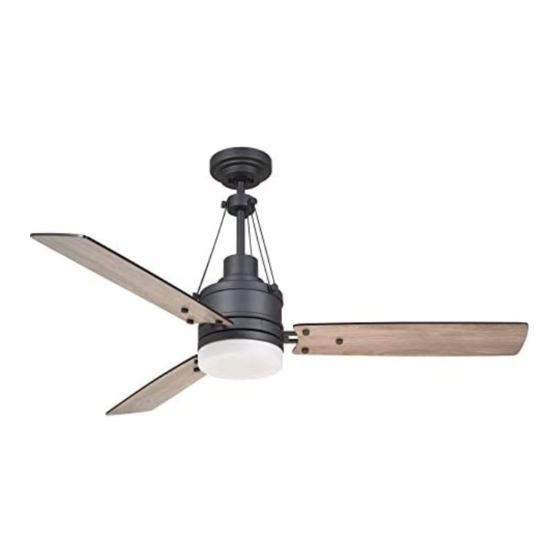
BP7375 Highpointe
12/9/08
11:08 AM
Page 1
READ AND SAVE THESE INSTRUCTIONS
HIGHPOINTE
™
Ceiling Fan
Owner's Manual
Model Numbers
CF205BS00
CF205GES00
Brushed Nickel Finish with
Golden Espresso with
Sandstone Glass and
Opal Matte Glass and
Chocolate Blades
Dark Mahogany Blades
22.1
Net Weight:
Lbs.
Part No. F40BP73750000
Form No. BP7375
U.L. Model No.: CF205
Advertisement
Table of Contents

Subscribe to Our Youtube Channel
Related Manuals for Emerson HIGHPOINTE CF205BS00


Summary of Contents for Emerson HIGHPOINTE CF205BS00
-
Page 1: Ceiling Fan
12/9/08 11:08 AM Page 1 READ AND SAVE THESE INSTRUCTIONS HIGHPOINTE ™ Ceiling Fan Owner's Manual Model Numbers CF205BS00 CF205GES00 Brushed Nickel Finish with Golden Espresso with Sandstone Glass and Opal Matte Glass and Chocolate Blades Dark Mahogany Blades 22.1 Net Weight: Lbs. -
Page 2: Safety Instructions
WARNING: This product is designed to use only those parts supplied with this product and/or any accessories designated specifically for use with this product by Emerson Electric Co. Substitution of parts or accessories not designated for use with this product by Emerson Electric Co. could result in personal injury or property damage. -
Page 3: Unpacking Instructions
If any parts are missing, contact parts or accessories not designated for your local retailer or catalog outlet for use with this product by Emerson Electric Co. could result in personal injury or replacement before proceeding. property damage. - Page 4 RECEIVER assembly. WALL CONTROL General LEVERS Your Emerson Ceiling Fan/Light Wall RECEIVER SWITCH LEVERS Control consists of a wall mount transmit- ter and a receiver. The SW102 transmitter LIG HT works in conjunction with the receiver. The...
-
Page 5: Electrical Requirements
BP7375 Highpointe 12/9/08 11:08 AM Page 5 Electrical Requirements Your new ceiling fan will require a ground- ed electrical supply line of 120 volts AC, 60 Hz, 15 amp circuit. LIG HT ME D ME D The outlet box must be securely anchored and capable of withstanding a load of at FAN OFF least 50 pounds. -
Page 6: How To Assemble Your Ceiling Fan
BP7375 Highpointe 12/9/08 11:08 AM Page 6 How to Assemble Your NOTE: In order to remove the light sockets, the wires on the light kit plate Ceiling Fan will need to be cut. MAKE SURE THIS IS 1. Mount the fan blades to the blade THE NO LIGHT ASSEMBLY DESIRED. - Page 7 BP7375 Highpointe 12/9/08 11:08 AM Page 7 5. Remove one of the fan motor/housing assembly screw (retain for later use). Position the light kit plate on the fan motor/housing assembly aligning the HANGER BALL keyhole slots over the fan motor screws.
- Page 8 BP7375 Highpointe 12/9/08 11:08 AM Page 8 12. Using the decorative rod screws (sup- HAIRPIN plied), attach the three decorative rod CLIP assemblies to the motor housing DOWNROD (Figure 11). The decorative rods must be oriented so that they lean in MOTOR COUPLING towards the downrod.
-
Page 9: How To Hang Your Ceiling Fan
BP7375 Highpointe 12/9/08 11:08 AM Page 9 16. The fan comes with blue, black and SUPPORT white leads that are 80” long. Before DOWNROD ASSEMBLY installing the fan, measure up approxi- mately 6 to 9-inches above top of hanger ball/downrod assembly. Cut off DECORATIVE excess leads and strip back insulation ROD SCREW... -
Page 10: How To Wire Your Ceiling Fan
BP7375 Highpointe 12/9/08 11:08 AM Page 10 How to Wire 1. Securely attach the hanger bracket to the outlet box using the two screws Your Ceiling Fan supplied with the outlet box (Figure 15). If you feel that you do not have enough electrical wiring knowledge or experi- WARNING ence, have your fan installed by a... - Page 11 BP7375 Highpointe 12/9/08 11:08 AM Page 11 d. Securely connect the fan motor white WARNING wire to the receiver white (TO MOTOR N) wire. Check to see that all connections are tight, including ground, and that no e. Securely connect the fan motor black bare wire is visible at the wire con- wire to the receiver red (TO MOTOR L) nectors, except for the ground wire.
- Page 12 BP7375 Highpointe 12/9/08 11:08 AM Page 12 3. Push the wires and connectors up into CAUTION: To avoid risks of burns or other injury, assure power is off before the outlet box while inserting the receiv- attempting to install or replace the er fully into the hanger bracket.
- Page 13 BP7375 Highpointe 12/9/08 11:08 AM Page 13 How to Disassemble Your Light Kit for Cover Plate Assembly Only WARNING Turning off wall switch is not suffi- cient. To avoid possible electrical shock, be sure electricity is turned CUT LIGHT off at the main fuse box before SOCKET WIRES wiring.
- Page 14 BP7375 Highpointe 12/9/08 11:08 AM Page 14 4. Carefully tuck blue and white wires 2. To turn your fan off, press the FAN OFF from motor up into the fan motor/hous- button. ing assembly (Figure 24). 3. To set the level of light brightness, press and hold the LIGHT button.
-
Page 15: Maintenance
Maintenance designated specifically for use with IMPORTANT CARE INSTRUCTIONS this product by Emerson Electric Co. Substitution of parts or accessories for your Ceiling Fan not designated for use with this Periodic cleaning of your new ceiling fan is product by Emerson Electric Co. -
Page 16: Instruction To The User
BP7375 Highpointe 12/9/08 11:08 AM Page 16 INSTRUCTION TO THE USER (if device contains a digital device) This equipment has been tested and found to comply with the limits for a Class B digital device, pursuant to part 15 of the FCC Rules. These limits are designed to provide reason- able protection against harmful interference in a residential installation. -
Page 17: Troubleshooting
BP7375 Highpointe 12/9/08 11:08 AM Page 17 WARNING: FOR YOUR OWN SAFETY TURN OFF POWER AT FUSE BOX OR CIRCUIT BREAKER BEFORE TROUBLE SHOOTING YOUR FAN. Trouble Shooting TROUBLE PROBABLE CAUSE SUGGESTED REMEDY 1. Fuse or circuit breaker 1. Check main and branch 1. -
Page 18: Repair Parts
BP7375 Highpointe 12/9/08 11:08 AM Page 18 Repair Parts LIGHT FAN OFF U.L. Model No.: CF205... -
Page 19: How To Order Repair Parts
BP7375 Highpointe 12/9/08 11:08 AM Page 19 Repair Parts Listing Part Numbers Model No. Model No. Description CF205BS00 CF205GES00 Hanger Pack, Consisting of: 761655-74 761655-39 Hanger Bracket — — Hanger Ball — — 12” Downrod — — Parts Bag, Containing:... -
Page 20: Limited Warranty
You will be responsible for all insurance, freight or other transportation charges to our factory or authorized service center. Your Emerson Air Comfort Ceiling Fan should be properly packed to avoid damage in transit since we will not be responsible for any such damage.
Need help?
Do you have a question about the HIGHPOINTE CF205BS00 and is the answer not in the manual?
Questions and answers