Table of Contents
Advertisement
Advertisement
Table of Contents

Subscribe to Our Youtube Channel
Related Manuals for Gateway NE522


Summary of Contents for Gateway NE522
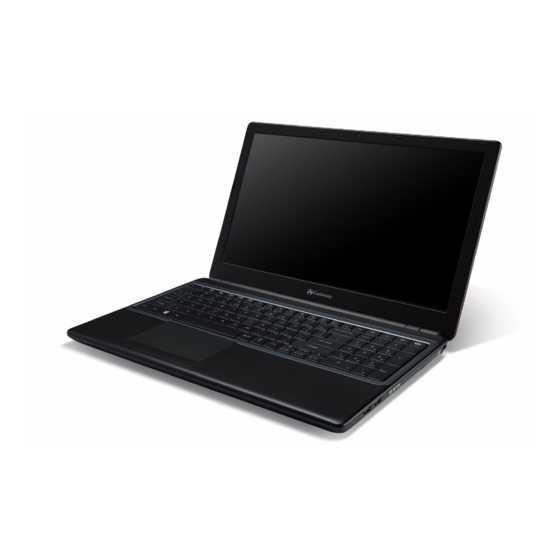
- Page 1 User’s Manual Gateway NE522...
-
Page 2: Table Of Contents
Getting to know your computer Using Windows and your software ....46 Top view - display ..........15 Internet security offer ....... 46 Top view - keyboard......... 16 Gateway Recovery Management..... 46 Front view............17 Left view ............19 Internet Right view............20 First steps on the net ........ - Page 3 Copyright © 2013. All Rights Reserved. Gateway NE522 User’s Manual Original Issue: 04/2013 Visit registration.gateway.com and discover the benefits of being a customer of Gateway. Remark: All images are for reference purposes only. Actual configuration may vary. Table of Contents - 3...
-
Page 4: Starting Your Computer
T A R T I N G Y O U R COMPUTER Thank you for purchasing this Gateway computer! This guide has been designed to introduce you to the features of your computer and assist in your computing experience. After setting up and starting your computer, as shown in the setup instructions, it will ask you questions that will help you connect to the Internet. -
Page 5: Registration
Another option Another way to register your Gateway product is to visit our website at registration.gateway.com. Choose your country and follow the simple instructions. -
Page 6: Software Installation
ECOVERY You should create recovery discs as soon as you are able. The Gateway Recovery Management program allow you to create recovery discs and then to restore or reinstall applications and drivers provided by Gateway. - Page 7 Warranty and contact information You can find information about the warranty for your computer and how to contact technical support in your computer’s Warranty. Starting your computer - 7...
-
Page 8: Computer Basics
OMPUTER ASICS AFETY AND COMFORT Safety precautions Please follow the guidelines below to use your computer comfortably and to avoid health problems. Computer environment Make sure that the computer: • Is used on a stable surface, stand or table. A fall can seriously damage the computer. - Page 9 Please note • Slots and openings are provided for ventilation to ensure reliable operation of the product and to protect it from overheating. These openings must not be blocked or covered. The openings should never be blocked by placing the product on a bed, sofa, rug or other similar surface.
- Page 10 • The power cable is connected to the computer before connecting the power cable to the AC power outlet. • The power cable is unplugged from the power outlet before disconnecting the power cable from the computer. • Three-pin power cords are connected to a grounded power outlet. •...
-
Page 11: Health Precautions
protect unused slots from dust, metal objects or other particles. Save the dummies for use when no cards are in the slots. Servicing your computer Do not attempt to service your computer yourself, as opening or removing covers may expose you to dangerous voltage or other risks. Refer all servicing to qualified service personnel. - Page 12 • Your device and its enhancements may contain small parts. Keep them out of the reach of small children. • The computer and accessories may contain small parts. Keep them out of the reach of small children. • If you work or play for hours at a time, then make sure you take regular breaks.
- Page 13 • Ensure that the computer’s ventilation slots and openings are never obstructed or covered. Do not place the computer on a soft surface (such as a carpet, chair or bed) that may block ventilation slots. • Do not push objects of any kind into ventilation or case slots as they may touch dangerous voltage points or short-out parts that may result in a fire or electric shock.
-
Page 14: 14 - Getting To Know Your Computer
ETTING T O KNOW Y O U R COM PU T E R After setting up your computer, as illustrated in the setup instructions, let us show you around your new Gateway computer. Gateway NE522 14 - Getting to know your computer... -
Page 15: Top View - Display
OP VIEW DISPLAY Icon Item Description Web camera for video communication. Webcam A light next to the Webcam indicates that the webcam is active. Also called Liquid-Crystal Display (LCD), Screen displays computer output. Microphone Internal microphone for sound recording. Getting to know your computer - 15... -
Page 16: Top View - Keyboard
OP VIEW KEYBOARD Icon Item Description Power button / Turns the computer on and off. Indicates the indicator computer's power status. For entering data into your computer. Keyboard - See "Using the keyboard" on page 24. Touch-sensitive pointing device which functions like a computer mouse. -
Page 17: Front View
Icon Item Description Click buttons (left The left and right side of the button function as and right) left and right selection buttons. RONT VIEW Icon Item Description Accepts Secure Digital (SD) cards. Card reader - Push to remove/install the card. Only one card can operate at any given time. - Page 18 Icon Item Description Power indicator Indicates the computer's power status. Indicates the computer's battery status. - Charging: The light shows amber when the Battery indicator battery is charging. - Fully charged: The light shows blue when in AC mode. HDD indicator Indicates when the hard disk drive is active.
-
Page 19: Left View
EFT VIEW Icon Item Description Connects to a Kensington-compatible Kensington lock slot computer security lock. - Wrap the computer security lock cable around an immovable object such as a table or handle of a locked drawer. Insert the lock into the notch and turn the key ... -
Page 20: Right View
Icon Item Description Connects to USB devices. - If a port is black, it is USB 2.0 compatible, if USB port it is blue it is also USB 3.0 compatible (see below). Connects to audio line-out devices (e.g., speakers, headphones). Headphones / - Supports compatible 3.5 mm headsets with speaker jack... - Page 21 Icon Item Description Connects to USB devices. - If a port is black, it is USB 2.0 compatible, if USB ports it is blue it is also USB 3.0 compatible (see below). Optical drive Internal optical drive; accepts CDs or DVDs. Optical disk access Lights up when the optical drive is active.
-
Page 22: Base View
ASE VIEW Icon Item Description Releases the battery for removal. Insert a Battery release latch suitable tool and slide to release. Memory Houses the computer's main memory. compartment Houses the computer's hard disk (secured with Hard disk bay screws). Speakers Deliver stereo audio output. - Page 23 Icon Item Description Allows the computer to stay cool. Ventilation and cooling fan - Do not cover or obstruct the openings. Battery bay Houses the computer's battery pack. Getting to know your computer - 23...
-
Page 24: Using The Keyboard
SING TH E KEYBOARD The keyboard has full-sized keys and a numeric keypad, separate cursor, Windows, function and special keys. Lock keys and numeric keypad Note: Information in this section may not apply to your computer. The keyboard has three lock keys which you can toggle on and off. Lock key Description When Caps Lock is on, all alphabetic characters typed... -
Page 25: Special Keys
Special keys Your computer’s keyboard includes keys that activate special functions. The function of each key is clearly marked with an icon. Icon Function Description Activates a second function on certain keys. Hotkey for E.g. press the Fn key to activate the F1 to F12 second function keys. - Page 26 Icon Function Description Stop Stop playing the selected media file. Previous Return to the previous media file. Next Jump to the next media file. Brightness down Decreases the screen brightness. Brightness up Increases the screen brightness. Opens the Social Networks application. Social If this application is not installed, the key will Networking...
- Page 27 Hotkeys The computer uses hotkeys (key combinations) to access function keys and navigation commands. To activate hotkeys, press and hold the Fn key (bottom left) before pressing the other key in the hotkey combination. Hotkey Function Description Fn + Special keys Function Activates the F1 to F12 keys.
-
Page 28: Windows Keys
Windows keys The keyboard has two keys that perform Windows-specific functions. Description Pressed alone it returns to the Start screen. Windows key It can also be used with other keys for special functions, please check Windows Help. This key has the same effect as clicking the right Application mouse button;... -
Page 29: Touchpad
OUCHPAD OUCHPAD BASICS The touchpad controls the arrow (or 'cursor') on the screen. As you slide your finger across the touchpad, the cursor will follow this movement. Press the left or right side of the button located beneath the touchpad to perform selection and execution functions. -
Page 30: Touchpad Gestures
OUCHPAD GESTURES Windows 8 and many applications support touchpad gestures that use one or more fingers. Note: Support for touchpad gestures depends on the active application. These allow you to control applications with a few simple gestures, such as: • Swipe in from edge: Access Windows tools by swiping into the center of the touchpad from the right, top or left. -
Page 31: Upgrading Your Computer
PGRADING YOUR COMPUTER XPANDING THROUGH OPTIONS Your computer offers you many options for a complete computing experience. Connectivity options Ports allow you to connect peripheral devices to your computer. For instructions on how to connect different external devices to the computer, read the following section. - Page 32 to use a program to access the contents of the card. Select an option here if it is appropriate, otherwise select Cancel. If the card contains no files, or unknown files, a window will open showing the contents of the card.
- Page 33 Built-in networking The built-in networking allows you to connect your computer to an Ethernet-based network. Connect an Ethernet cable from the Ethernet (RJ-45) port on the chassis of the computer to a network jack or hub on your network. ...
- Page 34 cable is usually included with the monitor. Follow these steps to connect an monitor to your computer: 1. Check that the computer is powered off and the monitor power switch is turned off. 2. Attach the video cable to the monitor port on the computer. Secure the cable connection with the screws provided.
- Page 35 High-Definition Multimedia Interface (only for certain models) HDMI (High-Definition Multimedia Interface) is an industry-supported, uncompressed, all-digital audio/video interface. HDMI provides an interface between any compatible digital audio/ video source, such as a set-top box, DVD player, and A/V receiver and a compatible digital audio and/or video monitor, such as a digital television (DTV), over a single cable.
-
Page 36: Power Supply
OWER SUPPLY POWER ADAPTER Your computer can use the supplied external power adapter (a power 'brick') to run on AC power. A power cable is provided that is appropriate for the country where the computer was purchased. The power adapter provides adequate power to run your computer and recharge the battery pack at the same time. -
Page 37: Battery Pack
Warning: The AC adapter and the underside of the computer can become hot after prolonged use. This is normal, but may cause injury with prolonged contact. ATTERY PACK The computer uses a battery pack that gives you extended use between charges. - Page 38 To maximize your battery’s life, you are advised to adhere to the recommendations set out below. Conditioning a new battery pack Before you use a battery pack for the first time, there is a “conditioning” process that you should follow: 1.
-
Page 39: Replacing The Battery Pack
In addition, the useful lifespan of the battery is adversely affected by the following usage patterns: • Using the computer on constant AC power with the battery inserted. If you want to use constant AC power, you are advised to remove the battery pack after it is fully charged. -
Page 40: Charging The Battery
To install a battery pack: 1. Align the battery with the open battery bay; make sure that the end with the contacts will enter first, and that the top surface of the battery is facing up. 2. Slide the battery into the battery bay and gently push until the battery locks in place. -
Page 41: Optimizing Battery Life
Optimizing battery life Optimizing battery life helps you get the most out of battery operation, prolonging the charge/recharge cycle and improving recharging efficiency. You are advised to follow the suggestions set out below: • Purchase an extra battery pack. • Use AC power whenever possible, reserving battery for on-the-go use. •... - Page 42 When the battery-low warning appears, the recommended course of action depends on your situation: Situation Recommended Action 1. Plug the AC adapter into the computer, and then connect to the mains power supply. The AC adapter and 2. Save all necessary files. a power outlet are 3.
-
Page 43: Power Management
OWER MANAGEMENT This computer has a built-in power management unit that monitors system activity. System activity refers to any activity involving one or more of the following devices: keyboard, mouse, hard disk, peripherals connected to the computer, and video memory. If no activity is detected for a period of time, the computer stops some or all of these devices in order to conserve energy. - Page 44 Your computer will also not start if it receives an instruction to start over a network (Wake on LAN). 1. Open the Desktop. 2. Click Power Options in the Notification area. 3. Select More Power Options. 4. Select Choose what the power buttons do. 5.
- Page 45 6. Scroll down and disable Turn on fast startup. 7. Select Save changes. Power management - 45...
-
Page 46: Software
OF T WA RE SING INDOWS AND YOUR SOFTWARE Gateway computers include software to help you use your computer; the programs and categories available on your computer depend on the model purchased. Internet security offer It is vital to protect your computer from viruses and attacks over the Internet (see Security on page 53). -
Page 47: Internet
NTERNET IRST STEPS ON THE NET Protecting your computer It is vital to protect your computer from viruses and attacks over the Internet (see Internet security offer on page 46 and Security on page 53). A comprehensive Internet security program is offered when you first start your computer. - Page 48 Connection types Depending your computer model, your location your communication needs, you have several ways to connect to the Internet. Dial-up Some computers include a telephone dial-up (‘modem’) connector. This allows you to connect to the Internet using your telephone line. With a dial- up connection, you cannot use the modem and the telephone simultaneously on a single phone line.
-
Page 49: Network Connections
Cable A cable connection provides fast and always-on Internet service via a cable television line. This service is generally available in large cities. You can use your telephone and watch cable TV at the same time you are connected to the Internet. 3G (WWAN or 'Wireless Wide-Area Network') A 3G connection allows you to use cellular networks (such as those used by a mobile phone) to connect to the Internet while away from home. - Page 50 Wireless networks A wireless LAN or WLAN is a wireless local area network, which may link two or more computers without using wires. Setting up a wireless network is easy and allows you to share files, peripheral devices and an Internet connection.
- Page 51 router with the subscription to their services. Read carefully the documentation supplied with your Access point/router for detailed setup instructions. Network cable (RJ45) A network cable (also called RJ45 cable) is used to connect the host computer to the access point (see illustration below); this type of cable may also be used to connect peripheral devices to the access point.
- Page 52 Diagram of a working network 1. Access point/router 2. Desktop computer 3. Modem 4. Printer 5. Portable computer 6. PDA/Smartphone 7. Network cables (RJ45) Turning on/off a wireless network connection Most computers feature a ‘WiFi’ button that turns the network connection on or off.
-
Page 53: Surf The Net
Gateway is dedicated to provide you with on-going personalized support. Check out our Support section to get help tailored to your needs. www.gateway.com is your portal to a world of online activities and services: visit us regularly for the latest information and downloads! Security You are probably eager to explore everything the Internet has to offer. - Page 54 Trojan horses, worms or spam can infect your computer in various ways, using up resources or clogging up a network. Note: Gateway guarantees that your computer was 100% virus free at the time of purchase and does not cover damages due to viruses.
- Page 55 Spyware is sometimes used by unscrupulous companies to monitor and track the sites you visit on the Internet so as to determine your web-surfing habits and display targeted pop-up ads on your screen. However, some kinds of spyware go beyond simple tracking and actually monitor keystrokes and capture passwords, posing a serious security risk.
- Page 56 How to protect your computer Cybercrime prevention can be straight-forward - when armed with a little technical advice and common sense, many attacks can be avoided. In general, online criminals are trying to make their money as quickly and easily as possible. The more difficult you make their job, the more likely they are to leave you alone and move on to an easier target.
- Page 57 A complete version of Norton Internet Security™ is pre-installed on your Gateway system. It includes a free trial subscription to protection updates. Make sure you Activate it! Internet - 57...
- Page 58 Choose strong passwords and keep them safe Passwords are a fact of life on the Internet today; we use them for everything from ordering flowers and online banking to logging into our favorite airline Web site to see how many miles we have accumulated. The following tips can help make your online experiences secure: •...
- Page 59 goods. Since not divulging any personal information is rarely possible, the following list contains some advice for how to share personal information safely online: • Keep an eye out for phony email messages. Things that indicate a message may be fraudulent are misspellings, poor grammar, odd phrasing, Web site addresses with strange extensions, Web site addresses that are entirely numbers where there are normally words, and anything else out of the ordinary.
- Page 60 sensitive data. Another sign that you have a secure connection is the small lock icon in the bottom of your web browser (usually the right-hand corner). • Pay attention to privacy policies on Web sites and in software. It is important to understand how an organization might collect and use your personal information before you share it with them.
- Page 61 Review bank and credit card statements regularly The impact of identity theft and online crimes can be greatly reduced if you can catch it shortly after your data is stolen or when the first use of your information is attempted. One of the easiest ways to get the tip-off that something has gone wrong is by reviewing the monthly statements provided by your bank and credit card companies for anything out of the ordinary.
- Page 62 correctly, your computer may be infected by malicious software. However, do not blame every computer problem on a virus! If you suspect your computer is infected, the first thing to do is update, if you have not already done so, and run your antivirus and anti-spyware software. 62 - Internet...
-
Page 63: Recovery
Windows tools, or the recovery backup. Note: Gateway Recovery Management is only available with a pre- installed Windows operating system. Important: We recommend that you create a Recovery Backup and Drivers and Applications Backup and as soon as possible. - Page 64 USB drive with a capacity of 32 GB or larger. 1. From Start, type 'Recovery' and then click Gateway Recovery Management in the list of apps. 2. Click Create Factory Default Backup. The Recovery Drive window...
- Page 65 opens. Make sure Copy contents from the recovery partition to the recovery drive is selected. This provides the most complete and safest recovery backup. 3. Plug in the USB drive then click Next. Recovery - 65...
- Page 66 • Since the recovery backup requires at least 16 GB of storage after formatting, it is recommended to use a USB drive with a capacity of 32 GB or larger. 4. You will be shown the backup progress on the screen. 5.
-
Page 67: Creating A Drivers And Applications Backup
7. Unplug the USB drive and label it clearly. Important: Write a unique, descriptive label on the backup, such as 'Windows Recovery Backup'. Make sure you keep the backup in a safe place that you will remember. REATING A DRIVERS AND APPLICATIONS BACKUP To create a Drivers and Applications Backup, that contains the factory- loaded software and drivers needed by your computer, you may use either Recovery - 67... - Page 68 USB storage drive or, if your computer features a DVD recorder, one or more blank recordable DVDs. 1. From Start, type 'Recovery' and then click Gateway Recovery Management in the list of apps. 2. Click Create Drivers and Applications Backup.
- Page 69 • If you are using a USB drive, make sure your USB drive has enough capacity before continuing. • If using DVDs, it will also show the number of blank, recordable discs you will need to complete the recovery discs. Make sure that you have the required number of identical, blank discs.
-
Page 70: Recovering Your System
3. Click Start to copy files.You will be shown the backup progress on the screen. 4. Follow the process until it completes: • If you are using optical discs, the drive ejects each disc as it completes burning it. Remove the disc from the drive and mark it with a permanent marker.... -
Page 71: Reinstalling Drivers And Applications
solved by returning your system to a previous state when everything was working correctly. For instructions, see "Returning to an earlier system snapshot" on page 74. 3. Reset your operating system. If nothing else has solved the problem and you want to reset your system, but keep your user information, see "Returning your system to its factory condition"... - Page 72 If you are reinstalling using Windows and the recovery information stored on your computer: • From Start, type 'Recovery' and then click Gateway Recovery Management in the list of apps. • Click Reinstall Drivers or Applications. 72 - Recovery...
- Page 73 1. Insert the Drivers and Applications Backup into the disc drive or connect it to a free USB port. • If you inserted a DVD wait for Gateway Resource Center to start. • If Gateway Resource Center does not start automatically, press the Windows key + <E>, then double-click on the optical drive icon.
-
Page 74: Returning To An Earlier System Snapshot
• If you are using a USB drive, press the Windows key + <E>, then double-click on the drive that contains the backup. Double-click on ResourceCenter. 2. You should see the Contents section of the Gateway Resource Center. 3. Click the install icon for the item you want to install, then follow the onscreen prompts to complete the installation. -
Page 75: Returning Your System To Its Factory Condition
Windows automatically creates an additional restore point each day, and also each time you install software or device drivers. Note: For more information about using Microsoft System Restore, from Start, type 'Help' and then click Help and Support in the list of apps. -
Page 76: Recovering From Windows
"Recovering from a recovery backup" on page 80. Recovering from Windows Start Gateway Recovery Management: • From Start, type 'Recovery' and then click Gateway Recovery Management in the list of apps. Two options are available, Restore Factory Settings (Reset my PC) or Customized Restore (Refresh my PC). - Page 77 Restore with Gateway Recovery Management" on page 79. Restore Factory Settings with Gateway Recovery Management 1. Click Restore Factory Settings. Caution: 'Restore Factory Settings' will erase all files on your hard drive. 2. The Reset your PC window opens. Recovery - 77...
- Page 78 Images for reference only. 3. Click Next, then choose how to erase your files: a. Just remove my files quickly erases all files before restoring your computer and takes about 30 minutes. b. Fully clean the drive completely cleans the drive after each file is erased, so no files can be viewed after the recovery.
- Page 79 Customized Restore with Gateway Recovery Management 1. Click Customized Restore (Retain User Data). 2. The Refresh your PC window opens. 3. Click Next, then Refresh. 4. The recovery process begins by restarting your computer, then continues by copying files to your hard drive. This process takes about 30 minutes.
-
Page 80: Recovering From A Recovery Backup
Recovering from a recovery backup To recover from a recovery backup on a USB drive: 1. Find your recovery backup. 2. If your computer does not have a built-in keyboard, make sure a keyboard is attached to your computer. 3. Plug in the USB drive and turn on your computer. 4. - Page 81 7. Select Troubleshoot and then choose the type of recovery to use: a. Click Advanced then System Restore to start Microsoft System Restore: Microsoft System Restore periodically takes a 'snapshot' of your system settings and saves them as restore points. In most cases of hard-to-resolve software problems, you can return to one of these restore points to get your system running again.
- Page 82 Reset your PC from the recovery backup Caution: Reset your PC will erase all files on your hard drive. 1. The Reset your PC window opens. Images for reference only. 2. Click Next. 3. Select the operating system to recover (normally only one option is available).
- Page 83 drive takes much longer, up to 5 hours, but is much more secure as old files are completely removed. 6. Click Reset. 7. After the recovery has finished, you can start using your computer by repeating the first-start process. Refresh your PC from the recovery backup 1.
-
Page 84: Frequently Asked Questions
REQUENTLY ASKED QUESTIONS The following is a list of possible situations that may arise during the use of your computer. Easy solutions are provided for each one. I turned on the power, but the computer does not start or boot up Look at the power indicator: •... - Page 85 • The brightness level might be too low. Press (increase) to adjust the brightness level. • The display device might be set to an external monitor. Press toggle the display back to the computer. • If the Sleep indicator is lit, the computer is in Sleep mode. Press and release the power button to resume.
- Page 86 • Make sure that the printer is connected to a power outlet and that it is turned on. • Make sure that the printer cable is connected securely to a USB port and the corresponding port on the printer. 86 - Frequently asked questions...
-
Page 87: Tips And Hints For Using Windows 8
IPS AND HINTS FOR USING INDOWS We know this is a new operating system that will take some getting used to, so we've created a few pointers to help you get started. Three concepts you might want to keep in mind 1. -
Page 88: How Do I Jump Between Apps
How do I turn off my computer? Press the Windows key + <C>, click Settings > Power and select the action you'd like to take. Alternatively, from Desktop, click Gateway Power Button and select the action you'd like to take. -
Page 89: How Do I Unlock My Computer
How do I unlock my computer? Press the any key and click on a user account icon to unlock the computer. If your account has a password set, you will need to enter the password to continue. How do I personalize my computer? You can personalize Start with a different background image or by arranging the tiles to suit your personal needs. -
Page 90: I Want To Use Windows In The Way
To change the background, press the Windows key + <C> and click Settings > Change PC settings > Personalize. Click Lock screen at the top of the page and select the image and apps you would like to see on the lock screen. - Page 91 To view the complete list of apps, press the space bar or the Menu key and click All apps. How do I make an app appear on Start? If you're in All apps and you want to make an app appear on Start, you can select the app and right-click on it.
-
Page 92: What Is A Microsoft Id (Account)
What is a Microsoft ID (account)? A Microsoft account is an email address and password that you use to sign in to Windows. You can use any email address, but it is best if you choose the one you already use to communicate with friends and sign in to your favorite websites. -
Page 93: How Do I Check For Windows Updates
Press the Windows key + <C> and click Settings > Change PC settings > Windows Updates. Click Check for updates now. Where can I get more information? For more information please visit: • Windows 8 tutorials: www.gateway.com/windows8-tutorial • Support FAQs: support.gateway.com Frequently asked questions - 93... -
Page 94: Regulatory Information
FCC rules. ALIFORNIA ROPOSITION WARNING This product contains chemicals known to the State of California to cause cancer, birth defects, and/or other reproductive harm. For additional information regarding this product warning, go to www.gateway.com/prop65. 94 - Regulatory information... - Page 95 日本 (J APAN 本装置は、第二種情報装置(住宅地域またはその隣接した地域において使用されるべき 情報装置)デ住宅地域での電波障害防止を目的とした情報装置等電波障害自主規制協議 会 (VCCI)基準に適合しております。 しかし、本装置をラジオ、テレビジョン受信機に、近接してご使用になると、受信障害 の原因となることがあります。本書の説明にしたがって正しい取り扱いをしてくださ い。 IRELESS DAPTER EGULATORY NFORMATION USA — FCC and FAA The FCC with its action in ET Docket 96-8 has adopted a safety standard for human exposure to radio frequency (RF) electromagnetic energy emitted by FCC certified equipment.
- Page 96 - The use of wireless adapters in hospitals is restricted to the limits set forth by each hospital. Antenna Use In order to comply with FCC RF exposure limits, low gain integrated antennas should be located at a minimum distance of 20 cm (8 inches) or more from the body of all persons or at a minimum distance as specified by the FCC module grant conditions.
- Page 97 - Caution: Due to the fact that the frequencies used by 802.11a, 802.11b, 802.11g and 802.11n wireless LAN devices may not yet be harmonized in all countries, 802.11a, 802.11b, 802.11g and 802.11n products are designed for use only in specific countries, and are not allowed to be operated in countries other than those of designated use.
- Page 98 situations or environments, the use of the wireless adapter may be restricted by the proprietor of the building or responsible representatives of the applicable organization. Examples of such situations may include: - Using the wireless adapter on board airplanes, or - Using the wireless adapter in any other environment where the risk of interference with other devices or services is perceived or identified as being harmful.
- Page 99 distance of at least 20 cm between you (or any other person in the vicinity), or the minimum separation distance as specified by the FCC grant conditions, and the antenna that is built into the computer. Details of the authorized configurations can be found at www.fcc.gov/oet/ea/ by entering the FCC ID number on the device.
- Page 100 - Caution: When machine supports and using IEEE 802.11a wireless LAN, this product is restricted to indoor use due to its operation in the 5.15- to 5.25 GHz frequency range. Industry Canada requires this product to be used indoors for the frequency range of 5.15 GHz to 5.25 GHz to reduce the potential for harmful interference to co-channel mobile satellite systems.
- Page 101 "To prevent radio interference to the licensed service, this device is intended to be operated indoors and away from windows to provide maximum shielding. Equipment (or its transmit antenna) that is installed outdoors is subject to licensing." « Pour empêcher que cet appareil cause du brouillage au service faisant l'objet d'une licence, il doit être utilisé...
- Page 102 The low band 5.15 -5.35 GHz is for indoor use only. This equipment complies with the essential requirements of the European Union directive 1999/5/EC. See Statements of European Union Compliance, and more details refer to the attached Declaration of Conformity. Hereby, ACER INC., declares that this devise is in English compliance with the essential requirements and other...
- Page 103 Por medio de la presente ACER INC. declara que el Español dispositivo cumple con los requisitos esenciales y [Spanish] cualesquiera otras disposiciones aplicables o exigibles de la Directiva 1999/5/CE. Δια του παρόντος η ACER INC. δηλώνει ότι η παρούσα Ελληνικά συσκευή...
- Page 104 Šiuo ACER INC. deklaruoja, kad šis įrenginys atitinka Lietuvių esminius reikalavimus ir kitas 1999/5/EB Direktyvos [Lithuanian] nuostatas. Hawnhekk, ACER INC., jiddikjara li dan jikkonforma mal- ti Malti [Maltese] ijiet essenzjali u ma provvedimenti o rajn relevanti li he mm fid-Dirrettiva 1999/5/EC. Alulírott, ACER INC.
- Page 105 ACER INC. izjavlja, da je ta naprava skladna z bistvenimi Slovensko zahtevami in ostalimi relevantnimi določili Direktive [Slovenian] 1999/5/ES. ACER INC. týmto vyhlasuje, že zariadenie spĺňa základné Slovensky požiadavky a všetky príslušné ustanovenia Smernice [Slovak] 1999/5/ES. ACER INC. vakuuttaa täten että tämä laite on direktiivin 1999/ Suomi [Finnish] 5/EY oleellisten vaatimusten ja sitä...
- Page 106 L'utilisation de cet equipement (2,4 GHz WLAN) est soumise à certaines restrictions : - La puissance maximale autorisée en intérieur est de 100 mW pour 2400 - 2483,5 MHz. - La puissance maximale autorisée est de 100 mW en extérieur pour 2400 - 2454 MHz.
- Page 107 Brazil Este equipamento opera em caráter secundário, isto é, não tem direito a proteção contra interferência prejudicial, mesmo de estações do mesmo tipo, e não pode causar interferência a sistemas operando em caráter primário. Pakistan Pakistan Telecommunication Authority (PTA) Approved. Morocco The operation of this product in the radio channel 2 (2417 MHz) is not authorized in the following cities: Agadir, Assa-Zag, Cabo Negro, Chaouen, Goulmima, Oujda, Tan Tan,...
- Page 108 ODIFICATIONS TO THE RODUCT CE Marking Gateway cannot be held responsible for unauthorized modifications made by the user and the consequences thereof, which may alter the conformity of the product with the CE Marking. Radio frequency interference The manufacturer is not responsible for any radio or TV interference caused by unauthorised modifications to this equipment.
- Page 109 You must unplug the power supply cord and remove or disable the battery to disconnect the equipment from the power supply. In that aim, the socket-outlet should be installed near to the equipment and should be easily accessible. Input rating: Refer to the rating label on the bottom of the computer and ensure that your power adapter complies with the specified rating.
- Page 110 Only Ethernet LAN or RTC modem cable can have length exceeding 3 metres. Gateway recommends that you add a ferrite core round clip to each cable connecting your computer to a hardware device that was not included with your computer.
- Page 111 The optical devices installed in your computer are designed for use solely as components of such electronic product and therefore do not comply with the appropriate requirements of Code of Federal Regulation Sec. 1040.10 and Sec. 1040.11 for COMPLETE laser products.
-
Page 112: Environment
UR COMMITMENT TO ENVIRONMENTAL PROTECTION Environment has been at the heart of our products. Gateway is committed to limit the environmental impact of its products during product life cycle. Starting at design phase, with a very strict procurement policy, maximum attention is given to electronic components in order to limit their weight in heavy metals such as lead, cadmium, chromium, mercury, etc. - Page 113 Products that are ENERGY STAR qualified use less energy and prevent greenhouse gas emissions by meeting strict energy efficiency guidelines set by the U.S. Environmental Protection Agency. Gateway is committed to offering products and services worldwide that help customers save money, conserve energy and improve the quality of our environment.
- Page 114 - wake from "Sleep" mode if the keyboard is pressed or mouse is moved. - save more than 80% energy when in "Sleep" mode. ENERGY STAR and the ENERGY STAR mark are registered U.S. marks. 114 - Environment...
-
Page 115: Software License
The following License Agreement applies to you. This is a legal agreement between you (either individual or an entity) and Gateway. By installing the software you are agreeing to be bound by the terms of this Agreement. If you do not agree to the terms of this... - Page 116 2. Copyright The SOFTWARE is owned by Gateway or its suppliers and is protected by United States copyright laws and international treaty provision. Therefore, you must treat the SOFTWARE like any other copyrighted material (e.g. a book or musical recording) except that you may transfer the CD and/or DVD disc portion of the SOFTWARE, if any, to a single hard disk provided you keep the original solely for backup or archival purposes.
- Page 117 write to the free Software Foundation, Inc. and request a copy. The address of the Free Software Foundation, Inc is: 59 Temple Place - Suite 330, Boston, MA, 02111-1307, USA. For a period of three (3) years as commencing from your receipt of this software, you may obtain a complete machine-readable copy of the source code for the Free Software under the terms of the GPL without charge except for the cost of media, shipping, and handling, upon a written request to us.
-
Page 118: 118 - Index
NDEX audio ......... 85 troubleshooting ..........113 ........42 Batteries low conditions ........113 ........37 battery disposal maximizing life .......... 41 battery pack optimizing ......41 ........... 40 battery-low warning removing ........37 ......38 characteristics using the first time .......... - Page 119 ........13 Environment Epilepsy warning ....84 FAQ. See frequently-asked questions frequently-asked questions ............. 55 ..........17 Firewall front view ... 46 Gateway Recovery Management ........11 ............ 27 Health precautions hotkeys ..........108 ..........55 Interference Firewall ....47 Internet Internet Service Provider (ISP) .........
- Page 120 ............. 33 ..........24 network num lock ....... 49 Network connections numeric keypad ....53, 57 ......... 24 Norton Internet Security embedded ............31 ..........84 ports problems ..........9 ..........84 Power cords display ........... 85 printer keyboard ......... 85 ..........
- Page 121 ............. 19 view left ............ 19 ........... 20 front right ............. 7 Warranty Windows ........... 49, 50 ......... 46 WiFi Using Windows ... 61 Windows automatic updates ......... 28 Windows keys Ver.: 01.01.02 Index - 121...
Need help?
Do you have a question about the NE522 and is the answer not in the manual?
Questions and answers