Table of Contents
Advertisement
Quick Links
HDMI® over IP Extender with Audio
IPUSB2HD2
DE: Bedienungsanleitung - de.startech.com
FR: Guide de l'utilisateur - fr.startech.com
ES: Guía del usuario - es.startech.com
IT: Guida per l'uso - it.startech.com
NL: Gebruiksaanwijzing - nl.startech.com
PT: Guia do usuário - pt.startech.com
For the most up-to-date information, please visit: www.startech.com
Manual Revision: 08/02/2011
*actual product may vary from photos
Advertisement
Table of Contents

Related Manuals for StarTech.com IPUSB2HD2


Summary of Contents for StarTech.com IPUSB2HD2
- Page 1 DE: Bedienungsanleitung - de.startech.com FR: Guide de l'utilisateur - fr.startech.com ES: Guía del usuario - es.startech.com IT: Guida per l'uso - it.startech.com NL: Gebruiksaanwijzing - nl.startech.com PT: Guia do usuário - pt.startech.com For the most up-to-date information, please visit: www.startech.com Manual Revision: 08/02/2011...
- Page 2 StarTech.com. Where they occur these references are for illustrative purposes only and do not represent an endorsement of a product or service by StarTech.com, or an endorsement of the product(s) to which this manual applies by the third-party company in question. Regardless of any direct acknowledgement elsewhere in the body of this document, StarTech.com hereby...
-
Page 3: Table Of Contents
Table of Contents Introduction ....................1 Packaging Contents ............................1 System Requirements ...........................1 Front View ................................2 Rear View ................................2 Installation ....................4 Driver Installation............................4 Hardware Installation for USB ........................5 Hardware Installation for Ethernet ......................5 How to Use ....................8 Display Modes ..............................9 “Extend”... -
Page 4: Introduction
Introduction The IPUSB2HD2 HDMI® over IP Extender delivers a versatile HDMI-IP link between PCs on your network and an HDMI monitor/projector, at full high definition (1080p, 1920 x 1080) video resolution. Accompanying audio signals are transmitted directly through the HDMI output, or separately through the built-on 3.5mm stereo output port. -
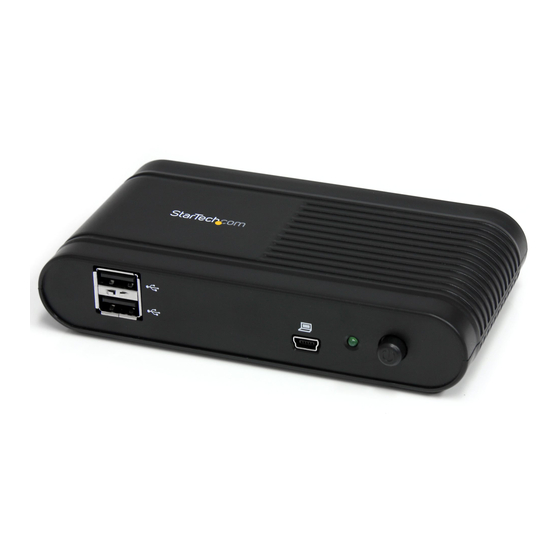
Page 5: Front View
Front View Rear View Instruction Manual... - Page 6 Instruction Manual...
-
Page 7: Installation
Installation Please ensure that the driver installation is complete prior to the physical installation (plugging in) of the USB 2.0 Video Adapter Driver Installation 1. Insert the Driver CD into your CD/DVD-ROM drive. 2. If the installation program does not begin automatically, locate the Autorun.exe application. -
Page 8: Hardware Installation For Usb
Hardware Installation for USB 1. Connect the HDMI display device (e.g. monitor) to the video adapter and power on the display device. 2. Connect the power adapter to the video adapter and press the power button. The power LED on the video adapter will light up. 3. - Page 9 7. If DHCP (automatic IP) is available on the network, no configuration should be required. Correct network configuration Incorrect network configuration If a DHCP server (automatic IP) is not available on your network (such as connecting directly to the host computer), the video adapter will use a default IP address of 192.168.1.50.
- Page 10 f ) Disconnect the HDMI video adapter from the host computer and connect both back to the network. g) Launch the USB Server software application. 8. The HDMI video adapter should appear as an available device, with the video and audio components listed below it.
-
Page 11: How To Use
How to Use Configuring the image being displayed by the monitor that is connected to the HDMI Video Adapter, can be done in one of two ways: 1. Accessing the Windows Display Settings • Windows XP: right-click on a blank area of the desktop, select Properties, then click on the Settings tab: • Windows Vista: right-click on a blank area of the desktop, select Personalize, then... -
Page 12: Display Modes
NOTE: In Windows XP/Vista, changes can be made directly from the DisplayLink icon, however in Windows 7, the DisplayLink icon automatically takes you to the Windows Display Settings, where the same settings are available. Windows 7 Windows XP/Vista Display Modes “Extend”... -
Page 13: Display Resolution
Display Resolution Select the desired video display resolution for the connected monitor in Extend Mode. The default setting resolution is: 1024 x 768 * 32-bit. Display Rotation 4 options are available: 0°(Normal), 90° (Left), 180° (Upside-Down), 270° (Right) when used with the Extended or Primary display modes. -
Page 14: Usb Server
USB Server The USB Server software can be configured to automatically startup when Windows starts and also connect certain devices automatically. In the “Options” menu of the USB Server window, the option to start the software automatically on Windows bootup is available. This will allow the software to automatically run, if the computer ever is restarted, instead of having to manually double-click the desktop icon each time. - Page 15 Alternatively, devices on the USB Hub ports can be set to connect automatically, based on the USB port they are plugged into on the HDMI video adapter (instead of based on the specific USB device itself ). This will allow for any type of USB device to be automatically connected to the host computer, so long as it is connected to the specified physical port on the HDMI video adapter.
-
Page 16: Specifications
Specifications Video Signal High Speed HDMI™ (HDMI 1.3) TCP/IP Host Interface USB 2.0 1 x HDMI type A female 2 x 3.5mm Audio mini-jack female 2 x USB type A female External Connectors 1 x USB mini-B female 1 x RJ45 Ethernet female 1 x DC Power 1 x Power LEDs... -
Page 17: Technical Support
Limitation of Liability In no event shall the liability of StarTech.com Ltd. and StarTech.com USA LLP (or their officers, directors, employees or agents) for any damages (whether direct or indirect, special, punitive, incidental, consequential, or otherwise), loss of profits, loss of business, or any pecuniary loss, arising out of or related to the use of the product exceed the actual price paid for the product. - Page 18 Hard-to-find made easy. At StarTech.com, that isn’t a slogan. It’s a promise. StarTech.com is your one-stop source for every connectivity part you need. From the latest technology to legacy products — and all the parts that bridge the old and new — we can help you find the parts that connect your solutions.
Need help?
Do you have a question about the IPUSB2HD2 and is the answer not in the manual?
Questions and answers