Table of Contents
Advertisement
Advertisement
Table of Contents

Related Manuals for SPORTS ART Performance 3108


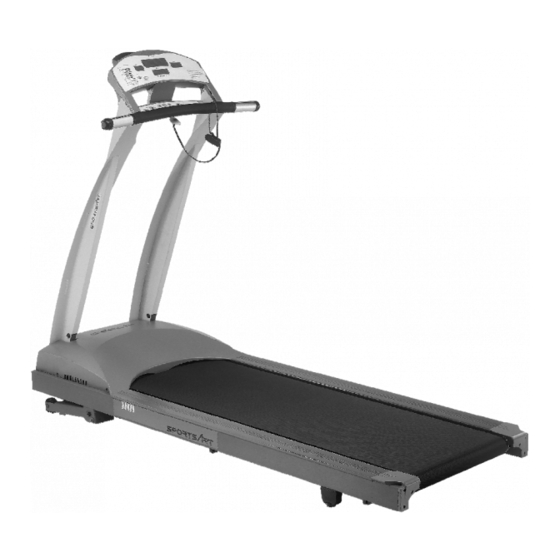
Summary of Contents for SPORTS ART Performance 3108
- Page 1 PDF created with pdfFactory trial version www.pdffactory.com...
-
Page 2: Table Of Contents
TABLE OF CONTENTS 1. SAFETY GUIDELINES..................2. ASSEMBLING YOUR TREADMILL Installation Requirements..................List of parts......................Step by step instructions..................Step by step instructions (If the unit with handrails)..........Floor level adjustment..................3. OPERATING INSTRUCTIONS Safety key......................4. UNDERSTANDING THE ELECTRONICS PACKAGE MANUAL mode.................... -
Page 3: Safety Guidelines
SAFETY GUIDELINES: Please read and follow the following safety guidelines: Before beginning any exercise program, you should consult with your doctor. It is recommended that you undergo a complete physical examination. • Read this owner's manual carefully and follow the instructions. •... -
Page 4: Assembling Your Treadmill Installation Requirements
ASSEMBLING YOUR TREADMILL: Installation requirements Read this owner's manual and follow the instructions contained herein. CAUTION: To avoid back strain, and to ensure safety to the unit and yourself, we suggest you may need a helper to remove the running deck assembly from box. - Page 5 If the unit with handrails PDF created with FinePrint pdfFactory Pro trial version http://www.pdffactory.com...
-
Page 6: List Of Parts
List of parts Before assembling your treadmill, make sure that you have all the following items: 1. One safety key 2. One hex Allen wrench (M6) with T-handle 3. One hex Allen wrench (M5) with T-handle 4. One hex Allen wrench (M5) 5. -
Page 7: Step By Step Instructions
Step by step instructions The following steps explain how to assemble your treadmill. Please read every step thoroughly and follow the directions completely to ensure correct assembly. 1. There are important parts enclosed inside of the Styrofoam, please check the Styrofoam compartments before discarding. - Page 8 5. Secure the front posts with the four screws provided. Do not tighten yet. (see Fig. Fig.3 6. Use the screwdriver to tighten all screws securely. (see Fig. 4) Fig.4 PDF created with FinePrint pdfFactory Pro trial version http://www.pdffactory.com...
-
Page 9: Step By Step Instructions (If The Unit With Handrails)
Step by step instructions (If the unit with handrails) The following steps explain how to assemble your treadmill. Please read every step thoroughly and follow the directions completely to ensure correct assembly. 1. There are important parts enclosed inside of the Styrofoam, please check the Styrofoam compartments before discarding. - Page 10 5. Using two 5/16" screws provided on each post. Do not tighten yet. (see Fig. 3) Fig.3 6. Loosen the screws of fixing the handlebar and remove the steel plate. (see Fig. 4) Fig.4 PDF created with FinePrint pdfFactory Pro trial version http://www.pdffactory.com...
- Page 11 7. Turn up the handlebar and fasten the screws. Do not tighten yet. Make sure to assemble the handlebar to the lift post correctly. R to R which are marked on the handlebar and lift post respectively. (see Fig. 5) Fig.5 If the Hand Touch Readout (HTR) is applicable, before fastening the screws, connect the wires from the display and the Hand Touch Readout handlebar...
- Page 12 8. Use the screwdriver to tighten all screws securely. (see Fig. 7) Fig.7 9. Insert the two handrails into the handlebars and then fasten the screws provided. Lastly secure the handrail clamp by fastening the screws. (see Fig. 8) Fig.8 Please note: The screws to the handrail clamp (Fig.8) are specially provided by manufacturer.
-
Page 13: Floor Level Adjustment
10. Secure the screws in front of the lift posts and handlebar tightly, Secure the screws to the lift posts tightly. (see Fig. 9) Fig.9 Floor level adjustment If the treadmill is not steady on your floor, turn the floor level adjustment on the rear feet leg of the treadmill. -
Page 14: Operating Instructions
OPERATING INSTRUCTIONS CAUTION: DO NOT STAND ON THE BELT WHEN STARTING. Safety key The safety key is required to operate the treadmill. The safety key should be used for an emergency stop switch by clipping the cord to your exercise clothing. After you have finished your workout, be sure to store the safety key in a safe place to avoid use of the treadmill by children or persons unfamiliar with this treadmill. -
Page 15: Manual Mode
D. Press the "Scroll" key to choose your desired program, such as Manual, Program, Interval, HRC. MANUAL A. Press the "Scroll" key until the Manual LED lights up. When "MAN'L" appears in the display window, you will be in the MANUAL course. ▼▲... - Page 16 6. When the REST segment is over, the display will show "GOING TO WORK" and then the machine will use the settings you chose for the WORK segment (speed and incline). If you need to change any of the settings during your workout, please refer to step 2 above.
-
Page 17: Program Mode
PROGRAM mode A. Press the "Scroll" key until the pre-program LED flashes and the larger display window will show "PRO:1~PRO:6". B. There are six(6) programs available. The course profile for each program is as follows: C. When you have chosen the program that you want, press the ENTER key. You ▼▲... -
Page 18: Hrc 65% / Hrc 80
HRC-65% / HRC-80% (if your electronics package includes the HRC feature) A. Press the "Scroll" key until the HRC 65% or 80% LED flashes and the larger display window will show "FAT or CARDIO". B. When you press the ENTER key, INPUT YOUR AGE will scroll through the ▼▲... -
Page 19: Key Functions
KEY FUNCTIONS: SCROLL: Will scroll through each function--Manual, Program, Interval and HRC. ▼▲ SPEED: Use the SPEED keys to speed up or slow down the treadmill. The speed range is 0.1-11 MPH or 0.2-18 KPH. ▼▲ INCLINE: Use the INCLINE keys to raise or lower the treadmill. -
Page 20: Running On The Treadmill
RUNNING ON THE TREADMILL: Now, you have become familiar with your treadmill's operation and are ready to exercise: 1. Turn the power switch ON, and place the safety key on the "SAFETY KEY" position. 2. Straddle the belt with your feet on the right and left staging platforms. Clip the safety key to your exercise clothing at your waistline. -
Page 21: Guidelines For Exercise
GUIDELINES FOR EXERCISE How long should I exercise? The duration of your exercise session is dependent on your fitness level. In general, it is recommended that you maintain your heart rate in the training zone for at least 10 minutes to realize an aerobic benefit. As your fitness level increases, you will be able to maintain your heart rate in the training zone for longer periods, usually between 20 and 30 minutes. -
Page 22: Maintaining Your Treadmill
MAINTAINING YOUR TREADMILL Your treadmill relies on low friction for peak performance. The treadmill's low friction operation is dependent on keeping the unit as clean as possible. See "Cleaning the Treadmill" for more information. Proper belt alignment is also important for proper operation of the treadmill. See "Adjusting the Running Belt"... -
Page 23: Adjusting The Running Belt
Adjusting the running belt Your treadmill comes with a belt alignment gauge located on the deck. (see Fig.12) The edge of the running belt should be in the middle of the green portion of the gauge. If the belt edge is in the green area, the belt does not need adjusting. If the belt edge is in the red portion, the belt needs adjusting immediately. - Page 24 The belt is properly aligned at the factory. However, during shipping and handling or by use on an uneven surface, the belt may move off center. Therefore, it is important that you check the belt's alignment before using the treadmill. The correct alignment of the running belt is critical for the smooth operation of the treadmill.
- Page 25 Periodically monitor the position of the belt to ensure peak performance: When you are using the treadmill, if you feel a pause in the belt with each foot plant, the belt is too loose. Stop the machine to check the belt tension, pull the running belt up in the middle (see Fig.
- Page 26 Conversely, if there is not enough "give", adjust both rear roller bolts counterclockwise 1/2 turn at a time. CAUTION: To avoid injury, special care must be taken when adjusting the running belt. Remove any loose clothing or shoelaces and tie back your hair. Be very careful to keep your fingers or any other objects clear of the belt and rollers.
-
Page 27: Trouble Shooting
TROUBLE SHOOTING: CAUTION: SHUT OFF UNIT AND DISCONNECT AC CORD BEFORE MAKING ANY REPAIRS OR MODIFICATIONS. "ERR" messages Note: If the electronic display shows "E-1, E-3, E-7 or E-10", please turn off the POWER switch on the front of the machine. Allow the unit to rest for 5 seconds;... -
Page 28: Blank Display
●Replace your hands after wetting your hands a little bit. Please note that placing your hands in steady contact with sensors is strictly required. E-12 will be cleared out after it flashes or scrolls 3 times and the heart rate will become "0"... -
Page 29: Electronics Package And Motor Fuse Failure
Electronics package and motor fuse failure If you turn on the POWER switch and there is no light, and nothing displays on the electronics package, then the fuse must be replaced. CAUTION: SHUT OFF THE UNIT AND DISCONNECT AC CORD BEFORE MAKING ANY REPAIRS OR MODIFICATIONS. -
Page 30: Wiring Schematic
Wiring Schematic: PDF created with FinePrint pdfFactory Pro trial version http://www.pdffactory.com...
Need help?
Do you have a question about the Performance 3108 and is the answer not in the manual?
Questions and answers
How to dismantle for transportation
To dismantle the SPORTS ART Performance 3108 treadmill for transportation, follow these steps:
1. Remove all packing materials from the treadmill deck.
2. Lay the treadmill on its side.
3. Ensure the running belt is aligned in the tracks of the two belt alignment rollers underneath.
4. Place the treadmill on a flat, level surface.
5. Detach the side posts by unscrewing the screws at the lift posts and front posts (do not tighten yet during reassembly).
6. Use a screwdriver to remove all screws securely.
Check the Styrofoam compartments for any important parts and retain the original packaging for future shipping.
This answer is automatically generated