Table of Contents
Advertisement
Quick Links
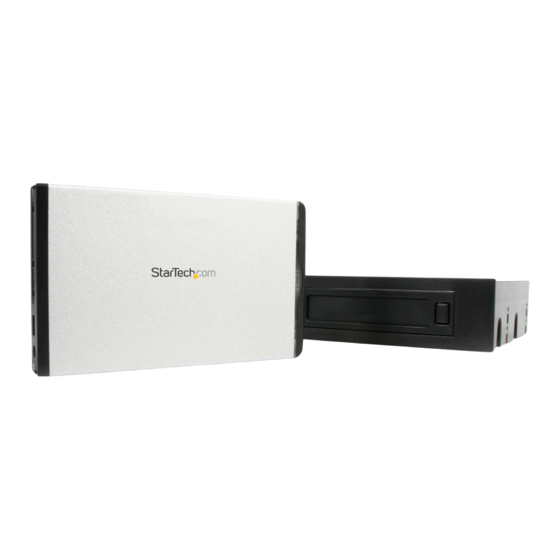
2.5 SATA External HDD Enclosure w/
3.5/5.25 Front Drive Bay
SAT2510U2REM
DE: Bedienungsanleitung - de.startech.com
FR: Guide de l'utilisateur - fr.startech.com
ES: Guía del usuario - es.startech.com
IT: Guida per l'uso - it.startech.com
NL: Gebruiksaanwijzing - nl.startech.com
PT: Guia do usuário - pt.startech.com
For the most up-to-date information, please visit: www.startech.com
Manual Revision: 10/28/2011
*actual product may vary from photos
Advertisement
Table of Contents

Summary of Contents for StarTech.com SAT2510U2REM
- Page 1 DE: Bedienungsanleitung - de.startech.com FR: Guide de l'utilisateur - fr.startech.com ES: Guía del usuario - es.startech.com IT: Guida per l'uso - it.startech.com NL: Gebruiksaanwijzing - nl.startech.com PT: Guia do usuário - pt.startech.com For the most up-to-date information, please visit: www.startech.com Manual Revision: 10/28/2011...
-
Page 2: Fcc Compliance Statement
StarTech.com. Where they occur these references are for illustrative purposes only and do not represent an endorsement of a product or service by StarTech.com, or an endorsement of the product(s) to which this manual applies by the third-party company in question. Regardless of any direct acknowledgement elsewhere in the body of this document, StarTech.com hereby... -
Page 3: Table Of Contents
Table of Contents Introduction ...................1 Features ................................ 1 Package Contents ............................. 1 System Requirements ..........................1 Installation ....................2 Installing the hard drive in the drive enclosure ................3 Installing the drive bay in the computer ..................4 Connecting the Drive Enclosure - Removable storage..............5 Removing the Drive Enclosure - Removable storage.............. -
Page 4: Introduction
Ideal for entry-level servers, network attached storage systems or applications requiring data transport from one location to another, SAT2510U2REM is the perfect solution for data mobility. Features • Hot swappable plug and play operation • Easy add-on storage for home or office usage... -
Page 5: Installation
WARNING: Hard drives, like all computer equipment can also be severely damaged by static electricity. Be sure that you are properly grounded before opening your computer case or touching any components. StarTech.com recommends that you wear an anti-static strap when installing any computer equipment. If an antistatic strap is unavailable, discharge yourself of any static electricity build-up by touching a large grounded metal surface (such as the computer case) for several seconds. -
Page 6: Installing The Hard Drive In The Drive Enclosure
Installing the hard drive in the drive enclosure 1. Remove the two screws from the rear panel of the Drive Enclosure. Remove the rear panel of the Drive Enclosure. 2. Remove the circuit board from the drive enclosure. 3. Attach the 2.5” SATA hard drive to the circuit board, and fasten it to the board using drive mounting screws. -
Page 7: Installing The Drive Bay In The Computer
Installing the drive bay in the computer Please note that the SAT2510U2REM drive bay can be installed into either a 3.5” or a 5.25” drive bay slot on the host computer, using the included 5.25” Drive Bay Bracket. If you wish to install the Drive Bay directly into the drive bay slot provided by the host computer, please skip steps 1 and 2 in the instructions that follow: 1. -
Page 8: Connecting The Drive Enclosure - Removable Storage
8. Connect one end of the SATA cable provided to the SATA port located on the rear panel of the Drive Bay. Connect the remaining end of the SATA cable to an available SATA connector as provided by the computer motherboard. 9. -
Page 9: Connecting The Drive Enclosure - Standalone
Connecting the Drive Enclosure - Standalone To connect the Drive Enclosure to the host computer, for use as standalone storage: 1. Insert the small connector (USB Mini-B) into the USB Mini-B port located on the rear panel of the Drive Enclosure. Insert the remaining end (USB type A) connector into an available USB port on the host computer. -
Page 10: Specifications
Specifications Internal Mount: 5.25” drive bay or 3.5” Form Factor drive bay 3.5” Internal Bay: External to Host - 4 pin power input 7 pin SATA Internal to HD enclosure - 7 pin and 15 pin SATA Connectors 2.5” HD Enclosure: External ports - USB 2.0 mini B DC 5V power to USB Internal - 7 pin and 15 pin SATA... -
Page 11: Technical Support
Limitation of Liability In no event shall the liability of StarTech.com Ltd. and StarTech.com USA LLP (or their officers, directors, employees or agents) for any damages (whether direct or indirect, special, punitive, incidental, consequential, or otherwise), loss of profits, loss of business, or any pecuniary loss, arising out of or related to the use of the product exceed the actual price paid for the product. - Page 12 StarTech.com is an ISO 9001 Registered manufacturer of connectivity and technology parts. StarTech.com was founded in 1985 and has operations in the United States, Canada, the United Kingdom and Taiwan servicing a worldwide market.


Need help?
Do you have a question about the SAT2510U2REM and is the answer not in the manual?
Questions and answers