Table of Contents
Advertisement
Quick Links
- 1 Configuring and Monitoring Your Da1101 from Web Browser
- 2 Chapter 3 Network Settings
- 3 Using the Da-Discovery.exe Program for Configuration of the Da1101
- 4 Running the Setup Wizard / Default Ap Mode Overview
- 5 Lan Interface Setup
- 6 Basic Settings
- 7 Appendix D Manual Logon to Da1101 for Configuration
- Download this manual
Advertisement
Table of Contents

Related Manuals for LEGRAND DA1101


Summary of Contents for LEGRAND DA1101
- Page 1 Wireless Access Point – N (P/N DA1101) Owner’s Manual 1308137 Rev. B - i -...
- Page 2 Federal Communications Commission Statement This device complies with Part 15 of the FCC Rules and RSS-210 Issue 8 of Canada. Operation is subject to the following two conditions: • This device may not cause harmful interference, and • This device must accept any interference received, including interference that may cause undesired operation.
- Page 3 user’s authority to operate the equipment. The manufacturer is not responsible for any radio or television interference caused by unauthorized modification of this device, or the substitution or attachment of connecting cables and equipment other than manufacturer specified. It is the responsibility of the user to correct any interference caused by such unauthorized modification, substitution or attachment.
- Page 4 This is to avoid damaging the equipment by local lightning strikes and other electrical surges. A Data Surge Conditioning Unit is also available from Legrand (P/N 364598-01) to help protect the data connection from the POE Injector to the N-WAP.
-
Page 5: Table Of Contents
Chapter 3 Network Settings ....................... 4 Configuring and monitoring your DA1101 from web browser ..........4 Using the DA-Discovery.exe program for configuration of the DA1101 ........4 Running the Setup Wizard / Default AP Mode Overview ............6 ... - Page 6 Appendix B DA1101 Specifications ....................B Appendix C DA1101 Utility Program ....................C Appendix D Manual logon to DA1101 for configuration ..............D Appendix E DA1101 Mounting Information & Best Practices ............E - vi -...
-
Page 7: Chapter 1 Introduction
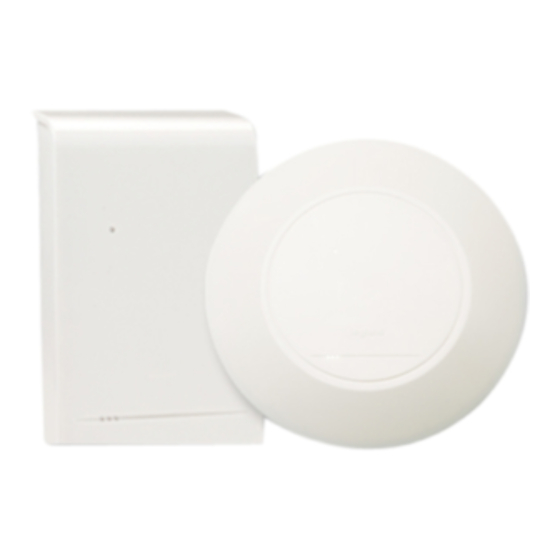
Overview Integrating the cutting edge of Internet Telephony and Access Point manufacturing experience, Legrand now introduces the latest member of our Wireless Access Point family: the DA1101 N-WAP. The N-WAP provides high-performance Access Point (AP) function for flexible wireless communication. - Page 8 Reset Button: The DA1101 has a reset button accessible through either cover or with the cover off that can be pushed and held for 10 seconds to reset the DA1101 to factory default condition (the IP address is reset to 192.168.40.253).
-
Page 9: Chapter 2 Physical Installation
Chapter 2 Physical Installation Physical Installation Steps This chapter illustrates the physical installation of the DA1101 Wireless Access Point –N. 1. Run a Category 5 cable from the triple-gang or single-gang electrical box at the intended DA1101 room location to the POE module located in the structured wiring enclosure. -
Page 10: Chapter 3 Network Settings
To restrict access (configure security) or operate in a different mode other than AP, you must log onto your DA1101. To do this you must know its IP address, and we have provided a utility program for you to find the DA1101’s IP address. - Page 11 Click on the “Refresh” button, and the screen will be updated to show the IP addresses of all devices attached to the router, including the DA1101. To configure the N-WAP simply highlight the DA1101 that you wish to connect to and click on the “Connect to Device” button and you will be shown the logon screen shown below.
-
Page 12: Running The Setup Wizard / Default Ap Mode Overview
IP addresses to all DHCP configured wireless devices in that 192.168.40.xxx sub network, including the DA1101 and all wirelessly attached PCs. Select the Setup Wizard on the left side of the screen and by clicking on Next on the Setup Wizard screen shown below, you will then name your N-WAP and setup its security. - Page 13 Settings” for a detailed overview of setting up security on the N-WAP. Step 3. Click the Finished button. You will then see the Finish page as shown below. The DA1101 will reboot automatically to make your configuration take effect and finish the Setup. - 7 -...
-
Page 14: Operation Mode Selection
N-WAP which is already in Client Mode, so first, let’s go over the use of Client Mode. Client Mode Overview Client Mode is used where a second DA1101 N-WAP is configured as a wireless remote client of the original N-WAP and connects directly to a LAN or PC (no wireless devices), while the original N-WAP connects to the router as in AP Mode. - Page 15 In this Client Mode, as in AP Mode, the router acts as the DHCP server, so if its IP address is say 192.168.40.254, it will give out IP addresses to all DHCP configured wireless devices in that 192.168.40.xxx sub network. The original N-WAP’s default address is 192.168.40.253, assuming no DHCP server for this example, (the Default Gateway is still the router at 192.168.40.254.), and the Client N-WAP is configured with an IP address of 192.168.40.252.
- Page 16 You’ll also need to go to the “Wireless” “Basic Settings” screen (shown below), and change the SSID to something different than what you called the original N-WAP, and change its Network Type to “Infrastructure”. You’ll then need to go to the “Wireless” “Site Survey” screen and click “Site Survey” to search for the original N-WAP.
-
Page 17: Repeater Mode Overview
“SSID of Extended Interface” with the SSID that you gave the second N-WAP. This completes the overview of the Setup Wizard, and the various Modes that are used by the DA1101 for typical residential networks. The following screens provide more detailed information on many of the previously discussed settings and their associated parameters. -
Page 18: Lan Interface Setup
LAN Interface Setup This page is used to configure the parameters for local area network which connects to the LAN port of your DA1101. Here you may change the setting for IP address, subnet mask, DHCP, etc.. IP Address LAN IP Address of the DA1101 Default : 192.168.40.253... -
Page 19: Wan Interface Setup
Interface Setup Choose menu “TCP/IP Settings→WAN Interface”, you can configure the IP parameters of the WAN on the screen below when router mode is enabled. Connections which dynamic address DHCP Client assignment. Static IP Connections which use static IP address assignment. Connections which use PPPoE that requires a user PPPoE WAN Access Type... -
Page 20: Dhcp Client
DHCP Client If your ISP provides the DHCP service, please choose DHCP Client type, and the Router will automatically obtain IP parameters from your ISP. You can see the page as follows. The page includes the following fields: Object Description Host Name This option specifies the Host Name of the Router. -
Page 21: Static Ip
Static IP If your ISP provides a static or fixed IP Address, then you have to setup the IP address, Subnet Mask, Gateway and DNS setting. You can see the page as follows. The page includes the following fields: Object Description IP Address Enter the IP address in dotted-decimal notation provided by your ISP. -
Page 22: Pppoe
PPPoE If your ISP provides a PPPoE connection, select PPPoE option. User has to setup the user name and password according to the ISP that provided the related information. You can see the page as follows. The page includes the following fields: Object Description User Name... -
Page 23: Pptp
PPTP If your ISP provides PPTP connection, please select PPTP option. And enter the following parameters. You can see the page as follows. The page includes the following fields: Object Description IP Address Enter the IP address in dotted-decimal notation provided by your ISP. Subnet Mask Enter the subnet Mask in dotted-decimal notation provided by your ISP, usually is 255.255.255.0... -
Page 24: L2Tp
is 5 minutes. This function will be available when the Connection Type is selected to Connect on Demand. MTU Size The default MTU (Maximum Transmission Unit) value is 1460 Bytes. It is not recommended that you change the default MTU Size unless required by your ISP. - Page 25 Password Enter the Password provided by your ISP. The Maximum input is 32 alphanumeric characters (case-sensitive). Connection Type Select the connection type Continuous, Connect on Demand or Manual from the drop-down menu. If selected Manual, user can click Connect button to make a connection. Idle Time It represents that the device will idle after the minutes you set.
-
Page 26: Chapter 4 Firewall
Port Filtering Entries in this table are used to restrict certain types of data packets from your local network to Internet through the DA1101. Use of such filters can be helpful in securing or restricting your local network. Enable Port Filtering Check to enable Port Filtering function. -
Page 27: Ip Filtering
IP Filtering Entries in this table are used to restrict certain types of data packets from your local network to Internet through the DA1101. Use of such IP filters can be helpful in securing or restricting your local network. Enable IP Filtering Check to enable IP filtering function. -
Page 28: Mac Filtering
MAC Filtering Entries in this table are used to restrict certain types of data packets from your local network to Internet through the DA1101. Use of such filters can be helpful in securing or restricting your local network. Enable MAC Filtering Check to enable MAC filtering function. -
Page 29: Port Forwarding
Entries in this table allow you to automatically redirect common network services to a specific machine behind the NAT firewall. These settings are only necessary if you wish to host some sort of server like a web server or mail server on the private local network behind your DA1101's NAT firewall. Enable Port Forwarding Check to enable Port Forwarding function. -
Page 30: Url Filtering
URL Filtering URL filter is used to deny LAN users from accessing the internet. Block those URLs which contain keywords listed below. Enable URL Filtering Check to enable URL filtering function. URL Address Enter the URL address in the field. After completing the settings on this page, click Apply Changes button to Apply Changes save the settings. -
Page 31: Dmz
A Demilitarized Zone is used to provide Internet services without sacrificing unauthorized access to its local private network. Typically, the DMZ host contains devices accessible to Internet traffic, such as Web (HTTP ) servers, FTP servers, SMTP (e-mail) servers and DNS servers. Check the box to enable DMZ function. -
Page 32: Vlan
VLAN Entries in below table are used to configure VLAN settings. VLANs are created to provide the segmentation services traditionally provided by routers. VLANs address issues such as scalability, security, and network management. Enable VLAN VLAN (Virtual Local Area Network) refers to a group of logically networked devices on one or more LANs that are configured so that they can communicate as if they were attached to the same wire, when in fact they are located on different LAN segments. -
Page 33: Chapter 5 Wireless Settings
Basic Settings This page is used to configure the parameters for wireless LAN clients who may connect to your DA1101. Here you may change wireless encryption settings as well as wireless network parameters. Disable Wireless LAN Enable or disable the wireless LAN. - Page 34 Mode - AP: The DA1101 functions as a wireless hub to which wireless clients can connect. The clients must make sure that they are configured to match the DA1101’s wireless settings. The DA1101 must be connected to a router for wireless devices to receive DHCP addressing.
- Page 35 Enable Universal Repeater Universal Repeater is a technology used to extend wireless Mode coverage. If this is enabled, a second DA1101 can be used for directly connected LAN devices and wireless devices. Default : Disable SSID of Extended Interface Click on “Enable Universal Repeater Mode”; In the “SSID of Extended Interface”, enter the SSID of the wireless router that you...
-
Page 36: Advanced Settings
If you set this value too low, it will result in bad performance. Default : 2346 RTS Threshold When the packet size is smaller the RTS threshold, the DA1101 will not use the RTS/CTS mechanism to send this packet. Default : 2347 Beacon Interval The interval of time that this DA1101 broadcast a beacon. - Page 37 Access Point, i.e the DA1101. If this is enabled, wireless stations of the selected band are not allowed to exchange data through the DA1101. The default value is set to 'Disabled'.
-
Page 38: Security Setup
Security Setup This page allows you setup the wireless security. Turn on WEP or WPA by using Encryption Keys could prevent any unauthorized access to your wireless network. Select SSID If assigned multiple AP feature, you could choose the SSID that want to setup encryption function. - Page 39 - WEP When you select the 128 or 64 bit WEP key security, please select one WEP key to be used and input 26 or 10 hexadecimal (0, 1, 2…8, 9, A, B…F) digits. - WPA When select the WPA function, the Wireless user must authenticate to this router first to use the Network service.
- Page 40 - WPA2 When select the WPA function, the Wireless user must authenticate to this router first to use the Network service. RADIUS Server IP address or the 802.1X server’s domain-name. If you select HEX, you have to fill in 64 hexadecimal (0, 1, 2…8, 9, A, B…F) digits If ASCII, the length of Pre-share key is from 8 to 63.
-
Page 41: Access Control
If you choose 'Allowed Listed', only those clients whose wireless MAC addresses are in the access control list will be able to connect to your DA1101. When 'Deny Listed' is selected, these wireless clients on the list will not be able to connect the DA1101. -
Page 42: Wds Settings
WDS. Site Survey This page provides a tool to scan the wireless network. If any DA1101 or IBSS is found, you could choose to connect it manually when client mode is enabled. -
Page 43: Wireless Schedule
Wireless Schedule This page allows you setup the wireless schedule rule. Please do not forget to configure system time before enable this feature. - 37 -... -
Page 44: Chapter 6 Management
Chapter 6 Management Status In this page can show the current status and some basic settings of the DA1101. - 38 -... -
Page 45: Statistics
Statistics This page shows the packet counters for transmission and reception regarding to Ethernet networks. DDNS Choose menu “Dynamic DNS”, and you can configure the Dynamic DNS function when enabled router mode. The Router offers the DDNS (Dynamic Domain Name System) feature, which allows the hosting of a website, FTP server, or e-mail server with a fixed domain name (named by yourself) and a dynamic IP address, and then your friends can connect to your server by entering your domain name no matter what your IP address is. -
Page 46: Time Zone Setting
Select local time zone according to location. Enable NTP client Check to enable NTP update. Once this function is enabled, the update DA1101 will automatically update current time from NTP server. NTP server User may select prefer NTP sever or input address of NTP server manually. -
Page 47: Denial-Of-Service
Denial-of-Service DoS (Denial of Service) attacks can flood your Internet connection with invalid packets and connection requests, using so much bandwidth and so many resources that Internet access becomes unavailable. The Wireless Router incorporates protection against DoS attacks. This screen allows you to configure DoS protection. -
Page 48: Log
This page can be used to set remote log server and show the system log. Enable Log Check to enable log function. System all Activates all logging functions. Wireless Only logs related to the wireless LAN will be recorded. Only logs related to the DoS protection will be recorded. Enable Remote Log Only logs related to the Remote control will be recorded. -
Page 49: Upgrade Firmware
Upgrade Firmware This page allows you upgrade the DA1101 firmware to new version. Please note, do not power off the device during the upload because it may crash the system. Firmware Version The current version is shown in this field. -
Page 50: Password Setup
Password Setup This page is used to set the account to access the web server of DA1101. Empty user name and password will disable the protection. User Name Enter user name. New Password Input password for this user. Confirmed Password Confirm password again. -
Page 51: Chapter 7 Qos
Chapter 7 Enable QoS Use this section to configure QoS. The QoS settings improve your online gaming experience by ensuring that your game traffic is prioritized over other network traffic, such as FTP or Web. Enable QoS Check the box to enable the QoS function. Automatic Check the box to enable the automatic uplink/ download speed Uplink/Download Speed... -
Page 52: Qos Rule Setting
QoS Rule Setting Administrator can setup a QoS rule for specific user depends on IP or MAC address. Address Type Select IP or MAC address type. Depend on the address type that selected, user can enter the IP Local IP Address address or MAC address of client to set up the bandwidth of the transmission. -
Page 53: Chapter 8 Route Setup
Chapter 8 Route Setup Dynamic Route Dynamic routing performs the same function as static routing except it is steadier. Dynamic routing allows routing tables in routers to change as the possible routes change. There are several protocols used to support dynamic routing including RIP and OSPF. Enable Dynamic Route Check the box to enable the Dynamic Route function. -
Page 54: Static Route
Static Route To set static routers, enter the settings including route IP address, route mask, route gateway and the route Interface from LAN or WAN. Enable Static Route Check the box to enable the Static Route function. Set up the IP address that would like to send the packets pass IP Address through. -
Page 55: Appendix A Frequently Asked Questions
Q1: I forget my DA1101 login username and / or password 1.) Restore DA1101 to its factory default settings by pressing the “Reset” button of the device for 10 seconds or more. Its factory settings are “admin” for both the user name and password. -
Page 56: Appendix B Da1101 Specifications
Appendix B DA1101 Specifications Product 802.11n Wireless DA1101 Model N-WAP Hardware WLAN Standards IEEE 802.11 b/g/n Wireless Frequency Range 2.4GHz ~ 2.4835 GHz Operation Mode AP, Client, Router Wireless Mode AP, WDS and AP+WDS mode 64/128 bit WEP data encryption,... -
Page 57: Appendix C Da1101 Utility Program
Click on the “Refresh” button, and the screen will be updated to show the IP addresses of all devices attached to the router, including the DA1101. To configure the N-WAP simply copy its shown IP address and put it into the browser window of your internet search program (ie. -
Page 58: Appendix D Manual Logon To Da1101 For Configuration
Use your web browser to connect to the DA1101, by putting its default IP address in your browser window as shown below. You should see the DA1101 logon screen pop up, as shown below. Simply type in “admin” for the logon and “admin”... -
Page 59: Appendix E Da1101 Mounting Information & Best Practices
Appendix E DA1101 Mounting Information & Best Practices NOTE TO USE THE CIRCULAR COVER PREWIRE WITH A THREE GANG PLASTIC BOX. The Pass and Seymour Slater S354RACS is recommended For the Single Gang Wall Cover the Pass and Seymour Slater S122RS is recommended.
Need help?
Do you have a question about the DA1101 and is the answer not in the manual?
Questions and answers