Table of Contents
Advertisement
Advertisement
Table of Contents

Related Manuals for Horizon Fitness LIMITED SERIES E6050


Summary of Contents for Horizon Fitness LIMITED SERIES E6050
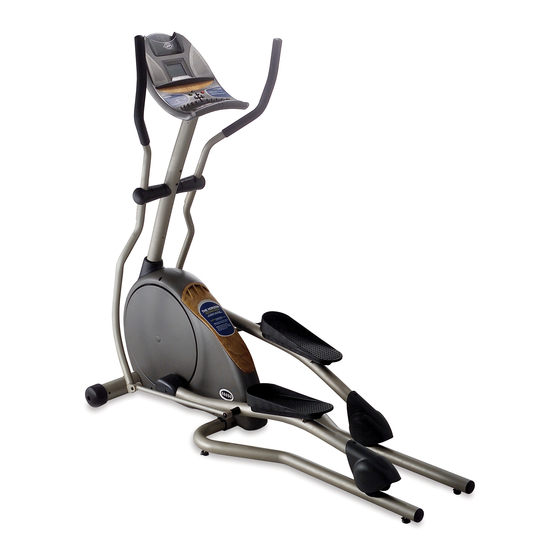
- Page 1 LIMITED SERIES E6050 Elliptical User’s Guide...
-
Page 2: Table Of Contents
Table of Contents IMPORTANT PRECAUTIONS ...........3 BEFORE YOU BEGIN . -
Page 3: Important Precautions
• Do not remove the elliptical trainer's side covers. Service should be performed only by an authorized Horizon Fitness service provider. • Never operate this elliptical trainer if it has a damaged cord or plug, if it is not working properly, if it has been damaged, or immersed in water. -
Page 4: Operation
OPERATION It is essential that your elliptical trainer is used only indoors, in a climate controlled room. If your WAR NING elliptical trainer has been exposed to colder temperatures or high moisture climates, it is strongly rec- ommended that the elliptical trainer is warmed up to room temperature before first time use. - Page 5 CAUTION! WAR NING There are several areas during the assembly process of a elliptical trainer that special attention must be paid. It is very important to follow the assembly instructions correctly and to make sure all parts are firmly tightened. If the assembly instructions are not followed correctly, the elliptical trainer TIPS could have frame parts that are not tightened and will seem loose and may cause irritating noises.
- Page 6 Before proceeding, find your elliptical trainer’s serial number and model name located under the console mast boot and enter it in the space provided below: SERIAL NUMBER AND MODEL NAME LOCATION: ENTER YOUR SERIAL NUMBER IN BOX BELOW: Refer to this number when calling for service, and also enter this serial number on your Warranty Card and in your own records.
-
Page 7: Before You Begin
• Help In Countering Anxiety and Depression • An Improved Self Image The key to reaping these benefits is to develop the exercise habit. Your new elliptical trainer will help you eliminate the obstacles that prevent you from getting in your exercise time. Inclement weather and darkness won't interfere with your workout when you use your elliptical trainer in the comfort of your home. -
Page 8: Assembly
• 1 Hardware Pack (contents listed below) Tools (included) • 4mm Allen Wrench • 5mm Allen Wrench/ Phillips Screw Driver • 13/15mm Flat Wrench • 17mm Wrench CONTACT HORIZON FITNESS CUSTOMER ASSISTANCE CENTER; TOLL FREE @ 1-800-244-4192 OR VISIT www.horizonfitness.com... - Page 9 HARDWARE E) 8mm Set Screw A) 20mm Bolt Quantity: 2 G) 13mm Nut Quantity: 1 B) 70mm Bolt Quantity: 3 J) Arc Washer Quantity: 3 P) 15/13mm Flat Wrench Quantity: 1 Q) 28mm Washer Quantity: 2 If you have any questions, or if there are any missing parts, we will guarantee complete satisfaction. PLEASE CALL OUR TOLL-FREE DIRECT CUSTOMER ASSISTANCE CENTER @ 1-888-993-3199 Mon.-Fri., 8 a.m.-5 p.m.
- Page 10 STEP 1: ATTACH FRONT TUBE. K) Note: Black portion of washer should be facing DOWN. K) Note: Black portion of washer should be facing UP. STEP 4: ATTACH LEFT & RIGHT PEDAL ARMS & PEDAL ARM SLEEVE. STEP 7: ATTACH LEFT & RIGHT LOWER LINK ARMS/HANDLE BARS.
-
Page 11: Elliptical Operation & Adjustment
The elliptical trainer should be level for optimum use. Once you have placed the elliptical trainer where you intend to use it, raise or lower the adjustable levelers located underneath each guiderail. Once you have leveled the elliptical trainer, lock the levelers in place by tightening the wing nuts against the frame. - Page 12 MOVING Your elliptical trainer has a pair of transport wheels built into the front of the frame. Carefully pick up the guide rails and roll the elliptical to the desired position.
-
Page 13: Foot Positioning
When using your elliptical trainer, you may notice that your heel raises off of the foot pad. This is a natural walking or running motion and you should not try to prevent this. -
Page 14: Console Features & Display
Console Features & Display Simply press the 'Start" button to begin exercising. The program will automatically default to the Manual program unless another program is selected. RESET Press and hold the Stop button to reset the elliptical trainer. - Page 15 TIME Shown as Minutes:Seconds. View the time remaining or the time elapsed in your workout. DISTANCE Shown as Miles. View the accumulated distance during your workout. CALORIES Shown as total accumulated calories burned during your workout. Shown as Revolutions per Minute. Improve striding technique while reducing leg muscle fatigue by striding between 60 &...
-
Page 16: Heart Rate
RESISTANCE During a workout, the amount of resistance can be adjusted by pressing the plus ‘Up’ or ‘Down’ buttons or the quick resistance keys on the console. The resistance levels vary from level 1 to 20 quick speed keys (level 1 being the easiest and level 20 being the most difficult). -
Page 17: Choosing A Program
CHOOSING A PROGRAM With the program text scrolling, press the arrow keys to scroll through the different programs. Press enter to choose your desired program. Once you choose your program, you will see the resistance level scrolling across the screen. CHOOSING A RESISTANCE With the resistance text scrolling, press the arrow keys or quick resistance keys to scroll through the different resistance levels. -
Page 18: Program Profiles
Program Profiles P1 MANUAL Customized workouts, allowing the user to adjust resistance level to the user's preference. P2 INTERVALS Improves your strength, speed, and endurance by raising and lowering the resistance levels through- out your workout to involve both your heart and muscles. P3 WEIGHT LOSS Promotes weight loss by raising and lowering the resistance level, while keeping you in your fat burn- ing zone. -
Page 19: Program Charts
Program Charts P2 INTERVALS Warm Up Resistance Level 1 Level 2 Level 3 Level 4 Level 5 Level 6 Level 7 Level 8 Level 9 Level 10 P3 WEIGHT LOSS Warm Up Resistance Level 1 Level 2 Level 3 Level 4 Level 5 Level 6 Level 7... -
Page 20: Troubleshooting & Maintenance Procedures
Troubleshooting & Maintenance Procedures Your elliptical trainer is designed to be reliable and maintenance free. However, if you do experience problems with your elliptical, please reference the troubleshooting guide listed below. PROBLEM: There is no display on the console. SOLUTION: Remove the console and verify that the console cable is attached properly, making sure that the cable is securely inserted into the console. - Page 21 If the above troubleshooting section does not remedy the problem, DO NOT RETURN TO THE STORE, PLEASE CONTACT THE HORIZON FITNESS CUSTOMER ASSISTANCE CENTER discontinue use and turn the power off. TOLLFREE @ 1-800-244-4192.
-
Page 22: Common Product Questions
CAN I MOVE THE TRAINER EASILY ONCE IT IS ASSEMBLED? Your elliptical trainer has a pair of transport wheels built into the front legs. It is easy to move your elliptical trainer by rolling it on the front transport wheels. It is important that you place your ellipti- cal trainer in a comfortable and inviting room. -
Page 23: After Each Use
Clean with soap and water cleaners only. Never use solvents on plastic parts. Cleanliness of your elliptical trainer and its operating environment will keep maintenance problems and service calls to a minimum. For this reason, Horizon Fitness recommends that the following pre- TIPS... -
Page 24: Conditioning Guidelines
Conditioning Guidelines CAUTION Always consult your physician before beginning an exercise program. TIPS HOW OFTEN? The American Heart Association recommends that you exercise at least 3 to 4 days per week to main- tain cardiovascular fitness. If you have other goals such as weight or fat loss, you will achieve your goal faster with more frequent exercise. -
Page 25: Monitoring Your Heart Rate
CAUTION Monitoring Your Heart Rate HEART RATE HANDLEBAR TIPS Place the palm of your hands directly on the heart rate handlebars. Both hands must grip the bars for your heart rate to register. When griping the handlebars, do not grip tightly. Holding the grips tightly may elevate your blood pressure. -
Page 26: Heart Rate Chart
Heart Rate Chart TARGET HEART RATE ZONE Your ‘Target Heart Rate Zone’ is a percentage of your maximum heart rate. Target Zones will vary for each individual, depending on age, current level of conditioning, and personal fitness goals. The American Heart Association recommends working-out at a ‘Target Heart Rate Zone’ of between 60% and 75% of your maximum heart rate. -
Page 27: Stretch First
Developing A Fitness Program STRETCH FIRST Before using your Horizon Fitness product, it is best to take a few minutes doing a few gentle stretching exercises. Stretching prior to exercise will improve flexibility and reduce chances of exer- cise related injury. Ease into each of these stretches with a slow gentle motion. Do not stretch to the point of pain. -
Page 28: Achieving Your Fitness Goals
HOW HARD? How hard you workout is also determined by your goals. If you use your elliptical trainer to prepare for a 5K run, you will probably work out at a higher intensity than if your goal is general fitness. -
Page 29: Weekly Log Sheets
Weekly Log Sheet... -
Page 30: Monthly Log Sheets
Monthly Log Sheet... -
Page 31: Limited Warranty
LABOR • 1 YEAR Horizon Fitness shall cover the labor cost for the repair of the device for a period of one year from the date of the original purchase, so long as the device remains in the possession of the original owner. - Page 32 HORIZON FITNESS | 800 BURTON BOULEVARD | DEFOREST, WI 53532 Phone 1-800-244-4192 Fax 1-608-842-1660 www.horizonfitness.com Limited Series. Rev. 1.3...
Need help?
Do you have a question about the LIMITED SERIES E6050 and is the answer not in the manual?
Questions and answers