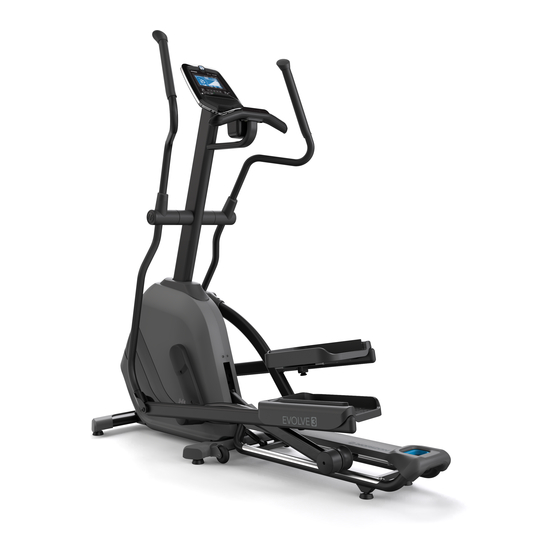
Summary of Contents for Horizon Fitness EVOLVE 5
- Page 1 EVOLVE EVOLVE ASSEMBLY GUIDE GUIDE DE MONTAGE GUÍA DE MONTAJE HZ14_AG_Evolve_3_5_Rev1_1.indd 1 7/31/14 9:01 AM...
- Page 2 ASSEMBLY ENGLISH FRANÇAIS ESPAÑOL WARNING There are several areas during the assembly process that special attention must be paid. It is very important to follow the assembly instructions correctly and to make sure all parts are firmly tightened. If the assembly instructions are not followed correctly, the elliptical could have frame parts that are not tightened and will seem loose and may cause irritating noises.
-
Page 3: Pre-Assembly
PRE ASSEMBLY TOOLS REQUIRED: READING RACK CONSOLE F L-Wrench F Flat Wrench UNPACKING SPEAKERS F L-Wrench/Screwdriver WATER BOTTLE HOLDER Unpack the product where you will be using it. Place the elliptical carton on a F Screwdriver (not included) level flat surface. It is recommended that you place a protective covering on your floor. -
Page 4: Assembly Step
ASSEMBLY STEP 1 ASSEMBLY STEP 2 HARDWARE FOR STEP 2 A Remove the PRE-INSTALLED BOLTS AND PART TYPE WASHERS (1) from the MAIN FRAME (2). RUBBER WASHER B Attach the CONSOLE CABLES (3) and tuck them FLAT WASHER into the MAIN FRAME (2). FLAT WASHER C Attach CONSOLE MAST (4) to MAIN FRAME (2) SPRING WASHER... - Page 5 ASSEMBLY STEP 3 HARDWARE FOR STEP 3 PART TYPE BOLT SPRING WASHER FLAT WASHER Open HARDWARE FOR STEP 3. Slide LOWER LINK ARM (7) into bottom end of HANDLEBAR (5). Secure the joint with 1 BOLT (F),1 FLAT WASHER (H), 1 SPRING WASHER (G) and 1 NUT (I).
- Page 6 FRANÇAIS ASSEMBLAGE AVERTISSEMENT Le processus d'assemblage comporte certaines étapes au cours desquelles il faut faire particulièrement attention. Il est très important de suivre correctement les instructions d'assemblage et de s'assurer que toutes les pièces sont bien serrées. Si les instructions d'assemblage ne sont pas suivies à la lettre, certaines parties du cadre de l'exerciseur elliptique pourraient être mal serrées et bouger, et ainsi causer des bruits irritants.
-
Page 7: Remarques Importantes
PRÉ-ASSEMBLAGE SUPPORT OUTILS REQUIS : DE LECTURE CONSOLE F Clé en L DÉBALLAGE F Clé plate HAUT-PARLEURS F Clé en L/tournevis Déballez l'appareil à l'endroit où vous l'utiliserez. Déposez la boîte contenant PORTE-BOUTEILLE D'EAU F Tournevis (non fourni) l'exerciseur elliptique sur une surface nivelée et plane. Il est conseillé de placer une toile de protection sur le plancher. - Page 8 ASSEMBLAGE ÉTAPE 1 ASSEMBLAGE ÉTAPE 2 QUINCAILLERIE NÉCESSAIRE POUR L'ÉTAPE 2 Enlevez les BOULONS ET LES RONDELLES PIÈCE TYPE QTÉ PRÉINSTALLÉS (1) sur le CADRE PRINCIPAL (2). RONDELLE EN CAOUTCHOUC Branchez les CÂBLES DE LA CONSOLE (3) et RONDELLE PLATE rentrez-les à...
- Page 9 ASSEMBLAGE ÉTAPE 3 QUINCAILLERIE NÉCESSAIRE POUR L'ÉTAPE 3 PIÈCE TYPE QTÉ BOULON RONDELLE ÉLASTIQUE RONDELLE PLATE ÉCROU A Ouvrez LE SACHET CONTENANT LA QUINCAILLERIE À UTILISER LORS DE L'ÉTAPE 3. B Glissez la BARRE DE LIAISON INFÉRIEURE (7) dans l'extrémité inférieure de la POIGNÉE (5). C Fixez le joint à...
- Page 10 ENSAMBLAJE ESPAÑOL ADVERTENCIA Durante el proceso de ensamblaje, hay varias áreas a las que se debe prestar atención especial. Es muy importante seguir las instrucciones de ensamblaje correctamente y asegurarse de que todas las piezas estén ajustadas con firmeza. Si no se siguen correctamente las instrucciones de ensamblaje, algunas piezas de la máquina elíptica podrían quedar sueltas y causar ruidos molestos.
-
Page 11: Herramientas Requeridas
PREENSAMBLAJE HERRAMIENTAS REQUERIDAS: ESTANTE DE LECTURA CONSOLA F Llave en L F Llave plana DESEMPAQUE ALTAVOCES F Llave en L/destornillador SOPORTE PARA BOTELLAS Extraiga el producto del paquete en el lugar donde lo utilizará. Coloque la caja F Destornillador (no incluido) de la máquina elíptica sobre una superficie plana y nivelada. - Page 12 ENSAMBLAJE PASO 1 ENSAMBLAJE PASO 2 TORNILLERÍA PARA EL PASO 2 A Retire los PERNOS PREINSTALADOS Y PIEZA TIPO CANT. ARANDELAS (1) del BASTIDOR PRINCIPAL (2). ARANDELA DE GOMA B Sujete los CABLES DE LA CONSOLA (3) ARANDELA PLANA y colóquelos en el BASTIDOR PRINCIPAL (2). ARANDELA PLANA C Una el POSTE DE LA CONSOLA (4) al ARANDELA ELÁSTICA...
- Page 13 ENSAMBLAJE PASO 3 TORNILLERÍA PARA EL PASO 3 PIEZA TIPO CANT. PERNO ARANDELA ELÁSTICA ARANDELA PLANA TUERCA A Abra la bolsa de TORNILLERÍA PARA EL PASO 3. B Deslice el BRAZO CONECTOR INFERIOR (7) en el extremo inferior de la BARRA DE SUJECIÓN (5). C Asegure la junta con 1 PERNO (F), 1 ARANDELA PLANA (H), 1 ARANDELA ELÁSTICA (G) y 1 TUERCA (I).
- Page 14 HZ14_AG_Evolve_3_5_Rev1_1.indd 26-27 7/31/14 9:02 AM...
- Page 15 NOTE: REMARQUE: NOTA: If a question or problem arises Si vous avez des questions ou Si surge una pregunta o un please see INFORMATION CARD éprouvez des problèmes, consultez problema, vea el TARJETA DE for contact information. du CARTE D'INFORMATION pour INFORMACIÓN para obtener trouver les coordonnées.


Need help?
Do you have a question about the EVOLVE 5 and is the answer not in the manual?
Questions and answers