Oki Microline 520 Service Handbook
Oki microline 520/521 service handbook
Hide thumbs
Also See for Microline 520:
- Service handbook (321 pages) ,
- User manual (68 pages) ,
- Guía del usuario (64 pages)

Related Manuals for Oki Microline 520


Summary of Contents for Oki Microline 520
- Page 1 Chapter 0 Manual Front Cover Microline 520/521 Service Handbook P/N 59257803 Part of the Microline 520/521Service Training Kit P/N 58229403 ML520/521 ( 96-02-04 )
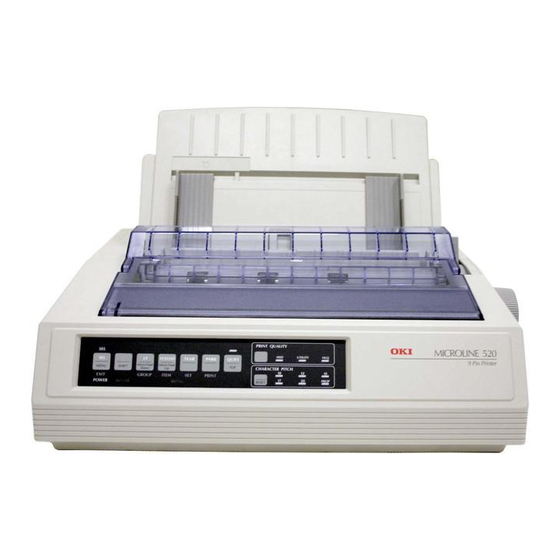
- Page 2 1.1.01 General Information 1.1.01 General Information The Microline 520 and Microline 521 are letter quality, nine-pin, dot-matrix printers which utilize OKISMART paper handling. Patented Okidata technology does away with the manual head gap adjustment. The printer actually reads and learns the print medium being used, then automatically adjusts the head gap to the optimum distance.
-
Page 3: Physical Specifications
%1.2 Physical Specifications 1.2 PHYSICAL SPECIFICATIONS 1.2.01 Dimensions NOTE: Dimensions INCLUDE the platen knob, acoustic cover, and paper separator. Microline 520 Width: 16.9 inches (43 centimeters) Depth: 14.9 inches (37.8 centimeters) Height: 6.5 inches (16.5 centimeters) Microline 521 Width: 23 inches (58.4 centimeters) Depth: 14.9 inches (37.8 centimeters) -
Page 4: Power Requirements
%1.3 Power Requirements 1.3 POWER REQUIREMENTS 1.3.01 Input Power 120 VAC: +5.5 / -15% 230/240 VAC: +10 / -14% 1.3.02 Power Consumption Operating: 110 VA Idle: 40 VA Local Test: 70 VA 1.3.03 Power Frequency 120 VAC: 60 Hz +/- 2% 230/240 VAC: 50/60 Hz +/- 2% ML520/521 ( 96-02-04 ) -
Page 5: Environmental Conditions
%1.4 Environmental Conditions 1.4 ENVIRONMENTAL CONDITIONS 1.4.01 Acoustic Rating Near Letter Quality Mode Microline 520 54.9 dBA Microline 521 54.4 dBA Utility Mode Microline 520 57.2 dBA Microline 521 56.9 dBA Quiet Mode Microline 520 52.5 dBA Microline 521 52.3 dBA 1.4.01 Altitude... -
Page 6: Operational Specifications
Print Speed at Different CPI for the ML 520/521 Mode Horiz. DPI Vert DPI 42.7 35.6 28.5 17.1 25.0 21.4 Utility 26.7 21.3 17.1 18.6 16.0 16.0 13.3 13.3 17.1 9.32 1.6.02 Characters Per Line Microline 520 ML520/521 ( 96-02-04 ) - Page 7 Microline 521 1.6.03 Character Pitches 5, 6, 8.5, 10, 12, 15, 17.1, 20 1.6.04 Character Sets Standard ASCII EPSON Character Set I & II IBM Character Set I, II & All Characters Foreign Character Substitution International Character Sets Code Page 850, 860, 863, 865 and 437 Line Graphics Bar Code Code 39...
- Page 8 Top of Form Tear Quiet Reset 1.6.08 Graphics Resolution Graphics Resolution: 288 (horizontal) x 144 (vertical) dots per inch (DPI) maximum 1.6.09 Interface Standard Centronics Parallel Optional RS232C Serial 1.6.10 Line Feed Increments Fixed 6 lines per inch (lpi) [0.167 inch (4.23 millimeters)] 8 lines per inch (lpi) [0.125 inch (3.175 millimeters)] Variable n/60 inch...
- Page 9 Bottom Feed: 0.5 inches (12.7 mm) Top Feed: 0.5 inches (12.7 mm) 1.6.17 Paper Tear Capabilities Forms Tear-0ff (sharp edge on access cover) Metal Tear Bar (with optional bottom feed tractor unit) 1.6.18 Print Method Printhead Type General Information Impact: Dot Matrix 9 pin printhead .0134 inch (0.34 millimeter) diameter pins Overheat Protection...
-
Page 10: Paper Specifications
Card Stock Weight: 120 lbs. (450 g/m 2 ) Maximum Width: Microline 520 5 to 8 inches (12.7 to 20.3 centimeters) Microline 521 5 to 14 inches (12.7 to 35.6 centimeters) Length: 3 to 17 inches (7.62 to 43.18 centimeters) Thickness: .017 inches (0.44 millimeters) - Page 11 Roller marks may mar the transparency under high temperature / high humidity conditions. Weight: 12 to 24 lbs. (45 to 90 g/m 2 ) Width: Microline 520 7.2 to 8.5 inches (18.2 to 21.5 centimeters) Microline 521 7.2 to 14.3 inches (18.2 to 36.3 centimeters) Length: 3 to 17 inches (7.62 to 43.18 centimeters)
-
Page 12: Memory Specifications
%1.8 Memory Specifications 1.8 MEMORY SPECIFICATIONS 1.8.01 EEPROM 1 Kbit serial EEPROM (used to store Menu data) 1.8.02 EPROM 1 MBit EPROM (Printer Control Program - Fonts) 1.8.03 RAM 128 Kbyte Total Resident RAM Used as Receive Buffer Receive Buffer Size is selected through the Menu. Settings are: 64 K, 32 K, 1 line Print Buffer DLL Buffer... - Page 13 %1.9 Consumables 1.9 CONSUMABLES 1.9.01 Ribbon CAUTION: Using a non-Okidata ribbon may damage the printhead and void any warranties. Material Nylon fabric, cartridge type, re-inking Type Black Ribbon Life (On average, at 10 characters per inch, Utility Mode) 4 million characters ML520/521 ( 96-02-04 )
-
Page 14: Options - Cut Sheet Feeders
1.10 OPTIONS - Cut Sheet Feeders 1.10.01 Cut Sheet Feeders Single Bin The CSF-5000 is a narrow feeder for the Microline 520. Single Bin with envelope capability Paper Width: 7.2" to 8.5" (18.3 cm to 36.3 cm) Paper Length: 10.1" to 14" (25.6 cm to 35.6 cm) Capacity: 170 sheets (16 lb.), 100 sheets (20 lb.) -
Page 15: Pull Tractor Kit
%1.10.02 Pull Tractor Kit 1.10.02 Pull Tractor Kit NOTE: The Pull Tractor Kit (P/N 70023001) is a narrow feeder for the Microline 520. The Pull Tractor Kit (P/N 70023201) is a wide feeder for the Microline 521. Bottom Feed Rear Feed (For Push/Pull Operation) -
Page 16: Bottom Push Tractor Kit
%1.10.04 Bottom Push Tractor Kit 1.10.04 Bottom Push Tractor Kit NOTE: The Bottom Push Tractor Kit (P/N 70022901) is a narrow feeder for the Microline 520. The Bottom Push Tractor Kit (P/N 70023101) is a wide feeder for the Microline 521. Bottom Feed... -
Page 17: Serial Interface
%1.10.05 Serial Interface 1.10.05 Serial Interface Super-Speed 19.2K RS-232C Ready/Busy/X-On/X-Off Protocols Can be configured through the Menu or OKISmart Utility Program ML520/521 ( 96-02-04 ) -
Page 18: Roll Paper Stand
%1.10.06 Roll Paper Stand 1.10.06 Roll Paper Stand Adapts printer for use with roll-type paper (Model 520 only) Includes: Stand, Support, Cord and DIN plug for connection to printer ML520/521 ( 96-02-04 ) - Page 19 %1.11 Reliability 1.11 RELIABILITY 1.11.01 Mean Time Before Failure (MTBF) Approximately 6,000 hours: 25% duty cycle / 35% page density 1.11.02 Mean Time To Repair (MTTR) Approximately 15 minutes to major sub-assembly level 1.11.03 Printer Life Approximately 16,000 hours of power-on time: 25% duty cycle / 35% page density 1.11.04 Printhead Life Average 200 million characters in 10 cpi utility mode @ normal 25% duty, 35% page density 1.11.05 Ribbon Life...
-
Page 20: Chapter 2 2.1 Electrical Operation
Chapter 2 2.1 Electrical Operation 2.1 ELECTRICAL OPERATION The printer is comprised of the electrical components listed below. Main Control Board Power Supply Assembly Transformer Filter Board Operator Panel Space Motor / Line Feed Motor Printhead ML520/521 ( 96-02-04 ) -
Page 21: Main Control Board
%2.1.01 Main Control Board 2.1.01 Main Control Board The main control board is made up of the microprocessor, peripheral circuits, drive circuits, sensors and interface connectors. The power to the main control board is supplied by the transformer assembly through a wire harness. The power to other electrical parts (line feed motor, space motor and printhead) is provided by the power supply circuitry through connectors on the main control board. -
Page 22: Block Diagram
%Block Diagram Block Diagram ML520/521 ( 96-02-04 ) -
Page 23: Program Rom
%Program ROM Program ROM Location 05CA: 27C1024 This 64k x 16 bit (1Mbit) EPROM contains the control program for the printer. The MPU executes the instructions contained in this program. The Program ROM is assigned to the program memory area of the MPU and instructions are fetched by the PSEN signal of the MPU. - Page 24 %RAM Location 05CB: 511664Z The RAM is CMOS dynamic RAM with 65,536 words x 16-bit configuration. It is used as a receive buffer, print buffer and work buffer. ML520/521 ( 96-02-04 )
- Page 25 %LSI Location 04B: MSM79VO35 Detects the output of the two-phase sensor on the DC space motor to control the motor drive phase. Transmits and receives serial data to and from the printhead based on the dot timing (which is derived from the space motor speed).
-
Page 26: Electrically Erasable Programmable Read Only Memory
%Electrically Erasable Programmable Read Only Memory (EEPROM) Electrically Erasable Programmable Read Only Memory (EEPROM) (Location 03C: 93CS46) The EEPROM is a CMOS serial I/O type memory (EEPROM). It is capable of electrically erasing and writing 1,024 bits. The EEPROM contains the menu data and the head drive time correction data. ML520/521 ( 96-02-04 ) - Page 27 %2.1.02 Initialization 2.1.02 Initialization This printer is initialized when the printer is powered on or when the I-PRIME-N signal is input from the host via the parallel interface. The steps in Printer Initialization are listed below. The RST-N signal is output from the reset circuit to reset the MPU and LSIs. The program is executed and the LSIs are reset by the MPU via IORST-N.
-
Page 28: Parallel Interface Control
%2.1.03 Parallel Interface Control 2.1.03 Parallel Interface Control The parallel data input from the host to the interface LSI is latched to the internal register at the falling edge of the STROBE-N signal. The LSI sets the BUSY-N signal to inform the host that the data is being processed. The LSI also outputs the RXD-N signal to inform the MPU of data reception. -
Page 29: Print Control
%2.1.04 Print Control 2.1.04 Print Control The print data is transmitted as serial data from the LSI to the control circuit and the driver contained in the printhead. After the data is printed, the sensor analog circuit controlling each pin returns the pin stroke data to the MPU. -
Page 30: Lsi/Printhead Interface
%LSI/Printhead Interface LSI/Printhead Interface The connection between the LSI and the printhead is made with the bi-directional serial data bus. The LSI transmits the print data as serial data to the logic circuit of the printhead. The printhead returns serial data from the printhead sensor analog circuit to the LSI. -
Page 31: Gap Adjust Control
%Gap Adjust Control Gap Adjust Control The Gap Adjust LSI receives stroke length information for all of the printhead pins from the sensor analog circuit. The Gap Adjust LSI then sets the optimum printhead gap for the printing medium. NOTE: Refer to Section 2.2.03 for a decription of the mechanical process. -
Page 32: Print Compensation Control
%Print Compensation Control Print Compensation Control The printhead compensates for the shape of the platen as shown below. NOTE: Also refer to Section 2.1.07 - Head Drive Time ML520/521 ( 96-02-04 ) -
Page 33: Space And Line Feed (Sp/Lf) Motor Control
%2.1.05 Space and Line Feed (SP/LF) Motor Control 2.1.05 Space and Line Feed (SP/LF) Motor Control The LSI (Location 04B: MSM79V035) generates the space motor and the line feed motor control signals according to commands received from the MPU. These signals are sent to the SP/LF motor driver. ML520/521 ( 96-02-04 ) -
Page 34: Line Feed Motor Control
%Line Feed Motor Control Line Feed Motor Control The SP/LF motor driver (Location 5A: MHM2025) drives the line feed motor in two-phase bipolar, based on the phase changeover data output from the LSI. The serial data from the LSI (04B: MSM79V035) is processed by a register contained in the SP/LF motor driver to measure the overdrive time and to change the phase. -
Page 35: Space Motor Control
%Space Motor Control Space Motor Control The SP/LF motor driver (Location 5A: MHM2025) drives the three-phase brushless motor. Motor movement is based on the phase signal (SPU,SPV and SPW) and the speed instruction data from the LSI. The MPU can identify the current speed of the space motor by measuring the pulse width of the output (Phase A, Phase B) of the encoder disk sensor. -
Page 36: Encoder Disk
%Encoder Disk Encoder Disk As the space motor operates, the encoder disk spins. When the encoder disk interrupts the photo sensors, the signals Phase A and Phase B are generated. The LSI (Location 04B: MSM79V035) divides these edge pulse signals (the frequency division is based on the selected print pitch) to generate the signal IPT. -
Page 37: Operation Panel
%2.1.06 Operation Panel 2.1.06 Operation Panel The Serial I/O Port (Ports 20 - 23) of the MPU reads the operation panel switch data from the operation panel control LSI (Location IC1: BUS148S). A two byte (15 bits +1 parity bit (even parity)) command (OPTXD) is transmitted from the MPU to the operation panel LSI in synchronization with the OPCLK signal. -
Page 38: Alarm Circuit
%2.1.07 Alarm Circuit 2.1.07 Alarm Circuit Driver Circuit Alarm Processing The printhead driver output and the head gap magnet output drive signals are monitored at R29 and C8. The POWER OFF-P signal is output by the comparator (Location 02C: IC2901) when driven for more than the specified time. -
Page 39: Low Motor Drive Voltage Alarm
%Low Motor Drive Voltage Alarm Low Motor Drive Voltage Alarm +40V is converted into the POWLEV signal (0 vdc to +5 vdc) by the voltage divider network of R542 and R544, then input to the A/D port of the MPU. The value of this voltage is used to control the drive time and the print speed (pass number) of the head. -
Page 40: Head Drive Time
%Head Drive Time Head Drive Time The head drive time is modified to compensate for the amount of the voltage drop of the POWLEV signal. By monitoring the voltage drop every 500 microseconds, the MPU is able to control and maintain the impact necessary for each printhead pin. -
Page 41: Print Speed
%Print Speed Print Speed ML520/521 ( 96-02-04 ) -
Page 42: Head Overheat Alarm Processing
%Head Overheat Alarm Processing Head Overheat Alarm Processing If the printhead temperature exceeds 110 degrees Celsius, the printer will switch to uni-directional print. If the temperature exceeds 118 degrees Celsius, printing will stop. Once the printhead cools, printing will resume. Two thermistors are used to monitor the printhead temperature. -
Page 43: Power Supply Circuit
%2.1.08 Power Supply Circuit 2.1.08 Power Supply Circuit The switching type power supply circuit supplies the +5 vdc, +/-8 vdc, 10 VAC and +40 vdc. ML520/521 ( 96-02-04 ) -
Page 44: Mechanical Operation - Printhead Mechanism
2.2 Mechanical Operation - Printhead Mechanism 2.2 MECHANICAL OPERATION 2.2.01 Printhead Mechanism The printhead is a spring-charged, 9-pin printhead. It is attached to the carriage, which moves parallel to the platen. Electrically, the printhead is controlled by the main control board via the carriage cable and the space motor. -
Page 45: Printhead Gap Information
%Printhead Gap Information Printhead Gap Information Three items factor into printhead gap information. 1. Printhead Gap Adjustment This is a SERVICE ADJUSTMENT made by a technician. It is covered in Section 3.3 of this Service Handbook. The Adjustment measures 0.014, +/- 0.001 inches (0.35, +/- 0.03 mm). 2. - Page 46 ML520/521 ( 96-02-04 )
-
Page 47: Printhead Operation
%Printhead Operation Printhead Operation When the printhead is idle, the armature is attracted to the permanent magnet. The print wires, which are attached to each armature, are then concealed inside the wire guide. When a signal to print a character is received, current flows through a coil. The magnetic field generated by the coil opposes the magnetic field between the armature and the permanent magnet. - Page 48 ML520/521 ( 96-02-04 )
-
Page 49: Printhead Temperature
%Printhead Temperature Printhead Temperature If the printhead temperature exceeds 110 degrees Celsius, the printer will switch to uni-directional print. If the temperature exceeds 118 degrees Celsius, printing will stop. Once the printhead cools, printing will resume. Two thermistors are used to monitor the printhead temperature. One is contained in the printhead. The other is in the printhead driver. -
Page 50: Spacing Mechanism
%2.2.02 Spacing Mechanism 2.2.02 Spacing Mechanism The spacing mechanism consists of a carriage shaft (mounted parallel to the platen), and a carriage frame which moves along the shaft. The carriage frame is driven by a DC servo motor mounted on the carriage frame. -
Page 51: Spacing Operation
%Spacing Operation Spacing Operation The carriage frame, which contains the printhead and space motor, moves along the carriage shaft parallel to the platen. When the space motor rotates, the driving force is transmitted to the motor gear. As the motor gear rotates, the carriage moves along the platen. For every revolution of the DC servo motor, the carriage frame moves 0.8 inch (20.32 mm). -
Page 52: Head Gap Mechanism
%2.2.03 Head Gap Mechanism 2.2.03 Head Gap Mechanism The head gap is automatically set for the thickness of the medium loaded in the printer. In the case of envelopes, where the medium thickness varies as the printhead moves along the platen, the strike force of the pins changes to compensate for the differences in thickness. - Page 53 ML520/521 ( 96-02-04 )
-
Page 54: Ribbon Drive Operation
%Ribbon Drive Operation Ribbon Drive Operation The ribbon drive mechanism feeds the ribbon in synchronization with the spacing operation. The force required to drive the ribbon is obtained from the space motor. The ribbon drive mechanism is composed of the items listed below. Ribbon Drive Gear Assembly Ribbon Gear This gear is located on the space motor assembly... -
Page 55: Line Feed Mechanism
%2.2.05 Line Feed Mechanism 2.2.05 Line Feed Mechanism The line feed operation is accomplished by activating the line feed motor which turns the platen. The rotation of the platen is used to feed paper from the selected paper path. The components of the paper feed mechanism are listed below. Line Feed Motor (pulse motor), with gears Line Feed Idler Gear Platen... -
Page 56: Cut Sheet/Continuous Sheet Switching Mechanism
%Cut Sheet/Continuous Sheet Switching Mechanism Cut Sheet/Continuous Sheet Switching Mechanism Top Feed (for cut sheet paper) When cut sheet paper is used during normal operation or by the Cut Sheet Feeder (CSF) option, place the change lever in the Top Feed position. As the platen turns, the platen gear causes the idle gear to rotate. -
Page 57: Cut Sheet Paper Feed Operation
%Cut Sheet Paper Feed Operation Cut Sheet Paper Feed Operation As the line feed motor rotates, power is transferred through the decelerating gears (line feed idler gear, platen gear) to the platen. When using cut sheet paper, the change lever must be in the TOP position so the platen and pressure rollers can feed the paper. -
Page 58: Continuous Paper Feed (Rear Tractor Mechanism)
%Continuous Paper Feed (Rear Tractor Mechanism) Continuous Paper Feed (Rear Tractor Mechanism) As the platen rotates, power is transferred to the tractor gear from the platen gear, the idler gear, and the change gear. The tractor gear drives the pin tractor belts, which feed the continuous paper. ML520/521 ( 96-02-04 ) -
Page 59: Continuous Paper Feed (Pull Tractor Mechanism)
%Continuous Paper Feed (Pull Tractor Mechanism) Continuous Paper Feed (Pull Tractor Mechanism) Bottom feed of continuous sheets is possible only when an optional pull tractor unit is installed. As the platen rotates, power is transferred to the drive gear from the line feed idler gear, the platen gear, idler gear B and idler gear A. - Page 60 %Continuous Paper Feed (Bottom Tractor Feed Mechanism) Continuous Paper Feed (Bottom Tractor Feed Mechanism) As the platen rotates, power is transferred to the drive gear from the platen gear, the idle gear and the tractor change gear. The drive gear turns the pin tractor belts on the bottom tractor feed unit, which feeds the continuous paper.
-
Page 61: Continuous Paper Feed (Push/Pull Tractor Mechanism)
%Continuous Paper Feed (Push/Pull Tractor Mechanism) Continuous Paper Feed (Push/Pull Tractor Mechanism) This mechanism consists of an optional pull tractor and a standard push tractor mechanism. Continuous paper is fed by these two tractors at the same time. ML520/521 ( 96-02-04 ) -
Page 62: Paper Detection Mechanism
%2.2.06 Paper Detection Mechanism 2.2.06 Paper Detection Mechanism Top Feed Paper Detection When cut sheet paper is inserted into the printer, Point A of the Rear/Top Paper Feed Lever is pushed backward, causing the Sensor Lever to rotate. As the Sensor Lever rotates, it contacts the Rear Sensor Lever. This makes the Rear Sensor Lever rotate. -
Page 63: Support Protector Mechanism
%2.2.07 Support Protector Mechanism 2.2.07 Support Protector Mechanism During printer initialization, the support protector is latched in the stored position (approximately 5 mm from the left bracket of the main frame). Just before paper is loaded, the printhead moves towards the left bracket and unlatches the support protector. -
Page 64: Automatic Paper Load
%2.2.08 Automatic Paper Load 2.2.08 Automatic Paper Load The Microline 520/521 printers will automatically detect cut sheet paper and feed the paper to the Top of Form (TOF) position. Cut Sheet Paper Set the change lever to the TOP FEED position. -
Page 65: Continuous Feed Paper
%Continuous Feed Paper Continuous Feed Paper Set the change lever to either the REAR FEED or BOTTOM FEED position. NOTE: When the change lever is in the REAR FEED or BOTTOM FEED position, the cut sheet detection lever does NOT contact the cut sheet detection switch (BASW), which is located on the main control board. Place continuous feed paper in the appropriate tractor. -
Page 66: Paper Park
%2.2.09 Paper Park 2.2.09 Paper Park If continuous feed paper is installed and printing on cut sheet paper is desired, it is not necessary to unload the continuous feed paper. The Paper Park feature provides a means of retracting the continuous feed paper from the paper path, while (at the same time) cut sheet paper is fed. -
Page 67: Chapter 3 %3.1.01 General Information
Chapter 3 %3.1.01 General Information 3.1.01 General Information This section lists the parts replacement, adjustment, cleaning, lubrication, and shipping procedures. Disassembly should not be performed unless absolutely necessary. NEVER perform disassembly on a malfunctioning printer until you have followed the failure analysis procedures in Section Four of this Service Handbook. -
Page 68: Maintenance Tools
%3.1.02 Maintenance Tools 3.1.02 Maintenance Tools The following tools are required to service the printer. #2 Phillips Screwdriver (with magnetic tip) Straight-slot Screwdriver Needle Nose Pliers (4 Inch) Wire Cutters Digital Multimeter Feeler Gauge (capable of measuring .014 inches) Shop Vacuum Clean, soft, and lint-free Cloth All-Purpose Cleaner Contact Kleen (Okidata P/N 51802301) -
Page 69: Maintenance Precautions
%3.1.03 Maintenance Precautions 3.1.03 Maintenance Precautions 1. Do not disassemble the unit if it is operating normally. 2. Before starting disassembly and assembly, always turn the AC power switch OFF and pull out the AC plug. 3. Detach the interface cable, if installed. 4. -
Page 70: Disassembly/Assembly Procedures
Appendix B is provided for each part. Items included in the Recommended Spare Parts List are indicated by the acronym RSPL. N/A will appear where a part number is not available. 520 indicates that the item is specific to the Microline 520. 521 indicates that the item is specific to the Microline 521. -
Page 71: Preliminary Items
%3.2.01 Preliminary Items 3.2.01 Preliminary Items 1. Press the AC switch (1) and power off the printer. 2. Remove the paper, if installed (2). 3. Detach the AC power cord (3). 4. Detach the interface cable, if installed (4). P/N 56609701 Cord: AC RSPL Both B.2.03 P/N 56624101 Cord: AC 220V (ML Series) Right Angle Option RSPL BothB.2.03 P/N 56624401 Cord: AC 240V Option RSPL Both B.2.08 P/N 70000803 Kit: Parallel Interface Option Both B.2.08 PlugnPlay Accessory... -
Page 72: Printhead Assembly
%3.2.02 Printhead Assembly 3.2.02 Printhead Assembly 1. Perform this procedure: 3.2.01. 2. Open the access cover (1). 3. Lift and remove the ribbon. ( Not shown ) 4. Pull the head clamp (2) towards the right and then rotate it up to release the printhead (3). 5. -
Page 73: Ribbon Protector
%3.2.03 Ribbon Protector 3.2.03 Ribbon Protector CAUTION You MUST use a straight slot screwdriver to release the ribbon protector. If you attempt to lift the protector without releasing the tabs, the protector will break. 1. Perform these procedures: 3.2.01, and 3.2.02. 2. -
Page 74: Gear Case Assembly
%3.2.04 Gear Case Assembly 3.2.04 Gear Case Assembly 1. Perform these procedures: 3.2.01, and 3.2.02. 2. Use a straight-slot screwdriver to release the four claws (1) of the gear case assembly (2). 3. Lift and remove the gear case assembly. NOTE: Lubrication When lubricating, refer to Section 3.5 of this Service Handbook. -
Page 75: Pull-Up Roller Assembly
%3.2.05 Pull-up Roller Assembly 3.2.05 Pull-up Roller Assembly 1. Perform this procedure: 3.2.01. 2. Open the access cover (1). 3. Open the cover of the pull-up roller assembly (2). 4. Press at A while rotating the assembly towards the back of the printer. 5. -
Page 76: Upper Cover, Access Cover, And Sheet Guide Assemblies
%3.2.06 Upper Cover, Access Cover, and Sheet Guide Assemblies 3.2.06 Upper Cover, Access Cover, and Sheet Guide Assemblies 1. Perform this procedure: 3.2.01. 2. Pull the platen knob (1) straight out and remove it. 3. Set the change lever (2) to the bottom feed position (toward the rear of the printer). 4. - Page 77 P/N 51009501 Guide: Sheet (Wide) RSPL 521 B.2.02 P/N 53066902 Cover: Upper (Narrow) RSPL 520 B.2.02 P/N 53067002 Cover: Upper (Wide) RSPL 521 B.2.02 P/N 53067101 Cover: Access (Narrow) RSPL 520 B.2.02 P/N 53067201 Cover: Access (Wide) RSPL 521 B.2.02 P/N 53067301 Cover: (B) for card slot RSPL Both B.2.03 P/N 53562601 Knob: Platen (ML500 Series) RSPL Both B.2.03 ML520/521 ( 96-02-04 )
- Page 78 %3.2.07 Control Board (FJIM) 3.2.07 Control Board (FJIM) 1. Perform these procedures: 3.2.01, and 3.2.06. 2. Remove the two screws (1). 3. Release the control board (2) from the bracket (3). 4. Tilt the board to access the connectors. 5. Detach connectors CN6 - operator panel (4), CN7- carriage cable (5), CN3 - power supply (6), and CN5 - line feed motor (7).
-
Page 79: Power Supply Assembly
%3.2.08 Power Supply Assembly 3.2.08 Power Supply Assembly 1. Perform these procedures: 3.2.01 and 3.2.06. 2. Use a straight slot screwdriver to detach the claws from both sides of the cable clamp (1). 3. Remove the cable clamp (2). 4. Detach the transformer cable from connector CN3 (3) of the control board (4). 5. -
Page 80: Operator Panel Pcb (Leop)
%3.2.09 Operator Panel PCB (LEOP) 3.2.09 Operator Panel PCB (LEOP) 1. Perform these procedures: 3.2.01, 3.2.06. and 3.2.07. 2. Cut the nylon tie and release the cable. (Not shown) 3. Disengage the claws (1) on both sides of the frame. 4. - Page 81 %3.2.10 PC Connector 3.2.10 PC Connector 1. Perform these procedures: 3.2.01, 3.2.02, and 3.2.04. 2. Remove the two screws (1) and the connector holders. The holders are not shown. 3. Remove the PC connector (2). NOTE: Installation Do not touch the contacts of the PC connector. Do not touch the contacts of the space motor (3).
-
Page 82: Space Motor And Roller Guide Assemblies
%3.2.11 Space Motor and Roller Guide Assemblies 3.2.11 Space Motor and Roller Guide Assemblies 1. Perform these procedures: 3.2.01, 3.2.02, 3.2.04, and 3.2.10. 2. Remove the three screws (1). 3. Lift the space motor assembly (2). 4. Remove the left (3) and right connector holders (4). 5. - Page 83 P/N 53342001 Holder: Guide Roller RSPL Both B.2.07 P/N N/A Pin Both B.2.07 P/N N/A Guide Roller Spring Both B.2.07 ML520/521 ( 96-02-04 )
-
Page 84: Carriage Cable
%3.2.12 Carriage Cable 3.2.12 Carriage Cable 1. Perform these procedures: 3.2.01, 3.2.06, 3.2.07, and 3.2.11. 2. Slightly bow the carriage cable (1) to release it from the claws (2) and the projection on the main frame (3). 3. Remove the carriage cable guide (4). 4. -
Page 85: Space Rack
%3.2.13 Space Rack 3.2.13 Space Rack 1. Perform these procedures: 3.2.01, 3.2.02, 3.2.04, 3.2.10, and 3.2.11. 2. Remove the spring (1). 3. Disengage the claws (2) on the both ends of the space rack (3). 4. Pull the space rack straight up and remove it. NOTE: Installation After installing the space rack, check the printhead gap adjustment. -
Page 86: Roller/Holder Backup Assembly
%3.2.14 Roller/Holder Backup Assembly 3.2.14 Roller/Holder Backup Assembly 1. Perform these procedures: 3.2.01, 3.2.02, 3.2.04, 3.2.10, and 3.2.11. 2. Use a small straight slot screwdriver to disengage the claws of the backup roller holder spring (1) from the carriage frame (2). 3. -
Page 87: Guide Rail And Adjust Cam
%3.2.15 Guide Rail and Adjust Cam 3.2.15 Guide Rail and Adjust Cam 1. Perform these procedures: 3.2.01, 3.2.02, 3.2.04, 3.2.10, 3.2.11, and 3.2.14. 2. Rotate the adjust cam (1) in the direction of arrow A as far as possible. 3. Pull the cam out and remove it. 4. -
Page 88: Left Ground Plate
%3.2.16 Left Ground Plate 3.2.16 Left Ground Plate 1. Perform these procedures: 3.2.01, 3.2.06, and 3.2.07. 2. Cut the nylon tie and release the cable. (Not shown). 3. Work the left ground plate (1) up, and then out, to remove it. P/N 51010301 Plate: Left Ground RSPL Both B.2.04 ML520/521 ( 96-02-04 ) -
Page 89: Right Ground Plate
%3.2.17 Right Ground Plate 3.2.17 Right Ground Plate 1. Perform these procedures: 3.2.01, and 3.2.06. 2. Pull the top tabs (1) of the right ground plate (2) out to free the plate from the claws of the base frame. You may have to use a screwdriver to work the plate tabs free. 3. -
Page 90: Rear And Cut Sheet Paper Feed Sensor Levers
%3.2.18 Rear and Cut Sheet Paper Feed Sensor Levers 3.2.18 Rear and Cut Sheet Paper Feed Sensor Levers 1. Perform these procedures: 3.2.01, 3.2.06, 3.2.07, 3.2.16, and 3.2.20. 2. Turn the cut sheet/continuous feed paper sensor lever (1) until the flag is at the top, then work the lever free. -
Page 91: Platen Assembly
%3.2.19 Platen Assembly 3.2.19 Platen Assembly 1. Perform these procedures: 3.2.01, and 3.2.06. 2. Move the change lever (1) to the bottom feed position (to the rear of the printer). 3. Push the lock levers (2) in, then rotate them towards the front to unlock them from the frame. 4. -
Page 92: Paper Chute Assembly
%3.2.20 Paper Chute Assembly 3.2.20 Paper Chute Assembly 1. Perform these procedures: 3.2.01, 3.2.06, and 3.2.19. 2. Remove the rear pressure roller (1). 3. Use a straight slot screwdriver to release the claws of the lock spring (2) and remove the spring. 4. -
Page 93: Line Feed Motor Assembly
%3.2.21 Line Feed Motor Assembly 3.2.21 Line Feed Motor Assembly 1. Perform these procedures: 3.2.01, 3.2.06, 3.2.07, 3.2.16, 3.2.19, 3.2.20, and 3.2.21. 2. Firmly press down on the line feed motor assembly (1) while tilting the assembly out. 3. Remove the line feed motor assembly. 4. -
Page 94: Reset Spring
%3.2.22 Reset Spring 3.2.22 Reset Spring CAUTION: Please read through this entire procedure before performing it. Do not press against the vertical extensions of the reset spring at any time during this procedure. Firm pressure will release the spring, not brute force. 1. -
Page 95: Idle Gear And Change Lever
%3.2.23 Idle Gear and Change Lever 3.2.23 Idle Gear and Change Lever 1. Perform these procedures: 3.2.01, 3.2.06, 3.2.07, 3.2.16, 3.2.17, 3.2.19, 3.2.20, and 3.2.22. 2. Remove the idle gear (1). The idle gear is a large narrow gear. 3. Release the claw (2) of the change lever (3). The claw is accessed from inside the unit. 4. -
Page 96: Pressure Spring
%3.2.24 Pressure Spring 3.2.24 Pressure Spring 1. Perform these procedures: 3.2.01, 3.2.06, 3.2.07, 3.2.16, 3.2.17, 3.2.19, 3.2.20, 3.2.22, and 3.2.23. 2. Turn the front release gear arm (1) until it is disengaged. 3. Remove the release cam (2). This is the medium size, thick cam. 4. -
Page 97: Carriage Shaft
%3.2.25 Carriage Shaft 3.2.25 Carriage Shaft CAUTION The space motor assembly, etc. may be left in place when removing the carriage shaft. However, use extra care when doing so. The carriage cable should be detached from the space motor before removing the carriage shaft. 1. -
Page 98: Leaf Spring
%3.2.26 Leaf Spring 3.2.26 Leaf Spring 1. Perform these procedures: 3.2.01, 3.2.06, 3.2.07, 3.2.16, and 3.2.25. 2. Position the unit so you can access the top and bottom of the leaf spring (1). 3. Start at one end of the spring. 4. -
Page 99: Bottom Paper Sensor Levers
%3.2.27 Bottom Paper Sensor Levers 3.2.27 Bottom Paper Sensor Levers 1. Perform these procedures: 3.2.01, 3.2.06, 3.2.07, 3.2.16, 3.2.17, 3.2.19, 3.2.20, 3.2.22, 3.2.23, and 3.2.24. 2. Working from the underside of the unit, release the claws of the paper pan (1). When you release a claw, push on the claw to move the paper pan away from the main frame. -
Page 100: Front Pressure Roller Assembly
4. Lift and remove the front pressure springs (3A and 3B). NOTE: The front pressure springs for the Microline 520 (3A) have three extensions. The front pressure springs for the Microline 521 (3B) have one extension. The Microline 521 uses both springs. -
Page 101: Tractor Assembly
%3.2.29 Tractor Assembly 3.2.29 Tractor Assembly 1. Perform these procedures: 3.2.01, 3.2.06, 3.2.07, 3.2.16, 3.2.17, 3.2.19, 3.2.20, 3.2.22, 3.2.23, and 3.2.24. 2. Use a needle nose pliers to release the claw of the tractor gear (1) and remove the gear. 3. - Page 102 P/N 50097501 Tractor: Assembly (Narrow) RSPL 520 B.2.06 P/N 50097502 Tractor: Assembly (Wide) RSPL 521 B.2.06 P/N 51228001 Gear: Change RSPL Both B.2.05 P/N 51228101 Gear: Tractor RSPL Both B.2.05 ML520/521 ( 96-02-04 )
-
Page 103: Main Frame
%3.2.30 Main Frame 3.2.30 Main Frame 1. All disassembly procedures must be carried out to reach the base frame (1). P/N 53563101 Frame: Main (Narrow) RSPL 520 B.2.04/5/6 P/N 53563201 Frame: Main (Wide) RSPL 521 B.2.04/5/6 ML520/521 ( 96-02-04 ) -
Page 104: Printer Adjustments
%3.3 Printer Adjustments 3.3 PRINTER ADJUSTMENTS 3.3.01 General Information This section contains the procedures for performing adjustments on the printer. These procedures may be required when replacing either consumables or parts. The disassembly/assembly procedures list the required adjustments and refer you to this section. Failure to perform these procedures may result in unnecessary service calls. -
Page 105: Printhead Gap Adjustment
%3.3.02 Printhead Gap Adjustment 3.3.02 Printhead Gap Adjustment General Information Before performing this adjustment, always verify that the printhead is properly installed. This adjustment should be performed when the following parts are replaced. 1. Printhead (3.2.02) 2. Space Motor Assembly (3.2.11) 3. - Page 106 as follows. (Figure 2 B) Turning the cam CLOCKWISE will increase the printhead gap. Turning the cam COUNTERCLOCKWISE will decrease the printhead gap. Verification Phase 13. Check the printhead gap adjustment at the left, right, and center of the platen. 14.
-
Page 107: Key Combinations
%3.3.03 Key Combinations 3.3.03 Key Combinations Key Combinations Description SEL + LF (Hold during Power-ON) Reset Menu to Factory Defaults. SEL (Hold during Power-ON) Access Menu (if Menu set to LIMITED OPERATION) QUIET + FF/LOAD (Hold during Power-ON) Reset Top of Form to Factory Default (1 inch) QUIET (Hold during Power-ON) Activate Rolling ASCII Test LF (Hold during Power-ON) -
Page 108: Menu Operation
%3.3.04 Menu Operation 3.3.04 Menu Operation General Information The menu is used to customize the printers settings and features. The Menu is made up of a number of Groups. Each Group has a list of Items. Each Item has several Settings. Menu Mode To place the printer in the Menu Mode, follow this procedure. - Page 109 Limited Operation General Information One of the menu selections that may be set by the end user is the operator panel function. This is found in the Set-up Group of the menu. Operator Panel Function is an item in the Set-up Group. This item may be set to either Full Operation or Limited Operation.
-
Page 110: Menu Settings
%Menu Settings Menu Settings Factory default settings are printed in Bold Italic . The tables show all possible menu settings available with the Microline 520/521. What you will actually see depends on the active emulation and the options installed. Group... - Page 111 Gap Control Auto Gap Semi Auto Gap Top Feed Line Spacing 8 LPI Form Tear-Off * * * * 500 ms 1 sec 2 sec * * * Bottom Margin Valid Invalid Page Width * 13.6" 8" Page Length 11 2/3 8.5 "...
- Page 112 * * * * * * * Appears only when optional Roll Paper Stand is installed Factory default settings are printed in Bold Italic. The tables show all possible menu settings available with the Microline 520/521. What you will actually see depends on the active emulation and the options installed.
-
Page 113: Top Of Form
%3.3.05 Top of Form 3.3.05 Top of Form General Information Top of Form is the distance from the top edge of the paper to the first print position on the page. The red line on the ribbon protector indicates the baseline of the Top of Form. Setting Top of Form 1. - Page 114 %3.3.06 Paper Park 3.3.06 Paper Park General Information Paper Park allows the user to print using single (cut) sheet pages without removing continuous forms from the printer. Procedure: Continuous Feed to Single Sheet 1. Remove any printed pages from the printer. 2.
-
Page 115: Tear Feature
%3.3.07 Tear Feature 3.3.07 Tear Feature NOTE: Tear is activated by pressing TEAR. It is a manual procedure. FORMS TEAR OFF is activated by changing a setting in the Menu. It is an automatic procedure. General Information This feature allows a printed page (rear or bottom feed, continuous form) to be torn off without wasting paper or adjusting the printer. -
Page 116: Forms Tear Off
The customers may have worked with other Okidata printers and DID NOT experience the problem with the other printer(s). The difference is that the Microline 520 and Microline 521 printers DO NOT have a bail arm. The paper does not feed as "high" as it would in a printer with a bail arm. - Page 117 8. Press SET until the desired setting prints (Off, 500 mS, 1 sec, 2 sec). 9. Press EXIT to save the change and exit Menu Mode. Using 1. Load paper. 2. Press FORM FEED 3. The paper will advance past the start print position (Top of Form) to the tear bar position. 4.
- Page 118 %3.3.09 Resets 3.3.09 Resets Reset Menu to Factory Defaults CAUTION: Once the menu has been reset, all customized menu settings will be lost. Always print the menu before resetting the printer to factory defaults. To reset the menu to factory default settings, follow this procedure. 1.
- Page 119 %3.4 Cleaning 3.4 CLEANING 3.4.01 General Information An accumulation of paper dust is the most frequent cause of print quality problems in a dot matrix printer. Small pieces of paper can cause paper jams. A dirty platen will smudge paper. It is important to clean the printer regularly, paying particular attention to the printhead area and the paper paths.
- Page 120 %3.5 Lubrication 3.5 LUBRICATION 3.5.01 General Information If the lubrication procedures are not performed properly, the printer will require more frequent cleaning. Excessive lubricant attracts dust and accumulations build up quickly. An accumulation of paper dust is the most frequent cause of print quality problems in a dot matrix printer. 3.5.02 Lubrication Schedule Routine inspection and lubricating should be performed: 1.
- Page 121 CAUTION Do NOT lubricate the space rack. Lubricating the space rack will attract dust. If enough dust accumulates on the space rack, printing problems will occur. 9. Teeth of the gears in the Gear Case Assembly ML520/521 ( 96-02-04 )
-
Page 122: Troubleshooting Tips
%4.4 Troubleshooting Tips 4.4 TROUBLESHOOTING TIPS 4.4.01 Preliminary Checks 1. Is the product being operated under the proper ambient conditions? 2. Does the paper being used meet the specifications for this product? 3. Has the ribbon been replaced as recommended? 4. -
Page 123: Problem Categories
%4.4.02 Problem Categories 4.4.02 Problem Categories There are three categories of problems that you might encounter when servicing the printer. ALARM Lamp Blinks (Fatal Errors) The following can cause the ALARM lamp to blink. Open Bail Arm Jammed Paper Printhead Cannot Move Other Fatal Error When the ALARM Lamp is blinking, check the items listed below. -
Page 124: Start Here Flowchart
%4.4.03 START HERE Flowchart 4.4.03 START HERE Flowchart START Power ON the unit. Does the printer initialize? No Is the ALARM Lamp Blinking? No Refer to RAP 01. Yes Refer to Section 4.6 of the Service Handbook. Yes Load the printer with paper. Does the paper load without jamming? No Refer to RAP 04. -
Page 125: Tips For Preventing Image Problems
%4.4.04 Tips for Preventing Image Problems 4.4.04 Tips for Preventing Image Problems 1. Make sure that the ribbon is not "dried out". If the printer output is faded, install a new ribbon, then print another sample. 2. Make sure that the paper you are using is within specifications. Paper specifications can be found in Section 1 of this Service Handbook. -
Page 126: Common Problems
%4.4.05 Common Problems 4.4.05 Common Problems 1. Nothing happens when the unit is powered on. The unit may not be plugged in. Check the power cord connection to the outlet and to the printer. If a power strip is being used, make sure that it is powered ON. Check to be sure that an external fuse hasnt blown or that a circuit breaker hasnt tripped. - Page 127 8. There are vertical spacing problems when using continuous forms and Forms Tear Off. The printer does not have a bail arm, so pages do not feed as high as printers with bail arms. The first page does not line up correctly. Enter Menu Mode and disable Form Tear Off. Exit Menu Mode.
-
Page 128: Abnormal Output - Output Samples
%4.5 Abnormal Output - Output Samples 4.5 ABNORMAL OUTPUT - Output Samples 4.5.01 Output Samples Light Print on the Entire Page Possible Causes: 1. Ribbon is "dried out". Replace the ribbon. 2. Verify that the headgap menu setting is appropriate for the type of paper being used. 3. - Page 129 1. Ribbon protector is missing or broken. Replace the ribbon protector. 2. Verify that the headgap menu setting is appropriate for the type of paper being used. 3. Check / perform the printhead gap adjustment. 4. Paper is not within specification. Refer to Section One for paper specification. Inconsistent Line Feed Possible Causes: 1.
-
Page 130: Left Margin Drifting Problem
%Left Margin Drifting Problem Left Margin Drifting Problem NOTE: This information is also provided in Technical Service Bulletin 1707. To correct a problem with the left margin drifting during print operations, follow this procedure. 1. Manually slide the carriage assembly back and forth along the full length of the carriage shaft. Check for "drag"... -
Page 131: Fault Alarms
%4.6 Fault Alarms 4.6 FAULT ALARMS 4.6.01 General Information Follow these guidelines when using the Troubleshooting Tables. CAUTION: Always check that all connectors on the printer are making good contact. 1. Record the status (OFF, solidly ON, Blinking) of the Operator Panel LEDs. 2. -
Page 132: Alarm/Led Display Troubleshooting Table Index
%4.6.02 ALARM/LED Display Troubleshooting Table Index 4.6.02 ALARM/LED Display Troubleshooting Table Index CAUTION: Always check that all connectors on the printer are making good contact. NOTE: Reference Numbers 25 and 26 use identical Operator Panel displays ALARM UTILITY PROP MENU Reference Number Blinking... - Page 133 Blinking ML520/521 ( 96-02-04 )
-
Page 134: Alarm/Led Display Troubleshooting Tables
%4.6.03 ALARM/LED Display Troubleshooting Tables 4.6.03 ALARM/LED Display Troubleshooting Tables CAUTION: Always check that all connectors on the printer are making good contact. Reference Failure Cause Recommended Action Number Description Space Motor Space motor IPT Refer to RAP 02. Alarm does not occur in specified time. - Page 135 CG ROM Alarm Check sum error Replace the main control board. CAUTION: Always check that all connectors on the printer are making good contact. ML520/521 ( 96-02-04 )
-
Page 136: Repair Analysis Procedures (Raps)
%4.7 Repair Analysis Procedures (Raps) 4.7 REPAIR ANALYSIS PROCEDURES (RAPs) 4.7.01 Using the RAPs When using the Repair Analysis Procedures, follow these steps. 1. Go to the RAP Index. 2. Find the RAP which is associated with the printers problem. 3. -
Page 137: Rap Index
%4.7.02 RAP Index 4.7.02 RAP Index Number Description No Power Supplied to Printer No Spacing Operation Printhead Homing Error Paper Jam During Paper Loading Printhead Not Firing Pins Poor Print Quality Ribbon Feed Problem Line Feed Problem Operator Panel Malfunction Parallel Interface Problem Serial Interface Problem ML520/521 ( 96-02-04 ) -
Page 138: Rap 01 No Power Supplied To Printer
%RAP 01 No Power Supplied to Printer RAP 01 No Power Supplied to Printer START The printer does not power On when the AC switch is turned ON. Check the AC cable. Is it correctly connected? Yes Check the fuse on the power supply board and F1 of the main control board. Are they open? No Go to A. -
Page 139: Rap 02 No Spacing Operation
%RAP 02 No Spacing Operation RAP 02 No Spacing Operation START The alarm LED blinks. Is the carriage assembly binding or jammed? No Make sure the carriage cable is properly connected to the space motor assembly and CN7 on the main control board. Go to A. -
Page 140: Rap 03 Printhead Homing Error
%RAP 03 Printhead Homing Error RAP 03 Printhead Homing Error START Printhead does not return to the home position. Make sure the carriage cable is properly connected to the space motor assembly and CN8 on the main control board. Make sure the power connector cable is properly connected to CN3 on the main control board. Does the space motor assembly move manually? No Remove the space motor assembly and inspect the space motor and space rack for dirt and worn teeth. -
Page 141: Rap 04 Paper Jam During Paper Loading
Check the front pressure springs to see that they are mounted properly. There are three springs in the Microline 520 and five springs in the Microline 521. Check the tension of all the front pressure rollers to see if they are the same. Top springs: 250 g. -
Page 142: Rap 05 Printhead Pins Not Firing
%RAP 05 Printhead Pins Not Firing RAP 05 Printhead Pins Not Firing START Missing dots on output. Verify that the printhead gap is set correctly. Ensure the carriage cable is making firm contact with CN7 on the main control board and the space motor assembly. -
Page 143: Rap 06 Poor Print Quality
%RAP 06 Poor Print Quality RAP 06 Poor Print Quality START Is the print head gap properly set? Yes Go to A No Go to B A Replace the printhead Has the problem been resolved? Yes End of procedure. No Go to C. C Replace the main control board. -
Page 144: Rap 07 Ribbon Feed Problem
%RAP 07 Ribbon Feed Problem RAP 07 Ribbon Feed Problem START The ribbon feed does not function properly. Verify that both ends of the carriage cable are connected correctly. Make sure the ribbon shield is fastened properly. Remove the ribbon cartridge. Grasp the carriage. -
Page 145: Rap 08 Line Feed Problem
%RAP 08 Line Feed Problem RAP 08 Line Feed Problem START No line feed operation. Make sure that the line feed cable is properly connected to the line feed motor and CN5 of the main control board. Power OFF the printer. Manually rotate the platen. Does the platen rotate smoothly? Yes Go to A No Is the left platen gear broken? -
Page 146: Rap 09 Operation Panel Malfunction
%RAP 09 Operation Panel Malfunction RAP 09 Operation Panel Malfunction START The operation panel does not function properly. Do the operation panel LEDs light when power is applied? Yes Make sure the cable from CN1 of the operation panel is properly connected to CN7 on the main control board. -
Page 147: Rap 10 Parallel Interface Problem
%RAP 10 Parallel Interface Problem RAP 10 Parallel Interface Problem START No parallel port communication. Is the SEL LED blinking? Yes The printer is in the Print Suppress mode. Disable the menu item Print Suppress if the function is not required. End of procedure. -
Page 148: Rap 11 Serial Interface Problem
%RAP 11 Serial Interface Problem RAP 11 Serial Interface Problem START. Are you using a cable with the proper number of pins? No Change the interface cable. Has the problem been resolved? Yes End of procedure No Go to A Yes Is the ALARM LED blinking? Yes Refer to Section 4.6 of the Service Handbook. -
Page 149: Printer Tests
%4.8 Printer Tests 4.8 PRINTER TESTS 4.8.01 General Information This section covers the tests listed below. · Rolling ASCII Test · Font Test · Serial Interface Loopback Test · Hexadecimal Dump Mode The Rolling ASCII and Font Tests check print operations. The Serial Interface Loopback Test checks the operation of the serial interface board. -
Page 150: Rolling Ascii Test
%4.8.02 Rolling ASCII Test 4.8.02 Rolling ASCII Test General Information The rolling ASCII test is a continuous printout of all 96 ASCII characters. Use this test to check the following items. 1. Print Quality Across the entire length of a line Down the entire page 2. -
Page 151: Font Test
%4.8.03 Font Test 4.8.03 Font Test General Information The font test is a one page sample printout of each available typeface. HSD 10 cpi HSD 12 cpi HSD 17.1 cpi Utility 10 cpi Utility 12 cpi Utility 17.1 cpi NLQ 10 cpi NLQ 12 cpi NLQ 10 cpi Double Height / Double Width At the top of the test is the printer type (1), emulation (2), country (3), and firmware revision level... -
Page 152: Serial Interface Loopback Test
%4.8.04 Serial Interface Loopback Test 4.8.04 Serial Interface Loopback Test NOTE: In order to run this test, the serial interface board must be installed with a serial loopback test connector attached to it. To perform the serial interface loopback test, follow these steps. 1. -
Page 153: Serial Cable Information
%Serial Cable Information Serial Cable Information The information in this section will help you make a serial cable to connect between the printer and computer. Refer to the computer documentation to determine the cable requirements on the computers end. The printer has the following cable requirements. ·... -
Page 154: Serial Interface Signal Requirements
%Serial Interface Signal Requirements Serial Interface Signal Requirements ML520/521 ( 96-02-04 ) -
Page 155: Commonly Used Serial Cable Configurations
%Commonly Used Serial Cable Configurations Commonly Used Serial Cable Configurations IBM 25-Pin Cable Configuration Computer Printer IBM 9-Pin Cable Configuration ML520/521 ( 96-02-04 ) -
Page 156: Hexadecimal Dump Mode
%4.8.05 Hexadecimal Dump Mode 4.8.05 Hexadecimal Dump Mode General Information The hexadecimal dump mode allows you to view the data sent from a computer to the printer. When the printer is in hex dump mode, all data received (both printable characters and control codes) will be printed in both hexadecimal and ASCII format. -
Page 157: Resistance Checks
%4.9 Resistance Checks 4.9 RESISTANCE CHECKS 4.9.01 General Description The charts on the following pages provide information needed to determine if the printhead and motors used in the printer are defective. NOTE: The printhead coil resistance values ARE NOT LISTED. The individual printwire control lines CANNOT be accessed on this printhead. -
Page 158: Layout Diagram
Layout Diagram Layout Diagram ML520/521 ( 96-02-04 ) - Page 159 %4.9.02 Printhead 4.9.02 Printhead Interconnect Diagram: Control Board to Printhead NOTE: The printhead coil resistance values ARE NOT LISTED. The individual printwire control lines CANNOT be accessed on this printhead. ML520/521 ( 96-02-04 )
-
Page 160: Line Feed Motor Resistance
%4.9.03 Line Feed Motor Resistance 4.9.03 Line Feed Motor Resistance The resistance of each coil should be approximately 13 ohms. ML520/521 ( 96-02-04 ) -
Page 161: Space Motor Resistance
%4.9.04 Space Motor Resistance 4.9.04 Space Motor Resistance The resistance of each coil should be approximately 5 ohms. ML520/521 ( 96-02-04 ) - Page 162 Appendix A A.1 Overview - A.1.01 General Information A.1 OVERVIEW - A.1.01 General Information This section describes the characteristics of the printed circuit boards used in the unit. The following areas are covered. Function Firmware Fuses Jumpers Sensors Switches Test Points Where an item is not applicable, the word NONE will be listed.
-
Page 163: Index To Charts
%A.2 Index To Charts A.2 INDEX TO CHARTS Description Board Designation Section Main Controller Board FJIM A. 2.01 Operator Panel Board LEOP A. 2.02 Power Supply Assembly N/A A. 2.03 Space Motor Board N/A A. 2.04 RS232-C Serial Interface Board LXHI A. -
Page 164: Board Layout
%Board Layout Board Layout ML520/521 ( 96-02-04 ) - Page 165 %A.2.01 Main Controller Board (FJIM) A.2.01 Main Controller Board (FJIM) Function The main controller board contains a microprocessor, EPROM, EEPROM, drive circuitry, 128 Kbyte DRAM, sensors and interface connector. The AC voltages from the power supply are rectified and regulated on the main controller board. Firmware 05CB: CMOS Dynamic RAM (1 MBit) 05CA: EPROM (Program)
-
Page 166: Operator Panel Board (Leop)
%A.2.02 Operator Panel Board (LEOP) A.2.02 Operator Panel Board (LEOP) Function The operator panel control LSI send commands to the microprocessors serial I/O port whenever the operator panels switches are pressed. The operator panel LED display provides information on fault alarms and printer status. Firmware NONE Fuses... - Page 167 %A.2.03 Power Supply Assembly A.2.03 Power Supply Assembly Function The power supply board is comprised of a noise filter board and transformer. The power supply board provides AC voltages to the main controller board via CN-3. Firmware NONE Fuses F1: 125/250V 2.5 amp. AC line fuse Jumpers NONE Sensors...
-
Page 168: Space Motor Board
%A.2.04 Space Motor Board A.2.04 Space Motor Board Function The space motor board contains an encoder disk and photosensor. The encoder disk and the photosensor generate phase signals. These signals governs the speed and direction of the space motor via the LSI and microprocessor. Firmware NONE Fuses... - Page 169 %A.2.05 RS232-C Serial Interface Board - Option (LXHI) A.2.05 RS232-C Serial Interface Board - Option (LXHI) Function This board provides you serial interface capabilities. The serial interface parameters can be set through the printer menu. Firmware Masked to the MPU: Socket is empty Fuses NONE Jumpers...
- Page 170 Appendix B B.1 Overview - B.1.01 General Information B.1 OVERVIEW - B.1.01 General Information This appendix will assist you in identifying the assemblies and parts of the product. Use Section Four (Failure Analysis) to determine the defective part(s). Locate the part and its part number in this section. Appendix B is cross-referenced to Section Three (Maintenance).
- Page 171 Format The format for this appendix is a series of tables with diagrams. The tables contain the item reference number, the Okidata and Oki-Japan (Oki-J) part numbers, the part description, a comments section, and the disassembly procedure. Items with the comments RSPL (Recommended Spare Parts List), Consumable, Document, or Option are available from Okidata.
-
Page 172: Current Part Numbers
%Current Part Numbers Current Part Numbers Okidata has made every effort to include current part numbers in this Service Handbook at the time of publishing . However, technical information frequently changes. These changes often include new or modified parts, with new or modified part numbers. Please refer to the following resources for current part numbers and pricing. -
Page 173: Definition Of Terms
Okidata distributes the TSBs through Okilink II. The TSBs are issued monthly. This part is specific to the Microline 520 printer. This part is specific to the Microline 521 printer. Both This part is used by both the Microline 520 and Microline 521 printers. ML520/521 ( 96-02-04 ) -
Page 174: Parts Ordering Information
%B.1.03 Parts Ordering Information B.1.03 Parts Ordering Information Service Center Reference Guide When a technician has successfully completed a Service Training Course for a product and the Dealer has become Service Authorized, an information package is provided to the Dealer. The Okidata Service Center Reference Guide outlines the following items. - Page 175 %B.2 Charts B.2 CHARTS Below is an index to the illustrated parts breakdown charts. Section Description B.2.01 Printer B.2.02 Upper Cover Assembly B.2.03 Printer General Assembly B.2.04 Printer Unit (1 of 3) B.2.05 Printer Unit (2 of 3) B.2.06 Printer Unit (3 of 3) B.2.07 Carriage Assembly B.2.08...
- Page 176 %Overview Overview ML520/521 ( 96-02-04 )
- Page 177 B.2.01 Printer Part numbers are subject to change. Refer to Okilink II for current part numbers and pricing information. Item Okidata P/N Description Comments Disassembly Oki-J P/N Refer to Procedure B.1.02 62409001 N/A Printer: ML520 Parallel (Epson/IBM/ML Comp.) 120 V...
-
Page 178: Upper Cover Assembly
%B.2.02 Upper Cover Assembly B.2.02 Upper Cover Assembly Item Okidata P/N Oki-J Description Comments Refer to Disassembly B.1.02 Procedure 53066902 Cover: Upper RSPL 520 3.2.06 1PP4094-6501P2 (Narrow) 53067002 Cover: Upper RSPL 521 3.2.06 1PP4094-7201P2 (Wide) 51009401 N/A Guide: Sheet RSPL 520 3.2.06... -
Page 179: Printer General Assembly
%B.2.03 Printer General Assembly B.2.03 Printer General Assembly Item Okidata P/N Oki-J Description Comments Refer to Disassembly B.1.02 Procedure 53562601 Knob: Platen RSPL Both 3.2.06 2PP4094-6507P3 (ML500 Series) 53067301 Cover: (B) for RSPL Both 3.2.06 2PP4094-6506P1 Card Slot 55072401 PCB: FJIM (w/o RSPL Both 3.2.07... - Page 180 56412402 Transformer: 120 RSPL 521 3.2.08 4YB4049-7030P2 V ML521 55073201 PCB: Filter 120 V RSPL Both 3.2.08 4YB4021-1143P1 56609701 Cord: AC 120V RSPL Both 3.2.01 3YS4011-1315P1 50099501 Printhead RSPL Both 3.2.02 4YA4023-2801G1 Assembly 50707501 Clamp: Cord RSPL Both 3.2.08 4PP4025-3621P1 56306201 Fuse: 1A 250V Option RSPL Both...
-
Page 181: Printer Unit
%B.2.04 Printer Unit B.2.04 Printer Unit Item Okidata P/N Oki-J Description Comments Refer to Disassembly B.1.02 Procedure 53563101 Frame: Main RSPL 520 3.2.30 3PA4025-3720G1 (Narrow) 53563201 Frame: Main RSPL 521 3.2.30 3PA4025-3721G1 (Wide) 50804601 Lever: Bottom RSPL Both 3.2.27 3PP4025-3315P1... - Page 182 51010301 Plate: Left Ground RSPL Both 3.2.16 3PA4025-3387G1 50923001 Spring: Leaf RSPL 520 3.2.26 3PP4025-3320P1 (Narrow) 50923101 Spring: Leaf RSPL 521 3.2.26 3PP4025-3507P1 (Wide) 53067701 Cam: Adjust RSPL Both 3.2.15 3PP4025-3380P1 53563301 Rack: Space RSPL 520 3.2.13 3PP4025-3376P1 (Narrow) 53563401 Rack: Space RSPL 521 3.2.13...
- Page 183 %B.2.05 Printer Unit B.2.05 Printer Unit Item Okidata P/N Description Comments Refer Disassembly Oki-J P/N to B.1.02 Procedure 53563101 Frame: Main RSPL 520 3.2.30 3PA4025-3720G1 (Narrow) 53563201 Frame: Main RSPL 521 3.2.30 3PA4025-3721G1 (Wide) 51228001 Gear: Change RSPL Both 3.2.29...
- Page 184 50098301 Platen RSPL 520 3.2.19 3PA4025-3370G1 Assembly (Narrow) 50098302 N/A Platen RSPL 521 3.2.19 Assembly (Wide) 53341501 Roller: Pull RSPL 520 3.2.05 3PA4025-3440G2 Up Assembly 53341601 Roller: Pull RSPL 521 3.2.05 3PA4025-3530G2 Up Assembly ML520/521 ( 96-02-04 )
- Page 185 %B.2.06 Printer Unit B.2.06 Printer Unit Item Okidata P/N Description Comments Refer Disassembly Oki-J P/N to B.1.02 Procedure 53563101 Frame: Main RSPL 520 3.2.30 3PA4025-3720G1 (Narrow) 53563201 Frame: Main RSPL 521 3.2.30 3PA4025-3721G1 (Wide) 50922901 Spring: Front RSPL 520 3.2.28...
- Page 186 51227901 Shaft: Front RSPL 521 3.2.27 3PP4025-3505P1 Release Gear (Wide) 50097301 N/A Pan: Paper RSPL 520 3.2.27 (Narrow) 50097401 Pan: Paper RSPL 521 3.2.27 1PP4025-3506P2 (Wide) 50923301 Spring: RSPL 520 3.2.24 3PP4025-3346G1 Pressure (Narrow) 50923401 Spring: RSPL 521 3.2.24 3PP4025-3511G1 Pressure (Wide) 50805201...
-
Page 187: Carriage Assembly
%B.2.07 Carriage Assembly B.2.07 Carriage Assembly Item Okidata P/N Description Comments Refer Disassembly Oki-J P/N to B.1.02 Procedure 50707401 Clamp: Head RSPL Both 3.2.02 3PP4025-3431P1 53562801 Protector: RSPL Both 3.2.03 3PP4025-3430P1 Ribbon 51228501 Gear: Case RSPL Both 3.2.04 3PA4025-3406G1 (Assembly) - Page 188 53343301 Guide: Both Inc. 9 3.2.11 4PA4025-3719G1 Roller Assembly 53341901 Roller: Guide Both 3.2.11 4PP4025-3398P1 53342001 Holder: Guide Both 3.2.11 3PP4025-3399P1 Roller N/A N/A Both 3.2.11 Guide Roller Both 3.2.11 4PP4025-3401P1 Spring 56627301 Cable: RSPL 520 3.2.12 2PU4007-1193P1 Carriage (Narrow) 56627302 N/A Cable: RSPL 521...
- Page 189 %B.2.08 Options B.2.08 Options Item Okidata P/N Description Comments Refer Disassembly Oki-J P/N to B.1.02 Procedure 70022501 N/A Kit: Single Option 520 Bin CSF 5000 Narrow 70022701 N/A Kit: Single Option 521 Bin CSF 5001 Wide 70023001 N/A Kit: Pull...
- Page 190 70000803 N/A Kit: Option Both Parallel Interface Plug'n'Play Accessory 70012801 N/A Kit: RS232-C Option Both Serial Interface 56412501 Transformer Option RSPL 520 4YB4049-7031P1 230-240V (ML520) 56412502 Transformer Option RSPL 521 4YB4049-7031P2 230-240V (ML521) 56624101 Cord: AC Option RSPL Both N/A 3YS4011-1265P1 (220V) ML Series Right...
-
Page 191: Option Parts
%B.2.09 Option Parts B.2.09 Option Parts Item Okidata P/N Description Comments Refer Disassembly Oki-J P/N to B.1.02 Procedure 50097901 N/A Tractor: Option RSPL Both N/A Pull and Bottom Assembly (Right) 50098001 Tractor: Option RSPL Both N/A 4PA4025-3608G1 Pull and Bottom... - Page 192 53480901 Supporter: Option RSPL 521 1PP4043-1891P4 Front Sheet (W) Cut-Sheet Feeder 53562901 Supporter: Option RSPL 520 1PP4053-2576P1 Front Sheet (N) Cut-Sheet Feeder 53563001 Shoe: Brake Option RSPL Both N/A 4PP4053-2547G1 Cut-Sheet Feeder 55937301 PCB: NCSF Option RSPL Both N/A 4YA4053-3025G1 Cut-Sheet Feeder 56510501...
Need help?
Do you have a question about the Microline 520 and is the answer not in the manual?
Questions and answers