Table of Contents
Advertisement
Quick Links
Advertisement
Table of Contents
Troubleshooting

Related Manuals for TallyGenicom Intelliprint mL260


Summary of Contents for TallyGenicom Intelliprint mL260
- Page 1 TallyGenicom Intelliprint mL260 User Guide Jun 04 Publication No. GEG-99199...
-
Page 2: Proprietary Statement
GTI. Copyright Notice This manual is Copyrighted © 2004 by TallyGenicom. All Rights Reserved. This manual may not be copied in whole or in part, nor transferred to any other media or language, without the express written permission of TallyGenicom. -
Page 3: Table Of Contents
Contents 1-iii Contents 1-iii Preface 1-1 About this Manual 1-2 Scope 1-2 Overview 1-2 Printer Orientation 1-3 Conventions 1-3 About the Printer 1-4 Features 1-4 Available Configuration 1-5 Chapter 1 Getting Started 1-1 Safety Precautions 1-2 Handling the Printer 1-2 Package Contents 1-2 CD-ROM Contents 1-3 Printer Location Requirements 1-3... - Page 4 TallyGenicom Intelliprint mL260 User Guide Parts of the Printer 1-6 Optional Printer Accessories 1-9 Paper Path 1-9 Chapter 2 2-1 Using the Printer 2-1 Connecting the Printer to the AC Outlet 2-2 Turning Power On and Off 2-3 Connecting the Printer to the Host Computer 2-4...
- Page 5 TallyGenicom Intelliprint mL260 User Guide Navigating the Control Panel Menus 3-4 Menu Structure 3-6 Job Library 3-7 Job Accounting 3-8 Paper Menu 3-9 Interface Menu 3-12 PS Menu 3-15 PCL Menu 3-16 System Menu 3-19 Quality Menu 3-21 Functions Menu 3-22...
- Page 6 TallyGenicom Intelliprint mL260 User Guide Clearing an E3 Paper Jam 5-8 Clearing an E4 Jam 5-10 Clearing an E7 Paper Jam 5-13 Clearing an E6 Paper Jam 5-16 Print Image Quality Problems 5-18 Other Print Image Quality Problems 5-21 Miscellaneous Problems 5-22...
- Page 7 TallyGenicom Intelliprint mL260 User Guide Loading Print Media 7-12 Loading the A4/Letter/Legal Paper Tray 7-12 Solving 550 Sheet Feeder Problems 7-16 Interpreting Paper Feeder Error Messages 7-17 Installation Problems 7-17 Clearing an E2 Paper Jam 7-18 Correcting Miscellaneous Paper Feeder Problems 7-19...
- Page 8 TallyGenicom Intelliprint mL260 User Guide Correcting Miscellaneous Offset Catch Tray Problems 9-10 Maintaining the Offset Catch Tray 9-13 Cleaning the Exterior of the Offset Catch Tray 9-13 Removing the Offset Catch Tray 9-13 Moving the Offset Catch Tray 9-16...
- Page 9 TallyGenicom Intelliprint mL260 User Guide References for OpenVMS users 10-52 RS-232C Serial Cable Pin Assignments 10-53 RS-422 Serial Cable Pin Assignments 10-53 Troubleshooting 10-53 Control Panel Error Messages 10-53 Obtaining Help and Information 10-54 10-55 Appendix A Customer Support and Part Numbers A-1...
- Page 10 TallyGenicom Intelliprint mL260 User Guide Publication No. GEG-99199 Jun 04...
-
Page 11: Preface
Preface In this Chapter . . . “Welcome” on page 2 “About this Manual” on page 2 “About the Printer” on page 4 Jun 04 Publication No. GEG-99199... -
Page 12: About This Manual
About this Manual Welcome Thank you for selecting the TallyGenicom Intelliprint mL260. This User Guide contains impor- tant information about the operation and care of your printer. Please read this manual in its entirety and keep it at hand for later reference. -
Page 13: Printer Orientation
TallyGenicom Intelliprint mL260 User Guide About this Manual Chapter 7: Using the 550-Sheet Feeder This chapter provides all of the information necessary to install, use, and maintain the 550-sheet paper feeder option, including procedures for cleaning the feeder and removing paper jams. -
Page 14: About The Printer
About the Printer About the Printer The Intelliprint mL260 printer uses a data modulated laser beam and conventional dry-ink xero- graphic processes to produce images up to 1200 dpi resolution at a paper output speed of 26 pages per minute. The printer can accommodate both plain paper and other print media, and feeds paper from either a main 550-sheet paper tray or from the front tray, which is designed to feed special print media such as labels and transparencies. -
Page 15: Available Configuration
TallyGenicom Intelliprint mL260 User Guide About the Printer Available Configuration Network Configuration - Intelliprint mL260 Printer The printer is available in the following network-ready configuration: Memory: 64MB Resolutions: 600 x 600 dpi, and 1200 x 1200 dpi Paper Input: One 550-sheet universal paper tray for A4/Letter/Legal, and one 100-sheet front... - Page 16 TallyGenicom Intelliprint mL260 User Guide About the Printer Publication No. GEG-99199 Jun 04...
-
Page 17: Getting Started
Getting Started In this Chapter . . . “About this Chapter” on page 1-2 “Package Contents” on page 1-2 “Printer Location Requirements” on page 1-3 “Parts of the Printer” on page 1-6 “Optional Printer Accessories” on page 1-9 “Paper Path” on page 1-9 Jun 04 Publication No. -
Page 18: Safety Precautions
TallyGenicom Intelliprint mL260 User Guide Safety Precautions About this Chapter This chapter reviews the contents of the printer packaging, explains the parts of the printer, and describes the space and environment requirements of the printer. Safety Precautions This printer is available in either of the following power specifications: 110V and 220V. The speci- fications that apply to your printer depend on your machine configuration. -
Page 19: Cd-Rom Contents
CD-ROM Contents Intelliprint mL260 Printer Electronic Library CD-ROM The Intelliprint mL260 Printer Electronic Library CD-ROM contains printer drivers, soft- ware, and documentation designed to help you fully utilize the printer, and also contains Adobe PostScript fonts that match those available on the printer. -
Page 20: Space Requirements
TallyGenicom Intelliprint mL260 User Guide Printer Location Requirements Space Requirements A certain amount of space is required for proper operation of the printer and also for performing printer maintenance and replacing consumables. Use the following figures to plan for appropriate clearances when determining a location for your printer. -
Page 21: Environment
TallyGenicom Intelliprint mL260 User Guide 1-5 Printer Location Requirements Environment Use the following guidelines to determine the best location for the printer: Horizontal, sturdy, and stable surface Location with good ventilation Location with stable temperature and humidity Exposed to direct sunlight... -
Page 22: Parts Of The Printer
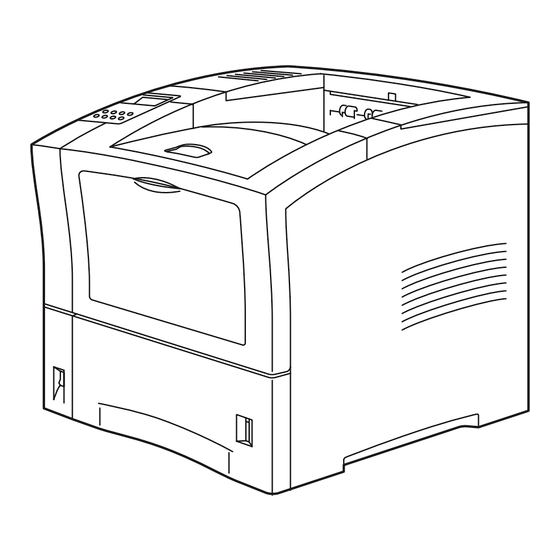
TallyGenicom Intelliprint mL260 User Guide Parts of the Printer Parts of the Printer The following figures indicate the names and functions of the main parts of the printer. Control panel Provides access to all controls required to Paper exit slot operate the printer. - Page 23 TallyGenicom Intelliprint mL260 User Guide 1-7 Parts of the Printer Toner Cartridge Integrated cartridge contains the toner and the photosensitive drum. Front Cover Provides access to the interior of the printer. Allows you to replace the toner cartridge or remove jammed paper.
- Page 24 TallyGenicom Intelliprint mL260 User Guide Parts of the Printer LCD Display Shows error messages and other status messages; also displays menus, submenus, and settings. LED Indicators Show printer status. Pushbuttons Allow you to navigate through menus, place a printer offline, or cancel a print job.
-
Page 25: Optional Printer Accessories
TallyGenicom Intelliprint mL260 User Guide 1-9 Optional Printer Accessories Optional Printer Accessories The following figure shows all of the available accessories as installed on the printer: Offset Catch Tray Holds and separates large print jobs by offset- ting. Envelope Feeder Holds a maximum of 75 envelopes or 100 postcards. - Page 26 1-10 TallyGenicom Intelliprint mL260 User Guide Paper Path The paper emerges onto the output tray, or the offset output tray if installed. Figure 1-9: Paper Path. Publication No. GEG-99199 Jun 04...
-
Page 27: Using The Printer
Using the Printer In this Chapter . . . “About this Chapter” on page 2-2 “Connecting the Printer to the AC Outlet” on page 2-2 “Turning Power On and Off ” on page 2-3 “Connecting the Printer to the Host Computer” on page 2-4 “Selecting Print Media”... -
Page 28: Connecting The Printer To The Ac Outlet
TallyGenicom Intelliprint mL260 User Guide Connecting the Printer to the AC Outlet About this Chapter This chapter provides information concerning the daily use of the printer, including procedures for connecting the printer and loading print media, and guidelines for selecting print media. -
Page 29: Turning Power On And Off
TallyGenicom Intelliprint mL260 User Guide Turning Power On and Off Turning Power On and Off Use the following procedure to turn the printer on: Turn the printer on by pressing [ I ] on the power switch on the left front of the printer. -
Page 30: Connecting The Printer To The Host Computer
TallyGenicom Intelliprint mL260 User Guide Connecting the Printer to the Host Computer Connecting the Printer to the Host Computer You must connect the printer to your computer using an IEEE 1284 parallel cable or a USB cable. These cables are user-supplied. The parallel and USB ports can be connected simultaneously, and the printer will automatically switch data sources between jobs. -
Page 31: Correct Paper Storage
TallyGenicom Intelliprint mL260 User Guide Selecting Print Media Has either an extremely slick surface or an extremely textured surface Has an exposed adhesive surface Has paper pieces glued or taped to the media Has staples or paper clips attached Is categorized as thermal paper, coated paper, or carbon paper... - Page 32 TallyGenicom Intelliprint mL260 User Guide Selecting Print Media If you want to use paper that is an odd size or weight, you must use the front paper tray. The front tray can hold the following quantities of non-standard print media:...
-
Page 33: Print Media Weight, Type, And Size
TallyGenicom Intelliprint mL260 User Guide Loading the Universal Paper Tray Print Media Weight, Type, and Size The following table defines print media that you can use in each of the paper sources, and also indi- cates the feed orientation—long edge feed (LEF) or short edge feed (SEF). If you have concerns about a specific brand or type of media, try samples of the media to determine if the resulting printer performance and print quality meet your expectations. - Page 34 TallyGenicom Intelliprint mL260 User Guide Loading the Universal Paper Tray Use the following procedure to load paper into the 550 sheet universal paper tray: Place the paper tray on a level surface. Squeeze the length guide, lift it up, and slide it to the rear of the tray.
- Page 35 TallyGenicom Intelliprint mL260 User Guide Loading the Universal Paper Tray Squeeze the right width guide, lift it up, and slide the guides to the sides of the tray. Verify that the plate has dropped down into the base of the paper tray. If the tray is locked in the up potision, pull the lever near the front of the tray to release the plate, or push the paper tray all the way into the printer and then remove it.
- Page 36 2-10 TallyGenicom Intelliprint mL260 User Guide Loading the Universal Paper Tray Align the edges of the paper and place it in the center of the paper tray with the side to print on facing down. NOTE: To avoid paper jams and other paper transportation problems, make sure the length and width guides are adjusted to match the paper size and are locked firmly into place.
-
Page 37: Loading The Front Tray
TallyGenicom Intelliprint mL260 User Guide 2-11 Loading the Front Tray Grasp the paper tray with both hands and insert it into the paper tray well on the printer. Push the paper tray completely into the printer, making sure the tray is properly seated. - Page 38 2-12 TallyGenicom Intelliprint mL260 User Guide Loading the Front Tray Do not mix print media in the front tray; for example, do not load a stack that includes both envelopes and standard paper. Load only one type of print media.
- Page 39 TallyGenicom Intelliprint mL260 User Guide 2-13 Loading the Front Tray Stack the paper that you will load in the front tray, making sure that the edges are aligned and neat. Position the paper stack so the surface to be printed faces up.
- Page 40 2-14 TallyGenicom Intelliprint mL260 User Guide Loading the Front Tray Publication No. GEG-99199 Jun 04...
-
Page 41: Understanding And Navigating The Control Panel Menus
Understanding and Navigating the Control Panel Menus In this Chapter . . . “About this Chapter” on page 3-2 “Control Panel Features” on page 3-2 “Navigating the Control Panel Menus” on page 3-4 “Menu Structure” on page 3-6 “Job Library” on page 3-7 “Job Accounting”... -
Page 42: Control Panel Features
TallyGenicom Intelliprint mL260 User Guide Control Panel Features About this Chapter This chapter explains the control panel and its functions, and also demonstrates how to navigate throughout the various menus and submenus that allow you to view and change the printer set- tings. -
Page 43: Led Indicators
TallyGenicom Intelliprint mL260 User Guide Control Panel Features LED Indicators The LED indicators also indicate printer status. The four indicators can each be on, off, or blink- ing, indicating different phases of printer operation. The table below explains the LED indicators. -
Page 44: Tallygenicom Intelliprint Ml260 User Guide
TallyGenicom Intelliprint mL260 User Guide Navigating the Control Panel Menus Pushbutton Function STATUS—Push this button to enter the Status Menu and view the current status of printer. PREVIOUS—Push this button to return to the previous menu, submenu, or option within the same level of the menu structure. - Page 45 TallyGenicom Intelliprint mL260 User Guide Navigating the Control Panel Menus The following figure shows the sequence of pushbuttons and display messages that would allow you to change the number of copies printed. This example illustrates the basic relationship between menus and submenus and demonstrates how the NEXT, PREVIOUS, SELECT, and RETURN buttons help you to navigate through the menus.
-
Page 46: Menu Structure
TallyGenicom Intelliprint mL260 User Guide Menu Structure Menu Structure The following figure shows the structure of the control panel main menus and submenus. For more specific information about using and navigating the printer menu system, see the User Guide pro- vided on the Electronic Library CD-ROM. -
Page 47: Job Library
TallyGenicom Intelliprint mL260 User Guide Job Library Job Library Press the MENU button on the control panel. Press the NEXT button until the text “Job Library Menu” is shown on the second line of the display. Press the SELECT button to enter the Job Library menu. -
Page 48: Job Accounting
TallyGenicom Intelliprint mL260 User Guide Job Accounting Submenu Default Available Settings Procedure for Changing Setting Setting Delete 1. Press NEXT or PREVIOUS to scroll Job1 through the Print Job Names. 2. Press SELECT to choose the desired Print Job to Delete. -
Page 49: Paper Menu
TallyGenicom Intelliprint mL260 User Guide Paper Menu Paper Menu The Paper Menu provides access to the printer settings for various paper-handling functions. Use the following procedure to enter the paper menu: Press the MENU button on the control panel. Press the NEXT button until the text “Paper Menu” is shown on the second line of the dis- play. - Page 50 3-10 TallyGenicom Intelliprint mL260 User Guide Paper Menu Submenus Default Setting Available Settings Procedure for Changing Setting Media Size/Type Front Tray Size Type 1. Press NEXT or PREVIOUS to scroll This submenu allows Size: Letter LEF Front Tray: Front Tray:...
- Page 51 TallyGenicom Intelliprint mL260 User Guide 3-11 Paper Menu Submenus Default Setting Available Settings Procedure for Changing Setting Auto Resize 1. Press NEXT or PREVIOUS to toggle This submenu allows between ON and OFF. you to set the printer 2. Press SELECT to save this setting.
-
Page 52: Interface Menu
3-12 TallyGenicom Intelliprint mL260 User Guide Interface Menu Interface Menu The Interface Menu provides access to the printer interface settings. Use the following procedure to enter the interface menu: Press the MENU button on the control panel. Press the NEXT button until the text “Interface Menu” is shown on the second line of the display. - Page 53 TallyGenicom Intelliprint mL260 User Guide 3-13 Interface Menu Submenus Default Available Procedure for Changing Setting Setting Settings Network 1 Setup Interpreter: Interpreter: 1. Press NEXT or PREVIOUS to toggle between Auto Switch Auto Switch This submenu allows you SPOOLING submenus.
- Page 54 3-14 TallyGenicom Intelliprint mL260 User Guide Interface Menu Submenus Default Available Procedure for Changing Setting Setting Settings USB Setup Interpreter: Interpreter: 1. Press NEXT or PREVIOUS to toggle between This submenu allows you Auto Switch Auto Switch INTERPRETER, FORMAT, DELAY OUT CLOSE, to choose set up the USB and, BINARY PS submenus.
-
Page 55: Ps Menu
TallyGenicom Intelliprint mL260 User Guide 3-15 PS Menu PS Menu The PS Menu provides access to the PostScript settings. Use the following procedure to enter the PS Menu: Press the MENU button on the control panel. Press the NEXT button until the text “PS Menu” is shown on the second line of the display. -
Page 56: Pcl Menu
3-16 TallyGenicom Intelliprint mL260 User Guide PCL Menu PCL Menu The PCL Menu provides access to the PCL settings. Use the following procedure to enter the PCL menu: Press the MENU button on the control panel. Press the NEXT button until the text “PCL Menu” is shown on the second line of the dis- play. - Page 57 TallyGenicom Intelliprint mL260 User Guide 3-17 PCL Menu Submenus Default Setting Available Settings Procedure for Changing Setting Symbol Set 10U:PC-8 CP437 10U:PC-8 CP437 15U:Pi Font 1. Press NEXT or PREVIOUS to This submenu allows 11U:PC-8 D/N 1U: Legal scroll through the available...
- Page 58 3-18 TallyGenicom Intelliprint mL260 User Guide PCL Menu Submenus Default Setting Available Settings Procedure for Changing Setting FF Mode FF = FF FF = FF 1. Press NEXT or PREVIOUS to This submenu allows FF = CR/FF choose from FF=FF or you to define the FF=CR/FF.
-
Page 59: System Menu
TallyGenicom Intelliprint mL260 User Guide 3-19 System Menu System Menu The system menu provides access to system settings. Use the following procedure to enter the sys- tem menu: Press the MENU button on the control panel. Press the NEXT button until the text “System Menu” is shown on the second line of the dis- play. - Page 60 3-20 TallyGenicom Intelliprint mL260 User Guide System Menu Submenus Default Setting Available Settings Procedure for Changing Setting Jam Recovery 1. Press NEXT or PREVIOUS to toggle This submenu allows you to turn between ON and OFF. jam recovery on or off.
-
Page 61: Quality Menu
TallyGenicom Intelliprint mL260 User Guide 3-21 Quality Menu Quality Menu The Quality Menu provides access to the printer settings that are related to print quality. Use the following procedure to enter the Quality Menu: Press the MENU button on the control panel. -
Page 62: Functions Menu
3-22 TallyGenicom Intelliprint mL260 User Guide Functions Menu Functions Menu The Functions Menu provides access to several printer functions that can supply you with informa- tion about the printer and its settings. Use the following procedure to enter the Functions Menu: Press the MENU button on the control panel. -
Page 63: Status Menu
TallyGenicom Intelliprint mL260 User Guide 3-23 Status Menu Status Menu In addition to the main menus listed above, the printer also provides a status menu that allows you to view the current settings for the input and output trays and the toner cartridge. Use the follow- ing procedure to enter the Status Menu: Press the STATUS button on the control panel. -
Page 64: Disk Menu
3-24 TallyGenicom Intelliprint mL260 User Guide DISK Menu Press the SELECT button to enter the system menu. Press the NEXT button to move through the submenus: Print, Delete, Format FLASH, and FLASH summary. Press the SELECT button to enter a submenu. - Page 65 TallyGenicom Intelliprint mL260 User Guide 3-25 DISK Menu Press the NEXT button to move through the submenus: Print, Delete, Format Disk, and Disk Summary. Press the SELECT button to enter a submenu. Use the procedures in the following table to access and change the system settings:...
- Page 66 3-26 TallyGenicom Intelliprint mL260 User Guide DISK Menu Publication No. GEG-99199 Jun 04...
-
Page 67: Maintaining The Printer
Maintaining the Printer In this Chapter . . . “About this Chapter” on page 4-2 “Upgrading Printer Firmware” on page 4-2 “Replacing Printer Components” on page 4-3 “Cleaning the Printer” on page 4-18 “Moving the Printer” on page 4-21 “Storing the Printer for Long Periods of Time” on page 4-22 Jun 04 Publication No. -
Page 68: Upgrading Printer Firmware
TallyGenicom Intelliprint mL260 User Guide Upgrading Printer Firmware About this Chapter This chapter provides information about maintaining your printer. Although the printer requires very little maintenance, with normal daily use you will need to perform some routine maintenance procedures, including replacing consumable items and cleaning the printer. This chapter also con- tains information about moving and storing the printer. -
Page 69: Replacing Printer Components
TallyGenicom Intelliprint mL260 User Guide Replacing Printer Components Replacing Printer Components Replacing the Toner Cartridge The toner cartridge contains the dry ink as well as the xerographic drum and associated compo- nents that create the xerographic image on a sheet of paper. The toner cartridge will eventually run out of ink through normal use. - Page 70 TallyGenicom Intelliprint mL260 User Guide Replacing Printer Components Place a drop-cloth or some paper on the table or floor near the printer. Press the button on the top of the printer to open the front cover, and pull the cover all the way open.
- Page 71 TallyGenicom Intelliprint mL260 User Guide Replacing Printer Components Grasp the toner cartridge firmly and pull the sealing tape straight out from the cartridge. Slide the pegs on the toner cartridge into the channels on the inside of the printer, and lower the toner cartridge into the printer.
-
Page 72: Replacing The Fuser
TallyGenicom Intelliprint mL260 User Guide Replacing Printer Components Dispose of or recycle the used toner cartridge. WARNING! Do not dispose of the old toner cartridge in an incinerator or in an open fire. Replacing the Fuser The fuser melts the toner image into the paper to form a finished print. The fuser wears with nor- mal use and can leave dirt or marks on printed sheets when worn. - Page 73 TallyGenicom Intelliprint mL260 User Guide Replacing Printer Components Squeeze the tabs on the top of the rear cover, and pull the cover toward you to open it. Remove the screws that secure the fuser to the printer. Grasp the metal brackets on the sides of the fuser and pull the fuser toward you to remove it from the printer.
- Page 74 TallyGenicom Intelliprint mL260 User Guide Replacing Printer Components Insert the new fuser into the printer, making sure it is securely seated. Secure the fuser to the printer by replacing and tightening the screws. Close the rear cover. Publication No. GEG-99199...
-
Page 75: Replacing Feed Roll, Nudger Roll, And Retard Roll
TallyGenicom Intelliprint mL260 User Guide Replacing Printer Components Verify that the power switch of the printer is in the [O] (off ) position, then insert the plug of the power cord into the AC outlet. Turn the printer on by pressing [ I ] on the power switch on the front of the printer. - Page 76 4-10 TallyGenicom Intelliprint mL260 User Guide Replacing Printer Components Turn the printer off by pressing the [ O ] on the power switch on the right side of the printer, and disconnect the AC power cord from the wall outlet.
- Page 77 TallyGenicom Intelliprint mL260 User Guide 4-11 Replacing Printer Components Unclip the retaining tabs on the end of the feed roll and nudger roll, and remove the rolls from their shafts. Push the new feed roll and nudger roll onto their shafts until the retaining tabs click into place.
- Page 78 4-12 TallyGenicom Intelliprint mL260 User Guide Replacing Printer Components Release the metal stopper plate inside the printer so it returns to its normal position. Press the locks on the left and right of the retard roll inside the paper tray, and lift the lever to open the retard roll cover.
- Page 79 TallyGenicom Intelliprint mL260 User Guide 4-13 Replacing Printer Components Push the new retard roll onto the shaft until the retaining tab clicks into place. Make sure the retaining tab is toward the right side of the printer. Close the retard roll cover.
-
Page 80: Replacing The Btr Roller
4-14 TallyGenicom Intelliprint mL260 User Guide Replacing Printer Components Grasp the paper tray with both hands and insert it into the paper tray well on the printer. Push the paper tray all the way into the printer, making sure the tray is properly seated. - Page 81 TallyGenicom Intelliprint mL260 User Guide 4-15 Replacing Printer Components Push the button on top of the printer to release the front cover, and pull the front cover toward you to open it. Remove the toner cartridge from the printer. NOTE: To prevent stains, place the toner cartridge on some old newspaper or other disposable surface.
- Page 82 4-16 TallyGenicom Intelliprint mL260 User Guide Replacing Printer Components Raise the BTR roller by pressing the two levers on the left and right sides of the plate that sits behind the BTR roller. CAUTION: Do not touch the surface of the BTR with your fingers. Contaminating the BTR will cause deletions on the printed page.
- Page 83 TallyGenicom Intelliprint mL260 User Guide 4-17 Replacing Printer Components Press the BTR roller down until it locks firmly in place. Insert the pegs on the toner cartridge into the channels inside the printer, and push the toner cartridge into the printer.
-
Page 84: Cleaning The Printer
4-18 TallyGenicom Intelliprint mL260 User Guide Cleaning the Printer Cleaning the Printer Cleaning the Exterior The covers and tray faces of the printer may collect dust and dirt through normal use. Although exterior dirt should not affect printer performance, an occasional exterior cleaning helps maintain the appearance of the printer appearance. -
Page 85: Cleaning The Interior
TallyGenicom Intelliprint mL260 User Guide 4-19 Cleaning the Printer Verify that the power switch of the printer is in the [O] (off ) position, then insert the plug of the power cord into the AC outlet. Turn the printer on by pressing [ I ] on the power switch on the right side of the printer. - Page 86 4-20 TallyGenicom Intelliprint mL260 User Guide Cleaning the Printer After removing a paper jam or replacing the toner cartridge, remove any paper scraps from inside the printer and wipe off paper dust with a clean, dry cloth. Publication No. GEG-99199...
-
Page 87: Moving The Printer
TallyGenicom Intelliprint mL260 User Guide 4-21 Moving the Printer Moving the Printer Follow the guidelines below when lifting or moving the printer: The printer is very heavy, and should always be lifted by two people. The weight of the printer without paper tray, toner cartridge, and paper is about 55 lbs (25 kg). Never attempt to lift the printer alone. -
Page 88: Storing The Printer For Long Periods Of Time
4-22 TallyGenicom Intelliprint mL260 User Guide Storing the Printer for Long Periods of Time Remove all installed paper-handling options. Refer to Chapters 6 through 10 for instructions for removing installed paper-handling options. Remove the toner cartridge and place it in an opaque plastic bag, then seal the bag with tape and place it in a sturdy box. -
Page 89: Troubleshooting
Troubleshooting In this Chapter . . . “About this Chapter” on page 5-2 “Installation Problems” on page 5-2 “Paper Jams” on page 5-4 “Print Image Quality Problems” on page 5-18 “Miscellaneous Problems” on page 5-22 “Warning Messages and Error Messages” on page 5-26 May 04 Publication No. -
Page 90: Installation Problems
TallyGenicom Intelliprint mL260 User Guide Installation Problems About this Chapter This chapter describes the problems that you may encounter when using your printer, and provides procedures for resolving the problems. This chapter also lists the warning and error messages that appear on the control panel display. -
Page 91: Inoperative Printer
TallyGenicom Intelliprint mL260 User Guide 5-3 Installation Problems Inoperative Printer If you have problems turning on the printer, check the possible causes listed in the table below. If the printer will not start after checking these items, turn the printer off, disconnect the power cord from the AC outlet, and contact your dealer or an authorized service provider. -
Page 92: Paper Jams
TallyGenicom Intelliprint mL260 User Guide Paper Jams Refer to the pictorial unpacking sheet and the Installation Guide included in the printer packaging and make sure you have removed all shipping spacers and protective tape from the inside of the printer, the paper trays, and the toner cartridge. - Page 93 TallyGenicom Intelliprint mL260 User Guide 5-5 Paper Jams Figure 5-1: Paper Jam Locations and Error Codes. The most common causes of paper jams are: The printer is not placed on a level surface. The print media does not conform to the specifications.
-
Page 94: Clearing An E2 Paper Jam
TallyGenicom Intelliprint mL260 User Guide Paper Jams Clearing an E2 Paper Jam If an E2 error code precedes the error message on the first line of the control panel display, paper has jammed somewhere between the feed area and the registration sensor. Use the following proce- dure to clear a paper jam in this location: Remove any printed pages from the output tray. - Page 95 TallyGenicom Intelliprint mL260 User Guide 5-7 Paper Jams Remove any jammed or wrinkled paper from the paper tray. Remove any jammed paper from the inside of the paper tray well. If the jam occurred while feeding from Tray 2 or 3, remove the paper tray associated with that feeder and remove any jammed paper.
-
Page 96: Clearing An E3 Paper Jam
TallyGenicom Intelliprint mL260 User Guide Paper Jams Insert each paper tray into the appropriate paper tray well, either on the optional feeder or on the printer. If the front tray is open, close it. Then pull on the recessed area on the front cover to open it. - Page 97 TallyGenicom Intelliprint mL260 User Guide 5-9 Paper Jams Remove all paper from the front tray. Press the button on the top of the front cover to release the cover, and open the front cover. Remove the toner cartridge from the inside of the printer.
-
Page 98: Clearing An E4 Jam
5-10 TallyGenicom Intelliprint mL260 User Guide Paper Jams Insert the pegs on the sides of the toner cartridge into the channels on the inside of the printer, and push the cartridge into the printer. Close the front cover, pressing on the center of the front cover until it closes securely. - Page 99 TallyGenicom Intelliprint mL260 User Guide 5-11 Paper Jams Squeeze the tabs on the top rear of the printer and pull the rear cover toward you to open it. If there is paper jammed in the space behind the rear cover, remove it.
- Page 100 5-12 TallyGenicom Intelliprint mL260 User Guide Paper Jams If there is paper jammed around the fuser unit, lift up the fuser unit release levers on the left and right sides of the fuser and remove the jammed paper. Return the fuser release levers to their original position.
-
Page 101: Clearing An E7 Paper Jam
TallyGenicom Intelliprint mL260 User Guide 5-13 Paper Jams Close the rear cover. Clearing an E7 Paper Jam When an E7 error message is shown on the display screen, there is a paper jam in the duplexer. Use the following procedure to clear a duplex paper jam: If you are using the paper tray in its extended position, remove the paper tray from the printer. - Page 102 5-14 TallyGenicom Intelliprint mL260 User Guide Paper Jams Remove any jammed paper from the duplex area. Push the green tabs on the sides of the duplexer toward the center of the duplexer, and grasp the recessed areas on the sides of the duplexer and remove it from the printer.
- Page 103 TallyGenicom Intelliprint mL260 User Guide 5-15 Paper Jams Remove any jammed paper from inside the duplexer unit. Slide the tabs on the left and right sides of the duplexer into the channels inside the printer, and push the duplexer completely into the printer.
-
Page 104: Clearing An E6 Paper Jam
5-16 TallyGenicom Intelliprint mL260 User Guide Paper Jams Close the rear cover. Clearing an E6 Paper Jam If an E6 error code precedes the error message on the first line of the control panel display, paper has jammed at the offset catch tray. Use the following procedure to clear a paper jam in this loca- tion: Pull on the recessed area on the rear of the offset catch tray to open the rear cover. - Page 105 TallyGenicom Intelliprint mL260 User Guide 5-17 Paper Jams Close the rear cover of the offset catch tray. Squeeze the latch on the upper part of the rear cover, and pull the cover toward you to open it. If there is paper jammed in the space behind the rear cover, remove it.
-
Page 106: Print Image Quality Problems
5-18 TallyGenicom Intelliprint mL260 User Guide Print Image Quality Problems Print Image Quality Problems When functioning correctly, the printer should produce printed paper that is relatively flat and undamaged, containing a fused image of correct intensity—without streaks, smears, spots, or miss- ing areas. - Page 107 TallyGenicom Intelliprint mL260 User Guide 5-19 Print Image Quality Problems Vertical black The toner cartridge is old or Replace the toner cartridge. streaks damaged. Repetitive defects The paper path is dirty. Print out several blank sheets. The toner cartridge is old or Replace the toner cartridge.
- Page 108 5-20 TallyGenicom Intelliprint mL260 User Guide Print Image Quality Problems Black page The toner cartridge is old or Replace the toner cartridge. damaged. The high-voltage power supply may Contact your dealer or an authorized be defective. service provider. Blank page The sealing tape of the toner Pull out the sealing tape.
-
Page 109: Other Print Image Quality Problems
TallyGenicom Intelliprint mL260 User Guide 5-21 Print Image Quality Problems Plotted print The print media is outside the Use the recommended print media. recommended specifications. The print media is moist. Remove the moist media and load new, dry media. The toner cartridge is old or Replace the toner cartridge. -
Page 110: Miscellaneous Problems
5-22 TallyGenicom Intelliprint mL260 User Guide Miscellaneous Problems The control panel does not display an error code. The following procedure guides you through multiple actions that may solve this print image qual- ity problem. Proceed one step at a time until the problem is solved—you may not need to complete the entire procedure. -
Page 111: Printer Operates Erratically
TallyGenicom Intelliprint mL260 User Guide 5-23 Miscellaneous Problems The printer motors do not run and the printer does not warm up. The control panel does not display an error code. The following procedure guides you through multiple actions that may solve this print image qual- ity problem. -
Page 112: Printer Makes Unusual Noises
5-24 TallyGenicom Intelliprint mL260 User Guide Miscellaneous Problems A loose or partially connected AC power cord may cause erratic operation. If the AC power cord is repeatedly loose or disconnected, you may consider moving the printer to a safer loca- tion. -
Page 113: Room Lights Dim Or Flicker When Printer Starts
TallyGenicom Intelliprint mL260 User Guide 5-25 Miscellaneous Problems Broken and dangling components or scraps of paper lodged inside the printer may be brush- ing against moving parts and causing the noise. Inspect the fan outlets for broken grills or objects stuck in the fans. Remove any objects from the fan grill. -
Page 114: Warning Messages And Error Messages
5-26 TallyGenicom Intelliprint mL260 User Guide Warning Messages and Error Messages If the radio/television is plugged into the same AC wall outlet as the printer, plug either the printer or the radio/television into another AC outlet. Electrical noise may be transmitted through the AC line. You can reduce the noise to the radio/television by using a dedicated AC wall outlet for the printer. -
Page 115: Warning Messages
TallyGenicom Intelliprint mL260 User Guide 5-27 Warning Messages and Error Messages Warning Messages The following table lists warning messages, possible causes, and the actions required to correct each cause. Warning Message Possible Cause Action Line 2 of display Paper Out Tray 1 There is no paper in Tray 1. -
Page 116: Error Messages
5-28 TallyGenicom Intelliprint mL260 User Guide Warning Messages and Error Messages Error Messages The table below lists error messages, the possible causes of each error, and the actions required to recover from each error. Error Message Error Message Possible Cause... - Page 117 TallyGenicom Intelliprint mL260 User Guide 5-29 Warning Messages and Error Messages Error Message Error Message Possible Cause Action Line 1 Line 2 U2 ROS FAILURE Call Service The ROS has failed. Turn the printer off, then turn it on. If the problem reoccurs,...
- Page 118 5-30 TallyGenicom Intelliprint mL260 User Guide Warning Messages and Error Messages Publication No. GEG-99199 May 04...
-
Page 119: Using The Duplexer
Using the Duplexer In this Chapter . . . “About this Chapter” on page 6-2 “About the Duplexer” on page 6-2 “Installing the Duplexer” on page 6-2 “Testing the Duplexer” on page 6-4 “Solving Duplexer Problems” on page 6-6 “Removing the Duplexer” on page 6-13 Jun 04 Publication No. -
Page 120: About The Duplexer
TallyGenicom Intelliprint mL260 User Guide About the Duplexer About this Chapter This chapter provides all of the information necessary to install, use, and maintain the duplexer. About the Duplexer The duplexer is a customer-installed optional device that enables automatic printing on both sides of a sheet of paper. - Page 121 TallyGenicom Intelliprint mL260 User Guide Installing the Duplexer Turn the printer off and remove the AC plug from the AC wall outlet. If you are using the paper tray in its extended position, remove the paper tray from the printer.
-
Page 122: Testing The Duplexer
TallyGenicom Intelliprint mL260 User Guide Testing the Duplexer Slide the tabs on the left and right sides of the duplexer into the channels inside the printer, and push the duplexer completely into the printer. Push the green tabs on the sides of the duplexer out toward the sides of the printer to secure the duplexer to the printer. - Page 123 TallyGenicom Intelliprint mL260 User Guide Testing the Duplexer Once the printer has warmed up and displays the “Ready” message on the control panel dis- play, use any software application to print a few duplexed sheets. If the duplexer does not transport paper or if the control panel shows an error message, refer “Solving Duplexer Problems”...
-
Page 124: Solving Duplexer Problems
TallyGenicom Intelliprint mL260 User Guide Solving Duplexer Problems Solving Duplexer Problems When there is a problem with the duplexer, the printer control panel displays an error code and error message. Most duplexer error codes indicate routine status conditions such as a paper tray running out of paper or a paper jam in a specific area of the duplexer. -
Page 125: Clearing Duplex Paper Jams
TallyGenicom Intelliprint mL260 User Guide Solving Duplexer Problems If the printer is not operational after you have removed the duplexer, refer to Chapter 5: Troubleshooting. After correcting the printer problem, return to “Installing the Duplexer” on page 6-2 and reinstall the duplexer. - Page 126 TallyGenicom Intelliprint mL260 User Guide Solving Duplexer Problems Remove any jammed paper from the duplex area. Push the green tabs on the sides of the duplexer toward the center of the duplexer, and grasp the recessed areas on the sides of the duplexer and remove it from the printer.
- Page 127 TallyGenicom Intelliprint mL260 User Guide Solving Duplexer Problems Remove any jammed paper from inside the duplexer unit. Slide the tabs on the left and right sides of the duplexer into the channels inside the printer, and push the duplexer completely into the printer.
-
Page 128: Correcting Miscellaneous Duplexer Problems
6-10 TallyGenicom Intelliprint mL260 User Guide Solving Duplexer Problems Close the rear cover. Correcting Miscellaneous Duplexer Problems Some duplexer problems may not cause an error message and may not interfere with the operation of the printer. If you are experiencing one of the problems listed below and there is no error message shown on the control panel display, refer to the procedures in the following sections to check the possible causes of the specific problem. - Page 129 TallyGenicom Intelliprint mL260 User Guide 6-11 Solving Duplexer Problems If the connection between the duplexer and the printer is not intact, the duplexer will not receive power or logic commands, resulting in an inoperative duplexer Examine the printer driver settings to make sure the duplexer is available as an installed option.
- Page 130 6-12 TallyGenicom Intelliprint mL260 User Guide Solving Duplexer Problems Duplex Makes Unusual Noises The following characteristics define this duplexer problem: The duplexer makes unusual noises or makes more noise than usual either while idle or while printing. The duplexer feeds paper without a problem.
-
Page 131: Removing The Duplexer
TallyGenicom Intelliprint mL260 User Guide 6-13 Removing the Duplexer Removing the Duplexer Use the following procedure to remove the duplexer: Turn off the printer and disconnect the AC power cord from the AC wall outlet.. If you are using the paper tray in its extended position, remove the paper tray from the printer. - Page 132 6-14 TallyGenicom Intelliprint mL260 User Guide Removing the Duplexer Pull the duplex unit toward you while sliding the left and right tabs inward, then grasp the recessed areas on the sides of the duplex unit and remove it from the printer.
-
Page 133: Using The 550 Sheet Feeder
Using the 550 Sheet Feeder In this Chapter . . . “About the 550 Sheet Feeder” on page 7-2 “Installing the 550 Sheet Paper Feeders” on page 7-3 “Testing the 550 Sheet Feeder” on page 7-11 “Selecting Print Media” on page 7-11 “Loading Print Media”... -
Page 134: About The 550 Sheet Feeder
TallyGenicom Intelliprint mL260 User Guide About the 550 Sheet Feeder About this Chapter This chapter provides all of the information necessary to install, use, and maintain the 550 sheet paper feeder option, including procedures for cleaning the feeder and removing paper jams. -
Page 135: Installing The 550 Sheet Paper Feeders
TallyGenicom Intelliprint mL260 User Guide 7-3 Installing the 550 Sheet Paper Feeders Installing the 550 Sheet Paper Feeders Before installing the paper feeder(s), verify that you have received the following items in the paper feeder shipping box: ;; ; 550 Sheet Paper Feeder Universal Paper Tray ;... - Page 136 TallyGenicom Intelliprint mL260 User Guide Installing the 550 Sheet Paper Feeders Turn the printer off by pressing [ O ] on the power switch on the left front of the unit. NOTE: Installing the paper feeder while the printer is on may damage the printer or paper feeder.
- Page 137 TallyGenicom Intelliprint mL260 User Guide 7-5 Installing the 550 Sheet Paper Feeders Remove the main paper tray from the printer. Align the holes on the bottom of the printer with the pegs on the paper feeder, and lower the printer onto the paper feeder.
-
Page 138: Installing Two Paper Feeders
TallyGenicom Intelliprint mL260 User Guide Installing the 550 Sheet Paper Feeders Insert the feeder paper tray and the main paper tray all the way into the paper feeder, making sure each is properly seated inside the printer. Insert the plug of the power cord into the AC outlet, and turn the printer on by pressing [ I ] on the power switch on the left front of the printer. - Page 139 TallyGenicom Intelliprint mL260 User Guide 7-7 Installing the 550 Sheet Paper Feeders Place one paper feeder on a sturdy, level surface. NOTE: Do not move the printer when the paper feeder is installed. Align the three holes on the bottom of the upper feeder with the three stubs on the lower feeder, and place the upper paper feeder on top of the lower paper feeder.
- Page 140 TallyGenicom Intelliprint mL260 User Guide Installing the 550 Sheet Paper Feeders Turn the printer off by pressing [ O ] on the power switch on the left front of the printer. Disconnect the power cord from the AC outlet and from the printer.
- Page 141 TallyGenicom Intelliprint mL260 User Guide 7-9 Installing the 550 Sheet Paper Feeders Remove the main paper tray from the printer. Lift the printer and lower it onto the two stacked paper feeders, aligning the pegs on the upper paper feeder with the holes on the bottom of the printer.
- Page 142 7-10 TallyGenicom Intelliprint mL260 User Guide Installing the 550 Sheet Paper Feeders Load paper into the paper trays for both paper feeders. Insert the paper trays all the way into the paper feeders, making sure each tray is properly seated.
-
Page 143: Testing The 550 Sheet Feeder
TallyGenicom Intelliprint mL260 User Guide 7-11 Testing the 550 Sheet Feeder NOTE: If an error message appears on the control panel display, see the Chapter titled “Error Messages” in the User Manual. Testing the 550 Sheet Feeder After installing the 550 sheet paper feeder, use the following test procedure to verify that the feeder is operating correctly. -
Page 144: Print Media Weight, Type, And Size
7-12 TallyGenicom Intelliprint mL260 User Guide Loading Print Media Store reams of paper in an area away from both direct sunlight and high humidity Open sealed reams only when you are ready to load the paper into the paper tray, and always close and seal partial reams of paper. - Page 145 TallyGenicom Intelliprint mL260 User Guide 7-13 Loading Print Media Use the following procedure to load paper into the 550 sheet A4/letter/legal paper tray: Place the paper tray on a level surface. Squeeze the length guide, lift it up, and slide it to the rear of the tray.
- Page 146 7-14 TallyGenicom Intelliprint mL260 User Guide Loading Print Media Squeeze the right width guide, lift it up, and slide the guides to the sides of the tray. Verify that the plate has dropped down into the base of the paper tray. If the tray is locked in the up potision, pull the lever near the front of the tray to release the plate, or push the paper tray all the way into the printer and then remove it.
- Page 147 TallyGenicom Intelliprint mL260 User Guide 7-15 Loading Print Media Align the edges of the paper and place it in the center of the paper tray with the side to print on facing down. NOTE: To avoid paper jams and other paper transportation problems, make sure the length and width guides are adjusted to match the paper size and are locked firmly into place Squeeze the right width guide, lift it up, and adjust the guides to match the paper width.
-
Page 148: Solving 550 Sheet Feeder Problems
7-16 TallyGenicom Intelliprint mL260 User Guide Solving 550 Sheet Feeder Problems Grasp the paper tray with both hands and insert it into the paper tray well on the printer. Push the paper tray completely into the printer, making sure the tray is properly seated.. -
Page 149: Interpreting Paper Feeder Error Messages
TallyGenicom Intelliprint mL260 User Guide 7-17 Solving 550 Sheet Feeder Problems If the paper feeder is inoperative after installation, refer to “Installation Problems” on page 7-17 and complete the recommended procedure. If the printer control panel displays an error message or an error code, refer to “Interpreting... -
Page 150: Clearing An E2 Paper Jam
7-18 TallyGenicom Intelliprint mL260 User Guide Solving 550 Sheet Feeder Problems Turn the printer off by pressing the [ O ] on the power switch on the right side of the printer. Remove and then reinstall the feeder. If the feeder is still inoperative after reinstallation, remove it from the printer so you can run tests on the printer alone. -
Page 151: Correcting Miscellaneous Paper Feeder Problems
TallyGenicom Intelliprint mL260 User Guide 7-19 Solving 550 Sheet Feeder Problems Push the paper trays back into the printer and optional feeders. Correcting Miscellaneous Paper Feeder Problems Some paper feeder problems may not cause an error message and may not interfere with the opera- tion of the printer. - Page 152 7-20 TallyGenicom Intelliprint mL260 User Guide Solving 550 Sheet Feeder Problems If the 550 sheet feeder is correctly set as an installed option, reload the printer driver software. The printer driver software running on the host computer may be damaged. Reinstalling the software is an easy and inexpensive way to isolate or eliminate the problem.
-
Page 153: Maintaining The 550 Sheet Feeder
TallyGenicom Intelliprint mL260 User Guide 7-21 Maintaining the 550 Sheet Feeder Remove the paper trays and inspect the inside of the feeder for jammed paper or obviously broken components. Broken components or scraps of paper lodged inside the feeder may be brushing against mov- ing parts and causing the noise. - Page 154 7-22 TallyGenicom Intelliprint mL260 User Guide Maintaining the 550 Sheet Feeder Remove the paper tray of the feeder that you intend to clean and set it on a flat level surface. Pull the metal stopper plate down. Unclip the retaining tabs on the end of the feed roll and nudger roll, and remove the rolls from their shafts.
- Page 155 TallyGenicom Intelliprint mL260 User Guide 7-23 Maintaining the 550 Sheet Feeder Push the new feed roll and nudger roll onto their shafts until the retaining tabs click into place. Make sure the tabs are toward the right side of the printer.
- Page 156 7-24 TallyGenicom Intelliprint mL260 User Guide Maintaining the 550 Sheet Feeder Press the locks on the left and right of the retard roll inside the paper tray, and lift the lever to open the retard roll cover. Unclip the retaining tab on the retard roll and remove it from the shaft.
- Page 157 TallyGenicom Intelliprint mL260 User Guide 7-25 Maintaining the 550 Sheet Feeder Push the new retard roll onto the shaft until the retaining tab clicks into place. Make sure the retaining tab is toward the right side of the printer. Close the retard roll cover.
-
Page 158: Removing The 550 Sheet Feeder
7-26 TallyGenicom Intelliprint mL260 User Guide Removing the 550 Sheet Feeder Grasp the paper tray with both hands and insert it into the paper tray well on the printer. Push the paper tray all the way into the printer, making sure the tray is properly seated. - Page 159 TallyGenicom Intelliprint mL260 User Guide 7-27 Removing the 550 Sheet Feeder Disconnect the power cord from the AC outlet. CAUTION: Removing or installing the paper feeder while the printer is on may damage the printer or paper feeder. Close the front tray and remove any printed sheets from the paper output tray.
- Page 160 7-28 TallyGenicom Intelliprint mL260 User Guide Removing the 550 Sheet Feeder Remove the three screws that secure the printer to the paper feeder. Lift the printer to remove it from the feeder. Publication No. GEG-99199 Jun 04...
-
Page 161: Moving The 550 Sheet Feeder
TallyGenicom Intelliprint mL260 User Guide 7-29 Moving the 550 Sheet Feeder Moving the 550 Sheet Feeder When moving the printer a short distance, you may leave the 550 sheet paper feeder attached. However, when moving the printer a long distance, please remove the 550-sheet paper feeder to avoid damaging either the printer or the feeder. - Page 162 7-30 TallyGenicom Intelliprint mL260 User Guide Moving the 550 Sheet Feeder Publication No. GEG-99199 Jun 04...
-
Page 163: Chapter 8 8-1 Using The Envelope Feeder
Using the Envelope Feeder “About this Chapter” on page 8-2 “About the Envelope Feeder” on page 8-2 “Installing the Envelope Feeder” on page 8-2 “Testing the Envelope Feeder” on page 8-4 “Selecting Print Media” on page 8-4 “Loading the Envelope Feeder” on page 8-6 “Solving Envelope Feeder Problems”... -
Page 164: About The Envelope Feeder
TallyGenicom Intelliprint mL260 User Guide About the Envelope Feeder About this Chapter This chapter provides all of the information necessary to install, use, and maintain the envelope feeder, including procedures for removing paper jams. About the Envelope Feeder The Envelope Feeder is an optional single-tray feeder that attaches to the front of the printer. The tray holds 50 to 100 envelopes or postcards, depending on the type of media. - Page 165 TallyGenicom Intelliprint mL260 User Guide 8-3 Installing the Envelope Feeder NOTE: Installing the envelope feeder while the printer is on may damage the printer or the envelope feeder. Remove the envelope feeder from its packaging and place it on a level surface. Remove any cardboard inserts and packing tape.
-
Page 166: Testing The Envelope Feeder
TallyGenicom Intelliprint mL260 User Guide Testing the Envelope Feeder Remove the gear cover on the left side of the inside of the printer and store it in a safe place. Push the envelope feeder all the way into the printer until it stops, making sure it is seated firmly inside the printer. -
Page 167: Paper And Print Media To Avoid
TallyGenicom Intelliprint mL260 User Guide 8-5 Selecting Print Media Paper and Print Media To Avoid Do not use paper or print media that has any of the following characteristics: Does not meet the paper and media size and weight specifications for this printer Is not labeled for use with xerographic printers or xerographic copiers Cannot withstand temperatures of up to 310°F/155°C... -
Page 168: Loading The Envelope Feeder
TallyGenicom Intelliprint mL260 User Guide Loading the Envelope Feeder Postcard Custom Size 3.87 x 5.85 inches (98.4 x 148.5mm) Maximum stack height 0.95 inches (24mm) 7 x 10 inches (178 x 254mm) Loading the Envelope Feeder Use the following procedure to load envelopes into the envelope feeder: If you are planning to use large size envelopes, pull out the extension at the end of the paper tray. -
Page 169: Solving Envelope Feeder Problems
TallyGenicom Intelliprint mL260 User Guide 8-7 Solving Envelope Feeder Problems Lower the paper holder. Adjust the paper guide to the size of the envelopes or postcards you are using. Solving Envelope Feeder Problems When there is a problem with the envelope feeder, the printer control panel displays an error code and error message. - Page 170 TallyGenicom Intelliprint mL260 User Guide Solving Envelope Feeder Problems If you are using the paper tray in its extended position, remove it from the printer. Squeeze the tabs on the rear cover and pull the cover toward you to open it.
- Page 171 TallyGenicom Intelliprint mL260 User Guide 8-9 Solving Envelope Feeder Problems Remove the caps (green) on the inside of the rear cover at the left and right. Store the caps in the holes provided on the inside of the rear cover.
-
Page 172: Interpreting Envelope Feeder Error Messages
8-10 TallyGenicom Intelliprint mL260 User Guide Solving Envelope Feeder Problems Interpreting Envelope Feeder Error Messages The printer control panel displays error messages when there is a problem with the printer or any of the optional paper-handling components. The following table lists all of the error messages associ- ated with the envelope feeder, the possible cause of the error, and the action to take to correct the problem. - Page 173 TallyGenicom Intelliprint mL260 User Guide 8-11 Solving Envelope Feeder Problems If you cannot print a sheet of paper from the main tray and the printer does not display an error code, go to “Inoperative Printer” on page 5-3. If you can print a sheet of paper from the main tray, proceed to the next step.
- Page 174 8-12 TallyGenicom Intelliprint mL260 User Guide Solving Envelope Feeder Problems The following procedure guides you through multiple actions that may solve this envelope feeder problem. Proceed one step at a time until the problem is solved—you may not need to complete the entire procedure.
-
Page 175: Maintaining The Envelope Feeder
TallyGenicom Intelliprint mL260 User Guide 8-13 Maintaining the Envelope Feeder Maintaining the Envelope Feeder The envelope feeder requires very little maintenance; however, with normal use you will need to perform some routine maintenance tasks such as cleaning the envelope feeder. - Page 176 8-14 TallyGenicom Intelliprint mL260 User Guide Maintaining the Envelope Feeder Publication No. GEG-99199 Jun 04...
-
Page 177: Using The Offset Catch Tray
Using the Offset Catch Tray In this Chapter . . . “About this Chapter” on page 9-2 “About the Offset Catch Tray” on page 9-2 “Installing the Offset Catch Tray” on page 9-3 “Testing the Offset Catch Tray” on page 9-7 “Solving Offset Catch Tray Problems”... -
Page 178: About The Offset Catch Tray
TallyGenicom Intelliprint mL260 User Guide About the Offset Catch Tray About this Chapter This chapter provides all of the information necessary to install, use, and maintain the Offset Catch Tray, including procedures for cleaning and removing paper jams. About the Offset Catch Tray The offset catch tray is an optional output tray that attaches to the top rear of the printer and can hold up to 500 printed sheets, and also sorts printed sheets using an offset. -
Page 179: Major Components Of The Offset Catch Tray
TallyGenicom Intelliprint mL260 User Guide 9-3 Installing the Offset Catch Tray Major Components of the Offset Catch Tray The following illustration shows the major components of the offset catch tray:. Output Tray Paper Stop Paper Guide Fitting Figure 9-2: Offset Catch Tray Major Components. - Page 180 TallyGenicom Intelliprint mL260 User Guide Installing the Offset Catch Tray NOTE: Installing the offset catch tray while the printer is on may damage the printer or the offset catch tray. Squeeze the latch on the top left of the rear cover to release the cover, then open the rear cover by pulling down on the top of the cover.
- Page 181 TallyGenicom Intelliprint mL260 User Guide 9-5 Installing the Offset Catch Tray Push up on the top cover tabs to release the top cover, and lift it off of the printer. Lower the offset catch tray onto the printer while inserting the stub at the front of the offset catch tray into the hole on the top of the printer.
- Page 182 TallyGenicom Intelliprint mL260 User Guide Installing the Offset Catch Tray Close the rear cover. Lift up the paper guide and open the offset tray. Pull the tray all the way out and lift the paper stop. Publication No. GEG-99199 Jun 04...
-
Page 183: Testing The Offset Catch Tray
TallyGenicom Intelliprint mL260 User Guide 9-7 Testing the Offset Catch Tray Push the tray in until it matches the size of paper that will be printed. Insert the plug of the power cord into the AC outlet and turn the printer on by pressing [ I ] on the power switch on the front left of the printer. -
Page 184: Interpreting Offset Catch Tray Error Messages
TallyGenicom Intelliprint mL260 User Guide Solving Offset Catch Tray Problems lems” on page 9-10 and follow the directions for correcting that problem. Interpreting Offset Catch Tray Error Messages The printer control panel displays error messages when there is a problem with the printer or any of the optional paper-handling components. -
Page 185: Clearing An Offset Catch Tray Paper Jam
TallyGenicom Intelliprint mL260 User Guide 9-9 Solving Offset Catch Tray Problems Clearing an Offset Catch Tray Paper Jam If an E6 error code precedes the error message on the first line of the control panel display, paper has jammed at the offset catch tray. Use the following procedure to clear a paper jam in this loca- tion: Pull on the recessed area on the rear of the offset catch tray to open the rear cover. -
Page 186: Correcting Miscellaneous Offset Catch Tray Problems
9-10 TallyGenicom Intelliprint mL260 User Guide Solving Offset Catch Tray Problems NOTE: If the main paper tray is in the extended position, remove the tray before opening the rear cover. Close the rear cover. Correcting Miscellaneous Offset Catch Tray Problems Some offset catch tray problems may not cause an error message and may not interfere with the operation of the printer. - Page 187 TallyGenicom Intelliprint mL260 User Guide 9-11 Solving Offset Catch Tray Problems The following procedure guides you through multiple actions that may solve this offset catch tray problem. Proceed one step at a time until the problem is solved—you may not need to complete the entire procedure.
- Page 188 9-12 TallyGenicom Intelliprint mL260 User Guide Solving Offset Catch Tray Problems Offset Catch Tray Makes Unusual Noises The following characteristics define this offset catch tray problem: The offset catch tray makes unusual noises or makes more noise than usual either while idle or while printing.
-
Page 189: Maintaining The Offset Catch Tray
TallyGenicom Intelliprint mL260 User Guide 9-13 Maintaining the Offset Catch Tray Maintaining the Offset Catch Tray The offset catch tray requires very little maintenance; however, with normal use you will need to perform some routine maintenance tasks such as cleaning. - Page 190 9-14 TallyGenicom Intelliprint mL260 User Guide Removing the Offset Catch Tray Push the paper stop into the output tray. Lift the paper guide and fold up the output tray. Turn the printer off by pressing [ O ] on the power switch on the front left of the printer, and disconnect the power cord from the AC outlet.
- Page 191 TallyGenicom Intelliprint mL260 User Guide 9-15 Removing the Offset Catch Tray Squeeze the latch on the upper left of the rear cover of the printer, and pull the cover toward you to open it. Press the tabs on the rear of the offset catch tray to release it and lift it off of the printer.
-
Page 192: Moving The Offset Catch Tray
9-16 TallyGenicom Intelliprint mL260 User Guide Moving the Offset Catch Tray Close the rear cover of the printer. Moving the Offset Catch Tray Moving the Offset Catch Tray a Short Distance Use the following procedure to move the offset catch tray a short distance: Turn the printer off by pressing the [ O ] on the power switch on the right side of the printer. - Page 193 TallyGenicom Intelliprint mL260 User Guide 9-17 Moving the Offset Catch Tray Once the offset catch tray is in the new location, refer to “Installing the Offset Catch Tray” on page 9-3. Jun 04 Publication No. GEG-99199...
- Page 194 9-18 TallyGenicom Intelliprint mL260 User Guide Moving the Offset Catch Tray Publication No. GEG-99199 Jun 04...
-
Page 195: Chapter 10 Optional Extended Features
Optional Extended Features In this Chapter . . . “About this Chapter” on page 10-2 “Installing DRAM Memory DIMMS” on page 10-2 “Installing a FLASH DIMM Module” on page 10-5 “Using the Hard Disk Option and User Flash DIMM Module” on page 10-9 “Using the Power-On Files Feature”... -
Page 196: Installing Dram Memory Dimms
10-2 TallyGenicom Intelliprint mL260 User Guide Installing DRAM Memory DIMMS About this Chapter This chapter describes the procedures for installation of DRAM Memory DIMMs and FLASH DIMMS. Also describes how to use the extended features associated with these options. Installing DRAM Memory DIMMS Removing Printer Side Cover 1. -
Page 197: Installing Sdram Memory Dimms On The Controller Assembly
TallyGenicom Intelliprint mL260 User Guide 10-3 Installing SDRAM MEMORY DIMMs on the Controller Assembly 3. Slide the cover towards the rear of the printer and then downwards to remove it. Installing SDRAM MEMORY DIMMs on the Controller Assembly CAUTION: ESD-sensitive precautions should be observed when installing the SDRAM Mem- ory DIMM. -
Page 198: Replacing The Printer Side Cover
10-4 TallyGenicom Intelliprint mL260 User Guide Installing DRAM Memory DIMMS Replacing the Printer Side Cover 1. Insert the top part of the left side cover into the printer. Ensure the locking tab aligns with the hole in the printer’s side. -
Page 199: Installing A Flash Dimm Module
TallyGenicom Intelliprint mL260 User Guide 10-5 Flash DIMM 4. Connect the power cord to the wall outlet and turn the printer power switch to the ON [ I ] position. Installing a FLASH DIMM Module Flash DIMM This section explains the procedure for installing the FLASH DIMM Module on the controller assembly in the 26 page-per-minute printer. -
Page 200: Installing The Optional User Flash Dimm On The Controller Assembly
10-6 TallyGenicom Intelliprint mL260 User Guide Installing the optional user FLASH DIMM on the Controller Assembly Loosen the thumbscrews at the top and bottom of the left side cover by turning them in a counter-clockwise direction. Slide the cover towards the rear of the printer and then downwards to remove it. -
Page 201: Replacing The Printer Side Cover
TallyGenicom Intelliprint mL260 User Guide 10-7 Flash DIMM Carefully insert the optional user FLASH DIMM module in user FLASH DIMM vertically as shown below. When properly seated, gently push down until the DIMM snaps and locks into place. Replacing the Printer Side Cover Insert the top part of the left side cover into the printer. - Page 202 10-8 TallyGenicom Intelliprint mL260 User Guide Replacing the Printer Side Cover Slide the side cover towards the front of the printer to install it. Tighten both thumbscrews in a clockwise direction. Publication No. GEG-99199 Jun 04...
-
Page 203: Loading Code From The Flash Dimm
TallyGenicom Intelliprint mL260 User Guide 10-9 Flash DIMM Connect the power cord to the wall outlet and turn the printer power switch to the ON [ I ] position. Loading Code from the FLASH DIMM This section describes the procedure for loading code from a FLASH DIMM to the on-board FLASH for new production controllers that have never been programmed. -
Page 204: Operator Panel Menu Structure
10-10 TallyGenicom Intelliprint mL260 User Guide Using the Hard Disk Option and User Flash DIMM Module Operator Panel MENU Structure When the Hard Disk or User Flash option is installed, the printer control panel menu structure is enhanced as shown in the following table. The shaded areas denote additional features and settings relevant to the Hard Disk or User Flash option. -
Page 205: Using The Disk Menu
TallyGenicom Intelliprint mL260 User Guide 10-11 Using the Disk Menu NOTE: 1. The Flash Menu and Disk Menu will only appear when the respective FLASH SIMM and/or Hard Disk option is installed. 2. Power-On Files menu will only appear if either a FLASH SIMM or a Hard Disk option is installed and power-on files exist. -
Page 206: Using The Pcl And Postscript Power-On Files Feature
10-12 TallyGenicom Intelliprint mL260 User Guide Using the Hard Disk Option and User Flash DIMM Module Format Flash This selection will reformat the FLASH SIMM. All files on the FLASH SIMM will be deleted if this function is selected. Flash Summary This selection will print a page containing information about the FLASH SIMM including a list of all the current existing files and directories. -
Page 207: Postscript Operators
TallyGenicom Intelliprint mL260 User Guide 10-13 PostScript Operators PostScript Operators All of the standard file-object related operators (file, read, write, etc.) are supported. In addition, following is a list of device-related PostScript Compatibility operators that are supported for use with the FLASH SIMM(%flash%) or hard disk (%disk0%) options:... - Page 208 10-14 TallyGenicom Intelliprint mL260 User Guide Using the Hard Disk Option and User Flash DIMM Module The first feature is the warmstart.ps file. Each time the printer is powered on, either or both optional storage devices will be checked for a file named warmstart.ps. If this file is found, it will be read and parsed by the PostScript interpreter.
-
Page 209: Power-On Files Defined
TallyGenicom Intelliprint mL260 User Guide 10-15 Power-on Files Defined Using the Power-On Files Feature Power-on Files Defined If a FLASH DIMM or hard disk drive is installed in your printer, your printer has the capability of storing additional power-on files which can be read and interpreted at power-on. Power-on files are processed at power-on initialization only and not at the start of every print. -
Page 210: Collating Feature
10-16 TallyGenicom Intelliprint mL260 User Guide Using the Hard Disk Option and User Flash DIMM Module Collating, Saved Jobs, and Job Accounting The features discussed in this section are designed to work with the Hard Disk Option. However, if no Hard Disk Option is installed, but a User Flash Option is installed, these features will utilize the User Flash Option. - Page 211 TallyGenicom Intelliprint mL260 User Guide 10-17 Collating Feature Press the Printing Properties button printer icon. Click on the Printing Preferences button. Jun 04 Publication No. GEG-99199...
- Page 212 10-18 TallyGenicom Intelliprint mL260 User Guide Using the Hard Disk Option and User Flash DIMM Module Click on the Paper Quality button and then the Advanced button. Click on the Copy Count button to enter the number of copies and make sure the Collate button is checked.
-
Page 213: Saved Jobs Feature
TallyGenicom Intelliprint mL260 User Guide 10-19 Saved Jobs Feature Saved Jobs Feature You can create saved jobs using the drivers that support this feature. The drivers that support this feature are as follows: PCL - All windows platforms PostScript - Windows 2000 and Windows XP There are three job types available, Normal, Saved, and Private. - Page 214 10-20 TallyGenicom Intelliprint mL260 User Guide Using the Hard Disk Option and User Flash DIMM Module You are now in the Printing Properties menu, click on the Printing Preference button. Click on the Advanced button. Publication No. GEG-99199 Jun 04...
- Page 215 TallyGenicom Intelliprint mL260 User Guide 10-21 Saved Jobs Feature Now scroll down to the Job Type Section of the menu. When you click on Job Type, three job types are available. Normal, Saved, and Private. The default setting is Normal.
- Page 216 10-22 TallyGenicom Intelliprint mL260 User Guide Using the Hard Disk Option and User Flash DIMM Module If you want to Save your print job, select Save in the Job Type Menu and enter a name you want to save the job as and it will be saved under the User ID folder listed. You can change the User ID in this menu also.
- Page 217 TallyGenicom Intelliprint mL260 User Guide 10-23 Saved Jobs Feature Then you enter a four digit number in the PIN menu. You will only be able to print this doc- ument if you know the PIN number Working with Saved Jobs There are two ways to work with Saved Jobs.
- Page 218 10-24 TallyGenicom Intelliprint mL260 User Guide Using the Hard Disk Option and User Flash DIMM Module Use the procedures in the following table to access and change the system settings. Menu Submenus Procedure for Changing Setting Job Library Print 1. Press NEXT or PREVIOUS to scroll through Print or...
-
Page 219: Job Accounting Feature
TallyGenicom Intelliprint mL260 User Guide 10-25 Job Accounting Feature Menu Submenus Procedure for Changing Setting Job Name 1. Press SELECT to print the job. Copies Printing The printer will display PRINTING on Line 1 and Playback PLAYBACK on Line 2 of the display while printing the job. - Page 220 10-26 TallyGenicom Intelliprint mL260 User Guide Using the Hard Disk Option and User Flash DIMM Module Front Panel Access The Job Accounting Menu provides access to functions and settings related to this feature. Use the following procedure to enter the Job Accounting Menu to change the settings or access the func- tions: Press the MENU button on the control panel.
-
Page 221: Operator Panel Access
TallyGenicom Intelliprint mL260 User Guide 10-27 Operator Panel Access Using the Custom Paper Size Feature There are two ways to work with the Custom Paper Size Feature. One is through the front panel menus, the other is through the printer driver. If you have a Windows or Macintosh printer driver, you can access this feature from the driver and you do not have to use front panel settings. -
Page 222: Printer Driver Access
10-28 TallyGenicom Intelliprint mL260 User Guide Using the Hard Disk Option and User Flash DIMM Module Printer Driver Access To access the Custom Paper Size Feature through your printer driver, use the following procedure: On your desktop, go to the Start menu, left click on Settings, left click on Printers, and then click on your printer driver icon, right click and follow the menu to the Properties menu. - Page 223 TallyGenicom Intelliprint mL260 User Guide 10-29 Printer Driver Access Click on the Advanced button. Click on the Paper Size button. Jun 04 Publication No. GEG-99199...
- Page 224 10-30 TallyGenicom Intelliprint mL260 User Guide Using the Hard Disk Option and User Flash DIMM Module Scroll down to Custom Page Size and click. Then enter the width and height of your custom paper size. Click the OKAY button until you exit out of the driver menu. You are now ready to print your custom sized document.
-
Page 225: Custom Page Size And Microsoft Word, Word 2000, And Word 2003
TallyGenicom Intelliprint mL260 User Guide 10-31 Resolution Custom Page size and Microsoft Word, Word 2000, and Word 2003 When you specify a PostScript custom page size in the Paper Size box in the advanced printer prop- erties for a supported printer, the custom size setting appears to be ignored if you have configured Microsoft Word to use the PostScript Custom Page Size setting. - Page 226 10-32 TallyGenicom Intelliprint mL260 User Guide Custom Page size and Microsoft Word, Word 2000, and Word 2003 In the program, click PRINT. In the PRINT dialog box, click PROPERTIES. In the PAPER SIZE box, click the new form. Click OK.
-
Page 227: Accessing The Printer Web Page
TallyGenicom Intelliprint mL260 User Guide 10-33 Resolution Accessing the Printer Web Page You can access the printer web page by going to the internet browser and typing the IP address of your network printer (http://IP ADDRESS). You can directly access the printer control panel on the web and it allows you to view and change the printer settings. - Page 228 10-34 TallyGenicom Intelliprint mL260 User Guide Custom Page size and Microsoft Word, Word 2000, and Word 2003 Main Page of Printer Web Site Submenu 1 of Printer Web Site Submenu 2 of Printer Web Site Printer Setup Paper Menu Copies...
- Page 229 TallyGenicom Intelliprint mL260 User Guide 10-35 Resolution Main Page of Printer Web Site Submenu 1 of Printer Web Site Submenu 2 of Printer Web Site PCL Menu Orientation Provides access to the PCL Font Source settings: Font Number Pitch or Point Size...
- Page 230 10-36 TallyGenicom Intelliprint mL260 User Guide Custom Page size and Microsoft Word, Word 2000, and Word 2003 Main Page of Printer Web Site Submenu 1 of Printer Web Site Submenu 2 of Printer Web Site Printer Status Displays printer option and consumables status.
- Page 231 TallyGenicom Intelliprint mL260 User Guide 10-37 Resolution Main Page of Printer Web Site Submenu 1 of Printer Web Site Submenu 2 of Printer Web Site You can view contents of folder, Only appears if Hard Disk Hard Disk Files retrieve files or delete print files.
-
Page 232: Printer Setup
10-38 TallyGenicom Intelliprint mL260 User Guide Custom Page size and Microsoft Word, Word 2000, and Word 2003 Printer Setup Go to your web browser and type in your printer web address. The printer web page will appear. Click on Printer Setup When you enter the Printer Setup Menu, you have access to the Paper Menu, Interface Menu, PS Menu, PCL Menu, System Menu, Quality Menu and Email Setup. - Page 233 TallyGenicom Intelliprint mL260 User Guide 10-39 Printer Setup The Paper Menu allows the user to access and change the paper menu settings. The Interface Menu allows the user to access and change the interface settings. Jun 04 Publication No. GEG-99199...
- Page 234 10-40 TallyGenicom Intelliprint mL260 User Guide Custom Page size and Microsoft Word, Word 2000, and Word 2003 The PS Menu allows the user to access and change the Post Script Menu settings The PCL Menu allows the user to access and change the PCL settings Publication No.
- Page 235 TallyGenicom Intelliprint mL260 User Guide 10-41 Printer Setup The System Menu allows the user to access and change the System Menu settings The Quality Menu allows the user to access and change the Quality Menu settings Jun 04 Publication No. GEG-99199...
- Page 236 10-42 TallyGenicom Intelliprint mL260 User Guide Custom Page size and Microsoft Word, Word 2000, and Word 2003 The Email Setup Menu allows you to configure the printer to send email messages when cer- tain status conditions occur. . Email Server Settings SMTP Server IP Address : Enter the IP address for the SMTP server that the printer will use to transmitt the email messages.
-
Page 237: Job Accounting
TallyGenicom Intelliprint mL260 User Guide 10-43 Job Accounting Email Address Settings/Email Alert Conditions You can configure 1 - 5 destination email addresses. For each of these destination email addresses you can configure which status conditions will cause an email to be sent. In addition, a resend inter- val can be set for each address, which determines if or how often the email message should be resent, as long as the condition persists. - Page 238 10-44 TallyGenicom Intelliprint mL260 User Guide Custom Page size and Microsoft Word, Word 2000, and Word 2003 When you enter the Job Accounting field the following options appear: When you click on Enable/Disable it will take you to the following screen. Click Yes or No to Enable or Disable Job Accounting.
- Page 239 TallyGenicom Intelliprint mL260 User Guide 10-45 Job Accounting When you click on Retrieve Accounting Files it will upload the file information, which is stored in a .CSV file. When you click on Display Job Accounting Info it will bring you the following screen which displays all your job information.
-
Page 240: File Management
10-46 TallyGenicom Intelliprint mL260 User Guide Custom Page size and Microsoft Word, Word 2000, and Word 2003 File Management Web Page Access Using the printer web page, you can delete, print, or download any job files stored in the job library. - Page 241 TallyGenicom Intelliprint mL260 User Guide 10-47 Job Accounting Click on the folder icon or name to view the printer jobs in the user folders. The printer job information will appear. If there is a PIN number associated with the file, you will be required to enter the correct PIN number to access the print file.
-
Page 242: Control Panel Menu Structure
10-48 TallyGenicom Intelliprint mL260 User Guide Custom Page size and Microsoft Word, Word 2000, and Word 2003 Using the RS-232C/RS-422 Serial Interface This section lists the Serial Interface setup features and available selections via the control panel menus. The Serial Interface connector pinouts are listed. Troubleshooting error messages appearing on the printer’s control panel are also discussed. - Page 243 TallyGenicom Intelliprint mL260 User Guide 10-49 Control Panel MENU structure None Even DTR Ready/Busy DTR Onl/Offl DTR Error RTS Ready/Busy RTS Onl/Offl RTS Error XON Ready/Busy XON Onl/Offl XON Error DTR Polarity High RTS Polarity High Robust XON PS Menu...
- Page 244 10-50 TallyGenicom Intelliprint mL260 User Guide Custom Page size and Microsoft Word, Word 2000, and Word 2003 Interpreter AVAILABLE SELECTIONS Auto Switch Postscript 3 DEFAULT Auto Switch Format AVAILABLE SELECTIONS Normal Binary DEFAULT Serial Mode AVAILABLE SELECTIONS RS232 RS422 DEFAULT...
- Page 245 TallyGenicom Intelliprint mL260 User Guide 10-51 Control Panel MENU structure DTR Ready/Busy AVAILABLE SELECTIONS DEFAULT DTR On/Off AVAILABLE SELECTIONS DEFAULT DTR Error AVAILABLE SELECTIONS DEFAULT RTS Ready/Busy AVAILABLE SELECTIONS DEFAULT RTS On/Off AVAILABLE SELECTIONS DEFAULT RTS Error AVAILABLE SELECTIONS DEFAULT...
-
Page 246: Disabling The Serial Interface
10-52 TallyGenicom Intelliprint mL260 User Guide Custom Page size and Microsoft Word, Word 2000, and Word 2003 XON Error AVAILABLE SELECTIONS DEFAULT DTR Polarity AVAILABLE SELECTIONS High DEFAULT High RTS Polarity AVAILABLE SELECTIONS High DEFAULT High Robust XON AVAILABLE SELECTIONS... -
Page 247: Rs-232C Serial Cable Pin Assignments
TallyGenicom Intelliprint mL260 User Guide 10-53 RS-232C Serial Cable Pin Assignments RS-232C Serial Cable Pin Assignments Eight pins of the 25-pin serial cable are utilized for the RS-232C standard: Pin No. Signal Direction Description Frame Ground Transmit Data Receive Data... -
Page 248: Obtaining Help And Information
10-54 TallyGenicom Intelliprint mL260 User Guide Custom Page size and Microsoft Word, Word 2000, and Word 2003 and where x indicates the network slot where the serial interface is installed and where y reflects the error number as shown below: Error No. - Page 249 TallyGenicom Intelliprint mL260 User Guide 10-55 Obtaining Help and Information The type of host computer you are using. Jun 04 Publication No. GEG-99199...
- Page 250 10-56 TallyGenicom Intelliprint mL260 User Guide Publication No. GEG-99199 Jun 04...
-
Page 251: Appendix A Customer Support And Part Numbers
• “About this Chapter” on page A-2 • “Obtaining Help and Information” on page A-2 • “Technical Support” on page A-2 • “TallyGenicom Worldwide Offices” on page A-3 • “TallyGenicom Part Numbers” on page A-4 Jun 04 Publication No. GEG-99199... -
Page 252: Obtaining Help And Information
You can access the TallyGenicom world wide web server via any one of the many world-wide web browsers available to Internet users. The TallyGenicom home page is at http://www.TallyGenicom.com. -
Page 253: Tallygenicom Worldwide Offices
TallyGenicom Intelliprint mL260 User Guide A-3 TallyGenicom Worldwide Offices • A printout of your printer’s Configuration Summary. (Refer to your printer’s Installation Guide). • If you have a printer hardware problem you cannot resolve, provide the error message dis- played on the Control Panel. For a list of error messages, refer to your printer’s User manual. -
Page 254: Tallygenicom Part Numbers
TallyGenicom Intelliprint mL260 User Guide TallyGenicom Part Numbers TallyGenicom Part Numbers The following tables list TallyGenicom part numbers for the Intelliprint mL260 printer, options, and consumables. Printers TallyGenicom Part Number Description ML260N-CA 110V ML260 Laser Printer, Ethernet, US ML260N-CC 220V ML260 Laser Printer, Ethernet, Central Europe... -
Page 255: Dram, Flash Simm And Hard Disk Drive Options
TallyGenicom Intelliprint mL260 User Guide A-5 TallyGenicom Part Numbers DRAM, FLASH SIMM and Hard Disk Drive Options TallyGenicom Part Number Description MLXXXM-64 64MB Memory DIMM MLXXXM-128 128MB Memory DIMM MLXXXF-FP 16MB User FLASH DIMM MLXXXF-HD Hard Disk Option User Publications and CD ROM... - Page 256 TallyGenicom Intelliprint mL260 User Guide TallyGenicom Part Numbers Publication No. GEG-99199 Jun 04...
-
Page 257: Appendix B Safety Notes And Regulatory Compliance
Safety Notes and Regulatory Compliance In this Chapter . . . “About this Appendix” on page B-2 “Safety Notes” on page B-2 “Regulatory Compliance” on page B-2 Jun 04 Publication No. GEG-99199... -
Page 258: Safety Notes
TallyGenicom Intelliprint mL260 User Guide Safety Notes About this Appendix This appendix lists important safety precautions and identifies the applicable regulatory compli- ances of your printer. Safety Notes Be sure to switch off and unplug the printer before accessing the interior of the printer for cleaning, maintenance, or fault clearance. -
Page 259: Emc Compliance
TallyGenicom Intelliprint mL260 User Guide Regulatory Compliance EMC Compliance Class B Equipment This equipment has been tested and found to comply with the limits for a Class B digital device, pursuant to Part 15 of FCC rules. These limits are designed to provide reasonable protection against harmful interference in a residential installation. - Page 260 TallyGenicom Intelliprint mL260 User Guide Regulatory Compliance Publication No. GEG-99199 Jun 04...
Need help?
Do you have a question about the Intelliprint mL260 and is the answer not in the manual?
Questions and answers