EnGenius DuraFon PRO User Manual
Digital long range industrial cordless phone systems
Hide thumbs
Also See for DuraFon PRO:
- User manual (74 pages) ,
- User manual (70 pages) ,
- User manual (11 pages)

Related Manuals for EnGenius DuraFon PRO


Summary of Contents for EnGenius DuraFon PRO
- Page 1 Digital Long Range Industrial Cordless Phone Systems DuraFon PRO & DuraWalkie User's Manual...
-
Page 2: Table Of Contents
Safety Instructions..........4 General Safety Instructions..........4 Product Safety Instructions..........5 Battery Safety Instructions..........7 Regulatory Information..........8 Congratulations.............10 Equipment Checklist..........11 Handset Illustration..........13 Handset Features...........14 Basic Handset Features..........14 Additional Handset Features..........16 Base Illustration............21 Base Features............21 Basic Base Station Features ..........21 Additional Base Station Features........22 Administrator Features............22 Charger Illustration..........24 Charger Features..........24... - Page 3 Mute...............39 Do Not Disturb (Silent Ring)........39 Key Guard...............39 To View Missed Call(s) (For DuraFon PRO only)..39 To Call back from Call Log (For DuraFon PRO only)..4 0 Battery Recharge and Replacement......40 Advanced Operations..........41 Handset Registration..........41...
-
Page 4: Safety Instructions
Advanced Registration..........42 Handset Group Subscription........43 Call Transfer(For DuraFon PRO only)......44 3-Way Conferencing(For DuraFon PRO only).....45 Base Select (For DuraFon PRO only)..... ..45 Call Waiting(For DuraFon PRO only)......46 Auto-Attendant(AA)..........47 AA Configuration by Administrator......48 Change AA Parameters...........48 Line Dedication............50 Outbound Line Selection (For DuraFon PRO only)..50 Change System Settings by Administrator....51... -
Page 5: General Safety Instructions
Caution: Your wireless telephone gives you freedom and flexibility to stay in touch while you move around. However, the safe and responsible use of the phone depends entirely on you. When using your phone equipment, safety instructions should be followed to avoid the risks of fire, electric shock, injury to person, and damage to property. - Page 6 pacemaker wearers . However, until more is known, FDA suggests that people with pacemakers may want to take precautions when using or carrying a wireless telephone to ensure that there is ample distance between the telephone and the pacemaker. Do not carry the handset in a breast pocket.
- Page 7 power supply. 8. Slots or openings in the product's housing are provided for ventilation. These openings must not be blocked or covered. Placing the product on a bed, carpeting, or other similar surface may block these openings and should be avoided. This product should never be placed near or over a radiator or heat register, or in a built-in installation unless proper ventilation is provided.
-
Page 8: Battery Safety Instructions
17. Do not install the base station or the handset charger near microwave ovens, radios, TV sets, speakers, or other electrical equipment. These appliances may cause interference to the product or experience interference from the product. 18. Unplug the base station or the charger adaptor from the wall power outlet and refer servicing to an authorized service center under the following conditions: a. - Page 9 DuraFon PRO & DuraWalkie FCC ID: U2M-SP922PRO IC: 3616C-SP922PRO This device complies with Part 15 of the FCC Rules. Operation is subject to the following two conditions: 1) this device may not cause harmful interference, and 2) this device must accept any interference received, including interference that may cause undesired operation.
-
Page 10: Congratulations
5. Your telephone company may make changes in its facilities, equipment, operations, or procedures that could affect the proper functioning of your telephone system. Consult with your local phone company for your rights if this happens. 6. This telephone system may not be used on coin service provided by the telephone company. - Page 11 DuraFon PRO can support up to 90 handsets. Important Warranty Note: U.S. customers: This EnGenius product has NO manufacturer's warranty unless purchased from an EnGenius Authorized Reseller. To verify a reseller is authorized, please visit our website at: www.engeniustech.com or contact us at 714-432-8668.
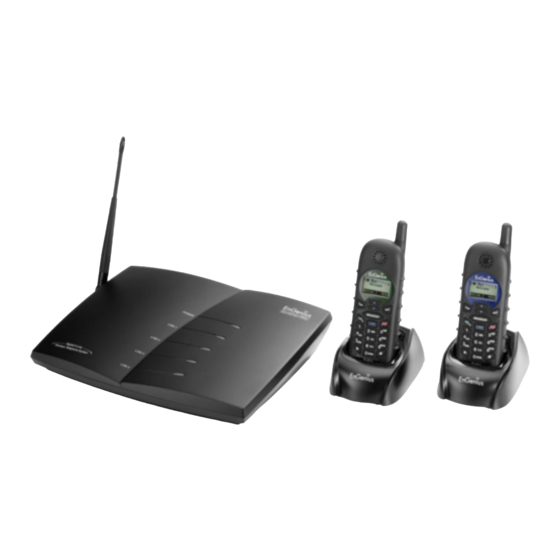
- Page 12 Equipment Checklist 1. In a Base + Handset package(DuraFon PRO), please find the following components: a. Base Station x 1 b. Base Antenna x 1 c. Base AC/DC Adaptor x 1 d. Handset x 1 e. Low Profile Handset Antenna x 1 f .
-
Page 13: Equipment Checklist
Equipment Checklist 4. Optional Accessories a. Outdoor Antenna Kit (including antenna and cable) b. Lightning Protection Kit (including cable) c. DuraPouch d. Belt Clip e. Spare Battery f . Low Profile Handset Antenna g. Optimal Performance Handset Antenna h. Antenna Splitter (including cable) -
Page 14: Handset Features
Handset Features 4-Line LCD Receiver Right soft key Volume control/ Scrolling END & Left soft key Power ON/OFF BROADCAST 2-WAY//Intercom TALK/ Microphone Travel/charger jack (For PRO) KEY LOCK/ Headset jack(2.5mm) Belt Clip holder (For Walkie) Antenna Battery pack... - Page 15 Handset Features Basic Handset Features 1. 4-line LCD (Liquid Crystal Display) (1) (2) (3) (4) (5) (7) (8) (9) REDIAL MENU a. The LCD display has LED (Light Emitting Diode) for backlighting. b. The 1 line of LCD consists of icons. c.
-
Page 16: Additional Handset Features
The last line displays the left and right soft keys. Re: There is only right soft key in idle mode of DuraWalkie. Note: “◎” means only shown on DuraFon PRO handset. 2. Ringer a. Rings to an incoming call. - Page 17 Handset Features 6. BROADCAST( a. Half duplex broadcasting to handsets for immediate announcement. 7. Left/Right ( ) Softkeys a. Make menu selection. 8. Up( ) /Down( ) Scrolling Keys a. Scroll through records and menu selections. b. Adjust receiver voice volume when in Talk mode. 9.
- Page 18 PBX or Key system passes that information through the analog ports. only 4. Call Waiting with Caller ID(For DuraFon PRO a. Displays 2 incoming call information on the same phone line when 1 call is in progress (needs Call Waiting with Caller ID service from local telephone company).
- Page 19 8. Any Key Answer (except END, Silent Soft Key) 9. Key-guard only 10. Dialing Prefix(For DuraFon PRO a. Up to 14 digits, including pause(s), one access code can be pre- programmed to be added automatically in front of the dialed number when dialing from call logs, phonebook, and dial-and-send dialing.
- Page 20 19. PBX option transfer(For DuraFon PRO a. PBX options transfer via wireless link. b. Transfer specific PBX option to one handset or all registered handsets.
-
Page 21: Base Illustration
Base Illustration Base Features AUDIO DC IN Line in Audio in DC IN Antenna POWER Power LED LINE 1 LINE 2 LINE 3 Digital 4-Line Wireless Telephone System LINE 4 REG Button Reset Button Line Status LED's Basic Base Station Features 1. -
Page 22: Additional Base Station Features
Base Illustration 3. Reset Button a. Restores base station to factory settings. b. Reset button is indented to prevent accidental system reset. c. All handsets (including administrator) and additional base(s) need to be re-registered after a base station reset. 4. Registration Key (REG) Enters registration mode along with handset, assigns handset ID (10-99). -
Page 23: Administrator Features
3. Call Transfer to PBX Extension(For DuraFon PRO a. When the DuraFon PRO is installed behind a PBX system, you can pre-program the feature code of call transfer function. b. The Flash time is set at 600ms, by default, and may be changed to match PBX settings. -
Page 24: Charger Illustration
Charger Illustration Charger Features Spare Battery Charging Slot Spare Battery Charging Indicator Handset Charging Slot DC IN... - Page 25 Charger Features 1. DC In Connects to Charger AC Adaptor. 2. Handset Charging Slot a. Charge handset battery when handset is placed in cradle. b. Refer to the handset LCD for charging status. i. Charging: LCD screen showed “Charging”. ii. Fully Charged: battery status bar stands still and the LCD screen would display “Fully Charged”.
-
Page 26: Getting Started
Getting Started Base Station Installation For best performance, maintain a distance of at least 1 meter (about 3 feet) between the base station and other electronic devices (e.g., TV, computer, stereo, fax machine, answer machine, cordless phone, etc.). 1. Install base station antenna. The base station's antenna port has a reverse-thread connector;... - Page 27 Call Waiting feature will alert the user and allow the user to toggle between 2 lines. Multi-base setups: EnGenius DuraFon PRO has the capability to expand the coverage or capacity. Re: For best performance, maintain a distance of at least 10 meters (about 30 feet) between any two base stations.
- Page 28 Getting Started Re : when a call is coming in from L1, any handset can pick up the call, as long as the handset are in the coverage of base1~3. 1. Handset Registration. a. Press button on Base “00” (default), four LEDs will light up in setting mode.
-
Page 29: Handset And Charger Installation
Getting Started Re : Handsets can answer calls from any port or line, unless port is dedicated to a specific handset or group. 1. Handset Registration. a. Press button on Base “00” (default), four LEDs will light up in setting mode. b. -
Page 30: Basic Operations
Both the base station and handset have levels of operation at which time only certain procedures of functions can be performed. Re: The main difference between DuraFon PRO and DuraWalkie is the handset of DuraFon PRO has the capability to make telephone calls, and the handset of DuraWalkie does not. - Page 31 Basic Operations 6. Charging cradle may be wall mounted, but an L bracket should be “ ” used for support under the cradle to avoid breaking mounting slots. An “L” bracket is not included, but can be purchased from a local home center.
- Page 32 Basic Operations DuraFon PRO Main menu Sub-menu 1.Dialed 1.KeyGuard 2.Received 3.Missed 1.Ring Volume 2.PhoneBook 2.Ring Tone 3.Key Volume 4.Key Tone 3.Call Logs 1.Dial Prefix 2.Group Select 3.Base Select 4.Sound 4.Clear 5.Naming 6.Contrast 7.Backlight 5.Settings 8.Line Select 9.PBX Options 0.Language 6.Registration #.PA On/Off...
- Page 33 Basic Operations DuraWalkie Main menu Sub-menu 1.Ring Volume 1.KeyGuard 2.Key Volume 3.Key Tone 2.PhoneBook 1.Group Select 2.Clear 3.Naming 4.Contrast 3.Unused 5.Backlight 6.Language #. PA On/Off 4.Sound . Phone Reset 5.Settings 1.Register 6.Registration 2.Deregister 3.Remote REG 7.Unused Select Mode: 8.Multi-base 1.Add Base Admin: 1.System 9.Admin...
-
Page 34: Making A Telephone Call(For Durafon Pro Only)
Basic Operations Making a Telephone Call (For DuraFon PRO only) 1. Press TALK , wait for dial tone, and then enter phone number. 2. Alternatively, you can enter phone number first then press TALK Key. When using this method, you can use the... -
Page 35: Making A Broadcast
Basic Operations 1. Press INTERCOM key followed by a two-digit handset ID or Group ID. 2. Press key to end the call. 3. During the call, press and hold the TALK Key, the speakerphone is active. Notes: 1. Intercom calls can be made regardless if the Base Station is present. -
Page 36: Redial(For Durafon Pro Only)
Intercom numbers (Handset ID) are not stored in the last 10 numbers dialed log. Receiving a Telephone Call (For DuraFon PRO only) 1. When an incoming call arrives, the handset will ring or vibrate unless the ringer has been turned off. -
Page 37: Receiving An Intercom Call
Basic Operations Also it can transfer the same telephone call to other DuraWalkie or PRO handset. (Details refer to call transfer) Notes: 1. You can press SILENT (Left softkey) if you choose to ignore the call. Unlike turning off the ringer (from the handset menu), the SILENT key operation is valid only for the current call. -
Page 38: Ending A Call
3. The new setting remains effective for all future calls until changed or handset is power down. Placing a Call On Hold (For DuraFon PRO only) 1. For calls held at DuraFon PRO Base only 2. When a call is in progress, it can be put on hold by pressing the HOLD (Right softkey). -
Page 39: Mute
3. Key Guard is in effect until unlocked or powered off. To View Missed Call(s) (For DuraFon PRO only) 1. Whenever you have missed incoming call(s), you can press VIEW softkey to enter the call logs information. -
Page 40: To Call Back From Call Log (For Durafon Pro Only)
2. You need to subscribe the caller ID service from local telephone company to retrieve this data. To Call back from Call Log (For DuraFon PRO only) 1. When you review missed incoming call(s), you can directly call back by... -
Page 41: Advanced Operations
Advanced Operations Handset Registration 1. If your handset is purchased as part of a system, it has been pre- registered with the base station at the factory. 2. If the Handset ID reads “00”, that means it is a new handset or the ID has been erased. -
Page 42: Advanced Registration
Advanced Operations f. Press the handset number key , this completes the de-registration process. Upon successful de-registration, the handset will show ID “00”. Notes: 1. The base has a 30 second registration timeout starting from pressing the button. The handset has a 12 second registration timeout starting from the time registration or de-registration option has been selected. -
Page 43: Handset Group Subscription
Advanced Operations g. If the handset ID is already in use by another handset, the administrator will be alerted. In that case, the administrator can choose another ID or asks the handset having the desired ID to vacate by de-registering with the base. h. -
Page 44: Call Transfer(For Durafon Pro Only)
Notes: 1. If the destination handset does not answer after handset paging timeout, the call is routed back to the originating handset. 2. Above described “Call Transfer” is for DuraFon PRO handset-to- handset call transfers. -
Page 45: 3-Way Conferencing(For Durafon Pro Only)
2 phone lines will take up two physical lines, leaving only two lines left available for other handsets. The handset must have access to a second line. Base Select (For DuraFon PRO only) 1. A handset can manually select the desired base station before access outbound line. -
Page 46: Call Waiting(For Durafon Pro Only)
1. Because this setting allows handset manually select the base station, the handset must be in range with the desired base station. Call Waiting (For DuraFon PRO only) 1. A handset, while talking on one phone line, can be informed of the arrival of a new incoming phone call. -
Page 47: Auto-Attendant(Aa)
Please try again later, goodby”. Then drops the call. 8. When the DURAFON PRO base station is connected to wired PBX extension lines, calls addressed/routed to the AA operator can be sent back to the operator of the wired PBX system. From an administrator handset, up to 10 keys/digits are allowed to program a specific code in order to transfer the calls back to the wired PBX. -
Page 48: Aa Configuration By Administrator
4. The calls can be routed to either a Handset ID or an extension number of the wired PBX system, There can be only one operator for the AA, which is either an DURAFON PRO handset or the wired PBX operator. - Page 49 Advanced Operations iv. Press to turn AA On/Off. This can be done separately for each phone line by using Up/Down arrows to scroll through Line 1 to Line 4, and press softkey to turn AA On/Off.If turning off the AA may be useful when: The line is not used by a group of people.
-
Page 50: Line Dedication
3. Handsets dedicated to a port will also receive calls from non- dedicated line as well as the handset’s dedicated line. Use Line Dedication for a group on other lines to further manage calls. Outbound Line Selection (For DuraFon PRO only) 1. Press MENU while the phone is in standby to enter Line Select menu. -
Page 52: Phonebook Operations
Advanced Operations iv. After setting broadcast, press (Left softkey) to enable the AA. Press (Right softkey) to disable the AA. Re: L3 and L4 can be setting as two broadcast lines, repeated above items for setting 2 broadcast line. c. Press to enter Line dedication setting. - Page 53 Advanced Operations Notes: 1. When entering a phone number, the cursor automatically advances to the next digit field. Use scrolling key to move the cursor backward or forward to insert or delete. 2. When entering a name, the cursor automatically advances to the next character field if you press a different key for the next character.
- Page 54 Advanced Operations c. For example, you are looking for “EnGenius”, and then press the number once. d. Use scrolling key to locate the exact record you are looking for . 7. To erase phonebook entry: a. Use scrolling key or the alphabetical search method to located the record to be erased.
-
Page 55: Broadcast Through Pbx
* P (Pause) when in number editing Broadcast through PBX 1. DuraFon PRO and DuraWalkie both have the broadcast function, each can broadcast another handset without going through the base station, as long as the handsets are connecting. However, when setting up the multi-base, the broadcast feature may not be available due to the coverage range. - Page 56 Advanced Operations 4. Press number , handset enters Line setting menu. a. Enter Base ID (00~07) to access base. b. Press to enter Broadcast setting. i. Press to select L3 or L4 (the status of setting will be displayed on LCD) ii.
-
Page 57: Menu Operations
Advanced Operations Menu Operations DuraFon PRO Main menu Sub-menu 1.Dialed 1.KeyGuard 2.Received 3.Missed 1.Ring Volume 2.PhoneBook 2.Ring Tone 3.Key Volume 4.Key Tone 3.Call Logs 1.Dial Prefix 2.Group Select 3.Base Select 4.Clear 4.Sound 5.Naming 6.Contrast 7.Backlight 5.Settings 8.Line Select 9.PBX Options 0.Language... - Page 58 Advanced Operations 1. Press MENU (Right softkey) while the phone is in standby. 2. Press to lock keypad (see Key Guard). 3. Press to view, search, erase, edit and transfer the phonebook (see Phonebook). 4. Press to view the last 10 numbers called, received, or missed. Records can be erased or edit/save into the phonebook.
- Page 59 Advanced Operations 2. Caller ID service is required from your local phone company in order to receive phone numbers, names and time stamps on incoming calls. The Received and Missed Call Logs will register no incoming calls if Caller ID service is not available. 3.
- Page 60 Advanced Operations d. Press to clear call logs and phonebook: i. Press and confirm to delete the entire phonebook. ii. Press and confirm to clear the three call logs (Called, Received, and Missed). e. Press to edit the name of Custom or Line: e-1.
- Page 61 Advanced Operations you can transfer the PBX options to other handset(s). Re: To transfer PBX options, both parties have to enter the PBX option mode firstly by following bellow: For sending party, press to enter sending mode. * Either press TX ALL (Left softkey) to transfer all PBX options to another handset(s).
- Page 62 Advanced Operations K. Press to turn Broadcast On/Off. i. Press (Left softkey) to turn on the broadcast function (including the broadcast of handset to handset and base to handset). ii. Press (Left softkey) to turn off the broadcast function Re: When broadcast setting “Off”, there is an icon indicated in the display, side of the battery icon.
- Page 63 Advanced Operations DuraWalkie Main menu Sub-menu 1.KeyGuard 1.Ring Volume 2.Key Volume 2.PhoneBook 3.Key Tone 3.Unused 1.Group Select 2.Clear 3.Naming 4.Contrast 4.Sound 5.Backlight 6.Language #.PA On/Off 5.Settings .Reset Phone 1.Register 6.Registration 2.Deregister 3.Remote REG 7.Unused Select Mode: 8.Multi-base 1.Add Base Admin: 1.System 9.Admin 2.Line Setting...
- Page 64 Advanced Operations 1. Press MENU (Right softkey) while the phone is in standby. 2. Press to lock keypad (see Key Guard). 3. Press to view, search, erase, edit and transfer and edit the phonebook (see Phonebook). 4. Press to set sound-related settings: a.
- Page 65 Advanced Operations e. Press to change the LCD backlight: i. Use to scroll through options: On, Off, and 8 Seconds. Default = 8 seconds, meaning that the backlight is always on. The 8-second option will turn off the backlight after 8 seconds of inactivity.
-
Page 66: Technical Specifications
Technical Specifications Electrical Specifications Base Station Portable Handset 902-928 MHz Frequency 902-928 MHz RF Power Peak: 708 mW Peak: 708 mW Average: 304 mW Average: 76 mW 200 kHz Channel Spacing 200 kHz Number of Channels Modulation GMSK GMSK Frequency Hopping TDMA Multiple Access Frequency Hopping TDMA Frequency Hopping Rate... - Page 67 Index Call Waiting with Caller ID, 17 Caller ID, 17, 18, 27, 37, 40, 56 2-WAY/INTERCOM, 13, 15,19, 34 Cardiac Pacemaker, 4 Charger Features, 24, 25 3-Way Conferencing, 44, 45 DC In: Jack, 22 De-registration, 41, 42, 43, 49 Adjusting Receiver (Earpiece) Voice Dialing Prefix, 18, 56 Volume, 38 DND, 17...
- Page 68 Index Handset ID, 14, 15, 18, 19, 22, 30, 35, 36, 37, 41, 42, 43, 44, outdoor antenna, 12, 21, 22 45, 49, 51, 53, 58, 59, 64 Handset Registration, 28, 29, 41, 59, 63 PBX option, 20, 57, 58 Handset to Handset Calls, 34 PBX option transfer, 20 Headset Jack, 13...
- Page 69 Index TALK mode, 16, 30 TALK/SPEAKERPHONE, 15 Technical Specifications, 65 Text Envelope, 14 Text Messaging, 14, 19, 59, 60, 63, 64 Three Call Logs, 17, 55, 57 To Call back from Call Log, 40 To View Missed Call(s), 39 Transformer, 26, 29 Two-Digit Address Index, 14, 55 Vibrator, 16 Volume, 16, 19, 30, 38, 39, 59, 60, 64...
- Page 70 P/N:6709A0243140 Literature order number: 120-0009-01...
- Page 71 W148mm H210mm INSTRUCTION MANUAL 148*210mm 6709A0554040 (SP-922PRO V2) (EN) LFP Chris 2011/06/13 SP-922PRO V2 商業設計工程師 檢 H.C Mei Rennier Austin 機構設計工程師 該專案經理人或業務之內容核准 圖 Allen 該專案經理人或業務之內容核准部門主管...
Need help?
Do you have a question about the DuraFon PRO and is the answer not in the manual?
Questions and answers