EnGenius DuraFon PRO User Manual
Digital long range cordless system
Hide thumbs
Also See for DuraFon PRO:
- User manual (71 pages) ,
- User manual (66 pages) ,
- User manual (70 pages)

Related Manuals for EnGenius DuraFon PRO


Summary of Contents for EnGenius DuraFon PRO
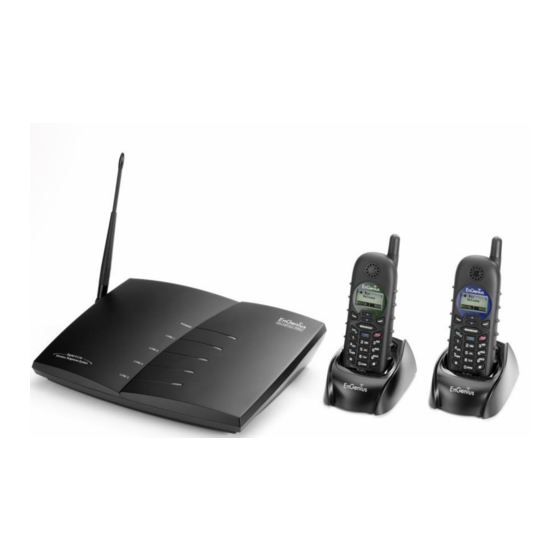
- Page 1 User Manual User Manual DuraFon PRO & DuraWalkie Digital Long Range Cordless System...
-
Page 2: Table Of Contents
Table of Contents SAFETY INSTRUCTIONS ..............4 ............... 4 ENERAL AFETY NSTRUCTIONS ............... 4 RODUCT AFETY NSTRUCTIONS ..............6 ATTERY AFETY NSTRUCTIONS REGULATORY INFORMATION ............7 EQUIPMENT CHECKLIST ..............10 HANDSET ILLUSTRATION .............. 12 HANDSET FEATURES ..............12 HANDSET FEATURES ..............13 .............. - Page 3 ........35 DJUSTING ECEIVER ARPIECE OICE OLUME ) ......36 LACING A ONLY ....................36 ) ............36 ISTURB ILENT ..................37 UARD ) (F ) ....... 37 ISSED ONLY ) ......37 ALL BACK FROM ONLY ..........38 ATTERY ECHARGE AND EPLACEMENT ADVANCED OPERATIONS ..............
-
Page 4: Safety Instructions
Safety Instructions Caution: Your wireless telephone gives you freedom and flexibility to stay in touch while you move around. However, when using your phone equipment, safety instructions should be followed to avoid the risks of fire, electric shock, injury to person, and damage to property. General Safety Instructions When using your wireless phone, ensure your safety and the safety of others: Always watch where you are walking and standing. - Page 5 manufacturer will void the warranty and the FCC authorization to operate the equipment. Use only manufacturer provided accessories. Do not use the telephone near water. Never spill liquid of any kind on this product. Unplug the product from the wall telephone jack and power outlet before cleaning.
-
Page 6: Battery Safety Instructions
17. Do not install the base station or the handset charger near microwave ovens, radios, TV sets, speakers, or other electrical equipment. These appliances may cause interference to the product or experience interference from the product. 18. Unplug the base station or the charger adaptor from the power outlet and refer to an authorized service center under the following conditions: If liquid has been spilled into the product. -
Page 7: Regulatory Information
Regulatory Information DuraFon PRO & DuraWalkie FCC ID: A8J-SP922PROV3 IC: 10103A-SP922PROV3 This device complies with Part 15 of the FCC Rules. Operation is subject to the following two conditions: 1) this device may not cause harmful interference, and 2) this device must accept any interference received, including interference that may cause undesired operation. - Page 8 IMPORTANT NOTE: FCC Radiation Exposure Statement: This equipment complies with FCC radiation exposure limits set forth for an uncontrolled environment. This equipment should be installed and operated with minimum distance 20cm between the radiator & your body. This transmitter must not be co-located or operating in conjunction with any other antenna or transmitter.
- Page 9 - Connect the equipment into an outlet on a circuit different from that to which the receiver is connected. - Consult the dealer or an experienced radio/TV technician for help. FCC Caution: Any changes or modifications not expressly approved by the party responsible for compliance could void the user's authority to operate this equipment.
-
Page 10: Equipment Checklist
Equipment Checklist In a Base + Handset package(DuraFon PRO), please find the following components: Base Station x 1 Base Antenna x 1 Base AC/DC Adaptor x 1 Handset x 1 Low Profile Handset Antenna x 1 Optimal Performance Handset Antenna x 1... - Page 11 Optional Accessories Outdoor Antenna Kit (including antenna and cable) Lightning Protection Kit (including cable) DuraPouch Belt Clip Spare Battery Low Profile Handset Antenna Optimal Performance Handset Antenna Headset Antenna Splitter (including cable)
-
Page 12: Handset Illustration
Handset Illustration Antenna Belt Clip Holder Receiver 4-line LCD Volume control / Scrolling Broadcast key END & Power ON/OFF key 2-WAY/ INTERCOM TALK/FLASH/ (For PRO) KEYLOCK/ (For Walkie) Microphone Battery pack Travel charger jack Headset jack (2.5mm) -
Page 13: Handset Features
Handset Features Basic Handset Features 4-line LCD (Liquid Crystal Display) (1) (2) (3) (4) (5,6) (7) (8) a. The LCD display has LED (Light Emitting Diode) for backlighting. b. The 1 line of LCD consists of icons. c. Icons explanation from left to right (1) RSSI (Receive Signal Strength Indicator) During a call, the number of bars is proportional to the radio signal strength received. - Page 14 The last line displays the left and right soft keys. Re: There is only right soft key in idle mode of DuraWalkie. Note:”◎”means only shown on DuraFon PRO handset. Ringer a. Rings to an incoming call. b. Distinctive alert sounds indicating various events:...
-
Page 15: Additional Handset Features
Caller ID service from local telephone company) Re: If behind a PBX or Key system, Caller ID information will only be recognized if the PBX or Key system passes that information through the analog ports. only 4. Call Waiting with Caller ID(For DuraFon PRO... - Page 16 PBX or Key system passes that information through the analog ports. only 5. Name Tagging with Caller ID(For DuraFon PRO Matches the Caller ID with the phone book entries; once matched, the LCD screen will display the name or nickname instead of pure...
- Page 17 16. Call Conferencing(For DuraFon PRO only 2-handset and 1-line conferencing (Applied for DuraWalkie too). b. 1-handset and 2-line conferencing. 17. Line Selection (For DuraFon PRO only When enabled from the handset menu, a handset user will be...
- Page 18 18. PBX option transfer(For DuraFon PRO only PBX transfer via air b. Transfer specific PBX option to one handset or all registered handsets Transfer all PBX options to one handset or all registered handsets 19.
-
Page 19: Base Illustration
Base Illustration Base Features Power LED Antenna Line Status REG Button LEDs Reset Button GROUNDING JACK CONSOLE DC IN Line 1 ~ 4 AUDIO IN... -
Page 20: Basic Base Station Features
All handsets (including administrator) and additional base(s) need to be re-registered after a base station reset. 9. Grounding jack Connecting with grounding wire 10. Console jack Jack for firmware upgrade (Type-B USB connector) Re: Please consult with EnGenius Tech support about the firmware upgrade. -
Page 21: Additional Base Station Features
Call Transfer to PBX Extension(For DuraFon PRO only) When the DuraFon PRO is installed behind a PBX system, you can pre- program the feature code of call transfer function. b. Need to adjust the Flash time to match your PBX setting. -
Page 22: Charger Illustration
Charger Illustration DC In Spare Battery Charging Slot Spare Battery Charging Indicator Handset Charging Slot... -
Page 23: Charger Features
Charger Features 1. DC In Connects to Charger AC Adaptor. 2. Handset Charging Slot a. Charge handset battery when handset is placed in cradle. b. Refer to the handset LCD for charging status (1) Charging: LCD screen showed “Charging” (2) Fully Charged: battery status bar stands still and the LCD screen would display “Fully Charged”... -
Page 24: Getting Started
Getting Started Base Station Installation For best performance, maintain a distance of at least 1 meter (about 3 feet) between the base station and other electronic devices (e.g., TV, computer, stereo, fax machine, answer machine, cordless phone, etc.) 1. Install base station antenna. The base station’s antenna port has a reverse-thread connector;... - Page 25 Call Waiting feature will alert the user and allow the user to toggle between 2 lines. Multi-base setups: EnGenius DuraFon PRO has the capability to expand the coverage or capacity. Re: For best performance, maintain a distance of at least 10 meters (about 30 feet) between any two base stations.
- Page 26 1. Handset Registration. a. Press button on Base 00(default), four LEDs will light up in setting mode b. Handset operation: Press MENU . (It will complete the registration process) c. Repeat, as needed, to add handsets Note: Additional handsets should be added to the system before adding additional base units.
-
Page 27: Handset And Charger Installation
Re : Handsets can answer calls from any port or line, unless port is dedicated to a specific handset or group. 1. Handset Registration. a. Press button on Base 00(default), four LEDs will light up in setting mode b. Handset operation: Press MENU . - Page 28 Charging cradle may be wall mounted, but an “L” bracket should be used for support under the cradle to avoid breaking mounting slots. An “L” bracket is not included, but can be purchased from a local home center. Note: 1. The handset packaged along with a Base Station is pre- registered at the factory.
-
Page 29: Basic Operations
Both the base station and handset have levels of operation at which time only certain procedures of functions can be performed. Re:The main difference between DuraFon PRO and DuraWalkie is the handset of DuraFon PRO has the capability to make telephone calls, and the handset of DuraWalkie does not. A. Base Operation Modes IDLE mode- this is the default mode. -
Page 30: Menu Tree
Menu Tree DuraFon PRO Main menu Sub-menu 1.Dialed 1.KeyGuard 2.Received 3.Missed 2.PhoneBook 1.Ring Volume 3.Call Logs 2.Ring Tone 3.Key Volume 4.Key Tone 4.Sound 1.Dial Prefix 2.Group Select 5.Settings 3.Base Select 4.Clear 5.Naming 6.Registration 6.Contrast 7.Backlight 8.Line Select 7.BC/INT Type 9.PBX Options 0.Language... - Page 31 DuraWalkie Main menu Sub-menu 1.KeyGuard 2.PhoneBook 3.Unused 1.Ring Volume 2.Ring Tone 3.Key Volume 4.Sound 4.Key Tone 5.Settings 1.Group Select 2.Clear 3.Naming 4.Contrast 6.Registration 5.Backlight 6.Language #.PA On/Off 7.BC/INT Type 1.Register 2.Deregister 3.Remote REG Select Mode: 8.Multi-base 1.Add Base Admin: 9.Admin 1.System 2.Line Setting 3.Auto Attndnt...
-
Page 32: Making A Telephone Call (For Durafon Pro Only)
A call duration timer will start displaying the length of the call after link is established. Making a 2-Way/ Intercom Call The EnGenius Industrial Cordless Phone System offers private, Intercom/ 2-way radio calls independent of the base station. Intercom/ 2-way communication can be placed from handset to handset. -
Page 33: Making A Broadcast
Press key to end the call. During the call, press and hold the key, the speakerphone is active. Notes: Intercom calls can be made regardless if the Base Station is present. If a Group ID is entered, the first handset (belonging to that group) that answers will establish a link with the caller. -
Page 34: Redial (For Durafon Pro Only)
Note: Intercom numbers (Handset ID) are not stored in the last 10 numbers dialed log. Receiving a Telephone Call (For DuraFon PRO only) When an incoming call arrives, the handset will ring or vibrate unless the ringer has been turned off. -
Page 35: Receiving An Intercom Call
information may have been blocked by the caller or the originating phone company. Receiving an Intercom Call 1. When an intercom call arrives, the handset will ring or vibrate unless the ringer has been turned off. Press to answer the intercom call. -
Page 36: Placing A Call On Hold (For Durafon Pro Only)
Placing a Call On Hold (For DuraFon PRO only) When a call is in progress, it can be put on hold by pressing the HOLD (Right) soft key. To return to the conversation, press “UNHOLD” Notes: HOLD The call being placed on hold can only be removed from by the handset that puts it on hold. -
Page 37: Key Guard
You need to subscribe the caller ID service from local telephone company to retrieve this data. To Call back from Call Log (For DuraFon PRO only) When you review missed incoming call(s), you can directly call back by pressing key. -
Page 38: Battery Recharge And Replacement
displayed number. Re:The CID default is 10 digits, when press FORMAT key, it will be 7- digit –> 11-digit –> 10-digit in circle. After the displayed number chosen, press the key to call back. Battery Recharge and Replacement Charge the battery when one or several of the following happen: Phone beeps twice every two seconds. -
Page 39: Advanced Operations
Advanced Operations Handset Registration If your handset is purchased as part of a system, it has been pre-registered with the base station at the factory. If the Handset ID reads “00,” that means it is a new handset or the ID has been erased. -
Page 40: Advanced Registration
Notes: The base has a 30 second registration timeout starting from pressing button. The handset has a 12 second registration timeout starting from the time registration or de-registration option has been selected. The base and handset will automatically exit registration mode after timeout. -
Page 41: Handset Group Subscription
administrator will be alerted. In that case, the administrator can choose another ID or asks the handset having the desired ID to vacate by de-registering with the base. h. Perform registration immediately afterward for the handset desiring a specific ID to ensure that the ID is not taken by another handset. -
Page 42: Call Transfer (For Durafon Pro Only)
Notes: 1. If the destination handset does not answer after handset paging timeout, the call is routed back to the originating handset. 2. Above described “Call Transfer” is for DuraFon PRO handset-to handset call transfers. 3-Way Conferencing (For DuraFon PRO) -
Page 43: Base Select (For Durafon Pro Only)
2 phone lines will take up two physical lines, leaving only two lines left available for other handsets. The handset must have access to a second line. Base Select (For DuraFon PRO only) A handset can manually select the desired base station before access outbound line. -
Page 44: Call Waiting (For Durafon Pro Only)
Because this setting allows handset manually select the base station, the handset must be in range with the direct base station. Call Waiting (For DuraFon PRO only) A handset, while talking on one phone line, can be informed of the arrival of a new incoming phone call. -
Page 45: Visual Message Waiting Indicator (Vmwi)
the local phone company. The phone company provided Call Waiting functions on the same phone line, while the DuraFon Call Waiting functions on two separate phone lines. This feature only works for 2 lines, if a 3 phone call comes for the same handset, the call will not be routed to the handset. -
Page 46: Aa Configuration By Administrator
Please try again later, goodby”. Then drops the call. 8. When the DURAFON PRO base station is connected to wired PBX extension lines, calls addressed/routed to the AA operator can be sent back to the operator of the wired PBX system. From an administrator handset, up to 10 keys/digits are allowed to program a specific code in order to transfer the calls back to the wired PBX. -
Page 47: Change Aa Parameters
Designated Handset ID or the Group ID can use that particular line for incoming and outgoing calls. Which means this specific line(s) will be dedicated to a particular handset (Handset ID 10-99) or a calling group (Group ID 01-07) e. Designate an operator, the handset which would answer un- routable calls or when the caller chooses “Operator”... -
Page 48: Line Dedication
DuraWalkie handset or invalid ID. 3. Handsets dedicated to a port will also receive calls from non-dedicated line as well as the handset’s dedicated line. Use Line Dedication for a group on other lines to further manage calls Line Selection (For DuraFon PRO only) -
Page 49: Change System And Line Settings By Administrator
Press MENU while the phone is in standby to enter Line Select menu. to switch between and Off, default = Off. If set to On, when pressing or entering a phone number followed by pressing key, the handset LCD display will show “Select Line” followed by available lines (1~4). -
Page 50: Phonebook Operations
Press number , handset enters Line Setting menu. Enter Base ID(00~07) to access base. b. Press to enter Broadcast setting i. Press handset OFF(Right soft key) to disable broadcasting function; Or press handset ON(Left soft key) to enable broadcasting function Press to enter Line dedication setting Select base’s line and press handset OK(Right soft key) - Page 51 (3) Use DELETE soft key to delete the last character entered. When completed, press SAVE soft key to confirm your selection. Notes: When entering a phone number, the cursor automatically advances to the next digit field. Use scrolling key to move the cursor backward or forward to insert or delete.
- Page 52 Press a key that corresponds to the first character of the name you are looking for. c. For example, you are looking for “EnGenius”, and then press the number once. d. Use scrolling key to locate the exact record you are looking for.
-
Page 53: Broadcast Through Pbx
Space – when in character editing # when in number editing Broadcast through PBX DuraFon PRO and DuraWalkie both have the broadcast function, each can broadcast another handset without going through the base station, as long as the handsets are connecting. However, when setting up the multi-base, the broadcast feature may not be available due to the coverage range. - Page 54 Press number , this will enter administration menu. Press number , handset enters Line setting menu. Enter Base ID(00~07) to access base. Press to enter Broadcast setting i. Press to select L3 or L4 (the status of setting will be displayed on LCD) ii.
-
Page 55: Repeater Operation
Repeater Operation Due to the range performance of handset to handset calls (intercom or broadcast) isn’t as good as line calls, in order to get better range performance for handset to handset calls, install a repeater and make the calls via repeater is the solution. The procedure of repeater’s registration is same as the multi-base which can be performed by administrator handset (Handset 10 and 11). - Page 56 d. The handsets which intend to work with the repeater require enabling a “Repeater Mode”. e. When enabling the “Repeater Mode”, both intercom and broadcast calls will go via the repeater, instead of the original direct handset to handset (P2P mode). f.
-
Page 57: Menu Operations
Menu Operations DuraFon PRO Main menu Sub-menu 1.Dialed 1.KeyGuard 2.Received 3.Missed 2.PhoneBook 3.Call Logs 1.Ring Volume 2.Ring Tone 3.Key Volume 4.Sound 4.Key Tone 1.Dial Prefix 2.Group Select 5.Settings 3.Base Select 4.Clear 5.Naming 6.Registration 6.Contrast 7.Backlight 8.Line Select 7.BC/INT Type 9.PBX Options 0.Language... - Page 58 Press MENU (Right) soft key while the phone is in standby. Press to lock keypad (see Key Guard). Press to view, search, erase, edit and transfer the phonebook (see Phonebook). Press to view the last 10 numbers called, received, or missed. Records can be erased or edit/save into the phonebook.
- Page 59 Caller ID service is required from your local phone company in order to receive phone numbers, names and time stamps on incoming calls. The Received and Missed Call Logs will register no incoming calls if Caller ID service is not available. The Caller ID feature may not be supported by all PBX or Key systems’...
- Page 60 Missed). Press to edit the name of Custom or Line: e-1. Press to change the power-up LCD display to show, e.g., customer name or other greeting message: e-2. Press to change the name of line, when calls coming, it will indicate the calls came from which line.
- Page 61 Or press TX ONE (right soft key) to transfer a specific entry to another handset(s). Press 2-digit handset ID or group ID, then select all PBX options or a specific entry to be transferred(“00” means all handsets) During PBX options transferring, LCD shows “Sending”, and 2- ...
- Page 62 Press to register or de-register handset: See Handset Registration. Press to set up the intercom or broadcast via repeater(see Repeater Setup). Item is to add new bases. From an administrator handset (Handset 10 or 11) to set new Base 01~07. Maximum additional bases is up to 8. Before adding a new base, the Handset must be registered in master base(Base ID =00).
- Page 63 DuraWalkie Main menu Sub-menu 1.KeyGuard 2.PhoneBook 3.Unused 1.Ring Volume 2.Ring Tone 3.Key Volume 4.Sound 4.Key Tone 5.Settings 1.Group Select 2.Clear 3.Naming 4.Contrast 6.Registration 5.Backlight 6.Language #.PA On/Off 7.BC/INT Type 1.Register 2.Deregister 3.Remote REG Select Mode: 8.Multi-base 1.Add Base Admin: 9.Admin 1.System 2.Line Setting 3.Auto Attndnt...
- Page 64 4. Press to set sound-related settings: Press to select ringer volume: scroll through 6 options: Low, Medium, High, Vibrate, Vib and Ring, Off. Press SAVE (Left) soft key to save selection. Default = High. b. Press to select ringer tone: scroll through 4 options: 0, 1, 2, and 3.
- Page 65 ii. Press SAVE (Left) soft key to save setting. 6. Press to register or de-register handset: See Handset Registration. 7. Press to set up the intercom or broadcast via repeater(see Repeater Setup). 8. Item is to add new bases. From an administrator handset (Handset 10 or 11) to set new Base 01~07.
-
Page 66: Technical Specifications
Technical Specifications Electrical Specifications Base Station Portable Handset Frequency 902-928 MHz 902-928 MHz RF Power Peak: 708 mW Peak: 708 mW Average: 304 mW Average: 76 mW Channel Spacing 200 kHz 200 kHz Number of Channels Modulation Multiple Access Frequency Hopping TDMA Frequency Hopping TDMA Frequency Hopping Rate 100 per second... - Page 68 INDEX 2-WAY/INTERCOM, 15 3-Way Conferencing, 43, 44 Adjusting Receiver (Earpiece) Voice Volume, 36 Administrator Features, 22 Audio-in Jack, 21 Base Station Features, 21, 22 Base Station Installation, 25 battery, 5, 7, 14, 15, 17, 24, 28, 29, 30, 37, 39 Battery Recharge and Replacement, 39 Battery Strength, 14 BROADCAST, 16, 34...
- Page 69 Call Waiting with Caller ID, 17 Caller ID, 16, 17, 26, 35, 54 Cardiac Pacemaker, 4 Charger Features, 24 Console, 20 DC In: Jack, 21 De-registration, 40, 42, 48 Dialing Prefix, 17 DND, 17 Do Not Disturb (Silent Ring), 37 emergency, 4 Ending a Call, 36 Equipment Checklist, 11...
- Page 70 Handset ID, 14, 34, 35, 36, 40, 41, 43, 44, 47, 48, 50, 52, 58, 62 Handset Registration, 27, 28, 29, 40, 57, 61 Handset to Handset Calls, 33 Hearing Aid Users, 4 IC, 8 IDLE mode, 30 Intercom in-progress, 14 interference, 4, 5, 6, 8, 9, 28, 51 Key Guard, 38, 53, 60 Key-guard, 17...
- Page 71 outdoor antenna, 21 PBX option transfer, 19 Phonebook, 18, 48, 53, 56, 58, 60, 61, 62 Placing a Call On Hold, 36 Power Outage, 5 Receiving a Telephone Call, 35 Receiving an Intercom Call, 36 Redial, 35 Registration, 8, 21, 30, 40, 41 Registration Key, 21 REGISTRATION mode, 30 Regulatory Information, 8...
- Page 72 Text Messaging, 18 Three Call Logs, 17 To Call back from Call Log, 38 To View Missed Call(s), 38 transformer, 25, 28 Two-Digit Address Index, 14 wall mounted, 29...
- Page 73 This equipment may not be used on coin service provided by the telephone company. Connection to party lines is subject to state tariffs. Company: EnGenius Technologies Address: 1580 Scenic Avenue, Costa Mesa, CA92626 Tel no.: 888.735.7888 ext. 827...
- Page 74 68 rules and requirements adopted by the ACTA. A compliant telephone cord and modular plug is provided with this product. It is designed to be connected to a compatible modular jack that is also compliant. See installation instructions for details. ''NOTICE: This equipment meets the applicable Industry Canada Terminal Equipment Technical Specifications.
Need help?
Do you have a question about the DuraFon PRO and is the answer not in the manual?
Questions and answers