Table of Contents
Advertisement
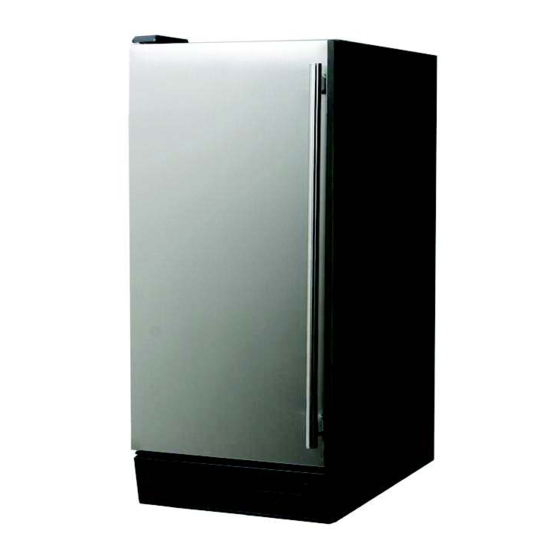
Automatic Undercounter Ice Maker
Máqina Automática para Hacer Hielo
User's Manual (
)
pages 1-26
Manual del usario (
)
páginas 27 a 52
Be sure ice maker is standing upright 24 hours prior to plug-in
Asegúrese que la máquina esté parade en posición vertical 24 horas antes que sea
conectada.
Model/Modelo
EWCIM44ST
Advertisement
Table of Contents

Related Manuals for NORPOLE EWCIM44ST


Summary of Contents for NORPOLE EWCIM44ST
- Page 1 User’s Manual ( pages 1-26 Manual del usario ( páginas 27 a 52 Be sure ice maker is standing upright 24 hours prior to plug-in Asegúrese que la máquina esté parade en posición vertical 24 horas antes que sea conectada. Model/Modelo EWCIM44ST...
-
Page 2: Table Of Contents
TABLE OF CONTENTS Page ICE MAKER SAFETY ..................... 2 IMPORTANT SAFEGUARDS ..................3 - 5 TECHNICAL INFORMATION ..................5 INTRODUCTION ......................6 COMPONENT LOCATIONS ..................6 - 7 ICE MAKER INSTALLATION .................7 - 14 Unpacking ......................7 - 8 Location requirements ..................8 - 9 Electrical requirements ..................9 - 10 Leveling the ice maker ................... -
Page 3: Ice Maker Safety
ICE MAKER SAFETY Your safety and the safety of others are very important We have provided many important safety messages in this manual and on your appliance. Always read and obey all safety messages. This is the Safety Alert Symbol. This symbol alerts you to potential hazards that can injure or kill you and others. -
Page 4: Important Safeguards
IMPORTANT SAFEGUARDS Before the ice maker is used, it must be properly positioned and installed as described in this manual, so read the manual carefully. MC Appliance Corporation strongly recommends that you have a professional install your new machine. The warranty may be affected or voided by an incorrect installation. To reduce the risk of fire, electrical shock or injury when using the ice maker, follow basic precautions, including the following: Plug into a grounded 3-prong outlet;... -
Page 5: Save These Instructions
Do not kink or pinch the power supply cord between the ice maker and cabinet. The fuse (or circuit breaker) size should be 15 amperes. It is important for the ice maker to be leveled in order to work properly. If the ice maker is not level, water may not flow properly through the evaporator (ice mold) and ice production will be less than normal. -
Page 6: Technical Information
Because of potential safety hazards under certain conditions, it is strongly recommended that you do not use an extension cord with this ice maker. TECHNICAL INFORMATION Model: EWCIM44ST Electrical power: 115VAC ~ 60Hz Power consumption: 13.2 kWh/100 lbs of ice Ice-making /-harvest rated current: 3.7A/4.8A... -
Page 7: Introduction
INTRODUCTION The Norpole® EWCIM44ST Ice Maker produces hard, crystal-clear ice cubes, and offers convenience for homeowners and hotel guests. This ice maker has a built-in, insulated ice storage bin and, you also have the option of using an internal or external drainage system. -
Page 8: Ice Maker Installation
Ice scoop Power cord Water inlet Drain outlet Water supply hose Drain hose ICE MAKER INSTALLATION Excessive Weight Hazard Use two or more people to move and install ice maker. Failure to do so can result in back or other injury. Unpacking Remove packaging materials IMPORTANT: Do not remove any permanent instruction labels or the data label on... -
Page 9: Location Requirements
Cleaning before use After you remove all of the packaging materials, clean the inside of your ice maker before using it. See the "Interior cleaning" in the Cleaning and Maintenance section. Location requirements INSTALLATION CLEARANCES: SIDE VIEW TOP VIEW 1” 4”... -
Page 10: Electrical Requirements
Normal operating ambient temperature should be between 50°F (10°C) to 100°F (38°C). Normal operating water temperature should be between 41°F (5°C) and 90°F (32°C). Operation of the ice maker for extended periods out- side of these normal temperature ranges may affect production capacity. It is strongly recommended that a water filter be used. -
Page 11: Leveling The Ice Maker
Before you move your ice maker into its final location, it is important to make sure you have the proper electrical connection: o A standard electrical supply (115V AC only, 60Hz, 15A), properly grounded in accordance with the National Electrical Code and local codes and ordinances, is required. -
Page 12: Reversing The Door Swing
floor, you must adjust the feet to level the ice maker and lock the rollers. If the floor is level, just revolve the two front feet to touch the floor. Reversing the door swing Tools needed: Flathead Screwdriver, Phillips Screwdriver IMPORTANT: Before you begin, unplug the ice maker or disconnect power. -
Page 13: Water Supply
Water Supply The water supply should be ready at the point of installation. The water supply pressure should be a minimum of 15 psig with a static pressure not more than 80 psig. (A wall outlet directly behind the ice machine will make installation easier.) IMPORTANT: 1. - Page 14 NOTE: Never allow the drain hose to hang or loop higher than the floor of the ice storage bin. 3. All horizontal runs of drain lines must have a fall of ¼” per foot. An air gap will likely be required between the ice maker drain tube and the drain/waste receptacle. A standpipe with a trap below it would be acceptable for the drain/waste receptacle.
-
Page 15: Installation Types
Installation Types This ice maker has been designed for Mobile (free-standing) installation. However, it can also be enclosed (as under a cabinet) or Built-in (sealed to the floor). In any case, there must be adequate air space around the unit for ventilation. Mobile installation: A mobile installation will allow you to install the ice maker, free-standing, in any place you desire provided you have access to a water supply and drain. -
Page 16: Operation
OPERATION Final Check List before Operation 1. Have all packing materials and tape been removed from the interior and exterior of the ice maker? 2. Did you clean the ice storage bin? 3. Have the installation instructions been followed, including connecting the machine to water, drain and electricity? 4. -
Page 17: How The Machine Makes Ice
ice storage bin. 4. When the ice storage bin is full, the sheet of cubes will not fall completely and will hold the bin-full probe open. The machine automatically stops making ice and progresses to the cold preservation stage. During this stage, the compressor works regularly to keep the temperature low to minimize ice melting. -
Page 18: Normal Sounds
Evaporator Water inlet Water pump Hot gas valve Compressor Fan motor Condenser Normal sounds Your new ice maker may make sounds that are not familiar to you. Most of the new sounds are normal. Hard surfaces like the floor and walls can amplify the sounds to make it seem louder than they actually are. -
Page 19: Cleaning And Maintenance
7. Leave water supply line and power cord disconnected until ready to reuse. IMPORTANT: Do not touch the power plug when your hands are wet. Never unplug the unit by pulling on the cord. Grasp the plug and pull out firmly. CLEANING AND MAINTENANCE If the ice maker is left unused for a long time, before the next use it must be thoroughly cleaned. -
Page 20: Cleaning And Maintenance
Before proceeding with cleaning and maintenance operations, make sure the power line of the unit is disconnected and the water line is shut off. Exterior cleaning The door and cabinet may be cleaned with a mild detergent and warm water solution such as 1 oz. -
Page 21: Condenser Cleaning
Condenser cleaning A dirty or clogged condenser prevents proper airflow, reduces ice making capacity, and causes higher than recommended operating temperatures that may lead to component failure. Have the condenser cleaned at least once every six months. Unplug the ice maker or disconnect power. Gently pull off the lower front louver. - Page 22 grains/ liter), you may need to clean the system as often as once every 6 months. 1. Make sure that all the ice is off the evaporator. If ice is being formed, wait until the cycle is completed, then press the machine’s ON/OFF switch on the control panel. 2.
-
Page 23: Control Panel
Control panel: Description of LEDs and buttons: Bin full indicator light Bin Full (Red) LED When this is lit, the ice storage bin is full of ice or there is something blocking the bin-full probe. The unit will stop working. When ice cubes are removed from the ice storage bin, freeing the bin-full probe, the Red LED will remain flashing for 3 minutes, then the unit will restart and return to the ice making mode. -
Page 24: Major Functions
Smaller ice setting: By pressing the “Clean” button, you can decrease the size of the ice cubes. The Ice Making (Green) LED will flash as you lower the ice size and will blink continuously when the setting of the smallest ice size has been reached. Larger ice setting: By pressing the “Mode”... -
Page 25: Troubleshooting
TROUBLESHOOTING Before Calling for Service If the unit appears to be malfunctioning, read through the OPERATION section of this manual first. If the problem persists, check the Troubleshooting Guide below and on the following pages. Some of the problems mentioned in the Guide can be resolved easily without a service call. - Page 26 on the bottom. Check water supply or filter may be restricted. Check for a water leak at the water trough. The feet are not leveled and Level and lock the feet. See Leveling the Ice Noise during locked. Maker. operation Certain sounds are normal.
-
Page 27: Limited Warranty
MC Appliance Corporation. Model Parts Labor Compressor Type of Service (Part Only) EWCIM44ST One-Year One-Year Five Years In-Home For Service or Assistance please call 888 775-0202. Or visit us on the web at www.mcappliance.com to request warranty service or order parts. - Page 29 SÍMBOLOS DE SEGURIDAD Su seguridad y la seguridad de los demás es de suma importancia. Tanto en este manual como en la máquina, encontrará varios mensajes de importantes de seguridad. Lea y observe siempre los mensajes de seguridad. Este es el símbolo de Alerta de Seguridad. Advierte sobre posibles riesgos que pueden causar accidentes lesivos e incluso fatales, tanto para usted como para los demás.
- Page 30 PELIGRO PELIGRO • • • • • • • • • • • ADVERTENCIA ADVERTENCIA • • •...
- Page 31 • • • • • • • • • • • • • • • •...
- Page 34 Cuchara para hielo Cordón eléctrico Entrada de agua Salida de drenaje Manguera de drenaje Manguera para suministra agua INSTALACIÓN DE LA MÁQUINA Desembalaje ADVERTENCIA Peligro de peso excesivo Mover e instalar la máquina entro dos personas como mínimo. Si lo hace una sola persona, hay riesgo de que se lesione por el esfuerzo excesivo.
- Page 35 Requisitos del lugar de instalación DISTANCIAS DE INSTALACIÓN: Vista superior Vista lateral 1Š 4Š Parte superior Parte de atrás 1Š 1Š Lado Lado Frente de la unidad Esta máquina debe ser instalada por el personal calificado. • Para que la máquina tenga ventilación adecuada, no debe haber ninguna obstrucción en •...
- Page 36 • • • • PELIGRO...
- Page 37 Circuito de descarga a tierra Por razones de seguridad personal, esta máquina debe tener circuito de descarga a tierra. La máquina viene equipada con un cordón eléctrico con un enchufe de 3 patas, una de la cuales es la conexión al circuito de tierra. Para reducir al mínimo las posibilidades de electrocución, el enchufe se debe conectar a un tomacorriente de 3 patas con circuito de descarga a tierra instalado de acuerdo con el Código Eléctrico Nacional (National Electrical Code) y los reglamentos municipales que correspondan.
- Page 38 Cambio del lado de apertura de la puerta Herramientas necesitadas: destornillador plano, destornillador Phillips IMPORTANTE: Antes de comenzar, desenchufe la máquina o desconecta la potencia. Para quitar la puerta de las bisagras: 1. Quite la cubierta de la bisagra superior. 2.
- Page 42 USO DE LA MÁQUINA Lista de control final antes de la puesta en servicio 1. ¿Se han quitado todos los materiales de embalaje y cintas adhesivas del interior y exterior de la máquina? 2. ¿Se ha limpiado el recipiente de hielo? 3.
- Page 43 • • • • •...
- Page 44 • • • • • • • • • • • •...
- Page 45 • • PRECAUCIÓN ADVERTENCIA...
- Page 46 ADVERTENCIA...
- Page 47 ADVERTENCIA...
- Page 48 ADVERTENCIA...
-
Page 50: Funciones Principales
Ajuste hielo más pequeños: Presionando el botón "Clean" puede reducir el tamaño de los cubos de hielo. El LED verde (la luz indicadora de ciclo de congelamiento) parpadeará como puede usted bajar el hielo tamaño y comenzará a parpadear continuamente cuando el entorno del menor tamaño hielo ha sido alcanzado.
Need help?
Do you have a question about the EWCIM44ST and is the answer not in the manual?
Questions and answers