
Related Manuals for AirLive Ether-FSH2400RS


Summary of Contents for AirLive Ether-FSH2400RS
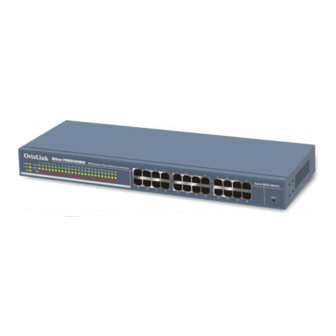
- Page 1 Ether-FSH2400RS Smart Fast Ethernet Switch Windows In-Band Management 24 × 10/100Base-TX ports Auto MDI/MDI-X VLAN, Priority, Bandwidth Control Trunking, Loop Detection User’s Manual...
-
Page 2: Fcc Warning
Contents in this manual are subject to changes without prior notice. About this User’s Manual This User’s Manual aims at helping users to know the key features of Ether-FSH2400RS Fast Ethernet Switch and to install it in a 10/100BASE-TX Fast Ethernet Local Area Network (LAN). OvisLink Corp... -
Page 3: Table Of Contents
In-Band and Out-of-Band Management................. 2 What is VLAN? ......................... 2 Defining VLAN ......................2 Port-based VLAN ......................2 Table Maintenance via Signaling..................3 802.1q VLAN Standard ....................3 What is Priority Queuing? ....................3 Product Features....................... 4 Ether-FSH2400RS Fast Ethernet Switch User’s Manual V1.0... -
Page 4: Table Of Contents
Desktop Installation ......................10 Installation Site Preparation..................10 Cabling Guide........................11 For 10/100BASE-TX ports ................... 11 Auto MDI/MDI-X function ..................11 Making your own UTP/STP cable................11 Connecting to Power....................... 12 LED INDICATORS................14 Ether-FSH2400RS Fast Ethernet Switch User’s Manual V1.0... - Page 5 Vlan Control Submenu ....................25 Device Feature ......................26 Security Function ......................27 Diagnostic Function ......................28 Fault Information ......................28 Device Reset ......................... 28 Pull down Menus......................29 System menu......................... 29 Options menu ........................ 29 Ether-FSH2400RS Fast Ethernet Switch User’s Manual V1.0...
- Page 6 Table of Contents APPENDIX A PRODUCT SPECIFICATIONS ..........30 APPENDIX B TROUBLESHOOTING...............32 Ether-FSH2400RS Fast Ethernet Switch User’s Manual V1.0...
- Page 7 Fig. 3-1 Fastening the brackets on the switch..............9 Fig. 3-2 Attaching the Switch to a 19-inch rack ............10 Fig. 3-3 Desktop installation..................10 Fig 3-13 Connecting the Switch to power outlet ............13 Ether-FSH2400RS Fast Ethernet Switch User’s Manual V1.0...
- Page 8 Table of Contents Tables Table 2-2 Cabling type for 10/100BASE-TX............... 11 Table 4-1 System & Station Port LEDs................ 15 Ether-FSH2400RS Fast Ethernet Switch User’s Manual V1.0...
-
Page 9: Product Overview
Windows Remote Management software Conventionally, configuring a switch's smart management will require users to attach the computer (serial or printer port) directly to the switch's console port. With Ether-FSH2400RS's in-band management capability, users can configure the switch through the Ethernet network. The included Windows management software provides a very simple point-and-click interface to set all the functions. -
Page 10: Loop Detection
RS-232, USB, or Parallel port. The Ether-FSH2400RS is equipped with WinSmart In-band management. It uses the unique RRCP protocol that enables the included Windows utility to manage the switch inside the LAN. However;... -
Page 11: Table Maintenance Via Signaling
The QoS setting for priority per port means that all packets received by the port will be priority frames; Ether-FSH2400RS can also judge the priority of frames by checking the specific bits of VLAN tag or TCP/IP TOS/DS included in the frame format. Ether-FSH2400RS will judge the... -
Page 12: Product Features
802.1p Prority: 2-level , Port Dimensions: 432 × 180 × 44 mm, 19" Based, IP Based(TOS), VLAN rack mountable TAG(TCI) • Weight: 2.7 kg 802.3ad Link Aggregation: 7 • Built-in power supply: 100~240 VAC, Ether-FSH2400RS Fast Ethernet Switch User’s Manual V1.0... - Page 13 Broadcast Storm Control to limit broadcast traffic Status on bandwidth utilization, byte count, packet count, MIB counter Loop detection LED on the front panel Diagnostic software detects Trunking and Loop fault Port speed, Duplex Mode, Flow Control Ether-FSH2400RS Fast Ethernet Switch User’s Manual V1.0...
-
Page 14: Preparation Before Installation
2 Preparation before Installation Preparation before Installation Unpack the Package Before you begin the installation of Ether-FSH2400RS Fast Ethernet Switch, make sure that you have all the necessary accessories that come with your package. Follow the steps below to unpack your package contents: 1. -
Page 15: The Front Panel
Fig. 2-2 Front Panel Reset Button The Ether-FSH2400RS Features a reset button that can restore the switch settings back to factory’s default value. Please press this button if your management software have problem detecting the switch or if the switch is not functioning correctly. The reset button is located on the right side of the... -
Page 16: Ac Power Connector
AC power outlet. The switch supports an input voltages ranging from 100 ~ 240 V @ 50~60 Hz . Power Switch Power Connector Fig. 2-4 Rear Panel Ether-FSH2400RS Fast Ethernet Switch User’s Manual V1.0... -
Page 17: Installation Of The Switch
Rack Mounting Ether-FSH2400RS Fast Ethernet Switch can also be mounted on a standard size 19-inch rack, which can in turn be placed in a wiring closet with other equipments. Before you can mount the switch on the rack, first you must attach the mounting brackets on both sides of the switch with screws, and then mount it as a unit on the rack. -
Page 18: Desktop Installation
Installation Site Preparation You can mount Ether-FSH2400RS Fast Ethernet Switch either on desktop or on a 19-inch rack. If you plan to mount the switch on desktop, please choose a steady, level surface in a well-ventilated area that is free from excessive dust. -
Page 19: Cabling Guide
RJ-45 Interface Cable to Use To an end station Straight-through twisted-pair cable To a hub/switch Straight-through twisted-pair cable Maximum Distance 100 meters Table 2-2 Cabling type for 10/100BASE-TX Making your own UTP/STP cable Ether-FSH2400RS Fast Ethernet Switch User’s Manual V1.0... -
Page 20: Connecting To Power
Fig 2-4 Pair Wires Connecting to Power Ether-FSH2400RS Fast Ethernet Switch features a universal auto-select power supply unit, which allows a power connection to a wide range of input voltages from 90 to 240V @ 50 ~ 60Hz. -
Page 21: Fig 3-13 Connecting The Switch To Power Outlet
3 Installation of the Switch Power Switch Power Connector Power Outlet Fig 3-13 Connecting the Switch to power outlet Ether-FSH2400RS Fast Ethernet Switch User’s Manual V1.0... -
Page 22: Led Indicators
4 LED Indicators LED Indicators Before connecting any network device to Ether-FSH2400RS Fast Ethernet Switch, you should take a few minutes to look over this chapter and get familiar with the front panel LED indicators of your Switch. System LEDs Power (green) to indicate power on/off status LoopDet (yellow) to indicate network loop has formed inside the network. -
Page 23: Led Table
Connection is made Blinking Transmitting/Receiving No connection is made FDX/Col ● Yellow Full Duplex Blinking Collision (in half duplex) Half Duplex 100M ● 100Mbps speed 10Mbps speed Table 4-1 System & Station Port LEDs Ether-FSH2400RS Fast Ethernet Switch User’s Manual V1.0... -
Page 24: Management Software Guide
Please make sure to press the “Update” button after changes Please make sure to “write to the switch” after change settings The Ether-FSH2400RS has a factory reset button on the right side of the front panel. This button will restore switch’s setting to factory’s default values. -
Page 25: Installing The Software
Insert the OvisLink CD into your computer, the Product CD menu should show up automatically. If not, on the File Explorer, please click on “setup.exe” to begin. Click on “ETHER/SNMP Series” and select the “Ether-FSH2400RS” Follow the instruction on screen to install the “WinPCap” and “The Remote Management Utility”... -
Page 26: Status Functions
“Diagnostic”. We will discuss them in the following sections. Please make sure to save to the hardware after changes. Status Functions Click on the Status Tab of the management screen will bring you the overview, port status, and MIB counter sub menus. Ether-FSH2400RS Fast Ethernet Switch User’s Manual V1.0... -
Page 27: Overview Submenu
If you want to know the newest switch’s information of the network, press the Update button. Switch database button You can view the switch database. The database dialog box displays switch’s name, mac address and authentication Key. Ether-FSH2400RS Fast Ethernet Switch User’s Manual V1.0... -
Page 28: Mib Counter Submenu
You can start counter by click the Start button, and click the Stop Button to stop. Clear Counter button is use to clear all MIB counters, it will reset the counters to 0. Polling interval button is used to set the time interval for the frequency of queried. Ether-FSH2400RS Fast Ethernet Switch User’s Manual V1.0... -
Page 29: Port Status Submenu
You can view the port status of the switch that you select. The list box will show the status of port1, port2…,and port26. The port status includes port type, enabled status, link status, speed duplex, flow control, Tx bandwidth control, Rx bandwidth control, and trunk setting status. Ether-FSH2400RS Fast Ethernet Switch User’s Manual V1.0... -
Page 30: Configuration Functions
5 Management Software Guide Configuration Functions Port Configuration Submenu Press the “Config” button, and you will see a dialog like follows. Put the check in the item you want to configure. Ether-FSH2400RS Fast Ethernet Switch User’s Manual V1.0... -
Page 31: Global Configuration Submenu
Global Configuration is used to configure the global port control registers. Press the Refresh button to read the status of the registers. Press the Update button to set the registers as shown in this frame. Ether-FSH2400RS Fast Ethernet Switch User’s Manual V1.0... -
Page 32: Qos Configuration Submenu
Qos Configuration is used to configure the Qos control registers. Press the Refresh button to read the status of the registers. Press the Update button to set the registers. VLAN Configuration Submenu This page is used to configure the vlan table registers. Ether-FSH2400RS Fast Ethernet Switch User’s Manual V1.0... -
Page 33: Vlan Control Submenu
Please make sure to “Save VLAN” after configuration. If the VLAN settings is wrong, it can cause user not enable to enter the switch’s management. In this case, simply reset the switch to factory’s default. Vlan Control Submenu Ether-FSH2400RS Fast Ethernet Switch User’s Manual V1.0... -
Page 34: Device Feature
IP multicast Router port list. Press the Refresh button to read the register. Press the Update button to set the registers, and it will set the register to the selection. Ether-FSH2400RS Fast Ethernet Switch User’s Manual V1.0... -
Page 35: Security Function
This page displays the authentication key of the switch, and the RCP Management Security Mask Configuration. The authentication key is readable in this version. You can press the Refresh button to read the register. The Ether-FSH2400RS does not have MPU unit and can not change the authentication key. -
Page 36: Diagnostic Function
NOT be done again. But the system will restart the process of Auto Negotiation . The hardware reset will reset all the system at a initial state like the process of power on hardware reset. Ether-FSH2400RS Fast Ethernet Switch User’s Manual V1.0... -
Page 37: Pull Down Menus
. Please check the “load application file automatically” to activate. The use of this function is not recommended for the switch as its settings are kept inside the switch’s non-volatile flash memory. Ether-FSH2400RS Fast Ethernet Switch User’s Manual V1.0... -
Page 38: Appendix A Product Specifications
Appendix A Production Specifications Ether-FSH2400RS Fast Ethernet Switch Appendix A Product Specifications • Standard Compliance IEEE 802.3 10BASE-T Ethernet IEEE 802.3u 100BASE-TX Fast Ethernet IEEE 802.1q VLAN standard IEEE 802.1p Class of Service IEEE 802.1ad Link Aggregation ANSI/IEEE Std 802.3 NWay auto-negotiation •... - Page 39 32 ~ 122 °F / 0 ~ 50 °C • Storage Temperature - 40 ~ 149°F / -40 ~ 65 °C • Humidity < 95% (non-condensing) Safety / EMI Certificates UL, TUV, VDE, FCC Class A, CE • Ether-FSH2400RS Fast Ethernet Switch User’s Manual V1.0...
-
Page 40: Appendix B Troubleshooting
• If you find out where the problem is but cannot solve it by yourself, or you simply cannot locate what is at fault, please contact your local dealer for technical support. Ether-FSH2400RS Fast Ethernet Switch User’s Manual V1.0...
Need help?
Do you have a question about the Ether-FSH2400RS and is the answer not in the manual?
Questions and answers