Table of Contents
Advertisement
Quick Links
Advertisement
Table of Contents

Related Manuals for AirLive ARM-201E


Summary of Contents for AirLive ARM-201E
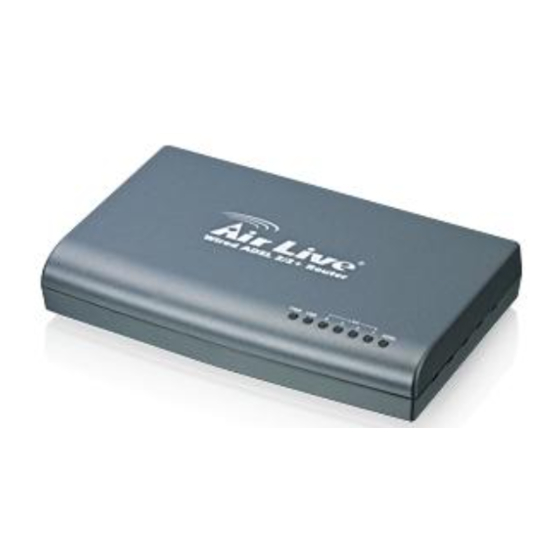
- Page 1 ARM-201E / 204E Wired ADSL2/2+ 1 / 4 Ports Modem Router User’s Manual...
- Page 2 Per FCC 15.21, you are cautioned that changes or modifications not expressly approved by the part responsible for compliance could void the user’s authority to operate the equipment. All brand and product names mentioned in this manual are trademarks and/or registered trademarks of their respective holders. AirLive ARM-201E / 204E User’s Manual...
-
Page 3: Table Of Contents
4.5.3 SNMP............................. 45 4.5.4 UPnP.............................. 45 4.5.5 DDNS ............................. 46 4.5.6 CWMP............................47 ..........................49 AINTENANCE 4.6.1 Administration ..........................49 4.6.2 Time Zone ............................49 4.6.3 Firmware ............................50 4.6.4 System Restart ..........................51 AirLive ARM-201E / 204E User’s Manual... - Page 4 ROBLEMS WITH THE NTERFACE ..............57 ROBLEMS WITH THE OGIN SERNAME AND ASSWORD LAN I ...................... 58 ROBLEMS WITH NTERFACE WAN I ..................... 58 ROBLEMS WITH NTERFACE ..................... 59 ROBLEMS WITH THE NTERNET CCESS AirLive ARM-201E / 204E User’s Manual...
-
Page 5: Chapter 1: Introduction
Chapter 1: Introduction 1.1 Introduction to this ADSL2+ router NOTE: Throughout this manual, some operation illustrations are based on ARM-201E. The corresponding operations are also the same or similar for ARM-204E. This ADSL2+ router is a full-featured ADSL router that provides Ethernet direct connections to individual PCs or local area network with 10/100 Base-T Ethernet. -
Page 6: Setup Wizard
Web-based GUI Configuration / Management Firmware upgrade via Web-based GUI Built-in Diagnostic tool and IP Ping SNMP (Simple Network Management Protocol) Support It’s an easy way to remote control the router via SNMP. AirLive ARM-201E / 204E User’s Manual... - Page 7 PPP over PAP (Password Authentication Protocol; RFC1334) PPP over CHAP (Challenge Authentication Protocol; RFC1994) VPN (IPsec, PPTP, L2TP) pass through Built-in NAT Firewall IP-based Packet filtering Password Protected System Management AirLive ARM-201E / 204E User’s Manual...
-
Page 8: Chapter 2: Hardware Installation
2.2 Front Panel Indicators and Description Front panel of ADSL router has LED indicators to display router’s operating status. One-Port ADSL Router Front Panel (ARM-201E) Descriptions of LED status When connection with Internet (ADSL Connected) is established, this LED will light up. -
Page 9: Back Panel
When connection with Internet (ADSL Connected) is established, this LED will light up. ADSL When this LED is flashing: NO ADSL physical connection 2.3 Back Panel One-Port ADSL Router Back Panel (ARM-201E) Descriptions of All Connectors LINE Connect with phone cable DEFAULT Reset button. -
Page 10: Connect Related Devices
Plug Power Adapter to PWR port on the back panel of the router and the other end to a power outlet. Warning! Use only the power adapter provided in the package. Use of other power adapters may cause hardware damage. AirLive ARM-201E / 204E User’s Manual... -
Page 11: Chapter 3: Connecting Adsl2+ Router Via Ethernet
Double click Network icon. Step 3: Select Configuration tab, then choose TCP/IP from the list of installed network Components and click Properties button. Step 4: You can setup the following configurations in two methods: AirLive ARM-201E / 204E User’s Manual... - Page 12 Option1: Get an IP from Router Automatically Select the IP Address tab. In this page, click Obtain an IP address automatically radio button. Select Gateway tab and click OK AirLive ARM-201E / 204E User’s Manual...
- Page 13 1) At IP Address tab, select Specify an IP address, set default IP address for the Router is 192.168.2.1, so use 192.168.2.X (X is a number between 2 to 254) for IP Address field and 255.255.255.0 for Subnet Mask field. AirLive ARM-201E / 204E User’s Manual...
- Page 14 2) Select Gateway tab and add default Router IP Address “192.168.2.1” in the New gateway field and click Add. Under DNS Configuration tab, select Enable DNS and add DNS values (192.168.2.1) in DNS Server Search Order field then click Add. AirLive ARM-201E / 204E User’s Manual...
- Page 15 (b) Or, go to Start / Settings / Control Panel. In the Control Panel, double-click on Network and Dial-up Connections. Step 2: Right click Local Area Connection (your local network hooked up with ADSL router) and select Properties: AirLive ARM-201E / 204E User’s Manual...
- Page 16 Step 3: Select Internet Protocol (TCP/IP) then click Properties: Configure IP Automatically: Step 4: Select Obtain an IP address automatically and Obtain DNS server address automatically then click OK to complete IP configuring process. AirLive ARM-201E / 204E User’s Manual...
- Page 17 IP address: Fill in IP address 192.168.2.x (x is a number between 2 to 254). Subnet mask: Default value is 255.255.255.0. Default gateway: Default value is 192.168.2.1. Preferred DNS server: Fill in preferred DNS server IP address. Alternate DNS server: Fill in alternate DNS server IP address. AirLive ARM-201E / 204E User’s Manual...
- Page 18 For Windows XP Step 1: Click Start then select Control Panel (in the Classic View). Step 2: Double-click Network Connections icon. AirLive ARM-201E / 204E User’s Manual...
- Page 19 Step 3: Right-click Local Area Connection (local network your ADSL hooked up with) and select Properties: Step 4: Select Internet Protocol (TCP/IP) then click Properties: AirLive ARM-201E / 204E User’s Manual...
- Page 20 Select Use the following IP address and Use the following DNS server addresses. IP address: Fill in IP address 192.168.2.x (x is a number between 2 to 254). Subnet mask: Default value is 255.255.255.0. Default gateway: Default value is 192.168.2.1. AirLive ARM-201E / 204E User’s Manual...
- Page 21 Request timed out. Request timed out. This failure might be caused by cable issue or something wrong in configuration procedure. For Windows Vista Step 1: Click Start then select Control Panel (in the Classic View). AirLive ARM-201E / 204E User’s Manual...
- Page 22 Step 2: Double-click Network and Sharing Center icon. Step 3: Select “Manage Network connections”. AirLive ARM-201E / 204E User’s Manual...
- Page 23 Step 4: Right-click Local Area Connection (local network your ADSL hooked up with) and select Properties: Step 5: Select Internet Protocol (TCP/IP) then click Properties: AirLive ARM-201E / 204E User’s Manual...
- Page 24 Select Obtain an IP address automatically and Obtain DNS server address automatically. Click OK to finish the configuration. Configure IP Address Manually: Step 7: Select Use the following IP address and Use the following DNS server addresses. AirLive ARM-201E / 204E User’s Manual...
- Page 25 192.168.2.1 under DOS prompt following messages will appear: Pinging 192.168.2.1 with 32 bytes of data: Request timed out. Request timed out. Request timed out. This failure might be caused by cable issue or something wrong in configuration procedure. AirLive ARM-201E / 204E User’s Manual...
- Page 26 After you enter User ID and Password, the main webpage will show as below: AirLive ARM-201E / 204E User’s Manual...
-
Page 27: Chapter 4: Configure Adsl2+ Router Via Html Interface
3) Entry of the username and password will be displayed. Enter the default login User Name and Password: The default login User Name of the administrator is admin, and the default login password is airlive. The main webpage will be displayed as below: AirLive ARM-201E / 204E User’s Manual... -
Page 28: Quick Start
This Quick Start will guide you step by step to configure the password, time zone, and WAN settings of you device. This Wizard is a helpful guide for first time uses to the device. NOTE: It is a strong recommendation that using Quick Start to configure your ADSL settings. AirLive ARM-201E / 204E User’s Manual... - Page 29 Please follow the quick start step by step to configure the device. Note: If your ISP doesn’t provide DNS, after you complete Quick Start configuration, please go to Interface Setup Internet to configure your DNS settings. AirLive ARM-201E / 204E User’s Manual...
-
Page 30: Interface Setup
VPI: Virtual Path Identifier. The valid range for the VPI is 0 to 255. VCI: Virtual Channel Identifier. The valid range for the VCI is 1 to 65635 (0 to 31 is reserved for local management of ATM traffic). AirLive ARM-201E / 204E User’s Manual... - Page 31 ISP. Each IP address entered in the fields must be in the appropriate IP form, which is 4 IP octets separated by a dot (x.x.x.x). The Router will not accept the IP address if it is not in this format. AirLive ARM-201E / 204E User’s Manual...
- Page 32 Bridge Mode: The modem can be configured to act as a bridging device between your LAN and your ISP. Bridges are devices that enable 2 or more networks to communicate as if they are 2 segments of the same physical LAN. Please set the Connection type. AirLive ARM-201E / 204E User’s Manual...
- Page 33 IN only means the ADSL router will only accept but will not send RIP packet. OUT only means the ADSL router will only sent but will not accept RIP packet. AirLive ARM-201E / 204E User’s Manual...
-
Page 34: Lan
Dynamic Route: Select the Dynamic Route from RIP1, RIP2-B, and RIP2-M. Please refer to Internet Dynamic Route. The only difference is the interface. Direction: Select the RIP direction from None, Both, In Only and Out Only. AirLive ARM-201E / 204E User’s Manual... - Page 35 DNS Rely Selection: If user wants to disable this feature, he just needs to set both Primary & Secondary DNS to 0.0.0.0. Using DNS relay, users can setup DNS server IP to 192.168.2.1 on their computer. If not, device will perform as NO DNS relay. AirLive ARM-201E / 204E User’s Manual...
-
Page 36: Advanced Setup
Internet router it should contact to route the data most efficiently. Select this option will list the routing table information. You can press ADD ROUTE to edit the static route. [Static Route] Select this option to set Static Routing information. AirLive ARM-201E / 204E User’s Manual... -
Page 37: Nat
LAN as the public IP address you use on the Internet. You define NAT rules that specify exactly how and when to translate between public and private IP addresses. Simply select this option to setup the NAT function for your ADSL router. AirLive ARM-201E / 204E User’s Manual... - Page 38 Users of the public network outside the company can access only the DMZ host. DMZ Host IP Address: Enter the specified IP Address for DMZ host on the LAN side AirLive ARM-201E / 204E User’s Manual...
- Page 39 End port number the same as Start port number. For example, set the FTP Virtual server, you can set the start and end port number to 21. Local IP Address: Enter the IP Address for the Virtual Server in LAN side. AirLive ARM-201E / 204E User’s Manual...
-
Page 40: Qos
This option will provide better service of selected network traffic over various technologies. Deploying QoS management to guarantee that all application receive the service levels required and sufficient bandwidth to meet performance expectations is indeed one important aspect of modem enterprise network. AirLive ARM-201E / 204E User’s Manual... -
Page 41: Adsl
Select this option to set ADSL Mode and ADSL Type information. ADSL Mode: You can set your ADSL mode in this section. The option has Auto Sync-up, ADSL2+, ADSL2, G.DMT, T1.413, G.LITE ADSL Type: ANNEX A, ANNEX I, ANNEX A/L, ANNEX M, ANNEX A/I/J/L/M AirLive ARM-201E / 204E User’s Manual... -
Page 42: Access Management
4. Choose the Application which you want to acce ss for this ACL Rule index. 5. Select the Interface you want to access from. 6. After all settings are ready, click SAVE and continue next ACL Rule Index setting. AirLive ARM-201E / 204E User’s Manual... -
Page 43: Ip Filter
24 rules per interface. If all six rules in an index are Next rules, the data will be sent to the next index for filtering. AirLive ARM-201E / 204E User’s Manual... - Page 44 Source IP Address: Enter the source IP address you wish to deny access to your system. Subnet Mask: Enter the subnet mask of the source IP address. Port Number: Enter the port number of the source IP address. Note that 0 means all that ports are allowed. AirLive ARM-201E / 204E User’s Manual...
- Page 45 Forward means that the data will be allowed into your system. Note that a Forward rule should be the last rule, as no data will be compared to rules after a Forward rule. IP/MAC Filter Set Index: Select the IP/MAC filter set you wish to view. For Example AirLive ARM-201E / 204E User’s Manual...
-
Page 46: Snmp
IP address, convey its capabilities and learn about other devices on the network. In turn, a device can leave a network smoothly an automatically when it is no longer in use. UPnP broadcasts are only allowed on the LAN. AirLive ARM-201E / 204E User’s Manual... -
Page 47: Ddns
This is for people with a dynamic IP from their ISP or DHCP server that would still like to have a DNS name. The Dynamic DNS service provider will give you a password or key. AirLive ARM-201E / 204E User’s Manual... -
Page 48: Cwmp
Auto Configuration Servers (ACS) and establish the configuration automatically. Accordingly other service functions can be provided. TR-069 is the current standard for activation of terminals in the range of DSL broadband market. AirLive ARM-201E / 204E User’s Manual... - Page 49 AirLive ARM-201E / 204E User’s Manual...
-
Page 50: Maintenance
NTP (Network Time Protocol) server. If an NTP server is set, you will only need to set the time zone. If you manually set the time, you may also set Daylight Saving dates and the system time will automatically adjust on those dates. AirLive ARM-201E / 204E User’s Manual... -
Page 51: Firmware
Current Firmware Ver.: This filed displays the current firmware version. New Firmware Location: Type in the location of the file you want to upload in this field or click Browse… to find it. UPGRADE: Click UPGRADE to begin the upload process. AirLive ARM-201E / 204E User’s Manual... -
Page 52: System Restart
The Diagnostic Test page shows the test results for the connectivity of the physical layer and protocol layer for LAN & WAN sides. Note: 1) User ONLY can view PVC0’s Diagnostic Test connection. 2) “Testing ADSL Synchronization” might take 30 sec to execute the Diagnostic Test. AirLive ARM-201E / 204E User’s Manual... -
Page 53: Status
Circuit on which the system status is to be shown. [Device Information] Firmware Version: This filed displays current firmware version. MAC Address: The MAC (Media Access Control) or Ethernet address unique to your modem. AirLive ARM-201E / 204E User’s Manual... - Page 54 Client ADSL Routerand the reference signal power level transmitted from the Central Office DSLAM. Data Rate: This field displays the ADSL data rate AirLive ARM-201E / 204E User’s Manual...
-
Page 55: System Log
Windows File Download dialog box that enables opening or saving the contents of the log to your PC. To remove all entries from the list, click Clear Log. New entries will begin accumulating. If the device is rebooted, the logs are automatically cleared. AirLive ARM-201E / 204E User’s Manual... -
Page 56: Statistic
Ethernet connection. Click on REFRESH to update the screen. [ADSL] The ADSL screen gives you information about how much data your router has transmitted or received across the ADSL connection. Click on REFRESH to update the screen. AirLive ARM-201E / 204E User’s Manual... -
Page 57: Chapter 5: Troubleshooting
Make sure that the telephone company has checked your phone line and set it up for ADSL service. Reset your ADSL line to reinitialize your link to the DSLAM. If these steps fail to correct the problem, contact your local distributor for assistance. AirLive ARM-201E / 204E User’s Manual... -
Page 58: Problems With The Web Interface
Press the DEFAULT button for five seconds, and then release it. When the ADSL LED begins to blink, the defaults have been restored and the router restarts. The default username is “admin”. The default password is “airlive”. The Password and Username fields are case-sensitive. Make sure that you enter the correct password and username using the proper casing. -
Page 59: Problems With Lan Interface
MAC address or the host name. The username and password apply to PPPoE and PPoA encapsulation only. Make sure that you have entered the correct Service Type, User Name and Password (be sure to use the correct casing). AirLive ARM-201E / 204E User’s Manual... -
Page 60: Problems With The Internet Access
ESSID, channel and WEP keys (if WEP encryption is activated). Internet connection disconnects. STEPS CORRECTIVE ACTION Check the schedule rules. If you use PPPoA or PPPoE encapsulation, check the idle time-out setting. Contact your ISP. AirLive ARM-201E / 204E User’s Manual...
Need help?
Do you have a question about the ARM-201E and is the answer not in the manual?
Questions and answers