Table of Contents
Advertisement
Quick Links
Advertisement
Table of Contents

Related Manuals for AirLive A.DUO


Summary of Contents for AirLive A.DUO
- Page 1 A.DUO Dual Band High-Power PoE AP Router User’s Manual...
- Page 2 OvisLink Corp. has made the best effort to ensure the accuracy of the information in this user’s guide. However, we are not liable for the inaccuracies or errors in this guide. Please use with caution. All information is subject to change without notice All Trademarks are properties of their respective holders. AirLive A.DUO User’s Manual...
-
Page 3: Regulatory Information
(2) this device must accept any interference received, including interference that may cause undesired operation. For product available in the USA/Canada market, only channel 1~11 can be operated. Selection of other channels is not possible. AirLive A.DUO User’s Manual... -
Page 4: Important Note
United States. The use of the system in any other combination (such as co-located antennas transmitting the same information) is expressly forbidden. © 2011, OvisLink Corporation. All rights reserved. AirLive A.DUO User’s Manual... -
Page 5: Table Of Contents
1.5.3 WISP + AP Mode ..................5 1.5.4 Bridge + AP Mode..................5 1.5.5 Dual Bridge Mode..................6 1.5.6 Client + AP Mode..................7 1.5.7 Bridge + Gateway ..................8 2. Installing the A.DUO ................10 2.1 Before You Start .................10 2.2 Installing A.DUO.................10 2.3 Knowing Your A.DUO.................11 2.3.1. - Page 6 3.5.4 Set the Time and Date ................33 3.5.5 Change System Management ..............34 3.5.6 Change Password ..................34 4. Wireless and WAN Settings ..............35 4.1 About A.DUO Menu Structure ............35 4.2 General Wireless Settings ..............37 4.2.1 Regulatory Domain ..................39 4.2.2 Network SSID ....................39 4.2.3 Site Survey ....................39...
- Page 7 5.1.7 Firmware Upgrade ................... 118 5.1.8 Configuration Save and Restore.............. 119 5.1.9 Factory Default ..................120 5.1.10 Reboot System ..................120 5.1.11 A.DUO Emergency Recovery ..............121 6. Device Status & Tools ................123 6.1 Device Status ...................123 6.1.1 Device Information...................123 6.1.2 Wireless Information ................125 6.1.3 LAN Information..................126...
-
Page 8: Introduction
Introduction 1.1 Overview The A.DUO is a multi-functional dual band concurrent AP Router that can operate in 7 different wireless modes.. The AP features 2 Atheros 11a/b/g radios that run in 5GHz or 2.4GHz frequency band. Moreover, it provides hi-power at 11a mode for extra long distance application. -
Page 9: Firmware Upgrade And Tech Support
FAQ are frequently updated with latest information. In addition, you might find new firmware that either increase software functions or provide bug fixes for A.DUO. You can reach our on-line support center at the following link: http://www.airlive.com/support/support_2.jsp Since 2009, AirLive has added the “Newsletter Instant Support System” on our website. -
Page 10: Dual Band Router Mode
1.5.1 Dual Band Router Mode In Dual Band Concurrent mode, the radio1 works in 5Ghz while radio2 works in 2.4GHz mode. That means the A.DUO can provide Internet service to both 5GHz (like game network) and 2.4GHz (like PC network) at the same time. -
Page 11: Dual Ap Mode
1. Introduction 1.5.2 Dual AP Mode In Dual AP mode, both wireless interface of A.DUO are set as AP and provide hotspot service on each interface. Radio1 is set to 11a mode while Radio2 is set to 11g/b Mode (changeable to 11a also). This mode is most useful for Dual Band Hotspot function such as in the hotels, shopping malls, or offices. -
Page 12: Wisp + Ap Mode
In this mode, Radio1 (in 11a mode) acts as a client to connect with remote WISP Base Station. Radio2 (in 11g/b mode) works as an AP router to allow subscriber to share the WISP connection wirelessly. Using the A.DUO, WISP no longer requires 2 AP/CPE to provide wireless access in subscriber’s home or office. -
Page 13: Dual Bridge Mode
Access Point. It can not connect with another Bridge. 1.5.5 Dual Bridge Mode In Dual WDS Bridge mode, both wireless interface of A.DUO are set as WDS Bridge and connect to remote network. This mode can be used to extend the distance of remote Bridge connection. -
Page 14: Client + Ap Mode
1. Introduction The A.DUO’s Bridge mode can be configured as “WDS Bridge” or “Bridge Infrastructure”. In WDS Bridge, you must enter the remote AP’s MAC Address. It can connect with another WDS Bridge. In Bridge Infrastructure, you do not need to enter remote AP’s MAC address. It work like a client mode with MAC address transparency. -
Page 15: Bridge + Gateway
Router in 11a/b/g mode. This mode is useful if your remote Base Station is working in WDS Bridge mode to transmit Internet broadband. The A.DUO’s Bridge mode can be configured as “WDS Bridge” or “Bridge Infrastructure”. In WDS Bridge, you must enter the remote AP’s MAC Address. It can connect with another WDS Bridge. - Page 16 1. Introduction AirLive A.DUO User’s Manual...
-
Page 17: Installing The A.duo
It is important to read through this section before you install the A.DUO. The A.DUO’s PoE port is 48V 802.3af compliant. If you need to power the A.DUO by PoE, you need to purchase 802.3af compliant PoE kit (e.g. AirLive PoE-48PB) or PoE switch. -
Page 18: Knowing Your A.duo
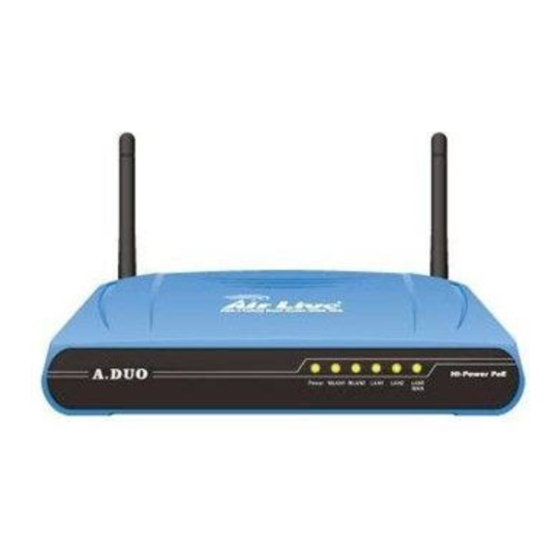
2. Installing the A.DUO 2.3 Knowing Your A.DUO 2.3.1. Front side introduction LED # Display Description Power Solid Green LED while the device is powered on, either by power adaptor or PoE. WLAN1 Solid Green LED while the device is powered on. -
Page 19: Back Side Introduction
2. Installing the A.DUO 2.3.2. Back side introduction Port # Display Description WLAN1 Detachable antenna with R-SMA connector. 2 indoor 2dBi antennas are delivered. Power Adaptor 5.5V 2.5A power supply adaptor delivered with product. RESET Reset button for rebooting and reset device as default factory value. -
Page 20: Installation Steps
2. Installing the A.DUO 2.4 Installation steps This section describes installation steps required for the A.DUO before it can work properly in your network. 2.4.1. Installation Steps by using LAN port Install antennas into the A.DUO Connect the broadband line into the LAN3/WAN port of the A.DUO Connect your PC to LAN1 or LAN2 port. - Page 21 2. Installing the A.DUO 1. Install antennas into the A.DUO 2. Connect the broadband line into the LAN3/WAN port of the A.DUO 3. Connect the power jack to the power port. 4. Wait for 5 minutes. Then on your Notebook PC, scan and connect to “airlive2”...
- Page 22 10. Choose WPA2-PSK and enter your own encryption key (please write down and do not forget it is case sensitive). Then click on “Apply” button 11. The A.DUO will reboot. After about 3 minutes, please try to access the network again. You will be prompted to enter your encryption key.
-
Page 23: Internet Installation Steps
Please finish the LAN port and Wireless installations first in 2.4.1 and 2.4.2 before performing the following steps. If you are using A.DUO as a router, please follow the steps below: Please make sure the Internet line is connected to the WAN port. - Page 24 2. Installing the A.DUO Please enter your ISP’s authentication Information and Click on “Apply” button. Here are some guidelines. If your Internet connection is ADSL, it is most likely using the following option: your ISP already provides you with PPPoE authentication information,...
-
Page 25: Configuring The A.duo
(http), secured web (https), command line (telnet), secured command shell (SSH, SSH2), and SNMP management. In this chapter, we will explain A.DUO’s available management interfaces and how to get into them. Then, we will provide the introduction on Web Management and recommended initial settings. -
Page 26: Prepare Your Pc
3. Configuring the A.DUO 3.2 Prepare Your PC The A.DUO can be managed remotely by a PC through either the wired or wireless network. The default IP address of the A.DUO is 192.168.1.1 with a subnet mask of 255.255.255.0. This means the IP address of the PC should be in the range of 192.168.1.2 to 192.168.1.254. -
Page 27: Management Interface
The A.DUO can be configured using one the management interfaces below: 3.3.1 Web Management (HTTP): You can manage your A.DUO by simply typing its IP address in the web browser. Most functions of A.DUO can be accessed by web management interface. We recommend using this interface for initial configurations. - Page 28 After you pass the security warning screen, you will enter the secured web management interface. The default password is “airlive”. Please ignore the “Certificate Error” warning icon, it just notice you that you are in an un-certificated site, you still can configure the A.DUO without limitation.
-
Page 29: Command Line Interface (Telnet)
Chapter 5 3.3.3 Command Line Interface (Telnet): A.DUO can be managed through the command line interface (CLI). It is possible to write a text script file, and then paste it into the CLI to execute several commands at once. -
Page 30: Secure Shell (Ssh, Ssh2)
Once you have download and install Putty. Please follow the figure below to make a connection with A.DUO: Choose “SSH” as indicated in the diagram Enter the IP address of A.DUO Click on “Open” to start the SSH session. AirLive A.DUO User’s Manual... - Page 31 3. Configuring the A.DUO When the following screen appear, click on “Yes” to continue When the following screen appears, please enter “root” for login. Then keyin the “airlive” as default password. Now you are ready to enter commands To get a list of a vailable command and their usage, please type “help”...
-
Page 32: Snmp Management
“Web Management” on this guide. 3.4.1 Getting into Web Management Normal Web Management (HTTP) To get into the Normal Web Management, simply type in the A.DUO’s IP address (default IP is 192.168.1.1) into the web browser’s address field. Secured Web Management (HTTPS) To get into the Secured Web Management, just type “https://192.168.1.1”... - Page 33 3. Configuring the A.DUO A security warning screen from your browser will then pop-up depending on the browser you use. Please follow step below to clear the security screen. Internet Explorer: Select “Continue to this website” to proceed Firefox: Select “or you can add an exception”...
- Page 34 3. Configuring the A.DUO Click on “Add Exception” Click on “Get Certificate”. Then, please enter A.DUO’s IP address. Finally, please click on “Confirm Security Exception.” AirLive A.DUO User’s Manual...
-
Page 35: Welcome Screen And Login
Therefore, the function will only appear in these 2 modes. For this reason, the first step to configure the A.DUO is to select the wireless mode. The router mode specific functions are also in this menu category. For explanation of different wireless modes, please refer to Chapter 1. - Page 36 After you click on the function category, the following screen will appear corresponding to the menu category you selected. The following example is when you selected the “System Configuration”. If you are placing the A.DUO behind router or firewall, you might need to open virtual server ports to A.DUO on your firewall/router HTTP:...
-
Page 37: Initial Configuration
3.5.1 Choose the wireless Operation Modes The wireless settings of A.DUO are dependant on the wireless operation mode you choose. Therefore, the first step is to choose the operation mode. For explanation on when to use what operation mode, please refer to Chapter 1. -
Page 38: Change The Device's Ip Address
3.5.2 Change the Device’s IP Address The default IP address is at 192.168.1.1. You should change it to the same subnet as your network. Also, if you want to manage A.DUO remotely, you have to set the Gateway and DNS server information. -
Page 39: Change The Country Code
3. Configuring the A.DUO 3.5.3 Change the Country Code The legal frequency and channels in 5GHz spectrum varies between countries. The default country code is United Kingdom which should require no changes If you are living in Europe. If you are living outside EU, you should change the country code accordingly. In the example below, we will change the country code to United States which enables the use of 5.8GHz spectrum. -
Page 40: Set The Time And Date
3. Configuring the A.DUO 3.5.4 Set the Time and Date It is important that you set the date and time for your A.DUO so that the system log will record the correct date and time information. Please go to “System Configuration” ->Time Settings. -
Page 41: Change System Management
“System Configuration”-> “System Management”. For WISP administrators, you can consider turning off HTTP and Telnet for security purpose. 3.5.6 Change Password You should change the password for A.DUO at the first login. To change password, please go to “System Configuration” -> “Password Settings” menu. AirLive A.DUO User’s Manual... -
Page 42: Wireless And Wan Settings
Chapter 5. 4.1 About A.DUO Menu Structure The A.DUO’s web management menu is divided into 4 main sections: Operation Modes, System Configurations, Tools and Device Status. The main menus’ options are always displayed on the top of the web management page. - Page 43 We will talk about this menu’s function in Chapter 5. Tools: Discover network status using ping, trace route and other tools Device Status: This section for monitoring the status of A.DUO. It provides information on device status, Ethernet status, wireless status, wireless client table, and system log.
-
Page 44: General Wireless Settings
4. Wireless and WAN Settings 4.2 General Wireless Settings The wireless settings of A.DUO are dependant on the wireless operation mode you choose. Therefore, the first step is to choose the operation mode. For explanation on when to use what operation mode, please refer to Chapter 1. - Page 45 4. Wireless and WAN Settings The A.DUO device provides all 14 modes of wireless operational applications with: Mode Radio 1(11a) Radio2(11a/b/g) Applications Dual Band Router AP Router AP Router Dual Home Networks: 5GHz for Games/AV and 2.4GHz for PC Dual AP Mode...
-
Page 46: Regulatory Domain
The SSID is the network name used to identify a wireless network. The SSID must be the same for all devices in the same wireless network. In A.DUO, it is possible to create more than one SSID in AP and AP Router mode, please check the “Multiple SSID & VLAN”... - Page 47 Client Infrastructure or Bridge Infrastructure modes. Once you click on this button, A.DUO will attempt to make a connection with the selected ESSID. If there is encryption needed, the A.DUO will prompt you to enter the encryption key. Please make sure you enter the correct encryption key, the A.DUO will not check whether the...
-
Page 48: Signal Survey
4.2.5 Radio Mode (11a, SuperA, TurboA) Operation Mode -> Setup -> Radio Mode A.DUO has 4 different options for WLAN transmission. All devices in the same network should use the same WLAN mode. 11a mode (normal-A): This is the IEEE standard for WiFi operating in 5GHz frequency band. -
Page 49: Supera Option
Channel 149 to 161 are available only to United States and a few other countries. If you are living outside EU, please change the country from the “Regulatory Domain” option in this page. Below is the table list of channels and frequency. AirLive A.DUO User’s Manual... -
Page 50: Channel Width
In 802.11a spec, each channel occupies 20MHz channel width. Therefore, each channel will jump by number of 4 (i.e. 36, 40, 44…etc). You can change the Channel Width to 40MHz (Turbo), 10MHz (Half) or 5MHz (Quarter) to either increase performance or reduce the interference problem. AirLive A.DUO User’s Manual... -
Page 51: Security Settings
Security settings allow you to use encryption to secure your data from eavesdropping. You can select different security policy to provide association authentication and/or data encryption. The A.DUO features various security policies including WEP, 802.1x, WPA, WPA-PSK, WPA2, WPA2-PSK, WPA-Auto, and WPA-PSK-Auto. Please note not all security policies are available in all operation modes. - Page 52 Key Length and Key type you choose. Key Length: The A.DUO offers 64bit, 128 bit, and 152 bit for WEP key length. The longer the Key Length, the more secure the encryption is.
- Page 53 802.1x allows users to leverage a RADIUS server to do association authentications. You can also enable dynamic WEP key (128 bit) to have data encryption. You do not have to enter the WEP key manually because it will be generated automatically and dynamically. AirLive A.DUO User’s Manual...
- Page 54 Shared Secret: This is used by your RADIUS server in the Shared Secret field in RADIUS protocol messages. The shared secret configured in the A.DUO must match the shared secret configured in the RADIUS server. The shared secret can contain up to 64 alphanumeric characters.
- Page 55 WPA-PSK or WPA2-PSK. Pre-shared Key: This is an ASCII string with 8 to 63 characters. Please make sure that both the A.DUO and the wireless client stations use the same key. Encryption Type: There are two encryption types TKIP and CCMP (AES).
-
Page 56: Distance
4.2.10 Distance Operation Mode -> Setup -> Distance Please enter the distance to the remote wireless device here. The A.DUO will then calculate the appropriate ACK Timeout value automatically. It is very important that you enter the correct distance for long distance connection. Failure to do so will result in poor performance. -
Page 57: Advance Settings
4.2.11 Advance Settings Operation Mode -> Setup -> Advance Settings This page includes all the wireless settings that change the RF behaviors of A.DUO. It is important to read through this section before attempting to make changes. Beacon Interval: Beacon Interval: The device broadcasts beacon frames regularly to announce its existence. - Page 58 This function is available only for the Access Point and AP router mode. Transmit Power: You can adjust the transmit output power of the A.DUO’s radio from 10dBm to 24dBm. The higher the output power, the more distance A.DUO can deliver.
- Page 59 4. Wireless and WAN Settings The easiest way to enter AckTimeOut value is by entering the distance in “Operation Mode -> Setup -> Distance”. The A.DUO will then calculate and enter the correct value for you. Press the “Apply” button to begin the calculation.
-
Page 60: Access Control (Acl)
4.2.12 Access Control (ACL) Operation Mode -> Setup -> Access Control The A.DUO allows you to define a list of MAC addresses that are allowed or denied to access the wireless network. This function is available only for Access Point and AP Router modes. -
Page 61: Multiple Ssid
This function is available only for Access Point and AP Router modes. Multiple SSID allows A.DUO to create up to 4 different wireless networks (SSID). It is also known as “Virtual AP” function. Each SSID can have its Encryption type, VLAN Tag, and TOS settings. In the following diagram, the A.DUO uses Multiple SSID function to create separate Bridge and... - Page 62 Click here to apply changes on adding or deleting SSID How to add a SSID You can add up to 4 SSID in A.DUO. Please follow the procedure below: Enter the SSID name (i.e. BridgeNet) Select the Security Policy (i.e. WPA-PSK) Enter the Security Key (i.e.
- Page 63 Select the SSID you want to modify or delete The SSID’s settings will be displayed in the box area. Modify any settings. Click on “Apply” to complete the modification Or click on “Delete Selected” to delete the SSID AirLive A.DUO User’s Manual...
- Page 64 4. Wireless and WAN Settings Configure the VLAN and DiffServ Markings When you check the Enable VLAN for All SSIDs and/or Enable DiffServ Marking, the following screen will appear: AirLive A.DUO User’s Manual...
- Page 65 VLAN IP: Each SSID can be given with different VLAN IP group. Please notice that the management IP in the VLAN will also be changed. For example, if you define the VLAN IP to be 192.168.2.X subnet, then the A.DUO’s management IP in the group will change to 192.168.2.1.
- Page 66 WEP; the other policy can use WPA-PSK. Once you enable the VLAN ID. The incoming packet from Ethernet port to your VLAN group must carry the same VLAN ID tag or the packet will be dropped. AirLive A.DUO User’s Manual...
-
Page 67: Wmm Qos Setting
WMM Settings is to specify parameters on multiple data queue for better performance of differentiated wireless traffic like Voice-over-IP (VoIP), other types of audio, video, and streaming media as well as traditional IP data over the AP. AirLive A.DUO User’s Manual... - Page 68 (FTP data, for example): Data 2 (Video, VI): High priority queue, minimum delay. Time-sensitive data such as Video and other streaming media are automatically sent to this queue. AirLive A.DUO User’s Manual...
- Page 69 ECWmin: The value specified for the Minimum Contention Window is the upper limit of a range for the initial random backoff wait time. The number used in the random backoff is initially a random number between 0 and the number defined for the Minimum Contention Window. AirLive A.DUO User’s Manual...
- Page 70 This value specifies (in milliseconds) the Transmission Opportunity (TXOP) for client stations; that is, the interval of time when a WMM client station has AirLive A.DUO User’s Manual...
-
Page 71: Radius Settings
If you choose to use 802.1x, WPA, or WPA2 as security policy, you might need to set the RADIUS server settings. To Enable RADIUS Server: Server IP: The IP address of the RADIUS server. Port Number: The port number that your RADIUS server uses for authentication. The default setting is 1812. AirLive A.DUO User’s Manual... -
Page 72: Bandwidth Control
Bandwidth Control can limit the maximum speed of entire wireless interface or individual device. It is also known as Traffic Shaping. The A.DUO provides both Total Bandwidth and Per-User Bandwidth Control for both uplink and downlink speed. It controls the speed of both wireless and wired interface. - Page 73 Infrastructure Mode, Bridge Mode, and WISP Router Mode. For WISP operator who use A.DUO as the client side device; setting the Total Bandwidth control on the A.DUO will easy the loading on the AP for bandwidth management. To begin, please enable the Bandwidth Management first.
- Page 74 Per User Bandwidth Control: Per user Bandwidth Control can limit speed of individual PC and network device. The A.DUO allows multiple Per-User bandwidth rules and can limit the bandwidth by IP address, MAC address, or IP segment. Please first enable the Bandwidth Control, then select “Per User Bandwidth Control”...
- Page 75 Uplink Max: Enter the speed you wish to limit the upload traffic in kbps Example 1: Total Bandwidth Control In this example, the A.DUO is in Client Infrastructure mode connecting to a remote AP. We want to limit the Bandwidth of the link to 2048Kbps download and 512kbps Upload.
- Page 76 4. Wireless and WAN Settings Example 2: Per User Bandwidth Control In this example, the A.DUO is Access Point mode. There is a wireless client connecting to A.DUO with MAC address of 00:04:6F:11:11:11. We want to limit the bandwidth of the wireless client to 1024 downstream and 512K upstream using A.DUO’s Per-User...
- Page 77 Enter the downlink speed as “1024” and uplink speed as “512”. Step 5 Click on “Add” button to add the bandwidth policy Step 6 This new policy should appear on the button. You can enable/disable it. AirLive A.DUO User’s Manual...
-
Page 78: Ap Specific Settings
The Access Point mode is the most basic mode of multi-function Access Point. In this mode, the AP will act as a central hub for different Wireless LAN clients. Some hotspot Access Points requires 802.1x authenticator function to authenticate a user before providing internet service. AirLive A.DUO User’s Manual... - Page 79 Disable SSID Broadcasting: Enable the check box if you want to hide your SSID in the network. This prevent an un-welcomed client survey your radio. Radio Mode: Connection modes on A.DUO and its wireless client. Note that the client must support the same mode as A.DUO to connect.
-
Page 80: Bridge Mode Specific Settings
4. Wireless and WAN Settings 4.4 Bridge Mode Specific Settings The A.DUO supports Bridge connection through either “WDS” or “Bridge Infrastructure settings. It is selectable under the Bridge mode settings as shown below: WDS Bridge (Pure MAC): WDS Bridge mode can make Point-to-Point and Multi-Point connections. - Page 81 When you require fast performance When you require multiple star topologies. Bridge Infrastructure When you are connection both Bridge network and wireless client to the remote Access Point When you require more advance security like WPA and WPA2 AirLive A.DUO User’s Manual...
-
Page 82: Wds Bridge Settings
When you add an entry to the WDS setting and select WEP encryption, the system will ask you which key to use. All devices on the network must have the same sets of keys, but each AirLive A.DUO User’s Manual... - Page 83 It is necessary to enter the same set of keys in the same WDS network. When you select WEP, the A.DUO will ask you to select from one of the 4 keys. Please be sure to select the same key on both side of the link.
-
Page 84: Client Mode Specific Settings
LAN to the Ethernet port of the client mode AP. This mode is mostly used as a CPE device for WISP subscriber. To connect to an access point, use the “Site Survey” button to find the Access Point. Local Area Network AirLive A.DUO User’s Manual... - Page 85 Click here to show the signal strength of Select the access point you want to connect the selected access point. and then click the “ASSOCIATE” button. The Signal Survey pop up windows shows as following: AirLive A.DUO User’s Manual...
- Page 86 4. Wireless and WAN Settings After the access point is selected, its SSID shows automatically in the Network ID (SSID) field. AirLive A.DUO User’s Manual...
-
Page 87: Gateway Mode Specific Settings
4. Wireless and WAN Settings 4.6 Gateway Mode Specific Settings In Gateway mode, router functions are added between one Ethernet port and other network interfaces. Therefore, the ISP subscriber can share the ISP connection without need for extra router. AirLive A.DUO User’s Manual... -
Page 88: Wan Port Settings
WAN port connection. Clone MAC Address: Some service provider (Cable Modem provider) lock to certain MAC address. In this situation, the WAN port of A.DUO needs to clone the MAC address. Please check the “Clone MAC address” box and enter the address that need to be cloned. - Page 89 4. Wireless and WAN Settings AirLive A.DUO User’s Manual...
-
Page 90: Pppoe Server Settings
4. Wireless and WAN Settings 4.6.2 PPPoE Server Settings The PPPoE server setting is only available when the A.DUO is in Dual Band Router mode. The maximum number of concurrent accounts is 14. Operation Mode -> Setup -> PPPoE Server Settings Enable/Disable: Used to enable or disable PPPoE server. -
Page 91: Pppoe Server Setup Example
PPPoE client will get an IP address between remote start IP and remote end 4.6.3 PPPoE Server Setup Example In this exercise, we will setup 2 PPPoE Server Accounts in A.DUO according to the Topology Diagram below. IP address: 192.168.20.2 Subnet mask: 255.255.255.0... - Page 92 Exercise: Connect all devices according to the IP address and topology on the Topology Diagram Go to A.DUO and set the operation mode to “Dual Band Router” From the wireless settings, please choose the “PPPoE” Server” AirLive A.DUO User’s Manual...
- Page 93 4. Wireless and WAN Settings setup the PPPoE server according to the information: Configure the WAN PPPoE client account on Router 1 and Router2. AirLive A.DUO User’s Manual...
-
Page 94: Dhcp Server Settings
Operation Mode -> Setup -> DHCP Server Settings DHCP Server Settings is to assign private IP address to the devices in your local area network (LAN). Note that A.DUO keeps the IP address of 192.168.1.1 and act as the default gateway of the LAN. -
Page 95: Multiple Dmz
Operation Mode -> Setup -> Multiple DMZ Multiple DMZ opens all TCP/UDP ports to particular IP address on the LAN side. It allows setting up servers behind the A.DUO. Select a DMZ type and then enter the local DMZ IP address Note: A DMZ server is a common term used to describe the default virtual server. -
Page 96: Virtual Server Settings
LAN that may be accessed by any Internet user. Internet data destined for the specified public port will be directed to the specified private port number on the LAN client with the specified private IP address. AirLive A.DUO User’s Manual... -
Page 97: Special Applications
Note: You can use up to 3 sets of opened ports for a specific application. The opened ports can be separated by a comma and no spaces are allowed (e.g. 2300-2305, 4300-4305, 5300-5305). AirLive A.DUO User’s Manual... -
Page 98: Ip Filtering Settings
IP. Disable IP filtering: No IP filtering is performed. Grant IP access: Data traffic satisfying rules below are allowed / forwarded. Deny IP access: Data traffic satisfying rules below are denied / filtered. AirLive A.DUO User’s Manual... -
Page 99: Ip Routing Settings
To grant or deny IP address, select ADD or Delete Selected. 4.6.8 IP Routing Settings Operation Mode -> Setup -> IP Routing Settings The IP Routing Settings allows you to configure routing feature in the gateway AirLive A.DUO User’s Manual... - Page 100 Static routes will override routes learned by standard routing protocol discover methods. IP Routing Table: To delete a static route from the table, select the route and click DELETE SELECTED. Note: Changes to the routing table will take effect immediately. AirLive A.DUO User’s Manual...
-
Page 101: Dynamic Dns Settings
Operation Mode -> Setup -> Dynamic DNS Settings Dynamic DNS (DDNS) allows you to create a hostname that points to your dynamic IP or static IP address or URL. A.DUO provide Dynamic DNS client using DynDNS, please visit http://www.dyndns.org for detail. -
Page 102: Remote Management Settings
Timeout: The default management timeout is 10 minutes. After timeout, the A.DUO will ask you to login again. You can change the timeout value here. HTTP Web Server Access: You can enable or disable HTTP service from WAN side... -
Page 103: Wisp Specific Settings
In WISP + AP mode, the Radio 1 is actually a wireless client of the WISP wireless node and also the gateway of the local area network. Gateway mode acts both in AP and Router which included in these operation modes: AP + Gateway and Gateway + AP. AirLive A.DUO User’s Manual... -
Page 104: Wan Port Settings
4.7.1 WAN Port Settings Operation Mode -> Setup -> WAN Port Settings The A.DUO support different authentication and IP assignment standards for the WAN port. It includes fixed IP, DHCP, PPPoE and PPTP protocols. Please consult with your ISP about what authentication type is used for the WAN port connection. - Page 105 4. Wireless and WAN Settings Clone MAC Address: Some service provider (Cable Modem provider) lock to certain MAC address. In this situation, the WAN port of A.DUO needs to clone the MAC address. Please check the “Clone MAC address” box and enter the address that need to be cloned.
- Page 106 4. Wireless and WAN Settings AirLive A.DUO User’s Manual...
-
Page 107: Dhcp Server Settings
Operation Mode -> Setup -> DHCP Server Settings DHCP Server Settings is to assign private IP address to the devices in your local area network (LAN). Note that A.DUO keeps the IP address of 192.168.1.1 and act as the default gateway of the LAN. -
Page 108: Multiple Dmz
Operation Mode -> Setup -> Multiple DMZ Multiple DMZ opens all TCP/UDP ports to particular IP address on the LAN side. It allows setting up servers behind the A.DUO. Select a DMZ type and then enter the local DMZ IP address Note: A DMZ server is a common term used to describe the default virtual server. -
Page 109: Virtual Server Settings
LAN that may be accessed by any Internet user. Internet data destined for the specified public port will be directed to the specified private port number on the LAN client with the specified private IP address. AirLive A.DUO User’s Manual... -
Page 110: Special Applications
Note: You can use up to 3 sets of opened ports for a specific application. The opened ports can be separated by a comma and no spaces are allowed (e.g. 2300-2305, 4300-4305, 5300-5305). AirLive A.DUO User’s Manual... -
Page 111: Ip Filtering Settings
IP. Disable IP filtering: No IP filtering is performed. Grant IP access: Data traffic satisfying rules below are allowed / forwarded. Deny IP access: Data traffic satisfying rules below are denied / filtered. AirLive A.DUO User’s Manual... -
Page 112: Ip Routing Settings
To grant or deny IP address, select ADD or Delete Selected. 4.7.7 IP Routing Settings Operation Mode -> Setup -> IP Routing Settings The IP Routing Settings allows you to configure routing feature in the gateway AirLive A.DUO User’s Manual... - Page 113 Static routes will override routes learned by standard routing protocol discover methods. IP Routing Table: To delete a static route from the table, select the route and click DELETE SELECTED. Note: Changes to the routing table will take effect immediately. AirLive A.DUO User’s Manual...
-
Page 114: Dynamic Dns Settings
Operation Mode -> Setup -> Dynamic DNS Settings Dynamic DNS (DDNS) allows you to create a hostname that points to your dynamic IP or static IP address or URL. A.DUO provide Dynamic DNS client using DynDNS, please visit http://www.dyndns.org for detail. -
Page 115: Remote Management Settings
Timeout: The default management timeout is 10 minutes. After timeout, the A.DUO will ask you to login again. You can change the timeout value here. HTTP Web Server Access: You can enable or disable HTTP service from WAN side... -
Page 116: System Configuration
The Device IP Settings screen allows you to configure the IP address and subnet of the device. Although you can rely on a DHCP server to assign an IP address to the A.DUO automatically, it is recommended that you configure a static IP address manually in most applications. - Page 117 66.218.71.80. In order to do this, a query is made by the requesting device to a DNS server to provide the necessary information. If your system administrator requires you to manually enter the DNS Server addresses, you should enter them here. Click APPLY to go to the next screen. AirLive A.DUO User’s Manual...
-
Page 118: Time Settings
5.1.2 Time Settings System Configuration ->Time Settings It is important that you set the date and time for your A.DUO so that the system log will record the correct date and time information. We recommend you choose “Enable NTP” so the time will be keep even after reboot. -
Page 119: Password Settings
System Configuration ->Password Settings To change password, please go to “System Configuration” -> “Password Settings” menu. 5.1.4 System Management System Configuration -> System Management In this page, administrator can change the management parameters and disable/enable management interface. AirLive A.DUO User’s Manual... - Page 120 Timeout: The default management timeout is 10 minutes. After timeout, the A.DUO will ask you to login again. You can change the timeout value here. Web Server Access: You can enable or disable HTTP service from WAN side Response to WAN ping: You can disable or enable whether A.DUO will...
-
Page 121: Snmp Settings
Enable Syslog box and configure the IP address of a Syslog daemon. When doing so, the A.DUO will send logged events over network to the daemon for future reviewing. - Page 122 5. System Configuration System Name: A name that you assign to your A.DUO. It is an alphanumeric string of up to 30 characters. System Location: Enter a system location. System Contact: Contact information for the system administrator responsible for managing the A.DUO. It is an alphanumeric string of up to 60 characters.
-
Page 123: Ping Watchdog
The Ping Watchdog will ping remote IP addresses to make sure the wireless connection is active, if not, it can either reconnect or reboot. To prevent the AP from power recycling, the PING watchdog will start 10 minutes after power up to prevent power recycle problem. AirLive A.DUO User’s Manual... - Page 124 CPE will ping every 2 minutes, after the second failure, it will reconnect. Actions: Reconnect: the A.DUO will attempt to re-establish the connection. It is recommend to use this option for WDS Bridge connection. Power Reboot: the A.DUO will do a power recycle.
-
Page 125: Firmware Upgrade
5.1.7 Firmware Upgrade System Configuration -> Firmware Upgrade You can upgrade the firmware of your A.DUO (the software that controls your A.DUO’s operation). Normally, this is done when a new version of firmware offers new features that you want, or solves problems that you have encountered with the current version. -
Page 126: Configuration Save And Restore
5. System Configuration Do not power off the device while upgrading the firmware. It is recommended that you do not upgrade your A.DUO unless the new firmware has new features you need or if it has a fix to a problem that you’ve encountered. -
Page 127: Factory Default
5.1.9 Factory Default System Configuration -> Factory Default You can reset the configuration of your A.DUO to the factory default settings. Step 1 Select Factory Default from the System Configuration menu. Step 2 Click “YES” to go ahead and restore the configuration to the factory default. -
Page 128: A.duo Emergency Recovery
2. Copy the tftpd32.exe of the downloaded file to C:\. 3. Change the IP address of your PC to 192.168.1.254 / 255.255.255.0 4. Copy the A.DUO firmware to C:\ and rename the firmware to “zImage”. Note that the name must be zImage and no extension. - Page 129 8. Push the “Reset” button until the “Status” LED off and on again and release the “Reset” button. 9. If the above process success, the A.DUO LAN LED keep flashing and the tftp serve shows file download information. 10. It takes around 5 minutes to download firmware and around 5 minutes to update the firmware.
-
Page 130: Device Status & Tools
Gateway IP: It shows IP address of Gateway. DNS IP: It shows IP address of DNS. Wireless MAC: This is the wireless MAC address (BSSID) of this A.DUO. This is the address to enter on the remote WDS Bridge for the WDS link. - Page 131 6. Device Status & Tools AirLive A.DUO User’s Manual...
-
Page 132: Wireless Information
6. Device Status & Tools 6.1.2 Wireless Information This page shows the information about wireless status such as current operation mode, wireless traffic, error packets, RSSI, Remote device’s BSSD, connecting State, channel, and encryption used. AirLive A.DUO User’s Manual... -
Page 133: Lan Information
6. Device Status & Tools 6.1.3 LAN Information This page shows the information about LAN port of the A.DUO. It includes the type of LAN port authentication used and the IP address information about the LAN port. AirLive A.DUO User’s Manual... -
Page 134: Internet Information
6. Device Status & Tools 6.1.4 Internet Information This page shows the information about WAN port of the A.DUO. It includes the type of WAN port authentication used and the IP address information about the WAN port. AirLive A.DUO User’s Manual... -
Page 135: Wireless Client Table
6.1.5 Wireless Client Table This function is available in AP mode and AP Router mode only. It displays the information about wireless clients that are associated with A.DUO. It includes signal strength, TX and RX data rate, MAC address, and the state. -
Page 136: System Log
6.1.6 System Log The System Log displays the system activities, login, and system error report. If you need to report a problem to Air Live, please be sure to send us the System Log information also. AirLive A.DUO User’s Manual... -
Page 137: Network Ping
6. Device Status & Tools 6.1.7 Network Ping Network Ping tool allows user to test whether a particular host is reachable across an Internet Protocol (IP) network. AirLive A.DUO User’s Manual... -
Page 138: Network Traceroute
6. Device Status & Tools 6.1.8 Network Traceroute Network Traceroute tool is used to show the route taken by packets across an IP network. AirLive A.DUO User’s Manual... -
Page 139: Command Line Interface
We will provide descriptions for the commands, example settings and the A.DUO’s response. The purpose for this chapter is to introduce available CLI commands only. For detail descriptions on the concept and application of the settings, please refer to chapter 4 and chapter 5. -
Page 140: System Commands
<ssid> 11a <channel> Purpose: Test if a SSID’s connection is okay Example: Command> ftptest airlive 11a 40 Set SSID: airlive, mode = 11a, channel = 40 ok! save config Purpose: save configuration file. Please remember to “save config” after making changes Example: Command>... - Page 141 -- * None signal survey <bssid> <channel> Purpose: Display continuous RSSI for the remote AP/Bridge Example: Command> signal survey 00-4f-69-52-a1-ed 36 BSSID Channel Signal Strength (dbm) ================================================ 00-4F-69-52-A1-ED BSSID Channel Signal Strength (dbm) ================================================ 00-4F-69-52-A1-ED … AirLive A.DUO User’s Manual...
-
Page 142: Debugging Commands
<ssidname> broadcast (enable/disable) to add a new SSID set ssid <ssidname> to replace the current ssid name with a new one Example: Command> z_debug add ssid air1 z_debug reboot Purpose: reboot your A.DUO Example: Command> z_debug reboot Rebooting... AirLive A.DUO User’s Manual... - Page 143 <ssid> : to set the ssid name set rate mode <mode value>: set radio mode to 11a | supera_no_turbo | supe ra_static_turbo.| supera_dynamic_turbo Example: Command> z_debug set port radio1 11a air2 64 AirLive A.DUO User’s Manual...
-
Page 144: Show Commands
7. Command Line Interface 7.3 Show Commands Show Commands are command that show the settings and status of A.DUO show arp table Purpose: Show ARP Table Example: Command> show arp table IP address Flags HWaddress Device -------------------------------------------------------------------------------------------- 192.168.1.100 00:1D:60:5E:AE:A0 show http... - Page 145 Purpose: show mac filter status with the filter name Example: Command> show mac filter hello Filter Name MAC address --------------------------------------------------- hello 00-4f-62-24-12-34 show community string read Purpose: Show SNMP community string Example: Command> show community string read SNMP Community String (read-only): public AirLive A.DUO User’s Manual...
- Page 146 Status -------------------------------------------------------------------- ailrive 192.168.1.123 enabled show trap manager <string up to 16 characters> Purpose: Show SNMP Trap manager status with the assigned name Example: Command> show trap manager airlive Trap Manager IP Address Status -------------------------------------------------------------------- ailrive 192.168.1.123 enabled show radius server...
- Page 147 Command> show telnet Telnet session timeout: 0 minutes Telnet port number: 23 Telnet state: enable Command> show system System Name: A.DUO ------------------------------------------------------------------------------ S/W Version: 1.00e09a H/W Version: System LAN MAC: 00-4F-79-90-00-16 Wireless MAC: 00-4F-79-90-00-15 WMAC-0: 00-4F-79-90-00-15 AirLive A.DUO User’s Manual...
- Page 148 NO-SUCH-NAME Errors BAD-VALUE Errors READ-ONLY Errors GENERAL-ERR Errors show rssi Purpose: Show RSSI signal strength Example: Command> show rssi Please wait a moment for site survey... ESSID MAC Address Signal Strength(dbm) ======================================================= airlive 0:4f:69:52:a1:ca A.DUO-ap 00:4f:69:90:00:01 AirLive A.DUO User’s Manual...
- Page 149 7. Command Line Interface show mode Purpose: Show what operation is A.DUO currently set to Example: Command> show mode operation mode: access point show wireless setting Purpose: Show wireless settings Example: Command> show wireless setting Radio[1] operation mode: access point...
- Page 150 Purpose: Check antenna polarization Example: Command> show antenna Antenna setting is Vertical; show ratemode Purpose: Show whether the A.DUO is using 5MHz, 10MHz, or 20MHz channel width Example: Command> show ratemode Ratemode is Full (20Mhz); show noise immunity...
-
Page 151: Set Commands
7. Command Line Interface 7.4 Set Commands The Set Commands are to make changes to the A.DUO’s settings set http timeout <timeout value in minutes, 1-999> Purpose: Set the timeout value for HTTP management Example: Command> set http timeout 10 HTTP timeout: 10 minutes set system <contact |location>... - Page 152 Purpose: change the telnet port numer Example: Command> set telnet port 23 Changing telnet port may cause current telnet connections to be lost. Are you sure ? ( y/n ) : y Telnet port number: 23 AirLive A.DUO User’s Manual...
- Page 153 <AP |repeater| client | ad-hoc |bridge_infra| wds_bridge | wisp | router> Purpose: set or change operation mode Example: Command> set operation mode AP Operation mode is already setting! Command> set operation mode wds_bridge System should be reboot... AirLive A.DUO User’s Manual...
- Page 154 Command> set enable Radio1 enabled set ssid <ssidname> Purpose: Replace current main SSID name with a new one Example: Command> set ssid A.DUO set ssid remotessid <remote ssidname> Repeater Mode Only Purpose: Set the remote SSID name for repeater mode Example:...
- Page 155 100 Radio1 beacon internal: 100 set rts threshold <range:0-2347> Purpose: s et rts threshold. For explanation on advance wireless parameters, please refe r to section 4.2.14 Example: Command> set rts threshold 2 Radio1 RTS threshold: 2347 AirLive A.DUO User’s Manual...
- Page 156 Command> set age out time 5 Radio1 age out time: 5 set transmit power <range: 0-24> Purpose: T o set the TX output power value of the radio Example: Command> set transmit pow er 20 Radio1 transmit power: 20 AirLive A.DUO User’s Manual...
- Page 157 Set Radio1 no security ! set securi ty <ssid> wep <key number> <64|128|152> <ascii | hex> <key string> <d efaultkey> Purpose: To set the WEP security policy Example: Command> set security A.DUO wep 1 64 hex 1234567890 AirLive A.DUO User’s Manual...
- Page 158 <ssid> <wpa|wpa2> <tkip|aes|both> int erval <0~300> Purpose: to set the WPA or WPA2 se curity policy Example: Command> set security A.DUO wpa2 tkip interval 300 Radio1 authentication ty pe : wpa2 ! set security <ssid> <wpa-psk|wpa2-psk> <tkip|aes|both> interval <0~300>...
-
Page 159: Enable/Disable Commands
Listening for requests ... Command> disable upnp Shutting down on signal 15.. UPnP is disabled <enable | disable> snmp Purpose: To enable /disable SNMP Example: Command> enable snmp SNMP is enabled Command> disable snmp SNMP is disabled AirLive A.DUO User’s Manual... - Page 160 <enable | disable> radius serv er <primary | secondary> Purpose: To enable or disable primary/second ary radius server Example: Command> enable radius server primary Invalid configuration specified. Command> enable radius server secondary Invalid configuration specified. AirLive A.DUO User’s Manual...
-
Page 161: Add/Delete Commands
K answers: No such file or directory mac filter aaa(00-4F-62-24-12-34) is added delete mac filter < Mnemonics Name> Purpose: to delete a mac filter entry Example: Command> delete mac filter aaa /etc/wlan/ap_service: 17: uname: not found AirLive A.DUO User’s Manual... - Page 162 > delete wds bridge delete wds <comment> successful! add radius ser ver primary Purpose: to add a primary radiu s server Exam ple: Command> add radiu s server primary enter server IP: 192.168.1.100 ente r port number (1~65535): AirLive A.DUO User’s Manual...
- Page 163 <primary | secondary> Purpose: to add a primary or secondary radius server Exam ple: Command> add radiu s server secondary enter server IP: 192.168.1.200 ente r port number (1~65535): enter shared secret: AirLive A.DUO User’s Manual...
- Page 164 00-4f-60-52-12-34 add wds <c omment> <mac> successful! add ssid <ssid name> broadcast <enable | disable> Purpose: to add a new ssid (AP and AP Router mode) to the multiple SSID list. Example: AirLive A.DUO User’s Manual...
- Page 165 7. Command Line Interface Command> add ssid air03 broadcast enable dd R1 ssid < air03> broadcast enable successful! AirLive A.DUO User’s Manual...
-
Page 166: Frequent Asked Questions
======= ================================ ============================= Question: he rd A.DUO can limit the bandwidth of BitTorrent and eDonkey traffic. But I don ’t see the option on the Bandwidth Control. Answer: The option to limit bandwidth by application or port is available only on WISP and Gateway modes. - Page 167 For example, all the PCs using the DHCP server to get IP addresses. ==================================================================== stion: I thought A.DUO has PPPoE server function, where can I find it? Answer: The A.DUO PPPoE function is available only in “Dual Band Router Mode”. The PPPoE function is inside the “Wireless Settings”->WAN Settings.
-
Page 168: Specifications
9. Specifications Specifications The specification of A.DUO is subject to change without notice. Please use the information with caution. dw re Atheros CPU High power design, up to 26dBm with included antennas (limit to 23dBm in U.S. and 20dBm in EU) 3 x 10/100Mbps LAN Ports 802.3af PoE Port... - Page 169 5.745 to 5.825GHz, U-NII Upper Band Frequenc y Cha nnel WLAN1(Radio 1) 802.11a USA (FCC) : 12 Europe (ETSI) : 19 WLAN2(Radio 2) 802.11b/g USA (FCC) : 11 Europe (ETSI) : 13 802.11a USA (FCC) : 12 Europe (ETSI) : 19 AirLive A.DUO User’s Manual...
- Page 170 9. Specifications Power Supply 5.5V at 2.5A DC Power Adapter Optional 802.3af 48V Power over Ethernet Adapter + Injector (AirLive model: PoE- 48PB) Modulation T echnology IEEE 802.11a 5GHz OFDM IEEE 802.11b 2.4GHz CCK IEEE 802.11g 2.4GHz OFD Athe ros Proprietary Super A/G mode 802.
- Page 171 Multiple SSID, VLAN, QoS, WPA with PSK/TKIP/AES support ,WPA2 support 152-bit WEP support (Atheros Proprietary) Super A/G mode support (Atheros Proprietary) Bootloader Protection and Emergency Firmware Upload Code in bootloader Radius Support HTB QoS P2P Bandwidth Control AirLive A.DUO User’s Manual...
- Page 172 9. Specifications roduct Weigh t (g 341 g Product Size (L x W x H mm) 191 x 145.5 x 29 mm AirLive A.DUO User’s Manual...
-
Page 173: Wireless Network Glossary
(also known as trunking) to increase the bandwidth. 02.3af his is the PoE (Power over Ethernet) standard by IEEE committee. 802.3af uses 48V POE standard that can deliver up to 100 meter distance over Ethernet cable. AirLive A.DUO User’s Manual... - Page 174 2.4 GHz frequency band as 802.11b. 802.11g devices are backward compatible wi 802.11b devices. 802.11h This IEEE standard define the TPC (transmission power control) and DFS(dynamic frequency selection) required to operat e WiFi devices in 5GHz for EU. AirLive A.DUO User’s Manual...
- Page 175 (such as Internet connection) for sharing. Multi-function Access oint can also function as an Ethernet client, wireless bridge, or repeat signals from other AP. Access Points typically have more wireless functions comparing to wireless routers. AirLive A.DUO User’s Manual...
- Page 176 Setting the correct ACK timeout value needs to consider 3 factors: distance, AP response time, and interference. The A.DUO provides ACK adjustment capability in form of either distance or direct input. When you enter the distance parameter, the A.DUO will automatically calculate the correct ACK timeout value.
- Page 177 Wireless (usually an AP with built-in Antenna) that receive wireless broadband ccess from the WISP. The opposite of CPE is CO. Clear To Send. A signal sent by a device to indicate that it is ready to receive data. AirLive A.DUO User’s Manual...
- Page 178 A program that translates URLs to IP addresses by accessing a database maintained on a collection of Internet servers. Domain Na The unique name that identifies an Internet site. Domain Names always have 2 or mo parts, separated by dots. In www.airlive.com, the "airlive.com" is the doman name. AirLive A.DUO User’s Manual...
- Page 179 Firmware The program that runs inside embedded device such as router or AP. Many network devices are firmware upgradeable through web interface or utility program. AirLive A.DUO User’s Manual...
- Page 180 One is the wireless infrastructure deployment; the other is the Int ernet access billing system. In a hotspot system, a service provider typically need an authentication and account system for billing purposes, and a wireless AP network to AirLive A.DUO User’s Manual...
- Page 181 IP layer. IPsec has been deployed widely to implement Virtual Private Networks (VPNs). IPsec supports two encryption modes: Transport and Tunne Transport mode encrypts only the data of each packet, but leaves the header untouched. AirLive A.DUO User’s Manual...
- Page 182 In Multi Out. A Smart Antenna technology designed to increase the coverage and erformance of a WLAN network. In a MIMO device, 2 or more antennas are used to crease the receiver sensitivity and to focus available power at intended Rx. AirLive A.DUO User’s Manual...
- Page 183 A PoE Access Point or CPE has the splitter built-in to e device. The IEEE 802.3af is a POE spec that uses 48 volt to deliver power up to 100 meter dista nce. AirLive A.DUO User’s Manual...
- Page 184 Rate Control management uses "Flow Control" to limit the speed of a port. Therefore, the Ethernet adapter must also have the flow control enabled. One way to force the dapter's flow control on is to set a port to half-duplex mode. AirLive A.DUO User’s Manual...
- Page 185 An IP sharing router is a device that allows multiple PCs to share one single broadband connection using NAT technology. A wireless router is a device that combines the functions of wireless Access Point and the IP sharing router. AirLive A.DUO User’s Manual...
- Page 186 SNMP agents. SNMP age nts are programs that reside SNMP capable device's firmware to provide SNMP configuration service. The NMS typically is a PC based software such as HP Openview that can view and manage SNMP network device remotely. AirLive A.DUO User’s Manual...
- Page 187 Found in larger networks, these smaller networks are used to simplify addressing between numero us computers. Subnets connect to the central network through a router, hub or gateway. Each individual wireless LAN will probably use the same subnet for all the local computers it talks to. AirLive A.DUO User’s Manual...
- Page 188 Normally, the TX output power level limit for 2.4GHz 11g/b is 20dBm at the antenna nd. The output power limit for 5GHz 802.11a is 30dBm at the antenna end. User Datagram Protocol. A layer-4 network protocol for transmitting data that does not require acknowledgement from the recipient of the data. AirLive A.DUO User’s Manual...
- Page 189 Network. A communication system of connecting PCs and other computing devices across a large local, regional, national or international geographic area. A WAN port on the network device means the port (or wireless connection) that is connected to the Internet side of the network topology. AirLive A.DUO User’s Manual...
- Page 190 WDS associate each other by MAC address, each device WLAN Wireless Local Area Network. A type of local-area network that uses high-frequency radio waves rather than wires to communicate between nodes. The most popular standard for WLAN is the 802.11 standards. AirLive A.DUO User’s Manual...
- Page 191 The WPA-PSK utilizes pre-share key for encryption/authentication. WPA2 Wi-Fi Protected Access 2. WPA2 is also known as 802.11i. It improves on the WPA security with CCMP and AES encryption. The WPA2 is backward compatible with WPA. WPA2-PSK utilizes pre-share key for encryption/authentication. AirLive A.DUO User’s Manual...
Need help?
Do you have a question about the A.DUO and is the answer not in the manual?
Questions and answers