
Related Manuals for AirLive ARM-104 V3


Summary of Contents for AirLive ARM-104 V3
- Page 1 ARM-104_v3 Wired ADSL 2/2+ Modem Router User’s Guide AirLive ARM-104_v3 ADSL2/2+ Router...
- Page 2 The contents of this publication may not be reproduced in any part or as a whole, stored, transcribed in an information retrieval system, translated into any language, or transmitted in any form or by any means, mechanical, magnetic, electronic, optical, photocopying, manual, or otherwise, without the prior written permission. AirLive ARM-104_v3 ADSL2/2+ Router...
-
Page 3: Fcc Interference Statement
However, there is no guarantee that interference will not occur in a particular installation. If AirLive ARM-104_v3 does cause harmful interference to radio or television reception, which is found by turning the... -
Page 4: Table Of Contents
1.3 Audience ............................6 1.4 Document Structure ........................7 1.5 System Requirement........................8 1.6 Packet Contents ..........................9 CHAPTER 2 KNOWING THE AIRLIVE ARM-104_V3 ADSL2/2+ ROUTER ....10 2.1 Front Panel:..........................10 2.2 Back Panel: ..........................11 2.3 Connection Mechanism: ......................12 CHAPTER 3 SETTING UP THE TCP/IP IN WINDOWS........... 14 3.1 Windows ME / 98 ........................15... - Page 5 4.4.10.1 Static Routing Configuration Procedure................104 4.4.11 ADVANCED – Dynamic Routing ..................105 4.4.11.1 Dynamic Routing Configuration Procedure ..............107 4.4.12 ADVANCED – Save All .......................108 4.5 TOOLS............................109 4.5.1 TOOLS - System Commands ....................110 4.5.2 TOOLS - Remote Log ......................111 AirLive ARM-104_v3 ADSL2/2+ Router...
- Page 6 4.6.4 STATUS - Modem Status .......................126 4.6.5 STATUS - Product Information ....................127 4.7.6 STATUS - System Log ......................128 APPENDIX A: ROUTER TERMS..................129 APPENDIX B: FREQUENTLY ASKED QUESTIONS .............131 APPENDIX C: TROUBLESHOOTING GUIDE..............133 APPENDIX D: GLOSSARY ....................136 AirLive ARM-104_v3 ADSL2/2+ Router...
-
Page 7: Chapter 1 Introduction
Chapter 1 Introduction Congratulations on your purchase of this outstanding AirLive ARM-104_v3 ADSL2/2+ Router. This device is a Four Ports Ethernet ADSL2/2+ Router combines an “Always-On” high speed Asymmetric Digital Subscriber Line (ADSL/ADSL2/ADSL2+) connection to the Telephone Line, and four 10/100BASE-T Ethernet Switch connection to a host PC or other Ethernet device to enable the widest array of host connectivity. -
Page 8: Features
1.1 Features The AirLive ARM-104_v3 ADSL2/2+ Router provides the following features: Compliant to ANSI T1.413 Issue 2, ITU-T G.992.1, ITU-T G.992.2, ITU-G.992.3, ITU G.992.5 and READSL2 standards. Support all Digital Loop ITU G.992.3 annex I and J specifications. Fully compliant with Annex A/B/B (U-R2) ADSL specifications. - Page 9 Support Transparent Bridging ( IEEE 802.1D ).Support RFC 2684/1483 Bridged. Firewall Built in Firewall functionality. Support IP Filtering. Support MAC Filtering. Support Web Filtering. IPSec Pass-Through. Protection against IP and MAC address spoofing. UpnP (Optional) Support UPnP functionality. AirLive ARM-104_v3 ADSL2/2+ Router...
- Page 10 Telnet, TFTP and FTP Management / Configuration. SNMP MIB-II. Restore factory default setting via Web or hardware reset button. WAN and LAN connection statistics. Configuration of static routes and routing table, NAT/NAPT and VCs. Support Password Authentication. AirLive ARM-104_v3 ADSL2/2+ Router...
-
Page 11: Scope
To help the reader understand more about these Web pages, some questions and answers (Q&A) are appended after the definition of each Web page along with the appendices at the end of the guide. AirLive ARM-104_v3 ADSL2/2+ Router... -
Page 12: Audience
1.3 Audience This document is prepared for use by those customers who purchase the AirLive ARM-104_v3 ADSL2/2+ Router and using the provided or embedded firmware. It assumes the reader has a basic knowledge of ADSL/ADSL2/ADSL2+ and networking. AirLive ARM-104_v3 ADSL2/2+ Router... -
Page 13: Document Structure
Setting Up TCP/IP In Windows, provides Windows system Network’s configurations. Chapter 4: Device Administration, describes the pages found under the Admin menu. These pages allow the user to view, change, edit, update, and save the AirLive ARM-104_v3 ADSL2/2+ Router’s configurations or settings. Appendix A: Router Terms, provides an introduction to basic Router Terms. -
Page 14: System Requirement
Pentium II compatible processor and above. Ethernet LAN card installed with TCP/IP protocol. USB Port ( Optional ) 64 MB RAM or more. 50 MB of free disk space ( Minimum ). Internet Browser. CD-ROM Drive. AirLive ARM-104_v3 ADSL2/2+ Router... -
Page 15: Packet Contents
1.6 Packet Contents The AirLive ARM-104_v3 ADSL2/2+ Router package contains the following items : One ARM-104_v3 ADSL2/2+ Router One Power Adapter One RJ-11 ADSL Cable One CAT-5 Ethernet Cable One CD-ROM (Manual / Quick Setup Guide ) If any of the above items are damaged or missing, please contact your dealer immediately. -
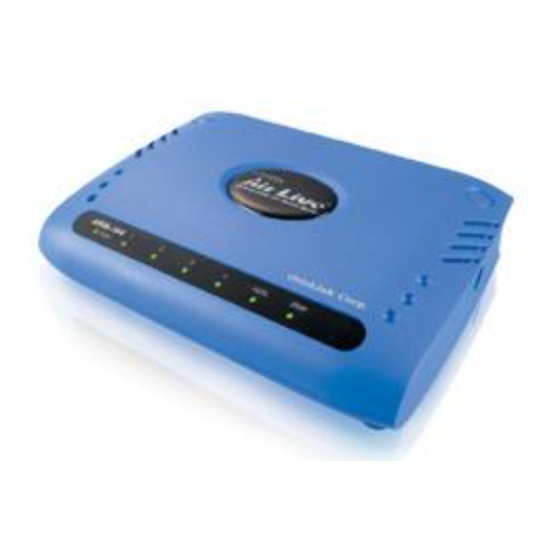
Page 16: Chapter 2 Knowing The Airlive Arm-104_V3 Adsl2/2+ Router
Chapter 2 Knowing the AirLive ARM-104_v3 ADSL2/2+ Router 2.1 Front Panel: The AirLive ARM-104_v3 ADSL2/2+ Router’s LEDs indicators display information about the device’s status. Lights up when ARM-104_v3 ADSL2/2+ Router is powered on. Blinking when ARM-104_v3 ADSL2/2+ Router is Sending/Receiving data. -
Page 17: Back Panel
Press the Reset button for 10~15 seconds and release. Wait for 30 seconds after release the Reset button. Do not power off the device during the reset process. The default settings are now restored after 30 seconds. AirLive ARM-104_v3 ADSL2/2+ Router... -
Page 18: Connection Mechanism
Multiplexing Method or Protocol Type or Encapsulation Type Host and Domain Names ISP Login Name and Password ISP Domain Name Server (DNS) Address Fixed or Static IP Address. Figure below shows the overall hardware connection mechanism of your ARM-104_v3 ADSL2/2+ Router. AirLive ARM-104_v3 ADSL2/2+ Router... - Page 19 Use the Power Adaptor exclusively in combination with the equipment supplied and do not use any other kind of power adaptor for the equipment. 5. Turn on your computer. 6. Refer to the next section to setup or configure your system’s Network Adaptor. AirLive ARM-104_v3 ADSL2/2+ Router...
-
Page 20: Chapter 3 Setting Up The Tcp/Ip In Windows
Follow the procedures below to set your computer/notebook function as a DHCP Client. Restart and Reboot your Windows system might be necessary after setting your computer function as a DHCP Client. In order to properly activate your choice, click “OK” to restart your Windows system. AirLive ARM-104_v3 ADSL2/2+ Router... -
Page 21: Windows Me / 98
Step 5: Go to Gateway icon and erase all previous setting. Step 3: Go to Configuration icon, select network Step 6: Go to DNS Configuration icon, select adapter installed and click Properties. Disable DNS and click OK. AirLive ARM-104_v3 ADSL2/2+ Router... -
Page 22: Windows 2000
Properties. Step 2: Double-click the Network and Dial-up Connections. Step 5: Select Obtain an IP address automatically and DNS server address automatically. Then, click OK. Step 3: Right Click the Local Area Connection and select Properties. AirLive ARM-104_v3 ADSL2/2+ Router... -
Page 23: Windows Xp
Step 2: Double-click the Network Connections. Step 5: Go to General icon, select Obtain an IP address automatically and DNS server address automatically. Then, click OK. Step 3: Right Click on the Local Area Connection and select Properties. AirLive ARM-104_v3 ADSL2/2+ Router... -
Page 24: Checking Tcp/Ip Configuration
All the Ethernet adapter information will be shown in the appears Windows. Check if you can get the following setting: The IP Address as 192.168.1.x The Subnet Mask as 255.255.255.0 The Default Gateway as 192.168.1.1 Type “Exit” to end up the MS-DOS Prompt. AirLive ARM-104_v3 ADSL2/2+ Router... - Page 25 All the Ethernet adapter information will be shown in the appear Windows. Check if you can get the following setting: The IP Address as 192.168.1.x The Subnet Mask as 255.255.255.0 The Default Gateway as 192.168.1.1 Type “Exit” to end up the process. AirLive ARM-104_v3 ADSL2/2+ Router...
- Page 26 All the Ethernet adapter information will be shown in the appear Windows. Check if you can get the following setting: IP address as 192.168.1.x The Subnet Mask as 255.255.255.0 the default gateway as 192.168.1.1 Type “Exit” to end up the process. AirLive ARM-104_v3 ADSL2/2+ Router...
-
Page 27: Chapter 4 Device Administration
“Password”: The default login Username of the administrator is “Admin”, and the default login Password is “airlive”. Note that the Username and Password are case sensitive. “Username” and “Password” can be changed after login. Refer to the Tools configuration section for further instruction. AirLive ARM-104_v3 ADSL2/2+ Router... - Page 28 ADVANCED: The Advanced section lets you configure advanced features like RIP, SNTP, SNMP, IP QoS, Access control, etc... TOOLS: The Tools section lets you carry out system commands and perform simple system tests. STATUS: The Status section displays status, log and statistical information for all connections and interfaces. AirLive ARM-104_v3 ADSL2/2+ Router...
- Page 29 Software Version: This field displays the ARM-104_v3 ADSL2/2+ Router’s data pump code version. Firmware Version: This field displays the ARM-104_v3 ADSL2/2+ Router’s firmware version. Log Out: Click to Log Out the Administration configuration page. Refresh: Click to Refresh current page. AirLive ARM-104_v3 ADSL2/2+ Router...
-
Page 30: Ez Setup
The EZ SETUP is a presetting wizard which meant to help you install the ARM-104_v3 ADSL2/2+ Router quickly and easily. Click on “Wizard” and the following screen will pop-up. Follow the Steps describe below to complete your installation. AirLive ARM-104_v3 ADSL2/2+ Router... - Page 31 Click “Config” if you can’t find any available parameters from the presetting country list. Check your ISP immediately for the setting/configuration details. The “Encapsulation” type differs in each country and there are two different kinds of setup windows wizard that will pop-up: AirLive ARM-104_v3 ADSL2/2+ Router...
- Page 32 For the following “Encapsulation” type after clicking the “Next” button, the pop-up setup window wizard is shown below: PPPoA VC-Mux PPPoA LLC PPPoE LLC Manually enter your “User Name” and “Password” which will be provided by your Service Provider (ISP). Click “Apply” after setup. AirLive ARM-104_v3 ADSL2/2+ Router...
- Page 33 For countries with the following “Encapsulation” type after clicking the “Next” button, the pop-up window is shown below: 1483 Bridged LLC 1483 Routed VC-MUX In this current window, you will find THREE different Connection Type: Static (Fixed IP by ISP) DHCP (Get IP dynamically from ISP) Bridge AirLive ARM-104_v3 ADSL2/2+ Router...
- Page 34 “DNS”: This is the DNS address specify by the user or ISP. Check your ISP for setting detail. Range for DNS Address is x.x.x.y, where 0 255 and 1 254. ≦ ≦ ≦ ≦ Click “Apply” after your setting. AirLive ARM-104_v3 ADSL2/2+ Router...
- Page 35 ISP). Click “Next” after your choice and the following window will pop-up: Place a check to enable the Default Gateway. If checked, the connection becomes the default gateway to the Internet. Click “Apply” after your setting. AirLive ARM-104_v3 ADSL2/2+ Router...
- Page 36 Select LAN: Select LAN group from the drop down manual. There are three Ethernet Bridges you can select from the drop down list or leave it in the default mode. Click “Apply” after your setting. AirLive ARM-104_v3 ADSL2/2+ Router...
- Page 37 Username: Show the Username manually entered in STEP 1. Password: Show the Password manually entered in STEP 1. VPI: Show the VPI setting as shown in STEP 1. VCI: Show the VCI setting as shown in STEP 1. AirLive ARM-104_v3 ADSL2/2+ Router...
- Page 38 Note that in many cases, only one Connection Profile will be required and only one Connection Profile in used at one time. To complete and save the new Connection Profile, click the Apply button, and then click Save All. AirLive ARM-104_v3 ADSL2/2+ Router...
- Page 39 STEP 4. Launch your web browser, and enter the Google Website Address: “www.google.com” the address field then press “Enter”. The following Google website index page will display on your screen. This shows your ADSL connection is correctly set and access to the Internet is now available. AirLive ARM-104_v3 ADSL2/2+ Router...
-
Page 40: Config
The CONFIG configuration page allows you to create new connections, edit existing connections, and configure other basic settings in WAN and LAN mode. The CONFIG Menu is divided into two sections : LAN Setup and WAN Setup. WAN Setup will be dealt with first. AirLive ARM-104_v3 ADSL2/2+ Router... -
Page 41: Config - Wan Setup
DSL Fixed Internet IP address Subnet Mask Default Gateway IP Address Primary DNS IP address. The next sections will describe in detail how to set up each of these connection types and save them as Connection Profiles. AirLive ARM-104_v3 ADSL2/2+ Router... -
Page 42: Config - Wan Setup - New Connection
(In many cases, only one connection profile will be required and only one connection profile will be used at one time). To complete and save the new Connection Profile, click the Apply button, and then click Save All. AirLive ARM-104_v3 ADSL2/2+ Router... -
Page 43: New Connection - Pppoe Connection Setup
Priority Bits: Priority is given to a VLAN connection from 0-7, 0 being the highest priority. PPP Settings: Username: Your ISP Account ID. Check your ISP for details. Password: Your ISP Account Password. Check your ISP for details. AirLive ARM-104_v3 ADSL2/2+ Router... - Page 44 LAN: The LAN field is associated with the PPP UNunmbered field and is enabled when the PPP UNnumbered field is checked. You can specify the LAN group the packets need to go through when the PPP UNnumbered feature is activited. AirLive ARM-104_v3 ADSL2/2+ Router...
- Page 45 Apply: Click Apply to complete the connection profile’s setting. Delete: Click Delete to delete a connection. Cancel: Click Cancel to ignore all the changes. To complete and save the connection profile, click Save All after clicking the Apply button. AirLive ARM-104_v3 ADSL2/2+ Router...
-
Page 46: Pppoe Configuration Procedures
A new link has been created for this connection in the left-hand column. You can Connect/Disconnect/Apply/Delete/Cancel this connection using this screen. To make the change permanent, click on Save All. To check on the connection status, click on Status (at the top of the page) and select Connection Status. AirLive ARM-104_v3 ADSL2/2+ Router... -
Page 47: New Connection - Pppoa Connection Setup
Two options are provided: Logical Link Control (LLC) and Virtual Channel (VC). Username: Your ISP Account ID. Check your ISP for details. Password: Your ISP Account Password. Check your ISP for details. AirLive ARM-104_v3 ADSL2/2+ Router... - Page 48 PVC Settings: VPI: Virtual Path Identifier is a virtual path used for cell routing that is identified by an eight bit field in the ATM cell header. The VPI field specifies this eight bit identifier for routing. AirLive ARM-104_v3 ADSL2/2+ Router...
- Page 49 Apply: Click Apply to complete the connection profile’s setting. Delete: Click Delete to delete a connection. Cancel: Click Cancel to ignore all the changes. To complete and save the connection profile, click Save All after clicking the Apply button. AirLive ARM-104_v3 ADSL2/2+ Router...
-
Page 50: Pppoa Configuration Procedures
Connect/Disconnect/Apply/Delete/Cancel this connection using this screen. To make the change permanent , click on Save All. 10. To check on the connection status, click on Status (at the top of the page) and select Connection Status. AirLive ARM-104_v3 ADSL2/2+ Router... -
Page 51: New Connection - Static Connection Setup
VLAN ID: If “VLAN” is selected, manually enter the “VLAN ID” and select “Priority Bits” from the drop down manual. Priority Bits: Priority is given to a VLAN connection from 0-7, 0 being the highest priority. AirLive ARM-104_v3 ADSL2/2+ Router... - Page 52 MBS: Maximum Burst Size. A term used in ATM (Asynchronous Transfer Mode) to specify the maximum number of cells which can be transmitted at the contracted PCR (Peak Cell Rate). Available only when VBR QoS is chosen. AirLive ARM-104_v3 ADSL2/2+ Router...
- Page 53 Apply: Click Apply to complete the connection profile’s setting. Delete: Click Delete to delete a connection. Cancel: Click Cancel to ignore all the changes. To complete and save the connection profile, click Save All after clicking the Apply button. AirLive ARM-104_v3 ADSL2/2+ Router...
-
Page 54: Static Configuration Procedures
Apply/Delete/Cancel this connection using this screen. 11. To make the change permanent , click on click on Save All. 12. To check on the status, click on Status (at the top of the page) and select Connection Status. AirLive ARM-104_v3 ADSL2/2+ Router... -
Page 55: New Connection - Dhcp Connection Setup
Encapsulation: Select the encapsulation type (LLC or VC) according to the information provided by the ISP. Default Gateway: Click to enable the Default Gateway. PVC Settings: PVC: This field allows you to choose the specific PVC for the PPP session. AirLive ARM-104_v3 ADSL2/2+ Router... - Page 56 Apply: Click Apply to complete the connection profile’s setting. Delete: Click Delete to delete a connection. Cancel: Click Cancel to ignore all the changes. To complete and save the connection profile, click Save All after clicking the Apply button. AirLive ARM-104_v3 ADSL2/2+ Router...
-
Page 57: Dhcp Configuration Procedures
Apply/Delete/Cancel this connection using this screen. To make the change permanent , click on Save All. 10. To check on the status, click on Status (at the top of the page) and select Connection Status. AirLive ARM-104_v3 ADSL2/2+ Router... -
Page 58: New Connection - Bridge Connection Setup
Bridge Settings: Encapsulation: Select the encapsulation type (LLC or VC) according to the information provided by the ISP. Select LAN: Up to three LAN Group can be specified. Select your LAN Group from the drop down manual. AirLive ARM-104_v3 ADSL2/2+ Router... - Page 59 Apply: Click Apply to complete the connection profile’s setting. Delete: Click Delete to delete a connection. Cancel: Click Cancel to ignore all the changes. To complete and save the connection profile, click Save All after clicking the Apply button. AirLive ARM-104_v3 ADSL2/2+ Router...
-
Page 60: Bridge Configuration Procedures
A new link has been created for this connection in the left-hand column. You can Apply/Delete/Cancel this connection using this screen. To make the change permanent, click on Save All. 10. To check on the status, click on Status (at the top of the page) and select Connection Status. AirLive ARM-104_v3 ADSL2/2+ Router... -
Page 61: New Connection - Clip Connection Setup
PVC Settings: VPI: Virtual Path Identifier is a virtual path used for cell routing that is identified by an eight bit field in the ATM cell header. The VPI field specifies this eight bit identifier for routing. AirLive ARM-104_v3 ADSL2/2+ Router... - Page 62 Apply: Click Apply to complete the connection profile’s setting. Delete: Click Delete to delete a connection. Cancel: Click Cancel to ignore all the changes. To complete and save the connection profile, click Save All after clicking the Apply button. AirLive ARM-104_v3 ADSL2/2+ Router...
-
Page 63: Clip Configuration Procedures
Apply/Delete/Cancel this connection using this screen. To make the change permanent , click on Save All. 10. To check on the status, click on Status (at the top of the page) and select Connection Status. AirLive ARM-104_v3 ADSL2/2+ Router... -
Page 64: Config - Wan Setup - Modem
T1413: T1.413 Mode. GDMT: G.dmt Mode. GLITE: G.Lite Mode. Apply: Click Apply to complete the setting. Cancel: Click Cancel to ignore all the changes. To complete and save the setting, click Save All after clicking the Apply button. AirLive ARM-104_v3 ADSL2/2+ Router... -
Page 65: Config - Lan Setup
4.3.2 CONFIG - LAN Setup The LAN Configuration page allow you to select or assign physical interfaces to LAN group and configure LAN IP Address and DHCP functionality. AirLive ARM-104_v3 ADSL2/2+ Router... -
Page 66: Lan Setup - Lan Configuration
Click Configure for detail LAN Group setting. Apply: Click Apply to complete the setting. Cancel: Click Cancel to ignore all the changes. To complete and save the setting, click Save All after clicking the Apply button. AirLive ARM-104_v3 ADSL2/2+ Router... -
Page 67: Lan Configuration Procedures
The Configure link for LAN group 2 has also been generated, which allows additional configurations for the defined LAN group. Click Apply to temporarily save the changes. To make the change permanent, click on Save All. AirLive ARM-104_v3 ADSL2/2+ Router... -
Page 68: Lan Configuration - Unmanaged
Click the Services items will guides you to detail setting. Refer to ADVANCED section for setting/configuration details. Apply: Click Apply to complete the setting. Cancel: Click Cancel to ignore all the changes. To complete and save the setting, click Save All after clicking the Apply button. AirLive ARM-104_v3 ADSL2/2+ Router... -
Page 69: Lan Configuration - Obtain An Ip Address Automatically
IP Address) or type mygateway1.ar7 in the Web browser’s address bar. Apply: Click Apply to complete the setting. Cancel: Click Cancel to ignore all the changes. To complete and save the setting, click Save All after clicking the Apply button. AirLive ARM-104_v3 ADSL2/2+ Router... -
Page 70: Lan Configuration - Ppp Ip Address
Click the Services items will guides you to detail setting. Refer to ADVANCED section for setting/configuration details. Apply: Click Apply to complete the setting. Cancel: Click Cancel to ignore all the changes. To complete and save the setting, click Save All after clicking the Apply button. AirLive ARM-104_v3 ADSL2/2+ Router... -
Page 71: Lan Configuration - Use The Following Static Ip Address
Enable DHCP Server: Click the radio button to enable the DHCP Server. By default, your ARM-104_v3 ADSL2/2+ Router has DHCP server (LAN side) enabled. If you already have a DHCP server running on your network, you must disable one of the two DHCP servers; if you plug AirLive ARM-104_v3 ADSL2/2+ Router... - Page 72 Gateway must be on the same subnet as all the other computers. Apply: Click Apply to complete the setting. Cancel: Click Cancel to ignore all the changes. To complete and save the setting, click Save All after clicking the Apply button. AirLive ARM-104_v3 ADSL2/2+ Router...
-
Page 73: Lan Setup - Ethernet Switch
100/Full Duplex: Data can be transferred and received simultaneously at the transfer rate of 100Mbps. Apply: Click Apply to complete the setting. Cancel: Click Cancel to ignore all the changes. To complete and save the setting, click Save All after clicking the Apply button. AirLive ARM-104_v3 ADSL2/2+ Router... -
Page 74: Lan Setup - Firewall/Nat Services
The default setting is “Enable”. Apply: Click Apply to complete the setting. Cancel: Click Cancel to ignore all the changes. To complete and save the setting, click Save All after clicking the Apply button. AirLive ARM-104_v3 ADSL2/2+ Router... -
Page 75: Advanced
IP Filters: Configure Firewall to block your LAN PCs from accessing the Internet. LAN Clients: Configure LAN Clients. LAN Isolation: Disable traffic between LANs. Bridge Filters: Select to setup Bridge Filters. Multicast: Configure Multicast pass-through for different connections. Static Routing: Configure Static routes. Dynamic Routing: Configure RIP. AirLive ARM-104_v3 ADSL2/2+ Router... -
Page 76: Advanced - Sntp
ARM-104_v3 ADSL2/2+ Router will try to connect to an SNTP server before it try to connect to the next server in line. Time Zone: This specifies the time zone ( Geographical location ). Day Light: Place a check at the Day Light to activate Daylight Savings Time. AirLive ARM-104_v3 ADSL2/2+ Router... - Page 77 Apply: Click Apply to complete the setting. Cancel: Click Cancel to ignore all the changes. To complete and save the setting, click Save All after clicking the Apply button. AirLive ARM-104_v3 ADSL2/2+ Router...
-
Page 78: Sntp Configuration Procedure
Use as a reference and configure the following fields: Primary SNTP Server Secondary SNTP Server Tertiary SNTP Server Timeout Polling Interval Retry Count Time Zone Day Light Click Apply to temporarily save the setting. To make the change permanent, click on Save All. AirLive ARM-104_v3 ADSL2/2+ Router... -
Page 79: Advanced - Snmp
Name: An administratively-assigned name for the ARM-104_v3 ADSL2/2+ Router. By convention, this is the node's fully-qualified domain name. Location: The physical location of the ARM-104_v3 ADSL2/2+ Router. Contact: Contact person and/or contact information for the ARM-104_v3 ADSL2/2+ Router. AirLive ARM-104_v3 ADSL2/2+ Router... - Page 80 Trap Version: Two trap versions/formats are supported: SNMPv1 & SNMPv2C. Apply: Click Apply to complete the setting. Cancel: Click Cancel to ignore all the changes. To complete and save the setting, click Save All after clicking the Apply button. AirLive ARM-104_v3 ADSL2/2+ Router...
-
Page 81: Advanced - Ip Qos
Enable IPQoS: This field allows you to enable/disable IP QoS for the chosen connection. Note: If IP QoS is enabled and no rules are defined, a default rule is applied to the connection. The default rule puts all the traffic to be transmitted in the Low Priority queue. AirLive ARM-104_v3 ADSL2/2+ Router... - Page 82 The default rule will have an associated queuing priority – Low. Apply: Click Apply to complete the setting. Cancel: Click Cancel to ignore all the changes. To complete and save the setting, click Save All after clicking the Apply button. AirLive ARM-104_v3 ADSL2/2+ Router...
-
Page 83: Ip Qos Rule Setup
"Un-trusted mode." "Un-trusted" mode will match first against all rules as in "Trusted" mode. The difference is that if there is no match then a default rule will be used. The default rule will have an associated queuing priority - Low. AirLive ARM-104_v3 ADSL2/2+ Router... - Page 84 (Switched LAN Port). These selections will define a rule and be associated with a particular queue priority: High, Medium, and Low. There is another option to choose a particular TOS marking. The allowed options are - No change, Normal service, Minimize monitory cost, Maximize reliability, Maximize throughput and Minimize delay. AirLive ARM-104_v3 ADSL2/2+ Router...
-
Page 85: Create Ip Qos Traffic Rule
Traffic Priority: The Traffic Priority field corresponds to the Priority Queue (High/Medium/Low) for this traffic. The possible options for Protocol are: ANY, ICMP, TCP, and UDP. Wildcard(*) entries are allowed for IP Address/Netmask and Port range fields. AirLive ARM-104_v3 ADSL2/2+ Router... - Page 86 TOS marking can be: No Change, Normal Service, Minimize monetary cost, Maximize reliability, Maximize throughput, and Minimize delay. Apply: Click Apply to complete the setting. Cancel: Click Cancel to ignore all the changes. To complete and save the setting, click Save All after clicking the Apply button. AirLive ARM-104_v3 ADSL2/2+ Router...
-
Page 87: Delete A Traffic Rule
The traffic rule “Example” has been created as illustrated in figure below: Check Delete next to the traffic rule you want to delete. Click Apply to temporarily save the setting. To make the change permanent, click on Save All. AirLive ARM-104_v3 ADSL2/2+ Router... -
Page 88: Advanced - Port Forwarding
“Custom Port Forwarding” section. Category: Custom and user-defined categories. Available Rules: Predefined and/or user-defined IP filtering rules for each category. Applied Rules: The IP filtering rules you select to apply for each given category. AirLive ARM-104_v3 ADSL2/2+ Router... -
Page 89: Port Forwarding Configuration Procedure
If a rule is not in the list, you can create your own in the user category. With User category selected, click Add. The Rule Management screen will populate for you to create new rules. The rule(s) you create will be available in the User category. You will be able to Edit/Delete the rule(s) you create. AirLive ARM-104_v3 ADSL2/2+ Router... - Page 90 Repeat adding rules to each category. Click Apply when you finish to temporarily save the settings. To make the change permanent, click on Save All. AirLive ARM-104_v3 ADSL2/2+ Router...
-
Page 91: Port Forwarding - New Ip
New IP: If you wish to manually add a LAN client so that you can apply rules to it, click on the New IP button. The following screen will pop-up. Refer to ADVANCED LAN Clients setting for more details. Enter the IP Address, Hostname and MAC Address as shown then click Apply to save your setting. AirLive ARM-104_v3 ADSL2/2+ Router... -
Page 92: Port Forwarding - Dmz
Internet. Be aware that this feature may expose your local network to security risks. LAN Clients: This link will take you to the LAN Clients screen, more information on LAN Clients can be found in “LAN Clients” configuration section. AirLive ARM-104_v3 ADSL2/2+ Router... -
Page 93: Dmz Configuration Procedure
Select the WAN Group, LAN Group, and LAN IP Address. DMZ is configurable per LAN segment. Click Apply when you finish to temporarily save the settings. Note—You can click on “LAN Clients” link to access the LAN Clients screen. To make the change permanent, click on Save All. AirLive ARM-104_v3 ADSL2/2+ Router... -
Page 94: Port Forwarding - Custom Port Forwarding
Protocol: There are three options available: TCP, UDP, and TCP and UDP. Source IP Address: You can define the source IP address from which the incoming traffic will be allowed. Enter “0.0.0.0” for all. Source Netmask: Netmask of the source IP address. Enter “255.255.255.255” for all. AirLive ARM-104_v3 ADSL2/2+ Router... - Page 95 Destination Port Start: The starting port number that will be made open for this application. Destination Port End: The ending port number that will be made open for this application. Destination Port Map: Destination port mapped on the LAN (destination) side to which packets will be forwarded. AirLive ARM-104_v3 ADSL2/2+ Router...
-
Page 96: Advanced - Ip Filters
Custom IP Filters: This link takes you to the Custom IP Filter screen, more is discussed in “Custom IP Filters Screen” section. Available Rules: Predefined and/or user-defined IP filtering rules for each category. Applied Rules: The IP filtering rules you elelct to apply for each given category. AirLive ARM-104_v3 ADSL2/2+ Router... -
Page 97: Ip Filters Configuration Procedure
User category. You will be able to Edit/Delete the rule(s) you create. Repeat adding rules for each category. Click Apply when you finish to temporarily save the settings. To make the change permanent, click on Save All. AirLive ARM-104_v3 ADSL2/2+ Router... -
Page 98: Ip Filters - Custom Ip Filters
Source IP: Since IP filtering is for outgoing traffic, the source IP is the IP address on your LAN side that you want to block network traffic from. Source Netmask: Netmask of the source IP on your LAN side. AirLive ARM-104_v3 ADSL2/2+ Router... - Page 99 Protocol: There are five options available: TCP, UDP, TCP and UDP, ICMP, and Any. Apply: Click Apply to complete the setting. Cancel: Click Cancel to ignore all the changes. To complete and save the setting, click Save All after clicking the Apply button. AirLive ARM-104_v3 ADSL2/2+ Router...
-
Page 100: Advanced - Lan Clients
Enter IP Address: Assign the dynamic IP address to the host here. This is a mandatory field. Hostname: Hostname of the client. This field is optional. MAC Address: MAC address of the PC. This field is optional. AirLive ARM-104_v3 ADSL2/2+ Router... -
Page 101: Lan Clients Configuration Procedure
You can convert the dynamic entry into static by clicking Reserve, then Apply. As shown in below, the IP is now changed to static address. You can delete this entry using the Delete checkbox. When you finish, click Apply to temporarily save the settings. To make the change permanent, click on Save All. AirLive ARM-104_v3 ADSL2/2+ Router... -
Page 102: Advanced - Lan Isolation
LAN Isolation allows you to disable the flow of packets between up to three-user-defined LAN groups (USB and Ethernet). This allows you to secure information in private portions of the LAN from other, publicly accessible LAN segments. AirLive ARM-104_v3 ADSL2/2+ Router... -
Page 103: Lan Isolation Configuration Procedure
4.4.7.1 LAN Isolation Configuration Procedure Check the traffic between the two LAN groups that you want to disable the packets flow. Click Apply to temporarily save the settings. To make the change permanent, click on Save All. AirLive ARM-104_v3 ADSL2/2+ Router... -
Page 104: Advanced - Bridge Filters
00-00-00-00-00-00 as “don't care”. Blanks can be used in the MAC address space, and would be considered also as “don't care”. SrC Port: Source port. You can choose from Any, Ethernet, USB, WLAN, or WAN Bridge Connection Port for the particular bridge. AirLive ARM-104_v3 ADSL2/2+ Router... - Page 105 Add: Click Add button to add the rule to the list of rules. Apply: Click Apply to complete the setting. Cancel: Click Cancel to ignore all the changes. To complete and save the setting, click Save All after clicking the Apply button. AirLive ARM-104_v3 ADSL2/2+ Router...
-
Page 106: Bridge Filters Configuration Procedure
You can also edit a rule that you created using the Edit checkbox. You can delete a rule using Delete. Click Apply to temporarily save the settings. To make the change permanent, click on Save All. AirLive ARM-104_v3 ADSL2/2+ Router... -
Page 107: Advanced - Multicast
Enable IGMP Multicast: Click to enable IGMP Multicast and then select a connection listed. Apply: Click Apply to complete the setting. Cancel: Click Cancel to ignore all the changes. To complete and save the setting, click Save All after clicking the Apply button. AirLive ARM-104_v3 ADSL2/2+ Router... -
Page 108: Multicast Configuration Procedure
Select the WAN connection from the Available Connections list. Note—Only one WAN connection can be enabled for Multicast. This is usually the default connection the ISP provides. Click Apply to temporarily save the settings. To make the change permanent, click on Save All. AirLive ARM-104_v3 ADSL2/2+ Router... -
Page 109: Advanced - Static Routing
The default value is “0”, which means the subnet is directly one level down the local LAN network. Apply: Click Apply to complete the setting. Cancel: Click Cancel to ignore all the changes. To complete and save the setting, click Save All after clicking the Apply button. AirLive ARM-104_v3 ADSL2/2+ Router... -
Page 110: Static Routing Configuration Procedure
The fours stations in the subnet will be able to send/receive packets. You can add up to 16 entries. You can also delete any entry using the Delete checkbox. Click Apply again when you finish making all the changes. To make the change permanent, click on Save All. AirLive ARM-104_v3 ADSL2/2+ Router... -
Page 111: Advanced - Dynamic Routing
Enable Password: This is an optional field. RIP version v2/Compatibility allows you to provide simple plaintext password based authentication to RIP packets. This field is disabled if RIP v1 protocol is selected. AirLive ARM-104_v3 ADSL2/2+ Router... - Page 112 None: Ignores this interface and not send or receive routing updates through this interface. Apply: Click Apply to complete the setting. Cancel: Click Cancel to ignore all the changes. To complete and save the setting, click Save All after clicking the Apply button. AirLive ARM-104_v3 ADSL2/2+ Router...
-
Page 113: Dynamic Routing Configuration Procedure
For LAN group 1 and LAN Group 2, leave “Both” checked in the Direction field. Click Apply to temporarily save the settings. Click Apply again when you finish making all the changes. To make the change permanent, click on Save All. AirLive ARM-104_v3 ADSL2/2+ Router... -
Page 114: Advanced - Save All
If you restart the system without saying your configuration, this ARM-104_v3 ADSL2/2+ Router will revert back to the previously saved configuration. Save All: Click Save All to confirm the setting. The following window will be shown. Cancel: Click Cancel to ignore all the changes. AirLive ARM-104_v3 ADSL2/2+ Router... -
Page 115: Tools
Update Gateway: Upgrade the ARM-104_v3 ADSL2/2+ Router firmware. Ping Test: Run a ping test. Modem Test: Check whether the modem with a specific connection is properly connected to the network. Save All: Save the device setting. AirLive ARM-104_v3 ADSL2/2+ Router... -
Page 116: Tools - System Commands
Note: Connectivity to the unit will be lost. You can reconnect after the unit reboots. Restore Defaults: Use this button to restore factory default configurations. Note: You will be redirected to the ARM-104_v3 ADSL2/2+ Router Homepage after the unit has successfully been restored to factory default configurations. AirLive ARM-104_v3 ADSL2/2+ Router... -
Page 117: Tools - Remote Log
Debug: Software debugging message. Specify the level only when so directed by a technical support representative. Note: when you select a log level, all log information within this severity level and level(s) above (meaning, more severe levels) will be sent to the remote PC. AirLive ARM-104_v3 ADSL2/2+ Router... - Page 118 Delete: Delete the logging destination IP Address from the drop down list. Apply: Click Apply to complete the setting. Cancel: Click Cancel to ignore all the changes. To complete and save the setting, click Save All after clicking the Apply button. AirLive ARM-104_v3 ADSL2/2+ Router...
-
Page 119: Tools - User Management
ADSL2/2+ Router if it is been inactive for 30 minutes. You can change the timeout here. Apply: Click Apply to complete the setting. Cancel: Click Cancel to ignore all the changes. To complete and save the setting, click Save All after clicking the Apply button. AirLive ARM-104_v3 ADSL2/2+ Router... -
Page 120: Tools - Update Gateway
Web browser by closing the window, clicking a link, or loading a new page. If the browser is interrupted, it may corrupt the upgrading process. When the upload is complete, your ARM-104_v3 ADSL2/2+ Router will automatically reboot and restart. The upgrade process will typically take about 1~2 minutes. AirLive ARM-104_v3 ADSL2/2+ Router... -
Page 121: Update Gateway Procedure
Wireless Firmware version information on the Product Information screen If you would like a copy of the configuration file (config.bin) saved to the ARM-104_v3 ADSL2/2+ Router flash, click Get Configuration to download it. AirLive ARM-104_v3 ADSL2/2+ Router... -
Page 122: Tools - Ping Test
Number of echo requests: You can define how many times the IP address will be pinged. The default is 3 times. Test: Click Test to start the ping test. The result will be shown in the window underneath. AirLive ARM-104_v3 ADSL2/2+ Router... -
Page 123: Ping Test Procedure
The ping results will be displayed in the box on the screen. If the ping test was successful, it means that the TCP/IP protocol is up and running. If the Ping test failed, the TCP/IP protocol is not loaded for some reason, you should restart the ARM-104_v3 ADSL2/2+ Router. AirLive ARM-104_v3 ADSL2/2+ Router... -
Page 124: Tools - Modem Test
Type: The type of the WAN connection. VPI/VCI: Virtual Path identifier/Virtual Channel Identifier. Test Type: There are 4 test types: F4 End: F4 end to end. F4 Seg: F4 segment. F5 End: F5 end to end. F5 Seg: F5 segment. AirLive ARM-104_v3 ADSL2/2+ Router... -
Page 125: Tools - Save All
If you restart the system without saying your configuration, this ARM-104_v3 ADSL2/2+ Router will revert back to the previously saved configuration. Save All: Click Save All to confirm the setting. The following window will be shown. AirLive ARM-104_v3 ADSL2/2+ Router... -
Page 126: Status
Figure shows the Status main screen, which can be accessed by clicking on the STATUS tab from the top of the screen. This screen provides access to the following status screens: Network Statistics Connection Status DHCP Clients Modem Status Product Information System Log AirLive ARM-104_v3 ADSL2/2+ Router... -
Page 127: Status - Network Statistics
4.6.1 STATUS - Network Statistics The Network Statistics show the Select Network Interface type to peruse statistics for each type of connection. Click Ethernet, USB (Optional), DSL or Wireless to view your Network Statistics. AirLive ARM-104_v3 ADSL2/2+ Router... -
Page 128: Status - Network Statistics - Ethernet
4.6.1.1 STATUS - Network Statistics - Ethernet Ethernet: Shows the Transmit/Receive Frames, Error Frames, Collision and CRC Errors information of the Ethernet Interface. The traffic counter will reset if the device is rebooted. Refresh: Click Refresh button to reload Web browser. AirLive ARM-104_v3 ADSL2/2+ Router... -
Page 129: Status - Network Statistics - Dsl
4.6.1.2 STATUS - Network Statistics - DSL DSL: Shows the Total Bytes Receive/Transmit and Error Count information of the ADSL (WAN) Interface. The traffic counter will reset if the device is rebooted. Refresh: Click Refresh button to reload Web browser. AirLive ARM-104_v3 ADSL2/2+ Router... -
Page 130: Status - Connection Status
You can view your the status of your different connections from the Connection Status screen. To access, click on the Connection Status link from the STATUS main screen. Refresh: Click Refresh button to reload Web browser. AirLive ARM-104_v3 ADSL2/2+ Router... -
Page 131: Status - Dhcp Clients
From the STATUS main screen, click the DHCP Clients link, select the LAN connection, and the following information of the DHCP LAN Clients will be displayed: MAC Address IP Address Host Name Lease Time Refresh: Click Refresh button to reload Web browser. AirLive ARM-104_v3 ADSL2/2+ Router... -
Page 132: Status - Modem Status
ARM-104_v3 ADSL2/2+ Router or set by the ADSL Central Office (CO) DSLAM, neither of which cannot be changed by the user. Refresh: Click Refresh button to reload Web browser. AirLive ARM-104_v3 ADSL2/2+ Router... -
Page 133: Status - Product Information
4.6.5 STATUS - Product Information The Product Information show the complete information and various parameters of the ARM-104_v3 ADSL2/2+ Router including Software Versions. AirLive ARM-104_v3 ADSL2/2+ Router... -
Page 134: Status - System Log
(if remote logging is enabled). This page contains information that is dynamic and will refresh every 5~10 seconds.. Refresh: Click Refresh button to reload Web browser. AirLive ARM-104_v3 ADSL2/2+ Router... -
Page 135: Appendix A: Router Terms
"fakes" the connection to your machine. You should use the DMZ when you want to run a server that others will access from the Internet. Internal programs and servers (like print servers, etc) should NOT be connected to the DMZ AirLive ARM-104_v3 ADSL2/2+ Router... - Page 136 If your machine can reach all stations on the same subnet (usually a building or a sector within a building), but cannot communicate outside of this area, it is usually because of an incorrectly configured default gateway. AirLive ARM-104_v3 ADSL2/2+ Router...
-
Page 137: Appendix B: Frequently Asked Questions
I do when I am not able to get the web configuration screen for this ARM-104_v3 ADSL2/2+ Router? Ans. Remove the proxy settings on your Internet Browsers or remove the dial-up settings on your browser. AirLive ARM-104_v3 ADSL2/2+ Router... - Page 138 TCP/IP ports to be open. It is recommended that you set your computer with a static IP if you want to use DMZ features. What is the maximum IP addresses supported by this ARM-104_v3 ADSL2/2+ Router? Ans. ARM-104_v3 ADSL2/2+ Router can support up to 253 IP addresses. AirLive ARM-104_v3 ADSL2/2+ Router...
-
Page 139: Appendix C: Troubleshooting Guide
3. Open the Windows System Command Prompt: For Windows 9x/ME: Manually enter winipcfg, then press Enter. For Windows 2000/XP: Manually enter ipconfig/all, then press Enter. 4. You should have the following information listed on your Window System: IP Address: 192.168.1.x Submask: 255.255.255.0 AirLive ARM-104_v3 ADSL2/2+ Router... - Page 140 Default Gateway IP: 192.168.1.1 AirLive ARM-104_v3 ADSL2/2+ Router...
- Page 141 2. Check whether you are using the correct LAN cable. 3. Check your Ethernet Adaptor installation and configurations. 4. Verify that the IP address for your ARM-104_v3 ADSL2/2+ Router and your workstation are correct and that the addresses are on the same subnet. AirLive ARM-104_v3 ADSL2/2+ Router...
-
Page 142: Appendix D: Glossary
CBR: Constant Bit Rate: A constant transfer rate that is ideal for streaming (executing while still downloading) data, such as audio or video files. Cell: A unit of transmission in ATM, consisting of a fixed-size frame containing a 5-octet header and a 48-octet payload. AirLive ARM-104_v3 ADSL2/2+ Router... - Page 143 DSL lines and places the signals on a high-speed backbone line. DSLAMs are typically located at a telephone company’s CO (Central Office). Encapsulation: The inclusion of one data structure within another. For example, packets can be encapsulated in an ATM frame during transfer. AirLive ARM-104_v3 ADSL2/2+ Router...
- Page 144 HNP: Home Network Processor Host: In context of Internet Protocol, a host computer is one that has full two way access to other computers on the Internet. AirLive ARM-104_v3 ADSL2/2+ Router...
- Page 145 NAPT: Network Address and Port Translation: An extension of NAT, NAPT maps many private internal addresses into one IP address. The outside network (WAN) can see this one IP address but it cannot see the individual device IP addresses translated by the NAPT. AirLive ARM-104_v3 ADSL2/2+ Router...
- Page 146 USB port. This enables the ADSL WAN access to be shared with multiple nodes on the LAN. Network Address Translation (NAT) is supported so that one WAN-side IP address can be shared among multiple LAN-side devices. DHCP is used to serve each LAN-side device and IP address. AirLive ARM-104_v3 ADSL2/2+ Router...
- Page 147 VC: Virtual Circuit: A virtual circuit is a circuit in a network that appears to be a physically discrete path, but is actually a managed collection of circuit resources that allocates specific circuits as needed to satisfy traffic requirements. AirLive ARM-104_v3 ADSL2/2+ Router...
- Page 148 Internet is consisted of WANs. WPA: Wi-Fi Protected Access (WPA) is a specification of standards-based, interoperable security enhancements that increase the level of data protection and access control for existing and future wireless LAN systems. UI845_03 AirLive ARM-104_v3 ADSL2/2+ Router...
Need help?
Do you have a question about the ARM-104 V3 and is the answer not in the manual?
Questions and answers