
Related Manuals for SMART Board 600i4


Summary of Contents for SMART Board 600i4
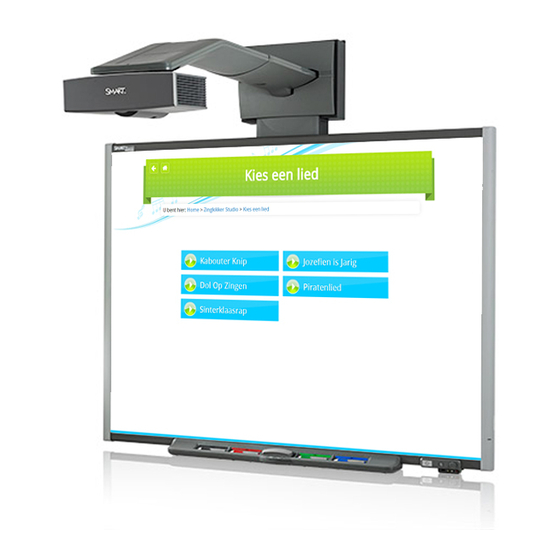
- Page 1 P L E A S E T H I N K B E F O R E Y O U P RI N T SMART Board™ 600i4 and D600i4 Interactive Whiteboard Systems Configuration and User’s Guide...
- Page 2 Microsoft Corporation in the U.S. and/or other countries. The Bluetooth word mark is a registered trademark and is owned by the Bluetooth SIG, Inc. and any use of such marks by SMART Technologies ULC is under license. All other third-party product and company names may be trademarks of their respective owners.
-
Page 3: Important Information
Ensure that your interactive whiteboard system is always being used correctly. NOTE If you own a SMART product other than a SMART Board 600i4 or D600i4 interactive whiteboard system, refer to the installation guide for your product for relevant warnings and maintenance instructions. -
Page 4: Safety Warnings, Cautions And Important Information
Do not climb (or allow children to climb) on any part of your wall-mounted SMART Board interactive whiteboard system. • Climbing on your interactive whiteboard or on the SMART UF65 or SMART UF65w projector’s boom could result in personal injury or product damage. Do not climb on, hang from or suspend objects from the projector’s boom. - Page 5 ii i IM P O RT A NT I NF O R MA TI O N • There are no user-serviceable parts inside the pen tray. Only qualified personnel should disassemble the pen tray’s printed circuit boards, and this procedure must be done with proper electrostatic discharge (ESD) protection. WARNINGS –...
- Page 6 • When replacing the projector lamp: – Use only replacement lamps approved by SMART Technologies. Contact your authorized SMART reseller for replacement parts. –...
- Page 7 IM P O RT A NT I NF O R MA TI O N • When returning the projector to the boom, replace all of the screws that you removed when you removed the projector. Failure to do so can result in the projector falling from the boom, causing personal injury or product damage.
- Page 8 If dust or small items prevent pen tray buttons from being pressed or cause constant button contact, remove the obstructions carefully. • Before you clean the SMART UF65 or SMART UF65w projector, press the Power button twice on the extended control panel (ECP) or remote control to put the projector into Idle mode, and then allow the lamp to cool for 30 minutes.
- Page 9 UF65w projector boom box to install your system. Do not use the instructions in your SMART Board interactive whiteboard box. • Make sure that an electrical socket is near to your SMART product and remains easily accessible during use. •...
- Page 10 vi ii | IM P O RT A NT I NF O R M A TI O N...
-
Page 11: Table Of Contents
Read This Section First ..................i Safety Warnings, Cautions and Important Information ........ii About Your Interactive Whiteboard System ............1 SMART Board 600i4 or D600i4 Interactive Whiteboard System Features ..2 Interactive Whiteboard Features .............. 3 Introducing SMART Board D600 Series Interactive Whiteboards.... 3 SMART UF65 or SMART UF65w Projector System Features .... - Page 12 HD and SD Signal Format Compatibility ..........36 Video System Signal Compatibility............37 Remotely Managing Your Interactive Whiteboard System........39 Connecting Your Room Control System to the SMART UF65 or SMART UF65w Projector ................. 40 Pin Configuration on the Projector’s RS-232 Connector ......40 Serial Interface Settings .................
- Page 13 CON T EN TS Additional Composite Video Source Controls ........48 Audio Output Controls ................49 Network Controls..................50 System Controls ..................51 Simple Network Management Protocol (SNMP)........... 55 Web Page Management ................55 Accessing Web Page Management ............55 Home......................
- Page 14 Transporting Your Interactive Whiteboard System ........89 Contacting SMART Technical Support ............89 Locating Your Projector Serial Number..........90 Replacing the SMART UF65 or SMART UF65w Projector Lamp ....... 91 Removing and Replacing the Projector Lamp Module ......... 91 Resetting the Lamp Timer ................94 Disabling USB Communications .................
- Page 15 xi ii | CON T EN TS Hardware Environmental Compliance............... 101 Waste Electrical and Electronic Equipment Regulations (WEEE Directive)101 Restriction of Certain Hazardous Substances (RoHS Directive) ....101 Batteries...................... 101 Packaging ....................102 China’s Electronic Information Products Regulations......... 102 U.S. Consumer Product Safety Improvement Act ........102 Index .........................
- Page 16 xi v | CON T EN TS...
-
Page 17: About Your Interactive Whiteboard System
SMART UF65 or SMART UF65w projector system with a SMART Board 600 or D600 series interactive whiteboard. Refer to these topics to learn more about the features of your SMART Board 600i4 or D600i4 interactive whiteboard system and for information about product parts and accessories. -
Page 18: Smart Board 600I4 Or D600I4 Interactive Whiteboard System Features
When you use SMART Notebook™ collaborative learning software with your SMART Board 600i4 or D600i4 interactive whiteboard system, you can write or draw over the projected computer image in digital ink using a pen tray pen or your finger, and then... -
Page 19: Interactive Whiteboard Features
In dual-user mode, SMART Notebook switches to full screen-mode and a line divides the screen into two separate workspaces, each with its own set of tools. The SMART UF65 or SMART UF65w projector is compatible with both standard and dual-touch SMART Board interactive whiteboards. -
Page 20: Smart Uf65 Or Smart Uf65W Projector System Features
A wall-mounted, high-offset projector engine that uses DLP® technology by Texas Instruments™, providing BrilliantColor™ performance and Gamma 2.2 correction with SMART Presentation, Bright Room, Dark Room, sRGB and User modes • PAL, PAL-N, PAL-M, SECAM, NTSC, NTSC 4.43 video system compatibility •... -
Page 21: Extended Control Panel (Ecp)
• One RJ11 6-wire jack behind the interactive whiteboard for product control Included Accessories The following accessories are included with your SMART Board 600i4 or D600i4 interactive whiteboard system. Remote Control The remote control enables you to control the system and set up your SMART UF65 or SMART UF65w projector. -
Page 22: Eraser
CH A P T E R 1 – A BO UT Y O UR I NT ER ACT I V E W H I T E B O A R D S Y S T E M NOTE Some of SMART’s older pens aren’t designed to reflect infrared light and the pen tray sensors might not detect them reliably. -
Page 23: Additional Details For Installing Your Interactive Whiteboard System
Additional Details for Installing Your Interactive Whiteboard System Consult the included SMART Board 600i4 or D600i4 interactive whiteboard system installation document for instructions on how to install your product and use the mounting template and extended control panel (ECP). IMPORTANT Use the instructions included with your SMART UF65 or SMART UF65w projector system to install your interactive whiteboard, projector and ECP. -
Page 24: Environmental Requirements
Doing so could cause a malfunction and shorten the life of the projector. IMPORTANT Using the SMART UF65 or SMART UF65w projector system near a TV or radio could cause interference to the images or sound. If this happens, move the TV or... - Page 25 Not for industrial use where heavy dust and pollutants can cause malfunctions or impaired operation. Periodic cleaning is required in areas with heavier dust. See page 80 for information on cleaning the SMART UF65 or SMART UF65w projector. • Designed for pollution degree 1 (P1) as per EN61558-1, which is defined as “No pollution or only dry...
-
Page 26: Choosing An Installation Location
Make sure that the bolt is tightened, and never remove it from the unit without first supporting the projector boom. Recommended Mounting Heights SMART includes a mounting template with each of its SMART Board 600i4 or D600i4 interactive whiteboard systems. If you lose this template, contact your authorized SMART reseller. -
Page 27: Routing The Cables
SMART Board interactive whiteboard’s wall-mounting bracket, and then down the right side of your interactive whiteboard. When connecting cables from the SMART UF65w projector to a SMART Board 685 or D685 interactive whiteboard, make sure that all cables pass between the two SMART Board interactive whiteboard wall-mounting brackets. -
Page 28: Smart Uf65 Or Smart Uf65W Projector Connection Diagram
CH A P T E R 2 – A DD IT IO N A L DET A I LS F O R INS T A LL IN G Y O U R I N T E R A C T I V E WH ITE BOARD S YS T E M SMART UF65 or SMART UF65w Projector Connection Diagram... - Page 29 18. Audio-R connector (for S-video connector) NOTES • Remove the cable cover to access the connection panel. • To connect your SMART Board 600 or D600 series interactive whiteboard, see the SMART Board 600 and D600 Series Interactive Whiteboard Installation and User’s Guide.
-
Page 30: Focusing The Image
Focusing the Image To focus the projected image, use the focus ring, located on the bottom of the SMART UF65 or SMART UF65w projector (when the projector is facing downward). NOTE Ensure that you remove the projector’s plastic lens cover. -
Page 31: Correcting Alignment Errors
SMART Board 600 or D600 series interactive whiteboard on an uneven surface or a wall that has obstructions, or if you swivel the SMART UF65 or SMART UF65w projector too far from your SMART Board 600 or D600 series interactive whiteboard’s vertical center. -
Page 32: Tips For Adjusting The Projected Image
WH ITE BOARD S YS T E M Tips for Adjusting the Projected Image Refer to these notes when adjusting the projected image as described in the included SMART Board 600i4 and D600i4 Interactive Whiteboard System Installation InstrIuctions. • Project a computer image (set to the proper resolution) while adjusting the image. -
Page 33: Securing The Pen Tray, Interactive Whiteboard And Projector
Screw Location Locking the Pen Tray to Your Interactive Whiteboard Because your SMART Board interactive whiteboard’s pen tray is detachable, you might want to safeguard it—and your interactive whiteboard—by anchoring it with a security cable. - Page 34 18 | CH A P T E R 2 – A DD IT IO N A L DET A I LS F O R INS T A LL IN G Y O U R I N T E R A C T I V E WH ITE BOARD S YS T E M If you already secured your pen tray brackets to the wall, you might need to remove the pen tray before you lock it with a security cable.
-
Page 35: Securing The Projector To The Boom
WH ITE BOARD S YS T E M Securing the Projector to the Boom To learn how to secure the SMART UF65 or SMART UF65w projector to the boom, see the included SMART Board 600i4 and D600i4 Interactive Whiteboard System Installation Instructions. - Page 36 20 | CH A P T E R 2 – A DD IT IO N A L DET A I LS F O R INS T A LL IN G Y O U R I N T E R A C T I V E WH ITE BOARD S YS T E M...
-
Page 37: Using Your Interactive Whiteboard System
Chapter 3 Using Your Interactive Whiteboard System This chapter describes the basic operation of your interactive whiteboard system, and also explains how to set up your remote control, retrieve system information, access the projector’s image adjustment options and integrate your interactive whiteboard system with peripheral devices. -
Page 38: Using Your Remote Control
CH A P T E R 3 – U SIN G Y O UR IN T ER ACT IV E WH IT EB OARD SY ST EM Using Your Remote Control The SMART UF65 or SMART UF65w projector remote control enables you to access on-screen projector menus and change projector settings. -
Page 39: Remote Control Buttons
23 | CH A P T E R 3 – U SIN G Y O UR IN T ER ACT IV E WH IT EB OARD SY ST EM Remote Control Buttons The projector remote control enables you to access on-screen menus and change projector settings. -
Page 40: Adjusting Projector Settings
There are no projector menu options on the ECP. Keep your remote control in a safe place because the ECP is not meant to substitute for the remote control. • The menu heading at the top of all settings is SMART UF65 Settings or SMART UF65w Settings. Menu Options Menu... - Page 41 Adjustment, cont’d NOTE Don’t adjust this option unless you’re advised to by a certified SMART Technical Support Specialist. You can apply these settings only after you make all boom adjustments. Applies to VGA inputs only. V-position Moves the projected image’s vertical position up or down from -5 to 5.
- Page 42 26 | CH A P T E R 3 – U SIN G Y O UR IN T ER ACT IV E WH IT EB OARD SY ST EM Menu Settings Description Heading Volume Increases and decreases the projector’s volume from Audio -20 to 20.
- Page 43 27 | CH A P T E R 3 – U SIN G Y O UR IN T ER ACT IV E WH IT EB OARD SY ST EM Menu Settings Description Heading Default, Lamp Mode Adjusts lamp brightness to Standard or Economy. cont’d Standard displays a high-quality, bright image.
- Page 44 Screen). This screen displays when the projector lamp is starting and an image isn’t displayed. Press Exit to return to the Default menu. • SMART displays the default SMART logo on a blue background. • Capture User Startup Screen closes the on-screen display menu and captures the entire projected interactive whiteboard image.
- Page 45 29 | CH A P T E R 3 – U SIN G Y O UR IN T ER ACT IV E WH IT EB OARD SY ST EM Menu Settings Description Heading Network Network The VGA out and Network features are Off by and VGA default.
- Page 46 30 | CH A P T E R 3 – U SIN G Y O UR IN T ER ACT IV E WH IT EB OARD SY ST EM Menu Settings Description Heading Language Language Selects language preference. Projector menu support is available in English (default), Brazilian Portuguese, Czech, Danish, Dutch, Finnish, French, German, Greek, Iberian Portuguese, Italian, Korean, Japanese, Norwegian, Polish,...
-
Page 47: Using Your Interactive Whiteboard
SMART Notebook enables you to capture and save your notes to a SMART Notebook file, or write directly into any Ink Aware application. The full capabilities of SMART Notebook include SMART Board Tools and a wide range of digital content. -
Page 48: Ecp Connection Diagram
32 | CH A P T E R 3 – U SIN G Y O UR IN T ER ACT IV E WH IT EB OARD SY ST EM ECP Connection Diagram Front View Rear View Number Function Power and status LED Input Volume control USB B receptacle (for your primary computer) -
Page 49: Attaching Peripheral Sources And Outputs To The Ecp
ECP harness cable and your interactive whiteboard. • Don’t connect SMART Board Audio (SBA) USB speakers to the ECP. Connect these speakers to the projector connection panel using a dual-channel (left and right) RCA plugs to 3.5 mm cable (not included). -
Page 50: Video Format Compatibility
Both the SMART UF65 and SMART UF65w projectors have a native video format and various video format compatibility modes. You can change image appearances for certain formats and compatibilities. Native Video Format The following table lists the native VESA RGB video formats for the SMART UF65 and SMART UF65w projector. Horizontal Pixel... - Page 51 Letterbox 1280 x 1024 SXGA3 85 85.024 Letterbox 1400 x 1050 SXGA+ 59.978 Full screen 1600 x 1200 UXGA Full screen SMART UF65w Projector Aspect Refresh “Match Input” Resolution Mode Ratio Rate (Hz) Appearance 720 × 400 720×400_85 85.039 Letterbox 640 ×...
-
Page 52: Hd And Sd Signal Format Compatibility
HD and SD Signal Format Compatibility The following tables list the projectors’ high definition and standard definition format signal compatibility that you can adjust by using the aspect ratio commands described on page 27. SMART UF65 Projector Aspect Horizontal Vertical “Match Input”... -
Page 53: Video System Signal Compatibility
37 | CH A P T E R 3 – U SIN G Y O UR IN T ER ACT IV E WH IT EB OARD SY ST EM SMART UF65w Projector Aspect Horizontal Vertical “Match Input” Signal Format Ratio... - Page 54 38 | CH A P T E R 3 – U SIN G Y O UR IN T ER ACT IV E WH IT EB OARD SY ST EM SMART UF65w Projector Aspect Horizontal Vertical Color Signal Video Mode Ratio...
-
Page 55: Remotely Managing Your Interactive Whiteboard System
Your Interactive Whiteboard System This chapter includes detailed instructions on how to set up your computer or room control system to remotely manage your SMART Board 600i4 or D600i4 interactive whiteboard system settings through an RS-232 serial interface. • Connecting Your Room Control System to the SMART UF65 or SMART UF65w Projector on page 40 •... -
Page 56: Connecting Your Room Control System To The Smart Uf65 Or Smart Uf65W Projector
SMART UF65 or SMART UF65w Projector By connecting a computer or room control system to the SMART UF65 or SMART UF65w projector’s RS-232 serial interface, you can select video inputs, start up or shut down your interactive whiteboard system and request information such as projector lamp use, current settings and network addresses. - Page 57 41 | CH A P T E R 4 – R E MO T E L Y M A N A G IN G Y O U R IN T ERAC T IVE WH IT EBOA RD SYS TE M NOTES •...
-
Page 58: Projector Programming Commands
CH A P T E R 4 – R E MO T E L Y M A N A G IN G Y O U R IN T ERAC T IVE WH IT EBOA RD SYS TE M Projector Programming Commands Projector Powerstate Controls The SMART UF65 or SMART UF65w projector responds to commands only at certain power levels and times. There are five projector power states: • Powering (startup) •... - Page 59 43 | CH A P T E R 4 – R E MO T E L Y M A N A G IN G Y O U R IN T ERAC T IVE WH IT EBOA RD SYS TE M See the following example for adjusting projector brightness: >get brightness brightness=55...
-
Page 60: Powerstate Controls
44 | CH A P T E R 4 – R E MO T E L Y M A N A G IN G Y O U R IN T ERAC T IVE WH IT EBOA RD SYS TE M Powerstate Controls These commands turn on or turn off the projector and request the projector’s current powerstate. -
Page 61: Source Selection Controls
45 | CH A P T E R 4 – R E MO T E L Y M A N A G IN G Y O U R IN T ERAC T IVE WH IT EBOA RD SYS TE M Source Selection Controls These commands switch input sources. - Page 62 See page 42 for setting absolute and adjustment commands. Command Command Target Range Response set displaymode [target] =SMART Presentation displaymode=[target] =Bright Classroom =Dark Classroom =sRGB =User set brightness [value]...
-
Page 63: Additional Vga Source Controls
47 | CH A P T E R 4 – R E MO T E L Y M A N A G IN G Y O U R IN T ERAC T IVE WH IT EBOA RD SYS TE M Additional VGA Source Controls Your VGA source supports all the general source controls described on page 45, as well as the commands listed in this section. -
Page 64: Additional Composite Video Source Controls
48 | CH A P T E R 4 – R E MO T E L Y M A N A G IN G Y O U R IN T ERAC T IVE WH IT EBOA RD SYS TE M Additional Composite Video Source Controls Your composite video source supports all the general source controls described on the previous page, as well as the commands listed in this section. -
Page 65: Audio Output Controls
49 | CH A P T E R 4 – R E MO T E L Y M A N A G IN G Y O U R IN T ERAC T IVE WH IT EBOA RD SYS TE M Audio Output Controls These commands control your projector’s audio output to your audio system (not included). -
Page 66: Network Controls
50 | CH A P T E R 4 – R E MO T E L Y M A N A G IN G Y O U R IN T ERAC T IVE WH IT EBOA RD SYS TE M Network Controls These commands control your projector’s network status and settings. -
Page 67: System Controls
51 | CH A P T E R 4 – R E MO T E L Y M A N A G IN G Y O U R IN T ERAC T IVE WH IT EBOA RD SYS TE M System Controls Enables you to switch system settings and access system information. - Page 68 52 | CH A P T E R 4 – R E MO T E L Y M A N A G IN G Y O U R IN T ERAC T IVE WH IT EBOA RD SYS TE M System Information Commands (Passive) These commands inform you of the current system settings.
- Page 69 CH A P T E R 4 – R E MO T E L Y M A N A G IN G Y O U R IN T ERAC T IVE WH IT EBOA RD SYS TE M Command Target Command Response Range set projectionmode [target] =front projectionmode=[target] =ceiling =rear =rear ceiling set startupscreen [target] =smart startupscreen=[target] =usercapture =preview set language [target] =Brazilian Portuguese language=[target] =Czech =Danish =Dutch =English =Finnish =French...
- Page 70 54 | CH A P T E R 4 – R E MO T E L Y M A N A G IN G Y O U R IN T ERAC T IVE WH IT EBOA RD SYS TE M Command Target Command Response...
-
Page 71: Simple Network Management Protocol (Snmp)
SYS TE M Simple Network Management Protocol (SNMP) SMART UF65 and SMART UF65w projectors support a list of SNMP commands as described in the management information base (MIB) file The SNMP agent supports SNMP version 1. Upload the MIB file to your SNMP management system application, and then use it as described in your application’s... -
Page 72: Home
56 | CH A P T E R 4 – R E MO T E L Y M A N A G IN G Y O U R IN T ERAC T IVE WH IT EBOA RD SYS TE M Home The Home menu page displays basic projector information and enables you to select the on-screen display language. - Page 73 SYS TE M Submenu Setting Description Display Mode Adjusts the display output to SMART Presentation, Bright Room, Dark Room, sRGB and User modes so you can project images from various sources with consistent color performance: • SMART Presentation is recommended for color fidelity.
- Page 74 58 | CH A P T E R 4 – R E MO T E L Y M A N A G IN G Y O U R IN T ERAC T IVE WH IT EBOA RD SYS TE M Submenu Setting Description Lamp Reminder...
- Page 75 Submenu Setting Description Startup Screen Selects the type of startup screen to SMART or User. The SMART screen is the default SMART logo on a blue background. The User screen uses the saved picture from the Capture User Startup Screen function.
-
Page 76: 3D Settings
60 | CH A P T E R 4 – R E MO T E L Y M A N A G IN G Y O U R IN T ERAC T IVE WH IT EBOA RD SYS TE M 3D Settings This menu allows you to enable or disable 3D image display and set the format. -
Page 77: E-Mail Alerts
61 | CH A P T E R 4 – R E MO T E L Y M A N A G IN G Y O U R IN T ERAC T IVE WH IT EBOA RD SYS TE M Submenu Setting Description Location... -
Page 78: Password Settings
Fan Lock conditions occur. Select the settings you want, and then press Submit. NOTE The projector sends an alert e-mail (SMART Alert) to your e-mail address. Press E-mail Alert Test to confirm your e-mail address by sending a test e-mail (SMART Alert-Test Mail). -
Page 79: Troubleshooting Your Interactive Whiteboard System
Interactive Whiteboard System This chapter provides basic troubleshooting information for your interactive whiteboard system. For issues not covered in this section, contact your authorized SMART reseller or consult the SMART Support website. • System Status and Warning Lights on page 64 •... -
Page 80: System Status And Warning Lights
SYS TE M System Status and Warning Lights This section describes your SMART Board 600i4 or D600i4 interactive whiteboard system’s three status and warning light regions and their patterns. Refer to these tables to troubleshoot your interactive whiteboard, ECP or projector. If you’re unable... -
Page 81: Integrated Interactive Whiteboard Ready Light Status
Ready Light Adding a SMART UF65 or SMART UF65w projector and an ECP changes the standard behavior of the interactive whiteboard Ready light. The following status light explanations only occur when you connect a computer source to your interactive whiteboard system’s VGA1 or VGA2 ports, and the USB input and the input source... -
Page 82: Projector Ready Lights And Projector Status
Projector Ready Lights and Projector Status The SMART UF65 or SMART UF65w projector’s two indicator LED lights (Power and Service) are located on the boom-mounted projector. Specific light sequences convey information about the state of the projector, including errors. -
Page 83: Projector Error States
67 | CH A P T E R 5 – T R O U B L E S H O O T I N G Y O U R IN TE RAC T IVE W H I T E B O A R D SYS TE M Power LED Service LED... -
Page 84: The "Projector Overheated" Message Appears
5. Reconnect the power cable, and then turn on the projector. 6. If the previous steps don’t resolve the issue, disconnect the power cable, and then contact your authorized SMART reseller. The “Fan Failure” Message Appears If the “Fan Failure” indicator message appears and the projector turns off during use, one or both of the following issues is occurring: •... -
Page 85: The "Color Wheel Failure" Message Appears
3. Reconnect the power cable, and then turn on the projector. 4. If the previous steps don’t resolve the issue, disconnect the power cable, and then contact your authorized SMART reseller. The “Lamp Failure” Message Appears If the “Lamp Failure” indicator message appears and the lamp turns off during use or won’t turn on, one of the following issues is occurring:... -
Page 86: The Ready Light Isn't Lit
4. Make sure the Hide Display feature on the remote is disabled. See page 23. 5. If the previous steps don’t resolve the issue, disconnect the power cable and then contact your authorized SMART reseller. Troubleshooting Standard Use Issues Standard use issues may occur during the life of the projector due to normal projector wear or deliberate user changes to your system. -
Page 87: Resolving Audio Issues
6. If the previous steps don’t resolve the issue, contact your authorized SMART reseller. Resolving Video Issues If your projector has a frozen image, perform the following procedure. -
Page 88: Resolving Image Issues
Resolving Image Issues Computers, peripherals, source inputs and their connection cables may not be set up correctly to transmit their signals to your SMART Board interactive whiteboard system. Refer to Video Format Compatibility on page 34 and the following section to help resolve these issues. - Page 89 3. Click Settings. 4. Verify that your display resolution setting is lower than or equal to 1024 × 768 (SMART UF65 projector) or 1280 × 800 (SMART UF65w projector). IMPORTANT If the projector still does not display the entire image, perform the following...
- Page 90 4. In the Models list, select the resolution you need. 5. Verify that the resolution setting of the monitor display is lower than or equal to 1024 × 768 (SMART UF65 projector) or 1280 × 800 (SMART UF65w projector). Your Connected Laptop or PowerBook® Computer Image Isn’t Projected Laptop and PowerBook computer settings can interfere with projector operations.
- Page 91 This action resets all values to their defaults. Unaligned Projected Image Like all mechanical systems, the SMART UF65 or SMART UF65w projector’s image may slip if it is moved often or installed in a location prone to vibration (such as next to a heavy door).
-
Page 92: Accessing The Service Menu
76 | CH A P T E R 5 – T R O U B L E S H O O T I N G Y O U R IN TE RAC T IVE W H I T E B O A R D SYS TE M Accessing the Service Menu CAUTION... -
Page 93: Maintaining Your Interactive Whiteboard System
Keeping the Writing Surface Clean on page 78 • Cleaning the Pen Tray on page 79 • Cleaning the SMART UF65 or SMART UF65w Projector on page 80 • Transporting Your Interactive Whiteboard System on page 85 • Contacting SMART Technical Support on page 85... -
Page 94: Preventing Damage To Your Interactive Whiteboard
USB cable from your interactive whiteboard so that you do not scramble the desktop icons or inadvertently activate applications when you wipe your interactive whiteboard’s screen. With proper care, your SMART Board interactive whiteboard will provide years of trouble-free service. Follow these tips to keep the screen surface clean: •... -
Page 95: Removing Permanent Marker Ink Stains
CH A P T E R 6 – M A I N T A I NI NG Y O U R I NT E R A C T I V E W H I TE BO A R D S Y S T E M For information on disinfecting your interactive whiteboard, see Disinfecting Your SMART Board Interactive Whiteboard. -
Page 96: Cleaning The Smart Uf65 Or Smart Uf65W Projector
CAUTION • Before you clean the SMART UF65 or SMART UF65w projector, press the Power button twice on the ECP or remote control to put the system into Idle mode, and then allow the lamp to cool for 30 minutes. -
Page 97: Cleaning The Lamp Module And Projector Vents
Cleaning the Lamp Module and Projector Vents This section provides instructions for using a vacuum cleaner to remove accumulated dust from the SMART UF65 or SMART UF65w projector’s lamp module, vents and slots. SMART recommends cleaning your projector every 12 months. - Page 98 82 | CH A P T E R 6 – M A I N T A I NI NG Y O U R I NT E R A C T I V E W H I TE BO A R D S Y S T E M 4.
- Page 99 83 | CH A P T E R 6 – M A I N T A I NI NG Y O U R I NT E R A C T I V E W H I TE BO A R D S Y S T E M 7.
- Page 100 91). NOTE You may need to adjust the projected image after performing the previous procedures. For more information, see the included SMART Board 600i4 and D600i4 Interactive Whiteboard System Installation Instructions and the tips on page 16.
-
Page 101: Transporting Your Interactive Whiteboard System
(if you printed it). Locating Your Projector Serial Number The serial number on the SMART UF65 or SMART UF65w projector is located on the top mounting plate (the side away from the projector’s lens). - Page 102 86 | CH A P T E R 6 – M A I N T A I NI NG Y O U R I NT E R A C T I V E W H I TE BO A R D S Y S T E M...
-
Page 103: Replacing The Smart Uf65 Or Smart Uf65W Projector Lamp
Resetting the Lamp Timer on page 94 Removing and Replacing the Projector Lamp Module If a lamp fails, or if a replacement message appears on the SMART UF65 or SMART UF65w projector’s screen, a qualified person can replace the projector lamp module. WARNING •... - Page 104 88 | CH A P T E R 7 – R E P L A C I N G T H E S M A R T U F 6 5 O R S M A R T U F 6 5 W P R O J E C T O R LA MP To remove the projector 1.
- Page 105 89 | CH A P T E R 7 – R E P L A C I N G T H E S M A R T U F 6 5 O R S M A R T U F 6 5 W P R O J E C T O R LA MP 6.
- Page 106 90 | CH A P T E R 7 – R E P L A C I N G T H E S M A R T U F 6 5 O R S M A R T U F 6 5 W P R O J E C T O R LA MP To remove and replace 1.
-
Page 107: Removing And Replacing The Projector Lamp Module
91 | CH A P T E R 7 – R E P L A C I N G T H E S M A R T U F 6 5 O R S M A R T U F 6 5 W P R O J E C T O R LA MP 4. - Page 108 92 | CH A P T E R 7 – R E P L A C I N G T H E S M A R T U F 6 5 O R S M A R T U F 6 5 W P R O J E C T O R LA MP WARNING Be sure to replace this screw.
- Page 109 9. Wait five minutes for the projector to warm up. NOTE You may need to adjust the projected image after performing the previous procedures. For more information, see the included SMART Board 600i4 and D600i4 Interactive Whiteboard System Installation Instructions and the tips on page 16.
-
Page 110: Resetting The Lamp Timer
You’re unable to reset the Display Hour value because it’s the running total of hours the projector has been in use. 3. Press the Menu button on the remote control. The SMART UF65 Settings menu appears. 4. Select to confirm that Lamp Hours has been reset to zero. -
Page 111: Disabling Usb Communications
Appendix A Disabling USB Communications Disabling the ECP’s USB Port In some situations, you may need to disable the ECP’s front USB port. Disabling the USB port prevents users from using or saving documents to USB storage devices using the ECP’s front USB receptacle. The other USB receptacles won’t be deactivated since they’re required for your interactive whiteboard and computer connections to function. - Page 112 96 | AP PENDI X A – D I S A B L I N G U S B C O M MU N I C A T I O N S To remove and cut the 1. Turn off the projector, and then wait 15 minutes for it to cool down. case on the ECP 2.
- Page 113 97 | AP PENDI X A – D I S A B L I N G U S B C O M MU N I C A T I O N S To remove the USB 1. Locate the USB jumper behind the jumper cover port. jumper switch 2.
- Page 114 98 | AP PENDI X A – D I S A B L I N G U S B C O M MU N I C A T I O N S...
-
Page 115: B Customer Support
Appendix B Hardware Environmental Compliance SMART Technologies supports global efforts to ensure that electronic equipment is manufactured, sold and disposed of in a safe and environmentally friendly manner. Waste Electrical and Electronic Equipment Regulations (WEEE Directive) Waste Electrical and Electronic Equipment regulations apply to all electrical and electronic equipment sold within the European Union. -
Page 116: General Inquiries
SMART Technologies products fall under this classification and meet the requirements for China’s EIP regulations. U.S. Consumer Product Safety Improvement Act The United States has enacted the Consumer Product Safety Improvement Act which limits the lead (Pb) content in products. SMART Technologies is committed to complying with this initiative. - Page 117 Technical Support If you experience difficulty with your SMART product, please contact your local reseller before contacting SMART Technical Support. Your local reseller can resolve most issues without delay. NOTE To locate your local reseller, visit www.smarttech.com/where.
- Page 118 Toll Free 1.888.42.SMART (U.S./Canada) +1.403.228.2500 E-mail info@smarttech.com Warranty Product warranty is governed by the terms and conditions of SMART’s “Limited Equipment Warranty” that shipped with the SMART product at the time of purchase. Registration To help us serve you, register online at www.smarttech.com/us/Product+Registration.
-
Page 119: Index
78 disabling USB ports, 95 lens, 80 display mode presets, 24, 57 pen tray, 79 documentation, 101 removing permanent marker stains, 79 SMART UF65 or SMART UF65w projector, 80 color adjustment, 25, 57 functions, 31 overview, 5 EIP regulations, 100... - Page 120 10 4 | IN DE X E-mail Alert page, 61 installing enabling your network port, 70 correcting alignment errors, 15 enabling your VGA out port, 70 environmental requirements, 8 environmental compliance, See focusing the image, 14 hardware environmental compliance tips for adjusting the projected image, eraser, 6 European Union regulations, 99 Extended Control Panel (ECP)
- Page 121 73 signal loss, 72 powerstate controls, 44 simple network management protocol projector (SNMP), 55, 61 additional VGA controls, 47 SMART Board 600 series interactive audio output controls, 49 whiteboard cleaning, 80 cleaning, 78 compatible interactive whiteboards, 3 features, 3...
- Page 122 10 6 | IN DE X troubleshooting audio system errors, 71 value-based command methods, 42 forgotten password, 76 VESA formats, 34 frozen image, 71 VGA input source settings, 47 image doesn’t appear, 73 VGA out port, enabling your, 70 laptop image, 74 video format network connection, 70 compatible formats, 34...
- Page 124 Toll Free 1.866.518.6791 (U.S./Canada) or +1.403.228.5940 www.smarttech.com...
Need help?
Do you have a question about the Board 600i4 and is the answer not in the manual?
Questions and answers