
Subscribe to Our Youtube Channel
Related Manuals for Kenmore 385.16774


Summary of Contents for Kenmore 385.16774
-
Page 1: Sewing Machine
® SEWING MACHINE Owner’s Manual MAQUINA DE COSER Manual de Instrucciones MACHINE À COUDRE Manuel d’instructions Model, Modelo, Modèle 385.16774 505-800-101 Sears Canada Inc., Toronto, Ont., M5B 2B8 CANADA www.sears.ca... -
Page 2: Important Safety Instructions
IMPORTANT SAFETY INSTRUCTIONS When using an electrical appliance, basic safety precautions should always be followed, including the following: Read all instructions before using this appliance. DANGER — To reduce the risk of electric shock: 1. An appliance should never be left unattended when plugged in. Always unplug this sewing machine from the electric outlet immediately after using and before cleaning. -
Page 3: Instrucciones Importantes De Seguridad
INSTRUCCIONES IMPORTANTES DE SEGURIDAD Cuando se utiliza un aparato eléctrico es necesario tomar ciertas precauciones básicas de seguridad, como las siguientes: Lea todas las instrucciones antes de utilizar este aparato. PELIGRO — Para reducir el riesgo de choque eléctrico: 1. No deje nunca el aparato sin vigilancia mientras esté enchufado. Desenchufe siempre la máquina de la toma eléctrica inmediatamente después de utilizarla y antes de limpiarla. - Page 4 CONSIGNES IMPORTANTES DE SÉCURITÉ Pour utiliser un appareil électrique, il faut toujours respecter les consignes de sécurité fondamentales, notamment les consignes suivantes: Avant d’utiliser cet appareil, lisez toutes ces instructions. DANGER — Pour réduire les risques d’électrocution. 1. Il ne faut jamais laisser un appareil sans surveillance lorsqu’il est branché. Il faut toujours débrancher cette machine à...
- Page 5 Kenmore Sewing Machine Warranty 25 Year Limited Warranty on Sewing Machine Die-Cast Metal Internal Frame For 25 years from the date of purchase, Sears will provide free repair for the die-cast metal internal frame of this sewing machine if it is defective in material or workmanship.
- Page 6 Garantie pour machine coudre Kenmore Garantie limitée de 25 ans pour l’armature interne en métal moul de la machine coudre Pendant les 25 ans suivant la date d’achat, Sears prendra sa charge la réparation de l’armature interne en métal moul de cette machine coudre en cas de défaut matériel ou de fabrication.
-
Page 7: Machine Specifications
Machine Specifications Item Specification Sewing speed (Maximum): Over 730 s.p.m Stitch length: 4 mm (Maximum) Stitch width: 6.5 mm (Maximum) Stitch package (Stitch functions): (Built-in stitches): Buttonhole: 1 step built-in buttonhole Machine dimensions: W 16.3ý (415 mm) x D 6.8ý (173 mm) x H 11.8ý (300 mm) Weight (Net): 17.6 Ibs (8 kg) Especificaciones de la máquina... - Page 8 Contrats d’entretien de Sears We Service What We Sell. La conception, la fabrication et le contrôle de vérification de votre dispositif Kenmore ® sont effectués de façon à vous Your Kenmore® product is designed, manufactured garantir un fonctionnement fiable pendant plusieurs années.
-
Page 9: Table Of Contents
TABLE OF CONTENTS Use the Seam Guides ............. 38 SECTION I. NAME OF PARTS Turn a Square Corner ............. 38 Names of Parts ..............2 Topstitching ..............40 Available Accessories and Attachments ......4 Quilting ................40 SECTION II. GETTING READY TO SEW Using 1/4ý... - Page 10 INDICE SECCION I. NOMBRE DE LAS PARTES Uso de las guías de costura ............39 Nombre de las partes ..............3 Cómo coser una esquina cuadrada .......... 39 Accesorios y refacciones disponibles ......... 5 Costura a la vista ..............41 SECCION II.
- Page 11 TABLE DES MATIÈRES PARTIE I. IDENTIFICATION DES PIÈCES DE LA Pour coudre un angle droit ............39 Surpiqûre .................. 41 MACHINE Matelassage ................41 Identification des pièces .............. 3 Utilisation du piqueuse 1/4 po ........... 43 Accessoires et pièces disponibles ..........5 Utilisation du pied à...
-
Page 12: Section I. Name Of Parts Names Of Parts
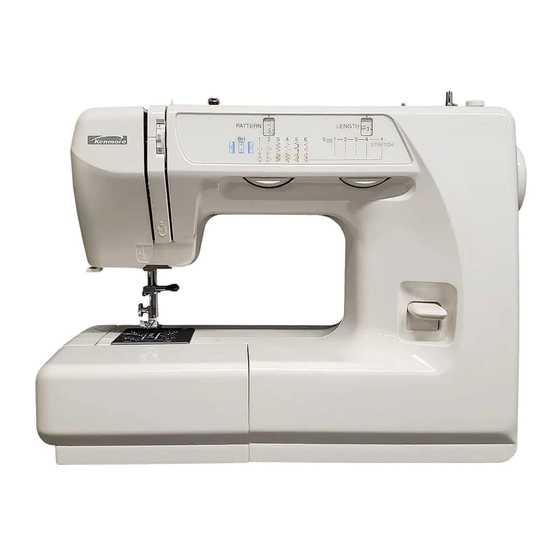
SECTION I. NAMES OF PARTS Names of Parts q Reverse stitch control w Stitch width setting display e Stitch length setting display r Stitch length control t Stitch width control y Bobbin winder spindle u Spool pin i Upper thread guide o Thread take-up lever !0 Thread tension dial !1 Face cover... -
Page 13: Seccion I. Nombre De Las Partes
SECCION I. NOMBRE DE LAS PARTES PARTIE I. IDENTIFICATION DES PIÉCES DE LA MACHINE Nombre de las partes Identification des pièces q Control de puntada reversa q Bouton de marche arrière w Pantalla de ajuste de la longitud de puntada w Fenêtre de réglage de la largeur du point e Pantalla de ajuste de la anchura de puntada e Fenêtre de réglage de la longueur du point... -
Page 14: Available Accessories And Attachments
Available Accessories and Attachments To order parts and accessories listed below, call: 1-800-4-MY-HOME (1-800-469-4663) 24 hours a day, 7 days a week When ordering parts and accessories, provide the following information: 1. Part Number 2. Part Name 3. Model Number of Machine Ref. -
Page 15: Accesorios Y Refacciones Disponibles
Accesorios y refacciones disponibles Accessoires et pièces disponibles Para ordenar las partes y accesorios listados abajo, llame al: Pour commander les pièces et les accessoires listés ci-dessous, 1-800-4-MY-HOME ® (1-800-469-4663) composez: de 6 AM a 11 PM, hora del centro, los siete días de la semana 1-800-LE-FOYER (1-800-533-6937) 24h/24, 7j/7 Al ordenar partes y accesorios, proporcione la siguiente... -
Page 16: Section Ii. Getting Ready To Sew Connecting Machine To Power Supply
Do not modify the plug in any way. Foot Controller Model YC-482J-1 or TJC-150 is used with Sewing Machine Model 385.16774. Controlling Sewing Speed Sewing speed is varied by the foot control. -
Page 17: Seccion Ii. Preparacion De La Maquina Para Coser Conexión De La Máquina A La Red Eléctrica
La pédale de contrôle YC-482J-1 ou TJC-150 s’utilise avec la apropiada. No intente modificar la clavija de ninguna forma. machine modèle 385.16774. Con esta máquina de coser Modelo 385.16774 deberá usarse el pedal de control Modelo YC-482J-1 o TJC-150. Control de la velocidad de costura Contrôlez la vitesse de couture... -
Page 18: Pressure Adjusting Lever
Pressure Adjusting Lever q Pressure adjusting lever The pressure adjusting lever should be set at “3” for regular sewing. Reduce the pressure to “2” for applique, cut work, draw work and basting. Set the pressure at “1” when sewing chiffon, lace, organdy and other fine fabrics. -
Page 19: Ajuste De La Presión Del Prensatelas
Ajuste de la presión del prensatelas Levier de réglage de la pression Palanca del ajuste de la presión Levier de réglage de la pression La palanca del ajuste de la presión debe ser situada en el “3” para Le levier de réglage de la pression devrait être réglé sur la costura normal. -
Page 20: Changing Needle
Changing Needle Flat side Needle clamp screw Lado plano Needle Needle clamp Méplat vers Aguja Turn off the power switch. Aiguille Raise the needle to its highest position by turning the handwheel counterclockwise, toward you, and lowering the presser foot. Loosen the needle clamp screw turning it counterclockwise. -
Page 21: Cambio De Aguja
Cambio de aguja Changer l’aiguille Tornillo de sujeción de la aguja Vis du pince l’aiguille Alojamiento de la aguja Pince l’aiguille Apague la máquina con el interruptor de corriente. Éteignez la machine. Faites monter l’aiguille le plus haut Suba la aguja hasta su posición más alta girando el possible en tournant le volant en sens antihoraire et volante en el sentido contrario a las agujas del reloj, y baje abaissez le pied presseur. -
Page 22: Presser Foot Types
Presser Foot Types • Zigzag foot (Foot A) Use this foot for both straight and zigzag stitching. For: Straight stitch (page 38) Topstitching (page 40) Quilting (page 40) Darning (page 48) Basic zigzag (page 50) Bar tacking (page 54) Button sewing (page 56) Overcasting (page 56) -
Page 23: Tipos De Prensatelas
Tipos de prensatelas Différents pieds presseurs • Prensatelas para zig-zag (Prensatelas A) • Pied zig-zag (Pied A) Utilice este prensatelas para puntada recta y puntada de Ce pied convient pour les points zig-zags et les points droits. zig-zag. Para: Puntada recta (página 39) Pour: Point droit (page 39) -
Page 24: F: Satin Stitch Foot
Presser Foot Types (continued) • Satin stitch foot (Foot F) Use this foot for satin stitch and outlining applique. For: Darning (page 48) Foot F: Satin stitch (page 50) Prensatelas F: Monogramming (page 52) Pied F: Applique (page 52) Shell stitch (page 62) Decorative stitch patterns (page 64) -
Page 25: F: Prensatelas Para Puntada Decorativa
Tipos de prensatelas (continuación) Différents pieds presseurs (suite) • Prensatelas para puntada decorativa (Prensatelas F) • Pied à point lancé (Pied F) Utilice este prensatelas para puntada decorativa y aplicaciones. Servez-vous de ce pied pour le pourtour des appliques et le point. Para: Zurcido (página 49) Pour: Reprisage... -
Page 26: Selecting Needle And Fabric
Selecting Needle and Fabric For general sewing, use needle sizes 11 or 14. A fine thread and needle should be used for sewing lightweight fabrics, so the fabric will not be marred. Heavy fabrics require a needle large enough to pierce the fabric without fraying the needle thread. In the needle set, there is one each of sizes 11, 14, 16, and 18, and a blue needle. -
Page 27: Selección De Hilo Y Tela
Selección de hilo y tela Para el cosido general se utilizan agujas del tamaño 11 o 14. Los hilos y agujas delgados deberán utilizarse para coser tejidos ligeros evitando así que éstos se puedan echar a perder. Cosa tejidos gruesos con una aguja lo suficientemente gruesa como para que pueda penetrar el tejido sin que el hilo de la aguja se deshilache. -
Page 28: Choix De L'aiguille Et Tissu
Choix de l’aiguille et tissu Pour les coutures normales, utilisez une aiguille n°11 ou 14. On devrait utiliser du fil fin et une aiguille fine avec les tissus légers pour ne pas les endommager. Les tissus lourds nécessitent une aiguille assez grosse pour percer le tissu sans effilocher le fil de l’aiguille. Dans un jeu d’aiguilles, il y a une aiguille de chaque grosseur 11, 14, 16, 18 et une aiguille à... - Page 29 (blank page) (página blanca) (page blanche)
-
Page 30: Bobbin Winding
Bobbin Winding • Horizontal spool pin Spool pin Large spool holder Small spool holder Lift up the spool pin . Place a spool of thread on the spool pin with the thread coming off the spool as shown. Attach the large spool holder , and press it firmly against the spool of thread. -
Page 31: Bobinado De La Canilla
Bobinado de la canilla Remplissage de la canette • Portacarretes horizontal • Porte-bobine horizontal Portacarretes Porte-bobine Tapa-carretes grande Grande rondelle de porte-bobine Tapa-carretes pequeño Petite rondelle de porte-bobine Levante el portacarretes y coloque un carrete de hilo en el Soulevez le porte-bobine . -
Page 32: Bobbin Winding
• Bobbin winding Pull the handwheel out to the right. Draw the thread from the spool. Guide the thread around the thread guide. For the horizontal spool pin For the additional spool pin Thread through the hole in the bobbin from the inside to the outside. -
Page 33: Bobinado De La Canilla
• Bobinado de la canilla • Remplissage de la canette Hale la volante manual a la derecha. Tirez le volant vers la droite. Saque el hilo del carette. Tirez sur le fil de la bobine. Guíe el hilo alrededor del guíahilos de bobinado. Passez le fil autour du guide fil. -
Page 34: Removing The Hook Cover Plate
• Removing the hook cover plate Hook cover plate release button Hook cover plate Slide the hook cover plate release button to the right, and remove the cover plate • Inserting the bobbin End of thread Notch Notch Threading diagram Place a bobbin in the bobbin holder with the thread running off counterclockwise. -
Page 35: Cómo Sacar La Canilla
• Cómo sacar la canilla • Retrait de la canette Pulsador de apertura de la tapa de acceso a canilla Bouton de dégagement du couvercle de navette Tapa de acceso a canilla Couvercle de navette Deslice el pulsador hacia la derecha y quite la tapa Coulissez le bouton de dégagement du couvercle vers la droite, et retirez le couvercle... -
Page 36: Threading The Machine
Threading the Machine • Threading the machine * Raise the thread take-up lever to its highest position by turning the handwheel counterclockwise. * Raise the presser foot lifter. * Place a spool on the spool pin, with the thread coming off as shown. -
Page 37: Enhebrado Del Hilo De La Aguja
Enhebrado del hilo de la aguja Enfilage de la machine • Enhebrado del hilo de la aguja • Enfilage de la machine * Suba el tirahilos hasta su posición más alta girando el volante * Faites monter le levier releveur tendeur de fil le plus haut en el sentido contrario a las agujas del reloj. -
Page 38: Drawing Up Bobbin Thread
• Drawing up bobbin thread Raise the presser foot. Hold the needle thread lightly with your left hand and rotate the handwheel counterclockwise for one complete turn. Bring the bobbin thread up by pulling the needle thread Pull both threads 4" to 6" (10.0 to 15.0 cm) under and behind the presser foot. -
Page 39: Extracción Del Hilo De La Canilla
• Extracción del hilo de la canilla • Comment remonter le fil de la canette Suba el prensatelas. Sujete ligeramente el hilo de la aguja con Remontez le pied presseur. Tenez le fil de l’aiguille su mano izquierda y gire el volante en el sentido contrario a las souplement de la main gauche, et tournez le volant d’un tour agujas del reloj una vuelta completa. -
Page 40: Tension Is Too Loose
• Tension is too loose Needle thread (Top thread) Bobbin thread (Bottom thread) To tighten tension Right side (Top side) of fabric Wrong side (Bottom side) of fabric The needle thread shows through on the wrong side of the fabric, and the stitch feels bumpy. Turn the dial to a higher tension setting number to tighten the needle thread tension. -
Page 41: El Hilo Está Demasiado Flojo
• El hilo está demasiado flojo • Si la tension est trop faible Hilo de la aguja (Hilo superior) Fil de l’aiguille (Fil du supérieur) Hilo de la canilla (Hilo inferior) Fil de la canette (Fil du inférieur) Para apretar Pour augmenter la tension Parte de arriba de la tela Endroit du tissu... -
Page 42: Stitch Selector
Stitch Selector (how to select stitches) q Sewing guide display w Red indicator e Stitch selector Turn the stitch selector until the red indicator reaches the desired stitch. The bottom row of stitches on the pattern indicating panel is selected when the stitch length control is set at the stretch stitch position. -
Page 43: Seleccionador De Puntadas
Seleccionador de puntadas (como seleccionar Bouton de sélection de points (sélectionner les puntadas) points) q Pantalla de guía de costura q Écran guide de couture w Indicador rojo w Marque rouge e Seleccionador de puntada e Bouton de sélection de points Gire el seleccionador de puntada hasta que el indicador rojo Tourner le bouton de sélection de points, jusqu'à... -
Page 44: Stitch Width Control
Stitch Width Control (how to adjust the stitch width) Slide the stitch width control to the desired stitch width number. The higher the number, the greater the stitch width. The mark shows the adjustment range when using the twin needle. The blue zone is the appropriate adjustment range for buttonhole sewing. -
Page 45: Control De La Anchure De Puntada
Control de la anchure de puntada Réglage de la largeur du point (cómo ajustar la anchure de las puntadas) (comment régler la largeur du point) Deslice el control de la anchura hasta al número deseado. Faites glisser le réglage de la largeur du point jusqu’à ce que le Números más altos proporcionarán mayor anchura de puntada. -
Page 46: Adjusting Stretch Stitch Balance
Adjusting Stretch Stitch Balance Feed balancing dial If the stretch stitch patterns are uneven when you sew on a particular fabric, adjust them with the feed balancing dial To adjust the distorted patterns: If the patterns are drawn out, correct them by turning the dial in the “–”... -
Page 47: Equilibrio De Los Patrones Distorsionados
Equilibrio de los patrones distorsionados Pour corriger un motif déformé Eje equilibrador de puntada Bouton d’équilibrage Si observa alguna distorsión al coser patrones de puntada Si les motif extensibles sont irréguliers lorsque vous piquez un elástica en una tela específica, ajústelos con el eje equilibrador tissu particulier, corrigez-les avec le bouton d’équilibrage de puntada Comment régler l’équilibre d’un motif extensible:... -
Page 48: Section Iii. Straight Stitch Sewing Straight Stitch
SECTION III. STRAIGHT STITCH SEWING Straight Stitch Stitch selector: 4 to 6 Stitch width: Stitch length: Red zone Needle thread tension: 2 to 6 Presser foot A: Zigzag foot Presser foot H: Straight stitch foot NOTE: There are three straight stitch needle position settings, left, center and right. -
Page 49: Seccion Iii. Costura De Puntada Recta
SECCION III. COSTURA DE PUNTADA RECTA PARTIE III. COUTURE AU POINT DROIT Puntada recta Point droit Selector de puntada: 4 a 6 Sélecteur de point: 4 à 6 Anchura de la puntada: Largeur du point: Longitud de la puntada: Zona roja Longueur du point: Zone rouge Tensión del hilo de la aguja:... -
Page 50: Topstitching
Topstitching Stitch selector: 4 to 6 Stitch width: Stitch length: Red zone Needle thread tension: 2 to 6 Presser foot A: Zigzag foot Presser foot H: Straight foot NOTE: When using the straight stitch foot, make sure to use the center needle position, otherwise the needle may strike the presser foot and possibly break. -
Page 51: Costura A La Vista
Costura a la vista Surpiqûre Selector de puntada: 4 a 6 Sélecteur de point: 4 à 6 Anchura de la puntada: Largeur du point: Longitud de la puntada: Zona roja Longueur du point: Zone rouge Tensión del hilo de la aguja: 2 a 6 Tension du fil de l’aiguille: 2 à... -
Page 52: Using 1/4Ý Seam Foot
Using Walking Foot Thumb screw Foot holder Lever Needle clamp Presser bar This is a special attachment for hard-to-feed materials. This foot prevents fabric slipping or puckering by feeding fabrics with both upper and lower feed dogs. The walking foot is great for fine fabrics, knits, leather and matching plaids. -
Page 53: Cómo Usar El Con 1/4Ý Guía
Cómo usar el prensatelas de doble arrastre Utilisation du pied à niveleur Tornillo Vis de blocage Soporte del prensatelas Support du pied Palanca Levier Soporte de la aguja Pince-aiguille Barra del prensatelas Barre du pied presseur Éste es un accesorio especial para materiales que son difíciles Le pied à... -
Page 54: Zipper Sewing
Zipper Sewing Stitch selector: Stitch width: Stitch length: Needle thread tension: 2 to 6 Presser foot E: Zipper foot • To snap on the zipper foot Groove To sew left side To sew right side Fit the pin on the zipper foot into the groove on the foot holder. -
Page 55: Costura De Cremalleras O Cierres
Costura de cremalleras o cierres La couture des fermetures à glissière Selector de patrón: Sélecteur de point: Anchura de la puntada: Largeur du point: Longitud de la puntada: Longueur du point: Tensión del hilo de la aguja: 2 a 6 Tension du fil de l’aiguille: 2 à... - Page 56 Zipper Sewing (Continued) Raise and release foot, and re-attach it on left-hand side of pin. Take the upper fabric layer and lay it flat over the zipper. Starting just below zipper bottom stop, sew across fabric to about 3/8" to 1/2" distance from the basting stitch line. Turn fabric 90°...
-
Page 57: La Couture Des Fermetures À Glissière
Costura de cremalleras o cierres (continuación) La couture des fermeture à glissière (suite) Levante y libere el prensatelas y vuelva a colocarlo en el lado Soulever et relâcher le pied, puis le fixer à nouveau du côté izquierdo del poste. gauche de la broche. -
Page 58: To Drop Or Raise The Feed Dogs
To Drop or Raise the Feed Dogs The drop feed dogs lever is located underneath the free arm bed on the back side of the machine. To drop the feed dogs, push the lever in the direction of the arrow, as illustrated. To raise the feed dogs, push the lever in the direction of the arrow, as illustrated, and turn the handwheel toward you. -
Page 59: Cómo Subir/Bajar Los Dientes Del Transporte
Cómo subir/bajar los dientes del transporte Comment monter et descendre les griffes La palanca de mando para los dientes del transporte está debajo d’entraînement del brazo libre colocabo en la parte del revés de la máquina. Le levier des griffes d’entraînement est situé sous le berceau du Para bajar los dientes del transporte empuje la palanca de bras libre à... -
Page 60: Section Iv. Zigzag Stitch Sewing Basic Zigzag
SECTION IV. ZIGZAG STITCH SEWING Basic Zigzag Stitch selector: Stitch width: 1 to 6.5 Stitch length: Red zone Needle thread tension: 3 to 5 Presser foot A: Zigzag foot The zigzag stitch is one of the most common and versatile stitches. -
Page 61: Seccion Iv. Puntadas De Zig-Zag Puntada De Zig-Zag
SECCION IV. PUNTADAS DE ZIG-ZAG PARTIE IV. POINTS ZIG-ZAG Puntada de zig-zag Zig-zag simple Selector de puntada: Sélecteur de point: Anchura de la puntada: 1 a 6.5 Largeur du point: 1 à 6.5 Longitud de la puntada: Zona roja Longueur du point: Zone rouge Tensión del hilo de la aguja: 3 a 5... -
Page 62: Monogramming
Monogramming Stitch selector: Stitch width: Stitch length: 0.5 to 1 Needle thread tension: 1 to 4 Presser foot F: Satin stitch foot Pressure adjusting lever: 1 or 2 Attach a piece of stabilizer on the wrong side (Bottom side) of the fabric. Draw letters on the fabric with tailor’s chalk. -
Page 63: Monogramas
Monogramas Monogrammes Selector de puntada: Sélecteur de point: Anchura de la puntada: Largeur du point: Longitud de la puntada: 0.5 a 1 Longueur du point: 0.5 à 1 Tensión del hilo de la aguja: 1 a 4 Tension du fil de l’aiguille: 1 à... -
Page 64: Bar Tacking
Bar Tacking Stitch selector: Stitch width: 2 to 6.5 Stitch length: 0.5 to 1 Needle thread tension: 2 to 6 Presser foot A: Zigzag foot This is similar to a very short satin stitch, and is used to reinforce points of strain such as corners, pockets and straps of lingerie. -
Page 65: Puntada De Refuerzo
Puntada de refuerzo Brides de renfort Selector de puntada: Sélecteur de point: Anchura de la puntada: 2 a 6.5 Largeur du point: 2 à 6.5 Longitud de la puntada: 0.5 a 1 Longueur du point: 0.5 à 1 Tensión del hilo de la aguja: 2 a 6 Tension du fil de l’aiguille: 2 à... -
Page 66: Button Sewing
Button Sewing Stitch selector: Stitch width: 2 to 6.5 Stitch length: Needle thread tension: 2 to 6 Presser foot A: Zigzag foot Feed dogs: Dropped 1. Drop the feed dogs. Place the button below the zigzag foot, making sure to align the holes with the horizontal slot in the foot. -
Page 67: Costura De Botones
Costura de botones Pose des boutons Selector de puntada: Sélecteur de point: Anchura de la puntada: 2 a 6.5 Largeur du point: 2 à 6.5 Longitud de la puntada: Cualquier número Longueur du point: Toute Tensión del hilo de la aguja: 2 a 6 Tension du fil de l’aiguille: 2 à... -
Page 68: Section V. Utility And Decorative Stitches Blind Hem Stitch
SECTION V. UTILITY AND DECORATIVE STITCHES Blind Hem Stitch Stitch selector: Stitch width: 2 to 3 Stitch length: Red zone Needle thread tension: 2 to 6 Presser foot G: Blind hem foot Use the same color thread as the fabric. On heavy weight fabrics that ravel, the raw edge should be overcast first. -
Page 69: Seccion V. Puntadas Utiles Y Puntadas
SECCION V. PUNTADAS UTILES Y PARTIE V. POINTS UTILITAIRES ET PUNTADAS DECORATIVAS DÉCORATIFS Dobladillo invisible Ourlet invisible Selector de patrón: Sélecteur de point: Anchura de la puntada: 2 a 3 Largeur du point: 2 à 3 Longitud de la puntada: Zona roja Longueur du point: Zone rouge... -
Page 70: Lace Work
Lace Work Stitch selector: Stitch width: 2 to 3 Stitch length: Needle thread tension: 1 to 4 Presser foot A: Zigzag foot Lace adds a fanciful, feminine touch to blouses and lingerie. Table linens and pillows become more elegant when trimmed with lace. Fold the raw edge of the fabric at least 5/8"... -
Page 71: Trabajos Con Lazos
Trabajos con lazos Dentelle Selector de patrón: Sélecteur de point: Anchura de la puntada: 2 a 3 Largeur du point: 2 à 3 Longitud de la puntada: Longueur du point: Tensión del hilo de la aguja: 1 a 4 Tension du fil de l’aiguille: 1 à... -
Page 72: Shell Stitch
Shell Stitch Stitch selector: Stitch width: 3 to 6.5 Stitch length: Red zone Needle thread tension: 4 to 9 Presser foot F: Satin stitch foot Use a lightweight fabric (tricot, for example). Fold the fabric in bias and stitch on the fold. Allow the needle to just clear the folded edge to create a shelled edge. -
Page 73: Puntada En Forma De Concha
Puntada en forma de concha Point coquille Selector de patrón: Sélecteur de point: Anchura de la puntada: 3 a 6.5 Largeur de point: 3 à 6.5 Longitud de la puntada: Zona roja Longueur du point: Zone rouge Tensión del hilo de la aguja: 4 a 9 Tension du fil de l’aiguille: 4 à... -
Page 74: Fagoting Stitch
Fagoting Stitch Stitch selector: Stitch width: 5 to 6.5 Stitch length: 0.5 to 2 Needle thread tension: 3 to 8 Presser foot A: Zigzag foot Paper or tear-away backing 1/8"(0.3cm) Use this stitch to join two pieces of fabric to create an open work appearance, and add design interest. -
Page 75: Puntada Para Deshilachados
Puntada para deshilachados Couture ajourée Selector de patrón: Sélecteur de point: Anchura de la puntada: 5 a 6.5 Largeur du point: 5 à 6.5 Longitud de puntada: 0.5 a 2 Longueur du point: 0.5 à 2 Tensión del hilo de la aguja: 3 a 8 Tension du fil de l’aiguille: 3 à... -
Page 76: Twin Needle Stitches (Option)
Twin Needle Stitches (Option) Stitch selector: 11 to 13 Stitch width: 1 to 2.5 Stitch length: Gold stretch stitch position or green zone Needle thread tension: 3 to 7 Presser foot A: Zigzag foot Presser foot F: Satin stitch foot Needle: Twin needle (optional item) Select stitch width within the indicated twin needle sewing... -
Page 77: Puntadas De Doble Aguja (Opción)
Puntadas de doble aguja (Opción) Aiguilles jumelées (Option) Selector de patrón: 11 a 13 Sélecteur de point: 11 à 13 Anchura de la puntada: 1 a 2.5 Largeur du point: 1 à 2.5 Longitud de la puntada: Posición oro de puntada Longueur du point: Position or point extensible ou elástica o zona verde... -
Page 78: Section Vi. Stretch Stitches Straight Stretch
SECTION VI. STRETCH STITCHES Straight Stretch Stitch selector: 4 to 6 Stitch width: Stitch length: Gold stretch stitch position Needle thread tension: 2 to 6 Presser foot A: Zigzag foot Presser foot H: Straight foot NOTE: When using the straight stitch foot, make sure to use center needle position. -
Page 79: Seccion Vi. Puntadas Elasticas Puntada Recta Triple
SECCION VI. PUNTADAS ELASTICAS PARTIE VI. POINTS EXTENSIBLES Point droit extensible Puntada recta triple Sélecteur de point: 4 à 6 Selector de patrón: 4 a 6 Largeur du point: Anchura de la puntada: Longueur du point: Position or point extensible Longitud de la puntada: Posición oro de puntada Tension du fil de l’aiguille:... -
Page 80: Overcast Stretch Stitching
Overcast Stretch Stitching Stitch selector: Stitch width: 3 to 6.5 Stitch length: Gold stretch stitch position Needle thread tension: 2 to 6 Presser foot A: Zigzag foot This stitch is for sewing a seam with an overcast finish. It is used when making swim wear, ski pants and other garments which require stretch. -
Page 81: Puntada Elástica De Remate O Sobrehilado
Puntada elástica de remate o sobrehilado Surfilage extensible Selector de patrón: Sélecteur de point: Anchura de la puntada: 3 a 6.5 Largeur du point: 3 à 6.5 Longitud de la puntada: Posición oro de puntada Longueur du point: Position or point extensible elástica Tension du fil de l’aiguille: 2 à... -
Page 82: Serging
Serging Stitch selector: Stitch width: 3 to 6.5 Stitch length: Gold stretch stitch position Needle thread tension: 3 to 6 Presser foot A: Zigzag foot Presser foot C: Overedge foot * When using Overedge foot, make sure to set the stitch width at 5 or more;... -
Page 83: Puntada De Dobladillo
Puntada de dobladillo Point de surjet Selector de patrón: Sélecteur de point: Anchura de la puntada: 3 a 6.5 Largeur du point: 3 à 6.5 Longitud de la puntada: Posición oro de puntada Longueur du point: Position point extensible or elástica Tension du fil de l’aiguille: 3 à... -
Page 84: Decorative Stretch Patterns
Decorative Stretch Patterns Stitch selector: 11 to 13 Stitch width: 3 to 6.5 Stitch length: Gold stretch stitch position Needle thread tension: 2 to 6 Presser foot A: Zigzag foot Decorative stretch patterns are used for adding a creative and personalized touch to items. You can decorate children’s clothes, women’s blouses, curtains, etc. -
Page 85: Diseños Decorativos Elásticos
Diseños decorativos elásticos Motifs décoratifs extensibles Selector de puntada: 11 a 13 Sélecteur de point: 11 à 13 Anchura de la puntada: 3 a 6.5 Largeur du point: 3 à 6.5 Longitud de la puntada: Posición oro de puntada Longueur du point: Position point extensible or elástica Tension du fil de l’aiguille:... -
Page 86: Section Vii. Buttonhole
SECTION VII. BUTTONHOLE Automatic Buttonhole Stitch selector: (BH) Stitch width: 3 to 6.5 Stitch length: 0.25 to 1.0 Needle thread tension: 2 to 6 Presser foot R: Automatic buttonhole foot • Preparation for sewing Groove Attach the automatic buttonhole foot R. Make sure the groove on the foot holder catches the pin on the foot when lowering the presser foot. -
Page 87: Seccion Vii. Ojales
SECCION VII. OJALES PARTIE VII. BOUTONNIÈRE Ojal automático Boutonnière automatique Selector de puntada: (BH) Sélecteur de point: (BH) Anchura de la puntada: 3 a 6.5 Largeur du point: 3 à 6.5 Longitud de la puntada: 0.25 a 1.0 Longueur du point: 0.25 à... - Page 88 Mark for placement of buttonhole Starting point Slider There should be no gap. Spring holder Difference Draw both threads to the left under the foot. Insert the garment under the foot, and lower the needle into the fabric to the starting point. Then lower the automatic buttonhole foot.
- Page 89 Marca para hacer el ojal Repère pour l’emplacement de la boutonnière Punto de comienzo Point de départ Deslizador Curseur No deberá haber holgura. Il ne devrait pas y avoir d’espace Soporte del resorte Support du ressort Diferencia Différence de longueur 3 Pase ambos hilos hacia la izquierda por debajo del 3 Tirez les deux fils vers la gauche, sous le pied.
-
Page 90: How To Adjust Buttonhole Stitch Density
If the button is extremely thick, make a test buttonhole. If it is difficult to fit the button through the test buttonhole, lengthen the buttonhole by pulling the button holder back to create a gap • How to adjust buttonhole stitch density Slide the stitch length control to adjust stitch density. -
Page 91: Cómo Ajustar La Densidad De Los Ojales
Si el botón es extremadamente grueso, haga un ojal de prueba. Si le bouton est très épais, faites une boutonnière d’essai. S’il est Si no pudiera meter el botón en el ojal de prueba: difficile de passer le bouton dans l’ouverture, augmentez la Alargue el ojal desplazando hacia atrás el alojamiento del botón longueur de la boutonnière en tirant sur le support du bouton à... -
Page 92: Corded Buttonhole
Corded Buttonhole Use the same procedure as the automatic buttonhole procedure. * Set the stitch width to match the thickness of the cord used. With the buttonhole foot raised, hook the filler cord on the spur at the back of the buttonhole foot. Bring the ends toward you under the buttonhole foot, clearing the front end. -
Page 93: Costura De Ojales Con Cordón
Costura de ojales con cordón Boutonnières passepoilées Emplee el mismo procedimiento que para la costura de ojales Suivez la même procédure que pour la boutonnière automáticos. automatique. * Ajuste el ancho de la puntada en concordancia con el * Ajustez la largeur du point en fonction de l’épaisseur du cordón que utilice. -
Page 94: Manual Buttonhole (Option)
Manual Buttonhole (Option) Stitch selector: (BH) Stitch width: 3 to 6.5 Stitch length: 0.25 to 1.0 Needle thread tension: 2 to 6 Presser foot B: Buttonhole foot • To sew If the diameter of the button is more than 1.0" (2.5 cm), a buttonhole must be made manually as follows: Turn the handwheel toward you to raise the needle to its highest position. -
Page 95: Ojal Manual (Opción)
Ojal manual (Opción) Boutonnière manuelle (Option) Selector de puntada: (BH) Sélecteur de point: (BH) Anchura de la puntada: 3 a 6.5 Largeur du point: 3 à 6.5 Longitud de la puntada: 0.25 a 1.0 Longueur du point: 0.25 à 1.0 Tensión del hilo de la aguja: 2 a 6 Tension du fil de l’aiguille:... -
Page 96: Automatic Buttonhole (Option)
Automatic Buttonhole (Option) For more varied and accurate buttonholes, use the buttonhole attachment and templates. The buttonhole attachment consists of the illustrated parts. Guide slot Measure marking Catch Buttonhole guide plate Buttonhole templates Guide block Two pins Hook Lever Gear Base plate Buttonhole foot •... -
Page 97: Ojal Automático (Opción)
Ojal automático (Opción) Boutonnière automatique (Option) Para mayor variedad y ojales más precisos, use el accesorio para Utilisez le guide pour les boutonnières avec les gabarits pour ojales, el cual consiste de las partes ilustradas. réaliser des boutonnières variées et plus précises. Le guide pour Ranura guía les boutonnières est constitué... -
Page 98: To Sew
Automatic Buttonhole (Continued) • To sew Stitch selector: Stitch width: Stitch length: 3 to 4 Needle thread tension: 2 to 6 Presser foot: Buttonhole foot NOTE: Best results are obtained by using #60 or #80 lightweight thread. It is advisable to use a #11 blue stretch needle when sewing knits and synthetic fabrics. -
Page 99: Para Coser
Ojal automático (continuación) Boutonnière automatique (suite) • Para coser • Pour coudre Selector de puntada: Sélecteur de point: Anchura de la puntada: Largeur du point: Longitud de la puntada: 3 a 4 Longueur du point: 3 à 4 Tensión de hilo de la aguja: 2 a 6 Tension du fil de l’aiguille: 2 à... - Page 100 Automatic Buttonhole (Continued) Guide slot Guide block Buttonhole guide plate Buttonhole template Catch Setting mark Gear Base plate Lever Select a buttonhole template . Pull back the guide plate catch , and slide the template into the guide plate get the desired buttonhole. Release the catch to lock the template into place.
- Page 101 Ojal automático (continuación) Boutonnière automatique (suite) Ranura guía Fente de guidage Bloque guía Doigt de guidage Placa guía para ojales Plaque guide de boutonnière Plantilla de ojales Gabarit Enganche Cliquet Marca de posición Marque de repère Dentada Pignon Placa base Plaque de base Palanca Levier...
-
Page 102: To Adjust Stitch Density
Automatic Buttonhole (Continued) Marked buttonhole on fabric Center marking on buttonhole foot Measure marking on the guide plate Fabric Mark the buttonhole position carefully on the fabric. Place the fabric behind the machine; insert the fabric between the guide plate and the buttonhole foot as illustrated. Align the marked buttonhole with the center marking on the buttonhole foot... -
Page 103: Para Ajustar La Densidad De Las Puntadas
Ojal autormático (continuación) Boutonnière automatique (suite) Ojal marcado en la tela Tracé de la boutonnière sur le tissu Marca central en el pie para ojales Repère central sur le pied à boutonnière Marca de medida en la placa guía Repère de dimension sur la plaque guide Tela Tissu Marque la posición del ojal cuidadosamente en la tela. -
Page 104: Section Viii. Care Of Your Machine
SECTION VIII. CARE OF YOUR MACHINE NOTE: * Unplug the machine. * Do not dismantle the machine other than as explained in this section. * Do not store the machine in a high-humidity area, near a heat radiator, or in direct sunlight. * Clean the outside of the machine with a soft cloth and mild soap. -
Page 105: Seccion Viii. Mantenimiento Del La Maquina
SECCION VIII. MANTENIMIENTO DEL LA PARTIE VIII. ENTRETIEN DE VOTRE MACHINE MAQUINA REMARQUE: NOTA: * Débranchez la machine. * Desenchufe la máquina. * Ne démontez rien d’autre que ce qui est décrit dans ce * No desmonte la máquina de ninguna otra forma que la chapitre. -
Page 106: Cleaning The Shuttle Race And Feed Dogs
Cleaning the Shuttle Race and Feed Dogs Unplug the machine and remove the presser foot and needle. Open the face cover to allow room to remove the needle plate screw with a screwdriver. Remove the needle plate and take out the bobbin. Needle plate Lift up the bobbin holder and remove it. -
Page 107: Limpieza Del Garfio Y Los Dientes Del Transporte
Limpieza del garfio y los dientes del transporte Nettoyage de la coursière et des griffes d’entraînement Desenchufe la máquina y quite el prensatelas y la aguja. Destornille el tornillo que sujeta la placa de aguja con un Débranchez la machine et retirez l’aiguille et le pied presseur. destornillador. -
Page 108: Troubleshooting
1. There is thread caught in the hook race. Page 96 2. Lint has built up in the shuttle or the shuttle race. Page 96 For customer assistance call or e-mail: 1-877-SEWING-U (1-877-739-4648) 9 am - 4:30 pm, CST, Monday - Friday support@kenmore-sewing.com... -
Page 109: Soluciones De Problemas De Funcionamiento
Soluciones para problemas de funcionamiento Causa Probable Referencia Condicion 1. El hilo de la aguja no se ha enhebrado correctamente. Página 27 Se rompe el hilo de 2. La tensión del hilo de la aguja es excesiva. Páginas 29, 31 la aguja. -
Page 110: En Cas De Problème
En cas de problème Problème Cause Reference Le fil de l’aiguille se 1. Le fil de l’aiguille n’est pas penfilé correctement. Page 27 casse. 2. La tension du fil d'aiguille est trop forte. Pages 29, 31 3. L’aiguille est tordue ou émoussée. Page 11 4. - Page 111 Printed in Taiwan Impreso en Taiwan Imprimé au Taiwan...
Need help?
Do you have a question about the 385.16774 and is the answer not in the manual?
Questions and answers