Table of Contents
Advertisement
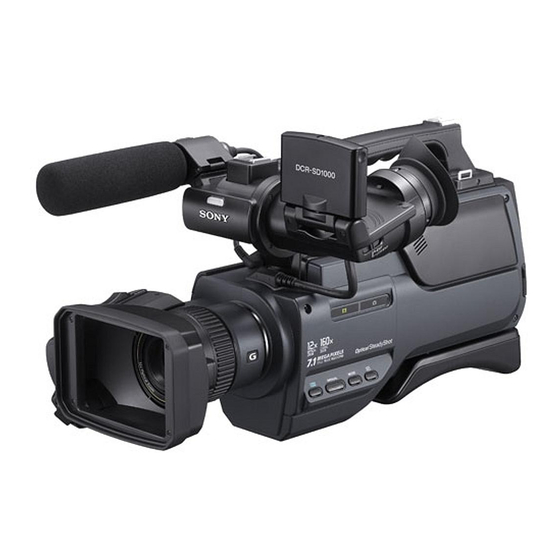
DCR-SD1000E
Digital Video Camera Recorder
Operating Guide
2010 Sony Corporation
4-262-073-12(1)
Table of contents
Getting started
Recording/Playback
Making good use of your
camcorder
Saving movies and photos
with a computer
Saving images with an
external device
Customizing your
camcorder
Additional information
Quick reference
7
10
23
40
49
56
63
82
103
Advertisement
Table of Contents

Related Manuals for Sony DCR-SD1000E


Summary of Contents for Sony DCR-SD1000E
- Page 1 Getting started Recording/Playback Making good use of your camcorder Saving movies and photos with a computer Saving images with an DCR-SD1000E external device Customizing your camcorder Digital Video Camera Recorder Operating Guide Additional information Quick reference 2010 Sony Corporation ...
-
Page 2: Read This First
Be sure to charge the battery pack using a shorter than 3 meters (9.8 feet). genuine Sony battery charger or a device that can charge the battery pack. ATTENTION Keep the battery pack out of the reach of small ... - Page 3 The chemical symbols for mercury the fuse cover, please contact your nearest (Hg) or lead (Pb) are added if the battery Sony service station. contains more than 0.0005% mercury or 0.004% lead. By ensuring these batteries are disposed of...
- Page 4 Lens hood Panel EVF block Supplied items The numbers in ( ) are the supplied quantity. AC Adaptor (1) Power cord (Mains lead) (1) A/V connecting cable (1) LCD panel Battery pack USB cable (1) ...
-
Page 5: About Language Setting
The LCD screen and the viewfinder are the camcorder, recording media, etc. manufactured using extremely high-precision TV color systems differ depending on the technology, so over 99.99% of the pixels are country/region. To view your recordings on a operational for effective use. -
Page 6: Notes On Use
the desired medium [YES] [YES] Notes on optional accessories We recommend using genuine Sony accessories. Genuine Sony accessories may not be available in some countries/regions. About this manual, illustrations and on-screen displays The example images used in this manual for ... -
Page 7: Table Of Contents
Table of contents Read this first..................2 Notes on use. - Page 8 Useful functions for playing movies and photos..........35 Searching for desired images by date (Date Index).
- Page 9 Customizing your camcorder Using menus..................63 Operating menus..
-
Page 10: Getting Started
Getting started Step 1: Attaching the supplied microphone, eyecup and the lens hood Attaching the supplied microphone Attach the wind screen to the microphone . Unlock the stopper of the microphone holder and open the cover. ... -
Page 11: Attaching The Eyecup
Attaching the eyecup Attach the eyecup aligned with the eyecup groove in the viewfinder. You can attach the eyecup facing either the right or left side. Attach the eyecup securely until it fits the corresponding part properly. Attaching the lens hood Align the marks on the lens hood to those on the camcorder, and turn the lens hood in the direction of the arrow. - Page 12 To remove the Lens hood Turn the lens hood cover in the direction of the arrow as illustrated while pressing the lever on the lens hood cover. Tips If you attach, remove or adjust an 37 mm (1 1/2 in.) PL filter or MC protector, remove the lens hood. ...
-
Page 13: Step 2: Charging The Battery Pack
Step 2: Charging the battery pack Battery pack POWER switch DC plug CHG (charge) lamp Align the mark on the DC To the wall outlet DC IN jack plug with that on the DC (wall socket) AC Adaptor IN jack. Power cord (Mains lead) You can charge the “InfoLITHIUM”... -
Page 14: Charging Time
When the battery is charged, disconnect the AC Adaptor from the DC IN jack of your camcorder. Tips See page 91 on recording and playing time. When your camcorder is on, you can check the approximate amount of remaining battery power with the ... -
Page 15: Charging The Battery Pack Abroad
Charging the battery pack abroad You can charge the battery pack in any countries/regions using the AC Adaptor supplied with your camcorder within the AC 100 V - 240 V, 50 Hz/60 Hz range. Notes Do not use an electronic voltage transformer. ... -
Page 16: Step 3: Turning The Power On, And Setting The Date And Time
Step 3: Turning the power on, and setting the date and time Slide the POWER switch to ON while pressing the green button. Select the desired geographical area with , then touch [NEXT]. Touch the button on the LCD screen (MENU) ... -
Page 17: Changing The Language Setting
Notes The date and time does not appear during recording, but they are automatically recorded on the recording media, and can be displayed during playback. To display the date and time, touch (MENU) [Show others] [PLAYBACK SET] (under [PLAYBACK] category) ... -
Page 18: Step 4: Making Setting Adjustments Before Recording
Step 4: Making setting adjustments before recording The LCD panel Open the LCD panel (), then rotate it to the best angle to record or play (). 90 degrees (max.) 180 degrees (max.) 180 degrees (max.) Tips If you rotate the LCD panel 180 degrees to the lens side, you can close the LCD panel with the LCD ... -
Page 19: The Shoulder Pad
Notes You may see primary colors shimmering in the viewfinder when you move your line of sight. This is not a malfunction. The shimmering colors will not be recorded on the recording media. Tips You can view pictures using the viewfinder to avoid wearing down the battery, or when the picture seen ... -
Page 20: Step 5: Preparing The Recording Media
Step 5: Preparing the recording media The recording media of your camcorder are displayed on the screen as follows. Internal memory Memory card In the default setting, both movies and photos are recorded on this recording media. You can perform recording, playback and editing operations on the selected medium. -
Page 21: Inserting A Memory Card
To check the recording media settings In either movie recording mode or photo recording mode, the media icon of the selected recording media is displayed at the top right corner of the screen. Recording media icon Inserting a memory card ... - Page 22 Open the cover, and insert the memory card with the notched edge in the direction as illustrated until it clicks. Close the cover after inserting the memory card. Access lamp Note direction of notched corner. The [Create a new Image Database File.] screen may appear if you insert a new memory card.
-
Page 23: Recording/Playback
Recording/Playback Recording In the default setting, movies and photos are recorded on the internal memory. Tips To change the recording media, see page 20. Remove the lens cap by pressing both knobs on its sides. Slide the POWER switch to ON while pressing the green button. You can switch recording modes by pressing MODE. -
Page 24: Recording Movies
Recording movies Press MODE to light up the (Movie) lamp. The LCD screen display switches for movie recording mode, and the screen aspect ratio becomes 4:3. Press START/STOP (or ). START/STOP START/STOP button button [STBY] [REC] To stop recording, press START/STOP again. -
Page 25: Shooting Photos
operate your camcorder during this time. The following states will be indicated if data is still being written onto the recording media after recording has finished. During this time, do not apply shock or vibration to the camcorder, or remove the battery or AC Adaptor. - Page 26 Press PHOTO lightly to adjust the focus, then press it fully. Flashes Lights up When disappears, the photo is recorded. Tips See page 92 on the recordable number of photos. (MENU) [Show others] [ To change the image size, touch IMAGE SIZE] (under ...
-
Page 27: Useful Functions For Recording Movies And Photos
Useful functions for recording movies and photos the LCD screen by setting [DISPLAY SET] to [AUTO1]. Note, however, that you cannot change the zoom speed with Zooming Tips You can magnify images up to 17 times the You can set [ DIGITAL ZOOM] (p. -
Page 28: Selecting The Recording Mode
Scene detection [IRIS] [SHUTTER SPEED] (Backlight), (Landscape), [PRIORITY SETTING] (Twilight), (Spotlight), (Low light), (Macro) Notes The camcorder selects the most effective Above settings are reset to the default settings setting automatically, depending on the when INTELLIGENT AUTO is set to ON. -
Page 29: Prioritizing The Subject
[LP](3M (LP)) Notes If you record in the LP mode, the quality of The face you touched may not be detected, movies may be degraded, or scenes with quick depending on the surrounding brightness or movements may appear with block noise when hairstyle of the subject. -
Page 30: Recording High Quality Photos During Movie Recording (Dual Rec)
Tips You can select the subject that has priority Press the MANUAL button to for face detection and smile detection with activate the manual adjustment [PRIORITY SETTING] (p. 73). When you mode. specify the priority subject by touching the detection frame on the LCD screen, the face The setting mode switches between with a double-lined frame has priority. - Page 31 horizontal stripes may appear, flicker may Rotate the RING and select a menu item occur, or color may change. In this case, change to be assigned. the shutter speed according to the power supply Press the MANUAL button. frequency in your region.
-
Page 32: Playback On The Camcorder
Playback. on.the.camcorder In the default setting, movies and photos that are recorded on the internal memory are played. Tips To change the recording media, see page 20. Slide the POWER switch to ON while pressing the green button. Press (VIEW IMAGES). - Page 33 Switches operating button display. To MENU screen Displays the screen to select the index type ([DATE INDEX] (p. 35)/[ FILM ROLL] (p. 35)/[ FACE] (p. 35)). : Displays images recorded on the previous/next date. : Displays the previous/next image. ...
- Page 34 To adjust the sound volume of movies adjust with While playing back movies, touch You can also adjust the sound volume by using from (OPTION) MENU. Viewing photos Your camcorder displays the selected photo. To start/stop slide Previous show Next...
-
Page 35: Useful Functions For Playing Movies And Photos
Useful functions for playing movies and photos Searching for desired scene by pinpoint (Film Roll Index) Searching for desired images by Movies can be divided by a set time and the date (Date Index) first scene of each division is displayed on You can search for desired images by date the INDEX screen. -
Page 36: Using Pb Zoom With Photos
Using PB zoom with photos Press (VIEW IMAGES). You can magnify photos from about 1.1 to 5 The VISUAL INDEX screen appears. times the original size. Magnification can be adjusted with the [ Touch FACE]. power zoom lever. Returns to the VISUAL INDEX screen ... -
Page 37: Playing Back A Series Of Photos (Slide Show)
Playing back a series of photos (Slide show) Touch on the photo playback screen. The slide show begins from the selected photo. To stop the slide show Touch To restart the slide show Touch again. Notes You cannot operate playback zoom during slide ... -
Page 38: Playing Images On A Tv
Playing images on a TV Connect your camcorder to the input jack of a TV or VCR using the supplied A/V connecting cable. Connect your camcorder to the wall outlet (wall socket) using the supplied AC Adaptor for this operation (p. 15). Refer also to the instruction manuals supplied with the devices to be connected. - Page 39 Play back movies and photos on your camcorder (p. 32). To set the aspect ratio according to the connected TV (16:9/4:3) (MENU) [Show others] [OUTPUT SETTINGS] (under Touch [GENERAL SET] category) [TV TYPE] [16:9] or [4:3] ...
-
Page 40: Making Good Use Of Your Camcorder
Making good use of your camcorder Deleting movies and photos You can free media space by deleting Touch and display the mark movies and photos from recording media. on the movies or photos to be deleted. Notes You cannot restore images once they are ... -
Page 41: Protecting Recorded Movies And Photos (Protect)
Protecting recorded movies and photos (Protect) Touch to select the recording Protect movies and photos to avoid deleting date of the desired movies/photos, then them by mistake. touch Touch the image on the LCD screen to Tips confirm the image. -
Page 42: Dividing A Movie
Dividing a movie To protect all the movies and photos recorded on the same day at one time (MENU) [Show Touch others] [ DIVIDE] (under Notes [EDIT] category). You cannot select [ PRT. by date] for still ... -
Page 43: Capturing A Photo From A Movie
Capturing a photo from a movie You can capture photos from movies A slight difference may occur from the point where you touch and the actual dividing recorded on the internal memory of your point, as your camcorder selects the dividing camcorder. -
Page 44: Dubbing/Copying Movies And Photos From The Internal Memory To
Dubbing/copying movies and photos from the internal To continue capturing, touch , then memory to memory repeat steps from step 3. To capture a photo from another movie, card touch , then repeat steps from step 2. Dubbing movies ... -
Page 45: Copying Photos
Tips To check the dubbed movies after dubbing is Touch the type of dubbing. finished, select [MEMORY CARD] on [MOVIE [DUB by select]: To select movies and MEDIA SET] and play them back (p. 20). [DUB by date]: To dub all movies of a Copying photos specified date You can copy photos from the internal... -
Page 46: Using The Playlist Of Movies
Using the Playlist of movies The Playlist is a list showing thumbnails of Select the photo to be copied. the movies that you have selected. The original movies are not changed even [COPY by select]: Touch the photo to if you edit or erase the movies added to the be copied, and mark with . -
Page 47: Playing The Playlist
To add all the movies recorded on the same day at one time Touch the movie you want to In step 2, touch [ play back. ADD by date]. The recording dates of movies are The Playlist is played back from the displayed on the screen. - Page 48 Select the movie to be moved. The selected movie is marked with . Touch the image on the LCD screen to confirm the image. Touch to return to the previous screen. Touch Select the destination with Destination bar ...
-
Page 49: Saving Movies And Photos With A Computer
Saving movies and photos with a computer Preparing a computer (Windows) Others You can perform following operations using USB port (this must be provided as standard, “PMB (Picture Motion Browser). ” Hi-Speed USB (USB 2.0 compatible)), DVD Importing images to a computer ... - Page 50 Confirm that your camcorder is Turn on your camcorder, then not connected to the computer. connect the camcorder to the computer using the supplied USB cable. Turn on the computer. Log on as an Administrator for installation.
- Page 51 Restart the computer if required to To disconnect your camcorder from the complete the installation. computer When the installation is completed, Click the icon at the bottom right of the following icons will appear. desktop of the computer [Safely remove Remove the CD-ROM from your USB Mass Storage Device].
-
Page 52: Starting Pmb (Picture Motion Browser)
Starting PMB Creating a disc with (Picture one touch Motion Browser) (One Touch Disc Burn) Double-click the “PMB” short-cut icon on Movies and photos recorded on your the computer screen. camcorder that have not yet been saved with One Touch Disc Burn function can be saved on a disc automatically. -
Page 53: Importing Movies And Photos To A Computer
Importing movies and photos to a computer Movies and photos recorded on your Press [DISC BURN] on the LCD camcorder can be imported to a computer. Turn on the computer beforehand. screen. Notes Connect your camcorder to the wall outlet (wall ... -
Page 54: Capturing Photos From A Movie
Capturing photos from a movie Click [Import]. You can save a frame of a movie as a Refer to “PMB Help” (p. 52) for details. photo file. Double-click the movie to be edited on “PMB, ” then click [Show Edit Palette] on the right side of the screen ... -
Page 55: Creating A Disc
Creating a disc You can create a disc by selecting movies Follow the instructions on the previously imported to your computer (p. 53). screen to create a disc. It may take a long time to create a disc. Turn on your computer, and place an unused disc on the DVD drive. -
Page 56: Saving Images With An External Device
Saving images with an external device Saving images in external media (DIRECT COPY) If the external media has the AC power cable, connect it to the You can save movies and photos on external wall outlet (wall socket). media (USB storage device), such as an external hard disk drive. - Page 57 Touch [Play without copying.] in step 5 After the operation is completed, above. touch on the camcorder The VISUAL INDEX screen of the screen. external media is displayed. Touch (MENU) [Show others] [MOVIE DUB] (when selecting movies)/[PHOTO COPY] (when ...
-
Page 58: Creating A Disc With A Dvd Writer, Recorder
Creating a disc with a DVD writer, recorder Notes Creating a disc with the dedicated The Date Index of photos cannot be displayed. DVD writer, DVDirect Express If your camcorder does not recognize the external media, try the following operations. You can create a disc or play back the Reconnect the USB Adaptor Cable to your ... - Page 59 Touch the movie you want to burn on Insert an unused disc into the the disc. DVD writer, and close the disc appears. tray. The [DISC BURN] screen appears on the camcorder screen. Press (DISC BURN) on the DVD Remaining Disc capacity writer.
-
Page 60: Creating A Disc With A Dvd Writer, Etc., Other Than Dvdirect Express
Connect your camcorder to the wall outlet (wall socket) using the supplied AC Adaptor for this operation (p. 14). Sony DVD writer may not be available in some Connect the AC Adaptor and the power countries/regions. cord (mains lead) to the DC IN jack of your camcorder and the wall outlet (wall ... -
Page 61: Creating A Disc With A Recorder, Etc
AC Adaptor for this the camcorder screen. operation (p. 14). If the [USB SELECT] screen does not Sony DVD writer may not be available in some (MENU) [Show appear, touch countries/regions. others] [USB CONNECT] (under [OTHERS] category). -
Page 62: Your Camcorder
[GENERAL SET] category) (under Insert the recording media in the [DISP OUTPUT] [V-OUT/PANEL] recording device. When the screen size of display devices (TV, If your recording device has an input (MENU) [Show etc.) is 4:3, touch selector, set it to the input mode. -
Page 63: Customizing Your Camcorder
Customizing your camcorder Using menus Using the menus, you can perform useful functions and change various settings. If you make good use of menu operations, you can enjoy using your camcorder. The camcorder has various menu items under each of eight menu categories. MANUAL SETTINGS (Items to adjust for scene condition) ... -
Page 64: Using My Menu
Notes You may not be able to set some menu items, depending on the recording or playback conditions. Grayed out menu items or settings are not available. Tips Depending on the menu items being changed, your camcorder switches between playback mode and ... -
Page 65: Using The Option Menu
Using the OPTION MENU The OPTION MENU appears just like the pop-up window that appears when you right-click the mouse on a computer. When is displayed at bottom-right of the screen, you can use the OPTION MENU. You touch , and the menu items you can change in the context appear. -
Page 66: Menu Lists
Menu lists (MANUAL SETTINGS) category PLAYLIST SCENE SELECTION PLAYBACK SET WHITE BAL. DATA CODE SPOT MTR/FCS (EDIT) category SPOT METER SPOT FOCUS DELETE EXPOSURE DELETE FOCUS DELETE TELE MACRO PROTECT AE SHIFT PROTECT WB SHIFT PROTECT SMTH SLW REC DIVIDE PHOTO CAPTURE (SHOOTING SET) category MOVIE DUB... - Page 67 REPAIR IMG.DB F. INT. MEMORY 86, 89 MEMORY CARD 86, 89 (GENERAL SET) category SOUND/DISP SET VOLUME 34, 80 BEEP LCD BRIGHT LCD BL LEVEL LCD COLOR DISPLAY SET OUTPUT SETTINGS TV TYPE DISP OUTPUT CLOCK/ LANG CLOCK SET AREA SET SUMMERTIME LANGUAGE SET POWER SETTINGS...
-
Page 68: Manual Settings (Items To Adjust For Scene Condition)
MANUAL SETTINGS (Items to adjust for scene SPOTLIGHT**( ) Prevents people’s faces from condition) appearing excessively white when subjects are lit by See “Using menus” (p. 63) on the operation. strong light. The default settings are marked with . BEACH** ( Takes the vivid blue of the SCENE SELECTION ocean or a lake. - Page 69 from inside the house, or vice versa, you need INDOOR () to redo the [ONE PUSH] procedure to readjust The white balance is appropriately adjusted the white balance. for the following recording conditions: Indoors SPOT MTR/FCS (Spot meter/ At party scenes or studios where the focus) lighting conditions change quickly...
- Page 70 Notes FOCUS [EXPOSURE] is automatically set to [MANUAL]. You can adjust the focus manually. You can select this function also when you want to SPOT FOCUS focus on a certain subject intentionally. You can select and adjust the focal point to aim it at a subject not located at the center of the screen.
- Page 71 TELE MACRO WB SHIFT This is useful to shoot small subjects, such You can adjust the white balance to the as flowers or insects. You can blur out desired setting using backgrounds and the subject stands out the setting value appear when you use [WB clearer.
-
Page 72: Shooting Set (Items For Customized Shooting)
SHOOTING SET (Items for customized shooting) The point when START/STOP is pressed. See “Using menus” (p. 63) on the operation. The default settings are marked with . [3sec AFTER] REC MODE (Recording mode) [3sec BEFORE] See page 28. Notes GUIDEFRAME You cannot record sound. - Page 73 FACE DETECTION ACTIVE Provides a more powerful SteadyShot effect. Detects the faces of your subjects STANDARD and adjusts the focus/color/exposure Provides the SteadyShot effect under relatively automatically. stable recording conditions. ON OFF ( Detects faces. The SteadyShot function is not used. OFF ( ) Does not detect faces.
- Page 74 ADULT PRIORITY Detects with priority on an adult’s face. Detects a big smile. Tips AUDIO REC SET When you specify the priority subject by touching the detection frame on the LCD MICREF LEVEL (Microphone screen, the face with a double-lined frame has priority (p.
-
Page 75: Photo Settings (Items For Recording Photos)
PHOTO SETTINGS (Items for recording photos) Notes See “Using menus” (p. 63) on the operation. When [ STEADYSHOT] is set to other The default settings are marked with . than [ACTIVE], up to 12× zoom is performed optically. SELF-TIMER ... -
Page 76: Playback (Items For Playback)
PLAYBACK (Items for playback) ON See “Using menus” (p. 63) on the operation. The SteadyShot function is used. VISUAL INDEX OFF ( The SteadyShot function is not used. See page 32. FILE NO. (File number) VIEW IMAGES You can select the way to assign file number ... -
Page 77: Edit (Items For Editing)
EDIT (Items for editing) DATE/TIME See “Using menus” (p. 63) on the operation. DELETE See page 40. PROTECT Date Time See page 41. CAMERA DATA DIVIDE Movie See page 42. PHOTO CAPTURE See page 43. MOVIE DUB Photo See page 44. -
Page 78: Others (Items For Other Settings)
OTHERS MANAGE MEDIA (Items for other settings) (Items for recording media) See “Using menus” (p. 63) on the operation. See “Using menus” (p. 63) on the operation. USB CONNECT MEDIA SETTINGS See page 60. See page 20. BATTERY INFO MEDIA INFO You can check the estimated remaining You can check the remaining recordable capacity of the battery. - Page 79 memory card from your camcorder (The access REPAIR IMG.DB F. lamp is lit or flashing while formatting memory card.). See page 86, 89. To prevent data on the internal memory from being recovered [EMPTY] allows you to write unintelligible data onto the internal memory of the camcorder.
-
Page 80: General Set (Other Setup Items)
GENERAL SET (Other setup items) Tips See “Using menus” (p. 63) on the operation. This adjustment does not affect the recorded The default settings are marked with . images in any way. LCD COLOR SOUND/DISP SET You can adjust the color of the LCD screen by touching ... - Page 81 POWER SETTINGS LCD PANEL Shows displays such as the time code on the LCD screen/viewfinder. A.SHUT OFF (Auto shut off ) V-OUT/PANEL You can set your camcorder to turn off Shows displays such as the time code on automatically when you do not operate the LCD screen/viewfinder, and on the TV your camcorder for more than about 30...
-
Page 82: Additional Information
Leave your camcorder with the in order to investigate the problem. However, power of your camcorder on. Turn off your your Sony dealer will neither copy nor retain camcorder and take it to a warm place. Leave your data. - Page 83 (p. 13). If the problem persists, disconnect the AC Adaptor from the wall The buttons on the touch panel quickly outlet (wall socket) and contact your Sony disappear. dealer. The battery pack may be damaged. Set [DISPLAY SET] to [ON] (p. 80).
- Page 84 have just shot on the recording media. You The image in the viewfinder is not clear. cannot make new recording during this Move the viewfinder lens adjustment lever period. until the image appears clearly (p. 18). The recording media is full. Delete ...
- Page 85 extremely low. Turn off your camcorder and Black bands appear when you record a TV take it to a warm place. Leave the camcorder screen or computer screen. there for a while, then turn on the camcorder. If you keep applying vibration on the Set [ STEADYSHOT] to an option except ...
- Page 86 pack while the recording media icon at the top You can add no more than 99 movies to a right corner of the screen flashes, or before Playlist. Erase unnecessary movies from the the access lamp is turned off after recording. Playlist (p.
-
Page 87: Self-Diagnosis Display/Warning Indicators
Examples of functions that cannot have tried to fix a couple of times, contact be used simultaneously your Sony dealer or local authorized Sony service facility. In this case, when you The following list shows examples of contact them, give them all the numbers of unworkable combinations of functions and the error code beginning with C or E. - Page 88 the battery pack or place it in a cool place. Check the data base file by touching (MENU) [Show others] C:13: / C:32: [REPAIR IMG.DB F.] (under [MANAGE Remove the power source. Reconnect it and MEDIA] category) ...
-
Page 89: Recording Media
Tips There is no Image Database File. Movies When [BEEP] is set to [ON] and the some cannot be recorded or played. Create a warning indicators appear, you hear beep sound new file? (p. 80). You cannot record or play back movies ... - Page 90 Other Reinsert the memory card. Reinsert the memory card a few times. If even No further selection is possible. then the indicator flashes, the memory card You can add no more than 99 movies to a could be damaged. Try with another memory Playlist.
-
Page 91: Recording Time Of Movies/Number Of Recordable Photos
Recording time of movies/number of recordable photos Expected recording time of movies Expected time of recording and Internal memory playback with each battery pack unit h (hour) and m (minute) Recording time Recording mode Recording time Approximate time available when you use a [HQ] 8 h 5 m (7 h 10 m) fully charged battery pack. -
Page 92: Expected Number Of Recordable Photos
(25) (25) (55) Notes (50) (50) (110) The unique pixel array of Sony’s ClearVid and the image processing system allow still image (100) (100) (225) resolution equivalent to the sizes described. 16GB Tips (205) -
Page 93: Using Your Camcorder Abroad
Using your camcorder abroad Power supply You can use your camcorder in any countries/regions using the AC Adaptor supplied with your camcorder within the AC 100 V to 240 V, 50 Hz/60 Hz range. On TV color systems Your camcorder is a PAL-system-based camcorder. - Page 94 Setting to the local time You can easily set the clock to the local time by setting a time difference when using your (MENU) [Show others] [CLOCK/ camcorder abroad. Touch LANG] (under [GENERAL SET] category) [AREA SET] and [SUMMERTIME] (p. 81). World time difference Time-zone Area setting...
-
Page 95: Maintenance And Precautions
Maintenance and precautions direction. Note that improper use may cause a About the memory card malfunction. A memory card formatted by a computer On image data compatibility (Windows OS/Mac OS) does not have Image data files recorded on memory card by guaranteed compatibility with your camcorder. -
Page 96: About The "Infolithium" Battery Pack
Notes on using the “Memory Stick To use the battery pack effectively Micro” media Battery pack performance decreases when the ambient temperature is 10 C (50 °F) or below, To use “Memory Stick Micro” media with your and the length of time you can use the battery camcorder, you need a Duo-sized M2 adaptor. -
Page 97: About Handling Of Your Camcorder
To store the battery pack, remove it checked by a Sony dealer before operating it from your camcorder and put it in a dry, cool any further. - Page 98 Note on moisture condensation SET] category) [CALIBRATION]. Moisture may condense when you bring your camcorder from a cold place into a warm place (or vice versa) or when you use your camcorder in a humid place as follows: You bring your camcorder from a ski slope ...
-
Page 99: Rechargeable Battery
On charging the pre-installed rechargeable battery Your camcorder has a pre-installed rechargeable battery to retain the date, time, and other settings even when the LCD screen is closed. The pre- installed rechargeable battery is always charged while your camcorder is connected to the wall outlet (wall socket) via the AC Adaptor or while the battery pack is attached. -
Page 100: Specifications
3 lx (lux) (LOW LUX is set to [ON], shutter speed 1/25 second) Audio recording system: Dolby Digital 2ch The unique pixel array of Sony’s ClearVid Dolby Digital Stereo Creator and the image processing system allow Photo file format still image resolution equivalent to the : DCF Ver.2.0 Compatible... - Page 101 Dimensions (approx.): 255 mm 232 mm 456 mm (10 1/8 in. × 9 1/4 in. × 18 in.) (w/h/d) including the projecting parts, lens hood and eyecup 255 mm 234 mm 464 mm (10 1/8 in. × ...
- Page 102 LICENSE UNDER APPLICABLE PATENTS IN Memory Stick Duo” are trademarks or THE MPEG-2 PATENT PORTFOLIO, WHICH registered trademarks of Sony Corporation. LICENSE IS AVAILABLE FROM MPEG LA, “InfoLITHIUM” is a trademark of Sony L.L.C., 250 STEELE STREET, SUITE 300, Corporation. DENVER, COLORADO 80206.
-
Page 103: Quick Reference
Quick reference Screen indicators Indicator Meaning Upper left Center Upper right Approximate number of 9999 recordable photos and 9999 recording media Playback folder (34) Current playing movie or photo/Number of total 100/112 recorded movies or photos (33) Bottom Bottom Upper left Indicator Meaning Indicator... - Page 104 Indicator Meaning VIEW IMAGES button (32) Slide show button (37) 101-0005 Data file name (34) Protected image (41) Index button (34) Indicators and their positions are approximate and may differ from what you actually see.
-
Page 105: Parts And Controls
Parts and controls The numbers in ( ) are reference pages. Cold shoe RESET button Initializes all the settings, including the setting REMOTE jack of the date and time. The REMOTE jack is used for controlling the playback of video devices and peripherals ... - Page 106 Eyecup (Movie) lamp (23) Viewfinder (18) (Photo) lamp (23) LCD screen/touch panel (4, 18) LCD/EVF-EVF switch (19) Lens hood release lever (12) Viewfinder lens adjustment lever (18) Hook for the Shoulder belt Attach the Shoulder belt (sold separately).
- Page 107 Microphone (10) Tripod receptacle Attach the tripod (sold separately: the length Slide cover (22) of the screw must be less than 5.5 mm (7/32 REC lamp (Camera recording lamp) in.)) to the tripod receptacle using a tripod The REC lamp lights up in red during ...
-
Page 108: Index
Index DISP OUTPUT ......80 Symbols DIVIDE ........42 16:9 ..........39 Macintosh ........49 Dual Rec ........30 4:3 ..........39 Maintenance ........95 Dubbing ........44 MANAGE MEDIA ....20, 78 DVDirect Express .......58 MANUAL SETTINGS ....68 A.SHUT OFF ......81 DVD writer......58, 60 MEDIA FORMAT ......78 A/V connecting cable...38, 61 MEDIA INFO ......78 Abroad .........93 MEDIA SETTINGS ....20... - Page 109 Playing..........32 Specifications ......100 Playlist ..........46 SPOT FOCUS ......70 PLAYLIST EDIT ......46 SPOTLIGHT .......68 PMB (Picture Motion Browser) SPOT METER ......69 ..........49, 52 SPOT MTR/FCS ......69 PMB Help ........52 STEADYSHOT .....72, 75 PORTRAIT ........68 SUMMERTIME ......81 Power on ........16 SUNRISE&SUNSET....68 POWER SETTINGS ....81 Supplied items .......4 Precautions ........95 PRIORITY SETTING ..73, 87...
- Page 112 Additional information on this product and answers to frequently asked questions can be found at our Customer Support Website. http://www.sony.net/ Printed in Japan...
Need help?
Do you have a question about the DCR-SD1000E and is the answer not in the manual?
Questions and answers