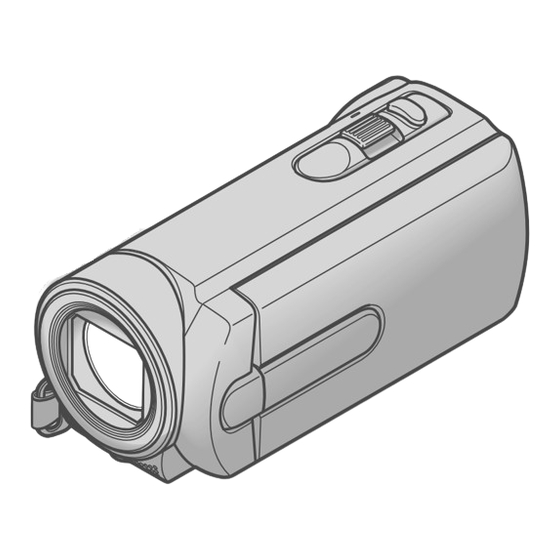
Sony Handycam DCR-SR15E User Manual

Digital video camera recorder
Hide thumbs Also See for Handycam DCR-SR15E:

Advertisement

DCR-SR15E/SR20E/SX15E/
SX20E/SX20EK
Digital Video Camera Recorder
Operating Guide
2010 Sony Corporation
4-209-890-11(1)
Table of contents
Getting started
Recording/Playback
Making good use of your
camcorder
Saving movies and photos
with a computer
Saving images with an
external device
Customizing your
camcorder
Additional information
Quick reference
8
10
20
30
32
39
47
54
63

Advertisement

Table of Contents
loading

Summary of Contents for Sony Handycam DCR-SR15E

  • Page 1 DCR-SR15E/SR20E/SX15E/ SX20E/SX20EK Digital Video Camera Recorder Operating Guide 2010 Sony Corporation  4-209-890-11(1) Table of contents Getting started Recording/Playback Making good use of your camcorder Saving movies and photos with a computer Saving images with an external device Customizing your...
  • Page 2: Read This First

    Do not handle damaged or leaking lithium ion  batteries. Be sure to charge the battery pack using a  genuine Sony battery charger or a device that can charge the battery pack. Keep the battery pack out of the reach of small  children.
  • Page 3 ATTENTION The electromagnetic fields at the specific frequencies may influence the picture and sound of this unit. Notice If static electricity or electromagnetism causes data transfer to discontinue midway (fail), restart the application or disconnect and connect the communication cable (USB, etc.) again.
  • Page 4: Supplied Items

    Never use the plug without the fuse cover. If you should lose the fuse cover, please contact your nearest Sony service station. Supplied items The numbers in ( ) are the supplied quantity.
  • Page 5: When The Camcorder Is Connected To A Computer Or Accessories

    [MEDIA FORMAT] by selecting (MENU)  [Show others]  [MEDIA FORMAT] (under [MANAGE MEDIA] category)  the desired medium (DCR-SR15E/ SR20E)  [YES]  [YES]  Notes on optional accessories We recommend using genuine Sony accessories. ...
  • Page 6 Do not use your camcorder in very loud areas  (DCR-SR15E/SR20E). On the drop sensor (DCR-SR15E/SR20E) To protect the internal hard disk from shock  by dropping, the camcorder has a drop sensor function.
  • Page 7: Operation Flow

     Expected recording time (MEDIA INFO) Shooting photos  p. 23 Playing movies and photos Playback on the camcorder  p. 25 Playing images on a TV  p. 28 Saving images Saving movies and photos with a computer  p. 32 Saving movies and photos in external media ...
  • Page 8: Table Of Contents

    (DCR-SR15E/SR20E) ........
  • Page 9 Customizing your camcorder Using menus ..................47 Getting detailed information from the “Handycam”...
  • Page 10: Getting Started

    Getting started Step 1: Charging the battery pack DCR-SR15E/SR20E Battery pack CHG (charge) lamp DCR-SX15E/SX20E Battery pack You can charge the “InfoLITHIUM” battery pack (V series) after attaching it to your camcorder. DC plug AC Adaptor CHG (charge) lamp DC IN jack...
  • Page 11  See page 57 on recording and playing time.  When your camcorder is on, you can check the approximate amount of remaining battery power with the  remaining battery indicator at the upper left on the LCD screen. Charging time Approximate time (min.) required when you fully charge a fully discharged battery pack.
  • Page 12: Charging The Battery Pack Abroad

     Remove the battery pack from your camcorder and put it in a cool place. In the default setting, the power turns off automatically if you leave your camcorder without any  operation for about 5 minutes, to save battery power ([A.SHUT OFF]).
  • Page 13: Step 2: Turning The Power On, And Setting The Date And Time

    Step 2: Turning the power on, and setting the date and time Open the LCD screen of your camcorder. Your camcorder turns on. Select the desired geographical area by selecting multi-selector, keep pressing the center of the multi-selector until the desired geographical area is turned on a light.
  • Page 14 If you set [SUMMERTIME] to [ON], the clock advances 1 hour. Select [NEXT] with  of the multi-selector, then press the center of the multi-selector. Set the date and time by repeating the procedure bellow.  Highlight the desired item with / of the multi-selector. ...
  • Page 15: Using The Multi-Selector

    Using the Multi-selector Multi-selector  Select a button by placing an orange frame over it using /// of the multi-selector.  Press the center of the multi-selector to confirm your selection. Changing the language setting You can change the on-screen displays to show messages in a specified language. (MENU) ...
  • Page 16: Step 3: Preparing The Recording Media

    Step 3: Preparing the recording media The recording media that can be used differs depending on your camcorder. The following icons are displayed on the screen of your camcorder. DCR-SX15E/SX20E: DCR-SR15E/SR20E: In the default setting, both movies and photos are recorded on this recording media. You can perform recording, playback and editing operations on the selected medium.
  • Page 17: To Check The Recording Media Settings

    Images recorded on SDXC memory cards cannot be played back or imported on non-exFAT*-compatible  computers, AV components, etc., connected to this camcorder by USB cable. Check that the connected devices are compatible with exFAT beforehand. If you connect a device that is not compatible with exFAT, the screen for initialization may appear.
  • Page 18 If [Failed to create a new Image Database File. It may be possible that there is not enough free space.]  is displayed, initialize the memory card by selecting [MANAGE MEDIA] category)  [MEMORY CARD] (DCR-SR15E/SR20E)  FORMAT] (under [YES]  [YES] ...
  • Page 19: To Memory Card (Dcr-Sr15E/Sr20E)

    Dubbing or copying movies and photos from the internal recording media to memory card (DCR-SR15E/SR20E) (MENU)  [Show others]  [MOVIE DUB]/[PHOTO COPY] (under Select [EDIT] category), then follow the displays on the screen.
  • Page 20: Recording/Playback

    In the default setting, movies are recorded on the following recording media. DCR-SX15E/SX20E: Memory card DCR-SR15E/SR20E: Internal hard disk Tips  See page 16 on changing the recording media (DCR-SR15E/SR20E).  To open the lens cover Slide the LENS COVER switch to open. Tips ...
  • Page 21 Open the LCD screen of your camcorder. Your camcorder turns on. You can switch recording modes by pressing MODE. Press MODE until the desired mode icon  appears. (Movie): When recording a movie Recording movies Press START/STOP to start recording.
  • Page 22 [ON], and record images using the outer frame displayed on the screen as a guide. STEADYSHOT] is set to [ON] in the default setting.  To adjust the angle of the LCD panel, first open the LCD panel 90 degrees to the camcorder (), and  then adjust the angle ().
  • Page 23 In the default setting, photos are recorded on the following recording media. DCR-SX15E/SX20E: Memory card DCR-SR15E/SR20E: Internal hard disk Tips  See page 16 on changing the recording media (DCR-SR15E/SR20E).   Press MODE until the The LCD screen display switches for photo recording mode, and the screen aspect ratio becomes 4:3.
  • Page 24  Press PHOTO lightly to adjust the focus, then press it fully. Tips  See page 58 on the recordable number of photos.  To change the image size, select  [PHOTO SETTINGS] category)  a desired setting  You can check the recordable number of photos on the LCD screen (p. 63). ...
  • Page 25: Playback On The Camcorder

    In the default setting, movies and photos that are recorded on the following recording media are played. DCR-SX15E/SX20E: Memory card DCR-SR15E/SR20E: Internal hard disk Tips  See page 16 on changing the recording media (DCR-SR15E/SR20E).  Open the LCD screen of your camcorder. Your camcorder turns on. Press (VIEW IMAGES).
  • Page 26: Playing Movies

     movie or photo with , you can continue playback from the previous time. ( appears on the photo recorded on a memory card.) Playing movies Your camcorder starts playing the selected movie. Volume adjustment Previous To stop To fast-reverse Tips ...
  • Page 27: Viewing Photos

    Viewing photos Your camcorder displays the selected photo. Previous To the VISUAL INDEX screen Tips  When viewing photos recorded on a memory card,  To start/stop slide show Next OPTION (playback folder) appears on the screen.
  • Page 28: Playing Images On A Tv

    Playing images on a TV Connect your camcorder to the input jack of a TV or VCR using the A/V connecting cable (supplied). Connect your camcorder to the wall outlet (wall socket) using the supplied AC Adaptor for this operation (p. 12). Refer also to the instruction manuals supplied with the devices to be connected.
  • Page 29 When your TV is monaural (When your TV has only one audio input jack) Connect the yellow plug of the A/V connecting cable to the video input jack and connect the white (left channel) or red (right channel) plug to the audio input jack of your TV or VCR. If your TV/VCR has a 21-pin adaptor (EUROCONNECTOR) Use a 21-pin adaptor (sold separately) to view playback pictures.
  • Page 30: Making Good Use Of Your Camcorder

    Making good use of your camcorder Deleting movies and photos You can free media space by deleting movies and photos from recording media.  Notes You cannot restore images once they are  deleted. Save important movies and photos in advance.
  • Page 31  In step 2, select [ DELETE]  DELETE by date]. To delete all photos on the same day at one  DELETE]  [ time, select [ by date].  Select to select the recording date of the desired movies/photos, then select Press LIGHT when thumbnail is selected ...
  • Page 32: Saving Movies And Photos With A Computer

    To save movies and photos using a computer, install “PMB” from the supplied CD-ROM beforehand.  Notes Do not format the media of your camcorder  from a computer. Your camcorder may not operate correctly. You can create discs using 12 cm discs of ...
  • Page 33 Select the one of the media types displayed on the screen to make the computer recognize your camcorder. USB CONNECT]: Internal hard disk (DCR-SR15E/SR20E) USB CONNECT]: Memory card The displayed recording media differ  depending on the model. If the [USB SELECT] screen does not ...
  • Page 34 To disconnect your camcorder from the computer  Click the icon at the bottom right of the desktop of the computer  [Safely remove USB Mass Storage Device]. Select [END]  [YES] on the camcorder  screen.  Disconnect the USB cable.  Notes Access from the computer using the supplied ...
  • Page 35: Starting Pmb (Picture Motion Browser)

    Install “PMB” beforehand (p. 32), however, do  not start “PMB. ” Connect your camcorder to the wall outlet (wall  socket) using the AC Adaptor supplied for this operation (p. 12). With One Touch Disc Burn function on your ...
  • Page 36: Importing Movies And Photos To A Computer

    Movies and photos recorded on your camcorder can be imported to a computer. Turn on the computer beforehand.  Notes Connect your camcorder to the wall outlet (wall  socket) using the supplied AC Adaptor for this operation (p. 12). Turn on your camcorder, then...
  • Page 37: Creating A Disc

    Click [Import]. Refer to “PMB Help” (p. 35) for details.  Movies and photos are imported to your computer. When the operation is completed, the “PMB” screen appears. Creating a disc You can create a disc by selecting movies previously imported to your computer (p.
  • Page 38: Copying A Disc

    Follow the instructions on the screen to create a disc. It may take a long time to create a disc.  Copying a disc You can copy a recorded disc to another disc using “Video Disc Copier. ” Click [Start]  [All Programs]  [PMB] ...
  • Page 39: Saving Images With An External Device

     socket) using the supplied AC adaptor (p. 12). Refer to the instruction manual supplied with  the external media. Refer to the Sony support page for your  country/region for details on external media that can be used. Tips ...
  • Page 40 Select [Copy.] on the camcorder screen. DCR-SR15E/SR20E: Movies and photos in the internal recording media of the camcorder that have not yet been saved on to external media can be saved. DCR-SX15E/SX20E: Movies and photos that have not yet been saved on to external media can be saved.
  • Page 41 (p. 28).  Notes The Date Index of photos cannot be displayed.  If your camcorder does not recognize the  external media, try the following operations. Reconnect the USB Adaptor Cable to your  camcorder If the external media has the AC power cable, ...
  • Page 42: Creating A Disc With A Dvd Writer, Recorder

    Refer also to the instruction manual supplied with the DVD writer.  Notes Connect your camcorder to the wall outlet (wall  socket) using the supplied AC Adaptor for this operation (p. 12). Only unused discs of the following types can ...
  • Page 43 When creating multiple copies of the same  disc When dubbing images in the memory card  (DCR-SR15E/SR20E)  Select [DISC BURN OPTION] on the screen in step 4.  Select the recording media containing the movie(s) you want to save SR15E/SR20E) ...
  • Page 44: Camcorder Screen

    DVDirect Express, with the USB cable. Refer also to the instruction manuals supplied with the devices to be connected.  Notes Sony DVD writer may not be available in some  countries/regions. Connect your camcorder to the wall outlet (wall ...
  • Page 45  Notes Connect your camcorder to the wall outlet (wall  socket) using the supplied AC Adaptor for this operation (p. 12). Sony DVD writer may not be available in some  countries/regions. A/V OUT jack Input VIDEO (Yellow)
  • Page 46: Your Camcorder

     Start playback on your camcorder, and record it on the recording device. Refer to the instruction manuals supplied  with your recording device for details.  When dubbing is finished, stop the recording device, and then your camcorder. ...
  • Page 47: Customizing Your Camcorder

    Using the menus, you can perform useful functions and change various settings. If you make good use of menu operations, you can enjoy using your camcorder. The camcorder has various menu items under each of eight menu categories. MANUAL SETTINGS (Items to adjust for scene condition)  p. 50 SHOOTING SET (Items for customized shooting) ...
  • Page 48 Grayed out menu items or settings are not available.  Tips  Depending on the menu items being changed, your camcorder switches between playback mode and  recording mode (movie/photo). Using MY MENU You can use the menu items more easily by registering the menu items you use most often on MY MENU.
  • Page 49 When the item you want is not on the screen, select another tab. (There may be no tab.)  The tabs and items that appear on the screen depend on the recording/playback status of your camcorder  at the time.
  • Page 50 WIDE SELECT ... Sets the horizontal to vertical ratio when recording movies. (PHOTO SETTINGS) category SELF-TIMER ... Sets the self-timer when your camcorder is in photo recording mode. IMAGE SIZE ... Sets the photo size. FILE NO..Sets how to assign the file number.
  • Page 51 (EDIT) category DELETE DELETE ... Deletes movies. DELETE ... Deletes photos. PROTECT PROTECT ... Protects movies to avoid deleting. PROTECT ... Protects photos to avoid deleting. DIVIDE ... Divides movies. PHOTO CAPTURE * ... Captures photos from desired scenes of movies. MOVIE DUB * DUB by select ...
  • Page 52 SOUND/DISP SET VOLUME ... Adjusts the volume of playback sound (p. 26). BEEP ... Sets whether the camcorder sounds operation beeps or not. LCD BRIGHT ... Adjusts the brightness of the LCD screen. LCD BL LEVEL ... Adjusts the backlight of the LCD screen.
  • Page 53: Getting Detailed Information From The "Handycam" Handbook

    [Install]. Install by following the instructions on the screen. The model name of your camcorder is  printed on its bottom surface. To view the “Handycam” Handbook, double-click the short-cut icon on the computer screen.
  • Page 54: Additional Information

    If you press RESET, all settings, including the clock setting, are reset.  Contact your Sony dealer or local authorized Sony service facility. Your camcorder may be required to initialize or  change the current internal recording media of your camcorder, depending on the problem.
  • Page 55 If the problem persists even after you have tried to fix a couple of times, contact your Sony dealer or local authorized Sony service facility. In this case, when you contact them, give them all the numbers of the error code beginning with C or E.
  • Page 56  [Show others]  [REPAIR IMG.DB F.] [MANAGE MEDIA] category)  (under the recording medium (DCR-SR15E/SR20E). The memory card is damaged. Format the  memory card with your camcorder (p. 51). Incompatible memory card is inserted (p. 18).
  • Page 57: Playing Time

       recommended. The recording and playback time will be  shorter when you use your camcorder in low temperatures. The recording and playback time will be shorter  depending on the conditions under which you use your camcorder.
  • Page 58: Memory Card

    [ MODE] (p. 50). The number in ( ) is the minimum recordable  time. Expected number of recordable photos Internal recording media (DCR-SR15E/ SR20E) You can record the maximum 9,999 photos. Memory card 512MB (unit: minute) 16GB...
  • Page 59: Precautions

    If any solid object or liquid gets inside the  casing, unplug your camcorder and have it checked by a Sony dealer before operating it any further. Avoid rough handling, disassembling,  modifying, physical shock, or impact such as hammering, dropping or stepping on the product.
  • Page 60 (wall socket) via the AC Adaptor or while the battery pack is attached. The rechargeable battery will be fully discharged in about 3 months if you do not use your camcorder at all. Use your camcorder after charging the pre-installed rechargeable battery. However, even if the pre-...
  • Page 61: Specifications

    When measuring media capacity, 1 GB equals 1 billion bytes, a portion of which is used for system management and/or application files. The capacity that a user can use is below. DCR-SR15E/SR20E: Approx. 79.3 GB Image device 2.25 mm (1/8 type) CCD (Charge Coupled Device) Gross: Approx.
  • Page 62 Stick PRO-HG Duo, ” “ Micro, ” “MagicGate, ” “ “MagicGate Memory Stick” and “MagicGate Memory Stick Duo” are trademarks or registered trademarks of Sony Corporation. “InfoLITHIUM” is a trademark of Sony  Corporation. “DVDirect” is a trademark of Sony ...
  • Page 63: Quick Reference

    101-0005  Indicators and their positions are approximate  and may differ from what you actually see. Some indicators may not appear, depending on  your camcorder model. Meaning Estimated recording remaining time FADER Drop sensor off Drop sensor activated...
  • Page 64: Parts And Controls

     Multi-selector (15)  (VIEW IMAGES) button (25) DCR-SR15E/SR20E  Speaker   (USB) jack (33, 36, 39, 42) DCR-SR15E: output only  A/V OUT jack (28)  MODE button (21)   (Backlight) button  RESET button Press RESET using a pointed object.
  • Page 65 MODE button (21)   (Backlight) button  RESET button Press RESET using a pointed object. Press RESET to initialize all the settings including the clock setting. DCR-SR15E/SR20E  Power zoom lever  PHOTO button (24)  POWER lamp ...
  • Page 66  DC IN jack (10)  Access lamp (memory card) (17) While the lamp is lit or flashing, the camcorder is reading or writing data.  BATT (battery) release lever (12)  Tripod receptacle Attach a tripod (sold separately) to the...
  • Page 67: Index

    Index Symbols 16:9 ...28 4:3 ...28 A/V connecting cable...28, 45 Altitude ...6 Battery pack ...10 Capturing photos from a movie ...38 Care ...59 Charging the battery pack ...10 Charging the battery pack abroad ...12 CLOCK SET ...13 Computer...32 Computer system ...32 Copy ...19 Copying a disc ...38 Creating a disc ...37, 42...
  • Page 68 Additional information on this product and answers to frequently asked questions can be found at our Customer Support Website. http://www.sony.net/ Printed in China...

Table of Contents