Table of Contents
Advertisement
Quick Links
Advertisement
Table of Contents

Related Manuals for CHIEF RSA


Summary of Contents for CHIEF RSA
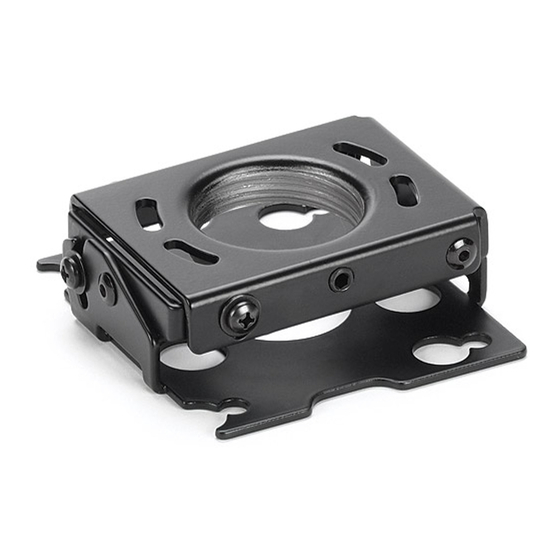
- Page 1 I N S T A L L A T I O N I N S T R U C T I O N S RSA Projector Mounts RPA Elite Series Projector Mount RPA Elite Series Projector Mount RPA Elite Series Projector Mount...
-
Page 2: Important Safety Instructions
RSA does not exceed 25 lbs contingency in connection with the installation or use of this (11.37 kg). -
Page 3: Installation Instructions
Installation Instructions RSA Projector Mounts LEGEND Pencil Mark Tighten Fastener Marquage au crayon Serrez les fixations Segno a matita Serrare il fissaggio Stiftmarkierung Befestigungsteil festziehen Marcar con lápiz Apretar elemento de fijación Potloodmerkteken Bevestiging vastdraaien Marcar com lápis Apertar fixador... -
Page 4: Tools Required For Installation
RSA Projector Mounts Installation Instructions Hammer Target of Projector Martillo Punto de enfoque del proyector Hammer Ziel des Projektors Martelo Mira do projector Martello Punto di proiezione Hamer Doel van de projector Marteau Cible du projecteur TOOLS REQUIRED FOR INSTALLATION 7/16"... - Page 5 IMPORTANT ! : When RSA is properly positioned, the set screw access hole should be pointing directly at target. (see bottom detail in figure at left) Secure RSA to pipe by turning set screw with a 5/32" hex key until tight. CAUTION: DO NOT OVERTIGHTEN! Overtightening of set screw can damage threads on pipe.
-
Page 6: Wood Stud Installation
The RSA mounts are designed to be mounted to double 2" x 4" wood stud cross bracing (1-1/2" on center) between two ceiling joists. Using the RSA as a guide, mark four mounting hole Ø 2.5mm locations with a pencil or similar tool. Hole locations must be centered on 2"... - Page 7 MUST be capable of supporting five times the combined weight of all equipment being mounted. Using the RSA as a guide, mark four mounting hole locations on ceiling using a pencil or similar tool. Drill four 1/4" (6.3mm) diameter pilot holes to a depth of 2-1/2"...
-
Page 8: Projector Installation
Install the RSA on the threaded rod. NOTE: Hole in the RSA allows socket wrench access without unit disassembly. 45mm Secure the RSA to the threaded rod using four 1/4" channel nuts. (1-3/4”) PROJECTOR INSTALLATION IMPORTANT ! : Model RSA uses optional Chief "SSB"... - Page 9 Installation Instructions RSA Projector Mounts Example Only (Interface bracket WARNING: varies dependent IMPROPER INSTALLATION CAN on projector model) LEAD TO PROJECTOR FALLING RESULTING IN SERIOUS PERSONAL INJURY OR DAMAGE TO EQUIPMENT. DO NOT substitute hardware. Use only the hardware provided by the manufacturer.
- Page 10 RSA Projector Mounts Installation Instructions Example Only Securing Projector with Interface Bracket (Interface bracket to Model RSA Mount. varies dependent on projector model) WARNING: IMPROPER INSTALLATION CAN LEAD TO PROJECTOR FALLING RESULTING IN SERIOUS PERSONAL INJURY OR DAMAGE TO EQUIPMENT. Make certain mounting slots in mount base slide under thumb screws and that screws are seated in the back of slots.
-
Page 11: Pitch Adjustment
Tighten yaw adjustment locking screw using a 5/32" hex key. Pitch Adjustment Loosen pitch adjustment locking screw on each end of the RSA projector mount using a #2 Phillips screwdriver. Adjust projector angle to desired pitch. Example Only Tighten pitch adjustment locking screw on each end... -
Page 12: Roll Adjustment
RSA Projector Mounts Installation Instructions Roll Adjustment Loosen roll adjustment locking screw on each side of the RSA projector mount using a #2 Phillips screwdriver. Adjust projector to desired roll position. Example Only Tighten roll adjustment locking screw on each side... - Page 13 Installation Instructions RSA Projector Mounts...
- Page 14 RSA Projector Mounts Installation Instructions...
- Page 15 Installation Instructions RSA Projector Mounts...
- Page 16 F 877.894.6918 / 952.894.6918 Europe A Franklinstraat 14, 6003 DK Weert, Netherlands P +31 (0) 495 580 852 Chief Manufacturing, a products division F +31 (0) 495 580 845 of Milestone AV Technologies Asia Pacific A Office No. 1 on 12/F, Shatin Galleria...
Need help?
Do you have a question about the RSA and is the answer not in the manual?
Questions and answers