Table of Contents
Advertisement
I N S T A L L A T I O N I N S T R U C T I O N S
Instructions d´installation
Instrucciones de instalación
Istruzioni di installazione
Installatie-instructies
Installationsanleitung
Instruções de Instalação
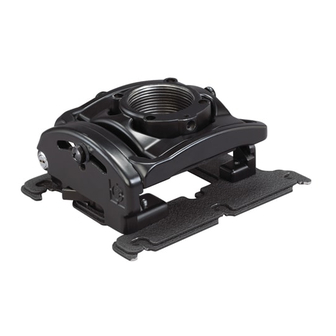
RPA Elite Series Projector Mount
RPA Elite Series Projector Mount
RPA Elite Series Projector Mount
RPA Elite Series Projector Mount
RPA Elite Series Projector Mount
RPA Elite Series Projector Mount
RPA Elite Series Projector Mount
RPM and RPM A-C
Advertisement
Table of Contents

Related Manuals for CHIEF RPM


Summarization of Contents
RPM INSTALLATION
Threaded Pipe Installation
Install ceiling plate and extension accessories per manufacturer's instructions.
Rough Alignment of RPM
Turn RPM clockwise/counter-clockwise until front faces target.
INSTALLATION 1a
Wood Stud Installation
Determine location, mark pilot holes using RPM as guide, drill holes.
1b
Concrete Installation
Determine location, mark pilot holes on ceiling using RPM as guide, drill holes.
1c
Threaded Rod Installation
Secure RPM to structural members using four 1/4" threaded rods.
PROJECTOR INSTALLATION
Install Interface Bracket
Assemble six Phillips flat head screws into the bottom of the interface bracket.
Install Projector With Interface Bracket
Orient projector, lift to align screws with slots, slide onto mounting slots.
Securing Projector with Interface Bracket to Model RPM Mount
Turn thumb nuts to secure projector to mount; step applies only to Model RPM.
Securing Projector with Interface Bracket to Model RPM-A, RPM-B and RPM-C Mounts
Verify screws, move locking lever, and insert key to secure projector.
ADJUSTMENTS
YAW Adjustment
Loosen YAW locking screw, adjust image, then tighten locking screw.
Pitch Adjustment
Loosen PITCH locking screw, adjust image, then tighten locking screw.
Roll Adjustment
Loosen ROLL locking screw, adjust image, then tighten locking screw.
Need help?
Do you have a question about the RPM and is the answer not in the manual?
Questions and answers