Advertisement
Owner's Manual
Liquid Propane Gas Grill
MODEL SS72 LP
Natural Gas Grill
MODEL SS72 NG
Customer Service:
or missing parts when you unpack this unit from the shipping boxes, call us 8:00am - 5:00 pm EST,
Monday through Friday at:
!
WARNING:
Read this Owner's Manual carefully and be sure
your gas grill is properly assembled, installed and
maintained. Follow all leak check procedures
carefully in this manual prior to grill operation. Do
this even if the grill was store assembled.
Failure to follow these instructions could result in
serious bodily injury and/or property damage.
This grill is intended for outdoor use only and is
not intended to be installed in or on recreational
vehicles or boats.
Note to Installer:
Leave this Owner's Manual
with the consumer after delivery and/or installation.
Note to Consumer:
Leave this Owner's Manual
in a convenient place for future reference.
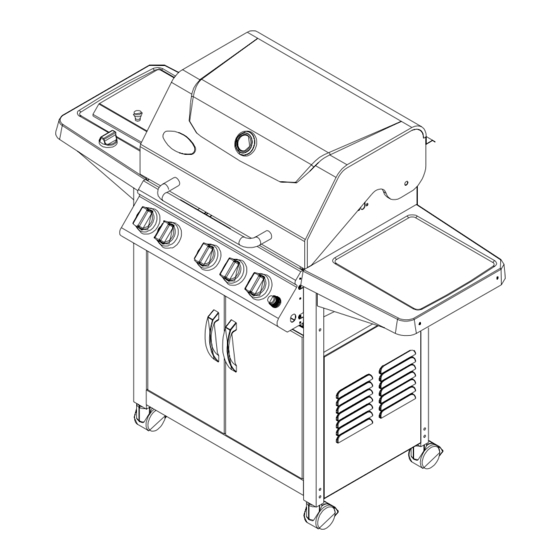
MODEL SS72 LP SHOWN
If you have questions about assembly or grill operation, or if there are damaged
1- 800-667-7313
Important Note:
This grill is manufactured to
exact specifications. Model SS72 LP is certi-
fied for use with Liquid Propane Gas and Model
SS72 NG is certified for use with Natural Gas.
You can not convert this grill from one fuel
type to the other. For your safety, conversion
kits are not available. Any attempt to convert
your grill will void your warranty.
Imported by S.R. Potten Ltd/Ltée
1645 – 50
th
AVENUE. LACHINE, QUEBEC,
CANADA H8T 3C8
1
P80154002R-Date: 12/05/2006
Advertisement
Table of Contents

Subscribe to Our Youtube Channel
Related Manuals for Grill Chef SS72 LP


Summary of Contents for Grill Chef SS72 LP
- Page 1 Important Note: This grill is manufactured to Read this Owner's Manual carefully and be sure exact specifications. Model SS72 LP is certi- your gas grill is properly assembled, installed and fied for use with Liquid Propane Gas and Model maintained. Follow all leak check procedures SS72 NG is certified for use with Natural Gas.
-
Page 2: Table Of Contents
Frequently Asked Questions ....25 Combustion by products produced when using Cooking Instructions........ 26 this product contain chemicals known to the Grill Chef Warranty State of California to cause cancer, birth defects, or other reproductive harm. Full 1-Year Warranty on Grill For one year from date of original retail purchase, S. - Page 3 • The LP gas tank has a Shut Off Valve, terminating The Regulator and Hose assembly must be in an LP gas supply tank valve outlet, that is inspected before each use of the grill. If there compatible with a Type 1 tank connection device. is excessive abrasion or wear or if the hose The LP gas tank must also have a safety relief is cut, it must be replaced prior to the grill...
-
Page 4: Natural Gas Safety Instructions
Figure 1 Natural Gas Safety Instructions (For Natural Gas Model Only) • Your Natural Gas Grill is designed to operate on NATURAL GAS SUPPLY Natural Gas only, at a pressure of 7" water column (W.C.) (1/4 psig or 1.75 kpa), regulated at the residential meter. -
Page 5: Assembly Instructions
Before Using Your Grill Assembly Instructions For Your Safety During unpacking, assembly and construction stages always wear work gloves and eye To reduce the chance of "FLASHBACK" (see protection. CAUTION at left) clean the Burner Tubes and As you unpack this gas grill from shipping Burners before fully assembling your grill. - Page 6 Contents for Hardware Pack Contents for Hardware Pack (Part #P4182A) Contents for Hardware Pack (Part #P4182A) The following table illustrates a breakdown of the Hardware Pack. It highlights what components are used in the various stages of assembly. Component Purpose of Components Attaches Bowl Bracket to Bowl Side Panel 1/4"...
- Page 7 Contents for Hardware Pack P06021006B(LP) & P06021026B(NG) Contents for Hardware Pack (Part #P4182A) Contents for Hardware Pack (Part #P4182A) Quantity of Each Hardware Piece: 1/4" Lock Nut 1/4" x 1/2" 1/4" x 2 1/2" Phillips Head Screw Phillips Head Screw QTY: 20 QTY: 12 QTY: 34...
- Page 8 SS72 Parts Diagram Remove all components from the carton and place within easy reach. Turn the carton upside down and it will provide a comfortable height work surface for grill assembly. 23 22 24-1 38(NG Only) 28-1 (NG model only)
-
Page 9: Parts List
SS72 Parts List REF# DESCRIPTION PART# QTY. REF# DESCRIPTION PART# QTY. Lid Plate P0011818EA Back Burner Orifice Heat Gauge P06520003A P00601061A (LPG) Name Plate P06520013A P00407005C (NG) Lid Handle P03701004A P00205014B Back Burner Extension Tube Warming Rack Side Shelf, Right P01103006F P01506002G Cooking Grid... - Page 10 Rotisserie Parts Diagram Y0250098 Rotisserie Parts List Hardware for Rotisserie REF# DESCRIPTION PART# QTY. P05508177F Rot. Collar P05508158F Rot. Spit P05508112F Rot. Holding Fork P03307028A Rot. Motor Bracket Rot. Screw#10-24x3/4" Rot.Washer P07101010A Rot. Motor/AC QTY. 2 S112G10124 Rot. Screw #10-24x3/4" QTY.
- Page 11 Figure 1 Cart Assembly Instructions CART LEG (LR) Remove all cart parts, hardware, and Grill Head from shipping boxes. Raise the Grill Lid and remove all CART LEG packed components. Use the parts list to check that (RR) BOTTOM all necessary parts have been included. SHELF Assemble the gas grill on a protective work surface to avoid scratching grill surfaces.
- Page 12 Figure 4 Attach the Door Bracket to the low holes in the front legs with the end tabs pointing upward and flange to the rear, pointing downward. Use 2 of 1/4" x 1/2" Phillips Head Screws. Do not fully DOOR BRACKET Tank Holder tighten.
- Page 13 Attach lighting stick to the Right Rear Leg, below side shelf bracket using 1 M4 x 10 self-tapping screw. M4 x 10 Self-Tapping Screw x 1 Attach the 2 Bowl Brackets to Bowl Side Panel using 4 of 1/4" x 1/2" Phillip Head Screw, 1/4" Nuts and 1/4"...
- Page 14 Figure 6 Grill Head Assembly Put the grill head onto cart. Secure grill head to all cart legs using 4 of 1/4" x 2-1/2" Phillips Head Screws and 1/4" Nuts. See Figure 6,7. GRILL BOWL 1/4" x 2-1/2" Phillips Head Screw x 4 Figure 7 GREASE TRAY 1/4"...
-
Page 15: Side Burner Assembly
Side Burner Assembly Figure 10 Insert the Orifice into the Side Burner Tube. Attach the Side Burner Gas Valve to Side Shelf Left. Secure firmly using 2 of M4 x 10mm Phillips Head Screws (Attach on Side Burner Gas Valve). LID KNOB Attach the Side Burner Electrode Wire to the Control Valve.See Figure 10,11. - Page 16 Regulator Assembly(NG Only) For Natural Gas Models attach the Regulator Bracket to Left Rear Cart Leg using 2 of 3/16” x 1/4” Phillips Head Screws. 3/16" x 1/4" Phillips Head Screw QTY. 2 REGULATOR ASSEMBLY / NG EXTENSION HOSE REGULATOR LEFT REAR BRACKET CART LEG...
- Page 17 Ignitor Battery Installation - See Figure 14 5. If no "clicking" sound is heard check the following common causes. If you need 1. Unscrew the Ignitor Cap located on the Grill Control assistance call our Grill Information Center Panel and remove the Contact and Spring from the at 1-800-667-7313.
- Page 18 Congratulations turn the Tank Valve off and do not use your Your Grill Chef gas grill is now ready for use. grill until the leak is repaired. Do this leak test Before the first use and at the beginning of each e v e n i f t h e g r i l l wa s s t o r e a s s e m b l e d .
-
Page 19: Grill Lighting Instructions
Grill Lighting Instructions WARNING Basic Lighting Procedures A strong gas smell, or the hissing sound of gas indicates a serious problem with your gas grill Familiarize yourself with the safety guidelines or the LP gas tank. Failure to immediately follow at the f ront of this manual. - Page 20 • Misalignment of Ignitor on Burner Manually Lighting Your Grill by Match Correction: Check for proper position of the To light your gas grill by match, insert a match into the Electrode Tip as shown on page 16. The gap Manual Lighting Stick and follow steps 1 through 6 of the between the Spark Electrode Tip and Spark Basic Lighting Procedures.
-
Page 21: Rotisserie Instructions
Rotisserie Instructions Remove all components from the carton. Attach the Motor Bracket on the outside of the left grill bowl panel. Align the two holes of the Bracket with the threaded holes on the grill bowl. Tighten securely using two Rot. Screws No.10- 24x3/4"... - Page 22 Install the AC (alternating current) Rotisserie Motor onto the Motor Bracket as shown. This is a universal Rotisserie Motor designed to fit a variety of grills. Be sure the Motor attaches to the B r ac k e t wi t h t h e e l ec t r i c a l c o r d d o wn . T h i s i ns t a l l a t i o n e ns u r es t h a t o n c e t h e S p i t i s inserted into the Motor it will also rest securely into the slot of your grill bowl.
-
Page 23: Important Safeguards
10. When rotisserie cooking place a drip pan of some Using your Infrared sort under the food to be cooked. This will Back Burner and Rotisserie capture the drippings and keep grill clean of excess grease which could cause a fire. Use Your new grill includes an Infrared Back Burner and a caution when moving a drip pan containing hot Rotisserie designed to slowly cook foods that are moist... -
Page 24: Cleaning And Maintenance Instructions
Cover each gas Valve Orifice with aluminum foil. Cleaning and Maintenance Brush the inside and bottom of the grill with a Keep outdoor cooking gas appliance area clear brass wire brush or fiber cleaning pad, and wash and free from comustible materials, gasoline and with a mild soap and warm water solution. - Page 25 Regardless of which Burner cleaning procedure you Cleaning The Burner Tubes and Burner Ports u s e , we r e c o m m e n d you a l s o c o m p l e t e t h e f o l l o wi n g s t e p s t o h e l p p r o l o n g B u r n e r l i f e .
-
Page 26: Frequently Asked Questions
Question: My grill has a low flame and sometimes Frequently Asked Questions will not light. Why? Question: Can I convert my grill from LPG to NG? Answer: You need to purge air from the gas line or reset the Regulator excess gas flow device. Opening the tank Answer: No, your gas grill is manufactured to exact valve all the way or too quickly triggers the Regulators specifications and is certified for Liquid Propane (LPG) -
Page 27: Cooking Instructions
Cooking Instructions Indirect Cooking The indirect cooking method can also be used with the supplied cooking grids. To cook indirectly, WARNING the food should be placed on the left or right side of your grill with the burner lit on the opposite side. Your grill will get very hot. - Page 28 GRILL CHEF GAS GRILL WARRANTY S.R. Potten Ltd. warrants to the original owner of each Grill Chef Gas Grill that it is free from defects in workmanship and materials under conditions of normal residential use. This limited warranty applies to Grill Chef Gas Grills purchased and located in Canada.
Need help?
Do you have a question about the SS72 LP and is the answer not in the manual?
Questions and answers