Table of Contents
Advertisement
Quick Links
CONSTITUTION
EPA CERTIFIED
WOODBURNING FIREPLACE
Model:
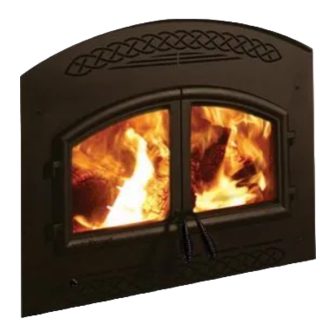
C40
•
If the information in these instructions
is not followed exactly, a fi re may result
causing property damage, personal injury,
.
or death
•
Do not store or use gasoline or other fl ammable vapors
and liquids in the vicinity of this or any other appliance.
•
Do not overfi re - If heater or chimney connector glows,
you are overfi ring. Overfi ring will void your warranty.
•
Comply with all minimum clearances to combustibles
as specifi ed. Failure to comply may cause house
Installation and service of this appliance should
be performed by qualifi ed personnel. Hearth &
Home Technologies recommends NFI certifi ed
professionals, or technicians supervised by an NFI
certifi ed professional.
www.heatilator.com
DO NOT DISCARD THIS MANUAL
• Read, understand and
Important operating
a n d m a i n t e n a n c e
instructions included.
WARNING
Heatilator • Constitution EPA Fireplace • 480-1091D
CAUTION
follow these instructions
for safe installation and
operation.
Hot screen/mesh and glass doors will cause burns.
•
DO NOT touch screen/mesh or glass doors until cooled
•
NEVER allow children to touch screen/mesh or glass
doors
•
Keep children away
•
CAREFULLY SUPERVISE children in same room as
fi replace.
•
Alert children and adults to hazards of high temperatures.
High temperatures may ignite clothing or other
fl ammable materials.
•
Keep clothing, furniture, draperies and other fl ammable
materials away.
Owner's Manual
Installation and Operation
• Leave this manual with
party responsible for
use and operation.
WARNING
HOT SURFACES!
Screen/mesh, glass doors and
other surfaces are hot during
operation AND cool down.
WARNING
Fire Risk.
For use with solid wood fuel only.
Other fuels may overfi re and generate
poisonous gases (i.e. carbon monoxide).
O-T L
Portland
Tested and
Oregon USA
Listed by
C
US
OMNI-Test Laboratories, Inc.
4/20/11
Advertisement
Table of Contents

Related Manuals for Heatiator CONSTITUTION C40


Summary of Contents for Heatiator CONSTITUTION C40
-
Page 1: Woodburning Fireplace
CONSTITUTION EPA CERTIFIED WOODBURNING FIREPLACE Model: • Important operating a n d m a i n t e n a n c e instructions included. WARNING If the information in these instructions is not followed exactly, a fi re may result causing property damage, personal injury, or death •... -
Page 2: Homeowner Reference Information
Read this manual before installing or operating this appliance. Please retain this owner’s manual for future references. Congratulations on selecting a Heatilator wood burning fireplace. The Heatilator fireplace you have selected is designed to provide the utmost in safety, reliability, and efficiency. -
Page 3: Table Of Contents
Safety Alert Key: • DANGER! Indicates a hazardous situation which, if not avoided will result in death or serious injury. • WARNING! Indicates a hazardous situation which, if not avoided could result in death or serious injury. • CAUTION! Indicates a hazardous situation which, if not avoided, could result in minor or moderate injury. •... -
Page 4: Warranty
Hearth & Home Technologies Inc., on behalf of its hearth brands (”HHT”), extends the following warranty for HHT gas, wood, pellet, coal and electric hearth appliances that are purchased from an HHT authorized dealer. WARRANTY COVERAGE: HHT warrants to the original owner of the HHT appliance at the site of installation, and to any transferee taking ownership of the appliance at the site of installation within two years following the date of original purchase, that the HHT appliance will be free from defects in materials and workmanship at the time of manufacture. - Page 5 WARRANTY CONDITIONS: • This warranty only covers HHT appliances that are purchased through an HHT authorized dealer or distributor. A list of HHT authorized dealers is available on the HHT branded websites. • This warranty is only valid while the HHT appliance remains at the site of original installation. •...
-
Page 6: Listing And Code Approvals
Listing and Code Approvals A. Appliance Certification This fireplace system has been tested and listed in accordance with UL127 and ULC-S610-M87 and (UM) 84-HUD standards, and has been listed by OMNI Test Laboratory Inc., for installation and operation in the United States and Canada as described in this manual. -
Page 7: Btu & Efficiency Specifications
C. BTU & Efficiency Specifications EPA Certified: 3.25 grams per hour Efficiency: up to 77.8% BTU Output with EPA test fuel: 51,400/ hr. with cord wood: 70,000/hr Vent Size: 8 inches Firebox Size: 2.7 cubic feet Max Wood Length: 24 inches Fuel: Cord Wood Shipping Weight:... -
Page 8: Operating Instructions
Operating Instructions HOT SURFACES! Glass and other surfaces are hot during operation AND cool down. Hot glass will cause burns. • • • • • High temperatures may ignite clothing or other fl ammable materials. • If you expect that children may come into contact with this fi replace, we recommend a barrier such as a decorative screen. -
Page 9: General Information
B. General Information Fireplaces, as well as other woodburning appliances, have been used safely for many years. It has been our experi- ence that most problems are caused by improper installa- tion and operation of the fireplace. Make certain that instal- lation and operation of the fireplace system is in accordance with these instructions. -
Page 10: Wood Fuel
E. Wood Fuel Hardwood vs. Softwood Your fireplace’s performance depends a great deal on the quality of the firewood you use. Contrary to popular belief, one species of wood varies very little to the other in terms of energy content. All seasoned wood, regardless of species, contains about 8,000 BTU’s per pound. -
Page 11: Outside Air
Seasoned Wood • Cut logs to size • Split to 6 in. (152 mm) or less • Air dry to a moisture content of around 20% Soft wood - about nine months Hard wood - about eighteen months NOTICE: Seasoning time may vary depending on drying conditions. -
Page 12: Clear Space Near The Fireplace
OPEN Figure 2.4 General Outside Air operating parts G. Clear Space Near the Fireplace Combustible materials must not be stored on the hearth ex- tension. Room furnishings such as drapes, curtains, chairs or other combustibles must be at least 4 ft (1219mm) from the open front of the fireplace. -
Page 13: Fire Safety
J. Fire Safety To provide reasonable fire safety, the following should be given serious consideration: Install at least one smoke detector on each floor of your home to ensure your safety. They should be located away from the heating appliance and close to the sleeping areas. -
Page 14: Starting A Fire
M. Starting a Fire Before lighting your first fire in the fireplace, make certain that the baffle and the ceramic blanket are correctly positioned. It should be resting against the rear support. Also refer to care and cleaning of plated surfaces on Section 5 before light- ing your first fire. -
Page 15: Automatic Combustion Control (Acc)
Final stage: The final stage of burning is the charcoal stage. This occurs when the flammable gases have been mostly burned and only charcoal remains. This is a naturally clean portion of the burn. The coals burn with hot blue flames. It is very important to reload your fireplace while enough lively hot coals remain in order to provide the amount of heat needed to dry and rekindle the next load of wood. -
Page 16: Manual Timer Override
P. Manual Timer Override If timer is unintentionally engaged, push the Timer Over- ride Lever to the left. This will disengage the timer and set the Fireplace back to the low setting. Figure 2.6 Manual Override Left-Close Right-Open Figure 2.6 Manual Override Q. -
Page 17: Troubleshooting
Troubleshooting This fireplace will operate correctly only if adequate ventila- tion is provided to allow proper draft to the fireplace system. Hearth & Home Technologies assumes no responsibility for the improper performance of the fireplace system caused by inadequate draft due to environmental conditions, down drafts, tight sealing construction of the structure, or mechan- ical exhausting devices which will create a negative air pres- sure within the structure where the fireplace is located. - Page 18 Another appliance in home also exhausting air (furnace, fan, dryer, etc.)? Overhead fan operating? Doors opening and closing? Window closed for start-up? Figure 3.1 Factory-built Fireplaces: Troubleshooting Page 18 Unsealed can lights? Air register from furnace near fireplace? Outside air Combustion closed? air control...
-
Page 19: Diagnostics And Problem Solving
C. Diagnostics and Problem Solving 1. If I can’t get a good fire going, what am I doing wrong? Diagnostic Question Are the air controls open? Is there enough paper? Is there enough kindling? Is the kindling dry? Is there enough or too much wood? Is it too large? Is it dry enough? Are there adequate air spaces... - Page 20 4. I don’t get enough/any heat. What can I do about it? Diagnostic Question How much wood is used for fire? How well seasoned is the wood? Did you install a fan? How much heat ouput do you expect? How are air controls set? 5.
-
Page 21: Maintenance And Servicing The Fireplace
Maintenance and Servicing the Fireplace A. General Maintenance 1. Creosote (Chimney) Cleaning • Frequency: As necessary; at least annually before lighting stove or once every 2 months during heating season. Formation and Need For Removal: When wood is burned slowly, it produces tar and other organic vapors which combine with expelled moisture to form creosote. -
Page 22: Disposal Of Ashes
2. Disposal of Ashes Frequency: As necessary By: Homeowner Task: See the following instructions. • Ashes should be placed in a metal container with a tight fitting lid. The closed container of ashes should be placed on a non-combustible floor or on the ground, well away from all combustible materials, pending final disposal. -
Page 23: Maintenance Task List
6. Maintenance Task List Inspect Screens 1. Assess condition of screen and replace as necessary. 2. Verify maintenance of proper clearance to combustible household objects. Glass Doors 1. Inspect glass panels for cracks. Replace if this condition is present. 2. Confirm there is no damage to glass or glass frame. Replace as necessary. 3. -
Page 24: Firebrick Replacement
2. Firebrick Replacement The firebox of your fireplace is lined with high quality firebrick, which has exceptional insulating properties. There is no need to use a grate; simply build a fire on the firebox floor. Do not operate the fireplace without bricks. IMPORTANT: The bricks are very similar in size. -
Page 25: Baffle Removal And Installation
3. Baffle Removal and Installation 1. Remove all ash from firebox, and extinguish all hot embers before disposal into a metal container. 2. Remove the baffle protection channel by turning it down and pulling it out of the firebox. See Figure 4.5 Figure 4.5 Removing Baffle Protection Channel 3. - Page 26 Fan Replacement Instructions 1. Remove the brick from the bottom of the fireplace and 3 of the back vertical bricks. 2. Remove the 2 screws from the access panel in the fire- box floor. See Figure 4.8. 3. Pry up the access panel using the screwdriver slot and completely remove the panel.
-
Page 27: Timer Assembly Replacement
5. Timer Assembly Replacement CAUTION shock Risk! Disconnect power by turning off circuit breaker BEFORE servicing. Black Knob Cover Plate Linkage Arm Mechanical Timer Figure 4.11 Timer Assembly 1. Remove both doors by lifting doors up and off of hinges. 2. Remove the black knob and spring handle. 3. -
Page 28: Timer Removal & Replacement
7. Move slider control rod and linkage arm to the right and out of the way. Pull rod down and out towards you. Lay the control arm down. Figures 4.16 and 4.17. 8. The timer assembly is bolted under the face. Use a 7/16 socket wrench to remove the 2 bolts. - Page 29 D cut side of timer shaft must face away from the Linkage Timer Arm Figure 4.21 3. Place linkage control arm over timer shaft and tighten set screw. Figure 4.22. Tighten set screw Figure 4.22 4. Rotate linkage control arm into final position and re- attach to mounting plate.
-
Page 30: Service & Maintenance Log
C. Service & Maintenance Log Date of Service Performed By Description of Service Page 30 4/20/11 Heatilator • Constitution EPA Fireplace • 480-1091D... -
Page 31: Getting Started
Getting Started A. Typical Fireplace System Termination Cap Storm Collar Chimney penetrates roof preferably without affecting roof rafters Offset/Return (with hanger straps) Attic insulation shield (not shown) must be used here to keep insulation away from chimney if attic is insulated Framing headed off in ceiling joists Chimney system... -
Page 32: Design And Installation Considerations
B. Design and Installation Considerations NOTICE: Check building codes prior to installation. • Installation MUST comply with local, regional, state and national codes and regulations. • Consult insurance carrier, local building inspector, fire officials or authorities having jurisdiction over restrictions, installation inspection and permits. Before installing, determine the following: •... -
Page 33: Locating Fireplace & Chimney
E. Locating Fireplace & Chimney Location of the fireplace and chimney will affect perfor- mance. • Install within the warm airspace enclosed by the building envelope. This helps to produce more draft, especially during lighting and die-down of the fire. •... -
Page 34: Tools And Supplies Needed
F. Tools and Supplies Needed Before beginning the installation be sure the following tools and building supplies are available: G. Fireplace System Requirements The Heatilator fireplace system consists of the following: • • • • • • Required components include: •... -
Page 35: Framing & Clearances
Framing & Clearances A. Selecting Fireplace Locations Several options are available to you when choosing a loca- tion for your fireplace. This fireplace may be used as a room divider, installed along a wall, across a corner or used in an exterior chase. -
Page 36: Clearances
B. Clearances WARNING! Risk of Fire! You must comply with all minimum air space clearances to combustibles as specified in Fig- ure 6.2. DO NOT pack required air spaces with insulation or other materials.Framing or finishing material used on the front of, or in front of, the appliance closer than the minimums listed.must be constucted entirely of non-combustible mate- rials (i.e., steel studs, concrete boaed, etc.). Failure to comply may cause fire. 2 in. (51 mm) min. 0 in. to level of standoffs Figure 6.2 Clearances to Combustible Materials NOTICE: Chimney air kit is not shown, but is required. Page 36 Storm Collar Roof Flashing 2 in. - Page 37 1. MINIMUM CLEARANCES TO COMBUSTIBLES WITHIN ENCLOSURE AREA: Appliance to backwall Appliance to sidewall Duct boots to framing Top standoffs to header Door opening to sidewall EXPOSED SURFACES Faceplate to sidewall Heat zone air grills to ceiling MANTEL Combustible and non-combustible mantel minimum height from base of fireplace to underside of mantel Maximum mantel depth 2.
-
Page 38: Electrical Access And Wiring Diagram
D. Electrical Access and Wiring Diagram NOTICE: The manual override switch, rheostat speed con- trol and cover plate are supplied. You will need to supply: 14-3 wire with ground; 14-2 wire with ground; standard wall mount junction box; wire nuts. 1. Remove junction box cover plate on the bottom right side of the fireplace. 2. Thread the 14-3 with ground wire through the opening with the strain relief on the cover plate. 3. -
Page 39: Installation Of Fireplace
Installation of Fireplace CAUTION! Risk of Cuts/Abrasions. Wear protective gloves and safety glasses during installation. Sheet metal edges are sharp. A. Install the Outside Air Kit This fireplace will operate correctly only if adequate ven- tilation is provided to allow proper draft to the fireplace system. See Section 6. An outside air kit must be used for combustion to mini- mize the effects of negative pressure within the structure. -
Page 40: Outside Air
Attic insulation shield must be used to keep insulation away from chimney. Ceiling firestop on floor of attic. Fiqure 7.2 Outside Air Inlet Locations Open/Close Knob for outside air Figure 7.3 Outside Combustion Air Handle Location Page 40 3 ft min. from top of uppermost chimney section to air inlet. -
Page 41: Secure The Fireplace
B. Secure the Fireplace • Position the Fireplace This fireplace may be placed on either a combustible or noncombustible continuous flat surface. Follow the in- structions for framing in Section 6.C. Slide the fireplace into position. Be sure to provide the minimum 1 in. air clearance at the sides and at back of the fireplace as- sembly. -
Page 42: Chimney Assembly
Chimney Assembly NOTICE: Chimney performance may vary. • Trees, buildings, roof lines and wind conditions affect performance. • Chimney height may need adjustment if smoking or overdraft occurs. Chimney must extend beyond combustible roof structure Maintain minimum height of chimney above roof Install roof flashing according to minimum requirements Offsets/returns may not exceed 30° from vertical Figure 8.1 Typical Chimney System - Guidelines for Chimney System Installation Page 42 Termination Cap Additional... -
Page 43: Chimney Requirements
A. Chimney Requirements Vertical distances are measured from the base of the fire- place as shown in Figure 8.2 Minimum overall straight height Minimum height with single offset/ return Double offset/return minimum height Maximum height Maximum chimney length between an offset and return Maximum distance between chimney stabilizers... -
Page 44: Using Offsets/ Returns
C. Using Offsets/ Returns • Use an offset/return to bypass overhead obstructions. • An offset and return can be used as a single entity or separated by chimney section(s). WARNING! Risk of Fire! DO NOT use offset/returns greater than 30°. Chimney draft will be restricted and could cause over- heating and fire. Secure offsets vwith screws ( not to exceed 1/2” / 13 mm in length) Secure returns with strapping. Straight chimney sections may be secured with screws. Keep chimney sections from separating or twisting. • MeAsuRe the shIFt NeeDeD to AvoID the oveRheAD obstRuctIoN. Refer to dimension A in Figure 8.3. •... -
Page 45: Assemble The Chimney Sections
D. Assemble the Chimney Sections Use only those components described in this manual. Substitute or damaged chimney components could impair safe operation and cause overheating and fire. Attach either a straight chimney section or an offset to the top of the fireplace (depending on your installation require- ment). -
Page 46: Install Ceiling Firestops
Wire Ties Figure 8.6 Installing Flex Pipe F. Install Ceiling Firestops CAUTION! Risk of Fire! Ceiling firestops must be used whenever the chimney penetrates a ceiling/floor. • Chase construction requires ceiling firestops at each floor or every 10 ft (3.05 m) of clear space. • The ceiling firestop slows spread of fire and reduces cold air infiltration. -
Page 47: Install Attic Insulation Shield
G. Install Attic Insulation Shield WARNING! Risk of Fire! You MUST install an attic insu- lation shield when there is any possibility of insulation or other combustible material coming into contact with the chimney. • DO NOT pack insulation between the chimney and the attic insulation shield. • Failure to keep insulation and other materials away from chimney pipe could cause fire. • DO NOT offset chimney inside insulation shield. Installation of a ceiling firestop is required • Refer to Figures 8.8 - 8.10. • Roll the shield (around the chimney if already installed) until you have a 3 in. -
Page 48: Double-Check The Chimney Assembly
WARNING! Risk of Fire! Secure offsets with screws (not to exceed 1/2in./13mm in length). Secure returns with strapping. Straight chinney sections may be secured with screw (not to exceed 1/2in./13mm in length) at the joints Keep chimney sections from separating or twisting. I. Double-check the Chimney Assembly Continue assembling the chimney sections up through the ceiling firestops as needed. While doing so, be aware of the height and unsupported chimney length limitations given un- der Section 8.A. -
Page 49: Chimney Termination Requirements
M. Chimney Termination Requirements • Install a cap approved and listed for this fireplace system. • Locate cap where it will not become plugged by snow or other materials. • Locate cap away from trees or other structures. • The bottom of the termination cap must be at least 3 ft (.91 m) above the roof AND at least 2 ft (.61 m) above any portion of roof within 10 ft (3.05 m) as shown in Figure 8.13 •... -
Page 50: Series Ceiling/Roof Thimble
N. SL-300 Series Ceiling/Roof Thimble NOTICE: REqUIRED for manufactured homes. 1. Locate the point where the chimney will exit the roof by plumbing down to the center of the chimney. Lay out, cut and frame a 14-1/2 in. (368 mm) square opening (measured on the horizontal) through the ceiling and roof structure. -
Page 51: Chase Installations
Chase Installations A. Construct the Chase A chase is a vertical boxlike structure built to enclose the fireplace and/or its vent system. Vertical chimneys that run on the outside of a building must be installed inside a chase. In cold climates, it is recommended that the chase insulated using batt type insulation between the joists. -
Page 52: Install Fireplace & Chimney
B. Install Fireplace & Chimney Install as per Sections 7 and 8. C. Install Chase Top • You MUST use a chase top in a chase installation. Chase tops are available from your Heatilator dealer or may be field constructed. •... - Page 53 • ST375 Square Termination Cap Flange Termination Cap Collar 2 in. (51 mm) Minimum Height Chase Top Chimney Pipe Termination cap pipe and chimney section must overlap 1-1/2 in. (38 mm) Figure 9.6 Installing an ST375 Square Termination Cap • TS345/TS345P Square Termination Cap Termination Cap Collar...
-
Page 54: Finishing
Finishing A. Non-Combustible Materials • Materials which will not ignite and burn, composed of any combination of the following: Steel - Iron Brick - Tile Concrete - Slate Glass - Plasters • Materials reported as passing ASTM E 136, Standard Test Method for Behavior of Metals, in a Vertical Tube Furnace at 750°... -
Page 55: Raised Hearth Extension Framing
Raised Hearth Extension Framing The hearth framing must be constructed of non-combusti- ble materials (Table 10.2) and placed on an HX3 or HX4, or equivalent material (Figure 10.2). When creating the platform, allow for the thickness of the non-combustible finishing materials (Figure 10.5). IMPORTANT! Hear th extension design must be determined before installation of fireplace. -
Page 56: Position The Hearth Extension
D. Position the Hearth Extension Position and secure the hearth extension over the protective metal strips that have been placed partially under the fireplace front. These strips should be protruding approximately 2 in. (51 mm) from under the fireplace front and 2 in. (51 mm) on both sides of the fireplace opening. -
Page 57: Mantel
• Non-Combustible Sealant Material Sealants which will not ignite and burn: Super Calstick After completing the framing and applying the facing mate- rial (drywall) over the framing, a bead of non-combustible sealant must be used to close off any gaps at the top and sides between the fireplace and facing to prevent cold air leaks. -
Page 58: Non-Combustible Facing Material Installation
G. Non-Combustible Facing Material Installa- tion WARNING! Risk of Fire! Follow these instructions exactly. Facing materials must be installed properly to prevent fire. No materials may be substituted without authorization by Hearth & Home Technologies TOOLS NEEDED: Powered drill with #2 Phillips head bit; caulk- ing gun. Secure the fireplace to the floor or wall framing studs at a minimum of two attachment points to prevent fur- ther movement of the fireplace. -
Page 59: Accessories
Accessories A. Heat Zone Kit (Optional) This kit is tested and safe when installed in accordance with this installation manual. It is your responsibility to read all instructions before starting installation and to follow these instructions carefully during installations. Installation of this kit MUST by performed by a qualified service technician. - Page 60 INSTALLATION 1. Remove the knockout or cover plate from the top of the fireplace and discard it. See Figure 11.2. 2. Cut a 3 in. (76mm) hole in the insulation board as per the dimensions shown in Figure 11.2 3-13/16 in. (97mm) 3-1/8 in.
- Page 61 2 x 4 Wall Fan Housing 1/2 in. (13mm) clearance to combustibles must be maintained. Figure 11.5 Secure B-Vent to Fan Housing with sheet metal screws Bracket Can rotate Return Air Grille Securely Twist Install with Louvers Lock B-Vent to pointed down Adapter Figure 11.6...
-
Page 62: Firescreen
B. Firescreen A firescreen must be used to control sparks if the home- owner choses to operate the fireplace with the doors open; and it must remain in place whenever the fireplace will be operating in this manner. Glass doors or firescreens must not be used to hold burning material inside the fireplace. -
Page 63: Reference Materials
Reference Materials A. Fireplace Dimensions FRONT VIEW Constitution Figure 12.1 4/20/11 TOP VIEW 3-1/2 31-1/8 1016 6-1/2 9-11/16 5-7/8 Heatilator • Constitution EPA Fireplace • 480-1091D SIDE VIEW Fan Electrical Access (right side of fireplace) 40-5/16 43-13/16 1024 1100 23-1/8 11-1/8 Page 63... -
Page 64: Chimney Components
B. Chimney Components The following drawings show the SL-300 Series chimney and fireplace components which may be safely used with this fireplace. Catalog Description CAK4A Chimney Air Kit Insulated Duct / Outside Air Uninsulated Duct / Outside Air SL306 Chimney Section - 6 in. SL312 Chimney Section - 12 in. - Page 65 20-3/4 in. (527 mm) Inside Diameter 8 in. (203 mm) Outside Diameter 10-1/2 in. (267mm) SL3 - Chimney Stabilizer Inside Diameter 8 in. (203 mm) Outside Diameter 10-1/2 in. (267 mm) SL315-SL330 - Offset/Return 15-3/4 in. (400 mm) TR344 Round Termination Cap TR342 TERMINATION CAP CHASE TOP...
- Page 66 DTS134/DTS146 DTO134/DTO146 Decorative Caps DTO134 DTO146 1168 DTS134 DTS146 1168 Page 66 22.7 21.18 21.18 Heatilator • Constitution EPA Fireplace • 480-1091D 4/20/11...
-
Page 67: Service Parts
C. Service Parts Beginning Manufacturing Date: June 2003 Constitution Woodburning Fireplace Ending Manufacturing Date: Active Part number list on following page. 4/20/11 Page 67 Heatilator • Constitution EPA Fireplace • 480-1091D... -
Page 68: Service Parts
Service Parts IMPORTANT: THIS IS DATED INFORMATION. When requesting service or replacement parts for your appliance please provide model number and serial number. All parts listed in this manual may be ordered from an authorized dealer. ITEM DESCRIPTION 8 in. Starter Section Blanket, Kaowool #3 Brick Set Brick, Set... -
Page 69: Service Parts
Service Parts IMPORTANT: THIS IS DATED INFORMATION. When requesting service or replacement parts for your appliance please provide model number and serial number. All parts listed in this manual may be ordered from an authorized dealer. ITEM DESCRIPTION Door Handle Assembly Baffle Protection Channel Baffle Protection channel Bracket, Snap Disc Mounting... - Page 70 This page intentionally left blank. Page 70 4/20/11 Heatilator • Constitution EPA Fireplace • 480-1091D...
-
Page 71: Contact Information
D. Contact Information Please contact your Heatilator dealer with any questions or concerns. ________________________________________________________________________________ ________________________________________________________________________________ ________________________________________________________________________________ ________________________________________________________________________________ ________________________________________________________________________________ ________________________________________________________________________________ ________________________________________________________________________________ ________________________________________________________________________________ ________________________________________________________________________________ • Important operating a n d m a i n t e n a n c e instructions included. This product may be covered by one or more of the following patents: (United States) 4593510, 4686807, 4766876, 4793322, 4811534, 5000162, 5016609, 5076254, 5113843, 5191877, 5218953, 5263471, 5328356, 5341794, 5347983, 5429495, 5452708, 5542407, 5601073, 5613487, 5647340, 5688568, 5762062, 5775408, 5890485, 5931661, 5941237, 5947112, 5996575, 6006743, 6019099, 6048195, 6053165, 6145502, 6170481, 6237588, 6296474, 6374822, 6413079, 6439226, 6484712, 6543698, 6550687, 6601579, 6672860, 6688302B2, 6715724B2, 6729551, 6736133, 6748940, 6748942, 6769426,...
Need help?
Do you have a question about the CONSTITUTION C40 and is the answer not in the manual?
Questions and answers