Table of Contents
Advertisement
Quick Links
Model:
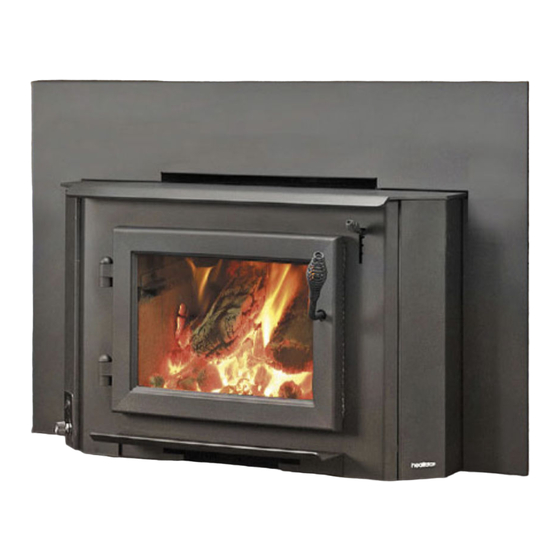
ECO-WINS18
WOOD BURNING INSERT
•
If the information in these instruc-
tions is not followed exactly, a
fi re may result causing property
damage, personal injury, or death.
• Do not store or use gasoline or other fl am-
mable vapors and liquids in the vicinity of
this or any other appliance.
• Do not overfi re - If heater or chimney con-
nector glows, you are overfi ring. Overfi ring
will void your warranty.
• Comply with all minimum clearances to
combustibles as specifi ed. Failure to
comply may cause house fi re.
WARNING
Fire Risk.
For use with solid wood fuel only.
Other fuels may overfi re and generate
poisonous gases (i.e. carbon monoxide).
www.heatilatorecochoice.com
Consumer Care 1-877-427-3316 - Prior to calling, please have the model and serial number of the unit you are calling
about. This information can be found at the front of the unit.
DO NOT DISCARD THIS MANUAL
• Read, understand and
Important operating
follow these instructions
a n d m a i n t e n a n c e
for safe installation and
instructions included.
operation.
WARNING
CAUTION
• Leave this manual with
party responsible for
use and operation.
Hot glass will cause burns.
•
Do not touch glass until it is cooled
•
NEVER allow children to touch glass
•
Keep children away
•
CAREFULLY SUPERVISE children in same room as
fi replace.
•
Alert children and adults to hazards of high
temperatures.
High temperatures may ignite clothing or other
fl ammable materials.
•
Keep clothing, furniture, draperies and other
fl ammable materials away.
Installation and service of this appliance should
be performed by qualifi ed personnel. Hearth &
Home Technologies recommends NFI certifi ed
professionals, or technicians supervised by an NFI
certifi ed professional.
7065-132D • November 22, 2011
Owner's Manual
Installation and Operation
WARNING
HOT SURFACES!
Glass and other surfaces are
hot during operation AND
cool down.
Advertisement
Table of Contents

Related Manuals for Heatiator WOOD BURNING INSERT ECO-WINS18


Summary of Contents for Heatiator WOOD BURNING INSERT ECO-WINS18
- Page 1 Model: ECO-WINS18 WOOD BURNING INSERT • Important operating a n d m a i n t e n a n c e instructions included. WARNING If the information in these instruc- tions is not followed exactly, a fi re may result causing property damage, personal injury, or death.
-
Page 2: Congratulations
Read this manual before installing or operating this appliance. Please retain this owner’s manual for future reference. Congratulations on selecting a Heatilator wood burning appliance. The wood burning appliance you have selected is designed to provide the utmost in safety, reliability and effi... -
Page 3: Table Of Contents
Safety Alert Key: • DANGER! Indicates a hazardous situation which, if not avoided will result in death or serious injury. • WARNING! Indicates a hazardous situation which, if not avoided may result in death or serious injury. • CAUTION! Indicates a hazardous situation which, if not avoided, may result in minor or moderate injury. •... -
Page 4: Warranty Policy
Hearth & Home Technologies Inc., on behalf of its hearth brands (“HHT”), extends the following warranty for ECO- CHOICE by heatilator wood and pellet hearth appliances that are purchased from an HHT authorized dealer. WARRANTY COVERAGE: HHT warrantes to the original owner of the HHT appliance at the site of installation, and to any transferree taking own- ership of the appliance at the site of installation within two years following the date of original purchase, that the HHT appliance will be free from defects in materials and workmanship at the time of manufacture. - Page 5 WARRANTY COVERAGE: • This warranty only covers HHT appliances that are purchased through an HHT authorized dealer or distributor. A list of HHT authorized dealers is available on th HHT branded websites. • This warranty is only valid while the HHT appliance remains at the site of original installation. •...
-
Page 6: Section 1: Listing And Code Approvals A
Listing and Code Approvals A. Appliance Certifi cation Model: ECO-WINS18 Laboratory: Intertek Report No: 100398890PRT-001 Type: Solid Fuel Type, Listed Room Heater Standard: UL1482 and ULC S628-93 and (UM) 84-HUD, Mobile Home Approved. NOTE: This installation must conform with local codes. In the absence of local codes you must comply with the UL1482, (UM) 84-HUD and NPFA211 in the U.S.A. -
Page 7: Section 2: Operating Instructions H
Operating Instructions HOT SURFACES! Glass and other surfaces are hot during operation AND cool down. Hot glass will cause burns. • DO NOT touch glass until it is cooled • NEVER allow children to touch glass • Keep children away •... -
Page 8: Fire Safety
B. Fire Safety To provide reasonable fi re safety, the following should be given serious consideration: Install at least one smoke detector on each fl oor of your home to ensure your safety. They should be located away from the heating appliance and close to the sleeping areas. -
Page 9: Burning Process
G. Burning Process In recent years there has been an increasing concern about air quality. Much of the blame for poor air quality has been placed on the burning of wood for home heating. In order to improve the situation, we have developed cleaner- burning wood appliances that surpass the requirements for emissions established by our governing agencies. -
Page 10: Burn Rate Air Control
H. Burn Rate Air Control • The air supply enters at the upper front of the fi rebox, near the top of the glass door. • This preheated air supplies the necessary fresh oxygen to mix with the unburned gases, helping to create sec- ond, third and fourth combustions •... -
Page 11: Correct Baffl E & Blanket Placement
J. Correct Baffl e & Blanket Placement WARNING Fire Risk Improper baffl e placement may cause: • Overheating of fi rebox • Overheating the chimney Baffl e must be placed properly (see instructions) Replace baffl e if damaged or missing. NOTE: A missing, damaged or improperly positioned baffl... -
Page 12: Building A Fire
K. Building A Fire WARNING Fire Risk. Keep combustible materials, gasoline and other fl ammable vapors and liquids clear of appliance. • Do NOT store fl ammable materials in the appliance’s vicinity. • DO NOT USE GASOLINE, LANTERN FUEL, KEROSENE, CHARCOAL LIGHTER FLUID OR SIMILAR LIQUIDS TO START OR “FRESHEN UP”... -
Page 13: Wood Fuel & Storage
L. Wood Fuel & Storage WARNING Fire Risk. • DO NOT BURN GARBAGE OR FLAMMABLE FLUIDS SUCH AS GASOLINE, NAPTHA OR ENGINE OIL. • DO NOT USE CHEMICALS OR FLUIDS TO START A FIRE. • Do NOT burn treated wood or wood with salt (driftwood). •... -
Page 14: Blower Control Box Snap Disc Operations
M. Blower Control Box & Snap Disc Operating Instructions 1. The blower will turn on/off automatically when set to AUTO. Figure 14.1. 2. When set to MANUAL, the fan will turn on/off only when you turn it on or off. This setting over-rides the internal snap disc. -
Page 15: Clear Space
O. Clear Space • Do NOT place combustible objects within 4 ft (1.2 m) of the front of fi replace. Figure 15.1. WARNING Fire Risk. • Do NOT place combustible objects within 48 inches in front of the appliance. • High temperatures may ignite clothing, furniture or draperies. -
Page 16: Quick Start Guide
R. Quick Start Guide FIRST FIRE ITEMS NEEDED: OPEN AIR CONTROL HIGH ADD KINDLING LIGHT THE PAPER ADD MORE WOOD Heatilator • ECO-WINS18 • 7065-132D • November 22, 2011 Note: This are generic drawings and may not represent your specifi c model. 10 Pieces of Newspaper, 10-20 Pieces of Dry Kindling and a Few Pieces of Dry Split Wood. -
Page 17: B. Chimney & Chimney Connector Inspection/Cleaning
Maintenance and Service A. Disposal of Ashes • Frequency: When ash is within 1-3/4 inch (44mm) of firebox lip. Leave 1/4 to 1/2 inch (6-13mm) of ash in the bottom of the firebox. • By: Homeowner WARNING! Risk of Fire! Ashes could contain hot embers. •... -
Page 18: Glass Cleaning
D. Glass Cleaning • Frequency: As desired • By: Homeowner • Clean glass with a non-abrasive glass cleaner. Abrasive cleaners may scratch and cause glass to crack. • If the deposits on the glass are not very heavy, normal glass cleaners work well. Heavier deposits may be removed by using a damp cloth dipped in wood ashes or by using a commercially available oven cleaner. -
Page 19: Quick Reference Maintenance Guide
F. Quick Reference Maintenance Guide CAUTION! Allow the appliance to completely cool down before performing any cleaning or maintenance. Baffl e & Blanket Blanket Baffle Optional Blower Chimney System Firebrick & Ash Removal Door & Glass Assemblies Door Handle Latch Cam Spacing Washers Note: These are generic drawings and may not represent your specifi... -
Page 20: Section 4: Troubleshooting Guide
Troubleshooting Guide With proper installation, operation, and maintenance your woodstove will provide years of trouble-free service. If you do experience a problem, this troubleshooting guide will assist you or a qualifi ed service person in the diagnosis of a problem and the corrective action to be taken. -
Page 21: A. Glass Replacement
Service Parts Replacement UNPLUG APPLIANCE FROM ANY POWER SOURCE A. Glass Replacement (Replace with 5mm ceramic glass only) Ensure that the fi re is out and the appliance is cool to the touch. Protect a table or counter top with padding or towels. Protect your hands and wear gloves to prevent injury. -
Page 22: Blower Replacement
D. Blower Replacement 1. Remove surround from unit. 2. Using a phillips head screwdriver, remove 8-32 screw, washer and bushing assemblies holding left side panel in place. Remove panel. Figure 21.1 3. Disconnect the wires from the blower. 4. Remove three wing nuts as shown. Figure 22.1 5. -
Page 23: Baffl E & Ceramic Blanket Removal
E. Baffl e & Ceramic Blanket Removal Remove all ash from the fi rebox, and extinguish all hot embers before disposal into a metal container. Remove the baffl e protection channel by rotating it down from the front tube. Figure 23.1. The baffl... -
Page 24: Tube Channel Assembly Replacement
G. Tube Channel Assembly Replacement Removing Tube Channel Assembly 1. Remove the right side bricks (3 pieces). 2. Remove the baffl e protection channel by rolling forward and out of the fi rebox. 3. Locate the 3 channel nuts inside of chamber and remove using a 7/16 socket wrench. -
Page 25: Installer's Guide
Installer’s Guide Getting Started A. Design and Installation Considerations CAUTION Check building codes prior to installation. • Installation MUST comply with local, regional, state and national codes and regulations. • Consult insurance carrier, local building, fi re offi cials or authorities having jurisdiction about restrictions, installation inspection, and permits. -
Page 26: Negative Pressure
C. Negative Pressure WARNING Asphyxiation Risk. • Negative pressure can cause spillage of com- bustion fumes, soot and carbon monoxide. • Appliance needs to draft properly for safety. Negative pressure results from the imbalance of air available for the appliance to operate properly. It can be strongest in lower levels of the house. -
Page 27: Locating Your Appliance And Chimney
D. Locating Your Appliance & Chimney Location of the appliance and chimney will affect perfor- mance. As shown in Figure 28.1 the chimney should: • Install through the warm space enclosed by the build- ing envelope. This helps to produce more draft, espe- cially during lighting and die down of the fi... -
Page 28: Rule
F. 2-10-3 Rule These are safety requirements and are not meant to assure proper fl ue draft. This appliance is made with a 6 inch (152mm) diameter chimney connector as the fl ue collar on the unit. • Changing the diameter of the chimney can affect draft and cause poor performance. •... -
Page 29: Tools And Supplies Needed
G. Tools And Supplies Needed Before beginning the installation be sure the following tools and building supplies are available: 7/16 Socket Framing materia Reciprocating saw High temp caulking material l Pliers Gloves Hammer Framing square Phillips screwdriver Electric drill and bits Flat blade screwdriver Safety glasses Plumb line... -
Page 30: Section 7: Dimensions And Clearances
Dimensions and Clearances A. Appliance Dimensions 24-1/4 in. (616mm) 10-1/2 in. (267mm) 33-1/4 in. (845mm) Figure 31.1 Top View 18-3/8 in. to 21-5/8 in. (467mm to 549mm) 13-7/8 in. to 17-3/16 in. (352mm to 437mm) 6 in. (152mm) Figure 31.3 - Side View With Optional Flue Adapter Heatilator •... -
Page 31: Clearances To Combustibles (Ul And Ulc)
B. Clearances to Combustibles, United States and Canada (UL and ULC) Minimum Clearances to Combustible Material Masonry, Heat Exchanger & Zero Clearance 18” (457) MANTEL CLEARANCES No Mantel Defl ector with Mantel Defl ector (Figure 31.1 FLOOR PROTECTION (EMBER PROTECTION) Floor height 0”... - Page 32 Factory-Build Solid Fuel Fireplace Floor Protection Under Hearth Extension USA ONLY Hearth Height 0 to 7 inch Thermal Protection Required 1 inch (25)mm) R value = 2.13 0 to 7 inch (0 to 178mm) Figure 32.1 - Thermal Protection Required USA and CANADA Hearth Height Greater than 7 inches...
-
Page 33: Alternate Floor Protection Calculation
C. Alternate Floor Protection Calculation Material Thermal Conductivity: k value The k value indicates the amount of heat (in BTU’s) that will fl ow in 1 hour through 1 square foot of a uniform mate- rial 1 inch thick for each degree (F) of temperature differ- ence from one side of the material to the other. -
Page 34: D. Masonry Chimney
Chimney Systems A. Venting Systems Chimney Connector: It is also known as fl ue pipe or liner. It must be 6 inches (152mm) minimum diameter stainless steel liner meeting minimum standards of UL1777. Chimney: The chimney can be new or existing, masonry or prefabricated and must meet the following minimum requirements as specifi... -
Page 35: Masonry Chimney
Masonry Chimney (Cont’d) This insert conforms with the UL 1482 and ULC S628 (Canada) in all respects, and is approved to UL & ULC safety standards for installation and use within a fi replace with a masonry chimney in accordance with NFPA 211 and CAN/CSA-B365-01. -
Page 36: Metal Heat Circulating Chimney
E. Metal Heat Circulating Masonry This insert conforms with the safety standard UL-1482 and ULC S628 (Canada) in all respects and is approved to UL & ULC safety standards for installation and use within a fi re- place with masonry chimney, in accordance with NFPA 211, and CAN/CSA-B365-01. -
Page 37: Securing Chimney Components
G. Securing Chimney Components All joints should be secured with 3 sheet metal screws or rivets per pipe manufacturers instructions. The sections must be attached to the insert and to each other with the crimped (male) end pointing toward the insert. Figure 38.1. LINER CONNECTOR CRIMPED TOWARDS... -
Page 38: Ovalizing Round Stainless Steel Liners
J. Ovalizing Round Stainless Steel Liners Ovalizing round stainless steel liners to accommodate the liner passing through the damper region of a fi replace is an allowable and acceptable practice. Ensure that the ovalization is minimized to the extent required to fi t through the damper. K. -
Page 39: Section 9: Appliance Set-Up
Appliance Set-up A. Outside Air Kit Installation A source of air (oxygen) is necessary in order for combustion to take place. Whatever combustion air is consumed by the fi re must be replaced. Air is replaced via air leakage around win- dows and under doors. -
Page 40: Securing Stove Pipe/Liner To Flue Collar
B. Securing Stove Pipe/Liner to Flue Collar 1. There are 4 pre-drilled holes in the fl ue collar 90 degrees apart. Attach the fl ue collar to the stove pipe/liner. If the seal is questionable use stove mastic Figure 40.1. 2. -
Page 41: Securing Appliance To Stove Pipe/Liner
D. Securing Appliance to Stove Pipe/Liner 1. Once you have the appliance in place and secured, remove the tube channel assembly, baffl e board and ceramic blanket. Detailed instructions are found on page 2. Reach up through the fl ue opening and grab the attach- ment bar and pull down inside fl... -
Page 42: Mobile Home Installation
Mobile Home Installation An outside air inlet must be provided for combustion and must remain clear of leaves, debris, ice and/or snow. It must be unrestricted while unit is in use to prevent room air starvation which can cause smoke spillage and an inability to maintain a fi... -
Page 43: Section 11: Reference Materials
Reference Materials ECO-WINS18 Service Parts Beginning Manufacturing Date: May 2011 Wood Insert Ending Manufacturing Date: Active 16 17 Part number list on following page. 05/11 Heatilator • ECO-WINS18 • 7065-132D • November 22, 2011... - Page 44 Service Parts IMPORTANT: THIS IS DATED INFORMATION. When requesting service or replacement parts for your appliance please provide model number and serial number. All parts listed in this manual may be ordered from an authorized dealer. ITEM DESCRIPTION Convection Air Channel Flue Attach Ring Gasket, Flue Collar Chimney Ring Attach...
- Page 45 Service Parts IMPORTANT: THIS IS DATED INFORMATION. When requesting service or replacement parts for your appliance please provide model number and serial number. All parts listed in this manual may be ordered from an authorized dealer. ITEM DESCRIPTION Retainers -Tube Support Tube Channel Assembly #12 Door Assembly Door Assembly...
-
Page 46: Service Parts
Service Parts IMPORTANT: THIS IS DATED INFORMATION. When requesting service or replacement parts for your appliance please provide model number and serial number. All parts listed in this manual may be ordered from an authorized dealer. ITEM DESCRIPTION Outisde Air Cover Plate Bottom Air Pan Door Gasket Inlet Door Assembly... -
Page 47: Service Maintenance Log
Service And Maintenance Log Date of Service Performed By Description of Service Heatilator • ECO-WINS18 • 7065-132D • November 22, 2011... -
Page 48: Contact Information
Please contact your Heatilator dealer with any questions or concerns. For the number of your nearest Heatilator dealer, please visit Prior to calling, please have the model and serial number of the unit you are calling about. This information can be found on the front of the unit under the ashlip •...
Need help?
Do you have a question about the WOOD BURNING INSERT ECO-WINS18 and is the answer not in the manual?
Questions and answers