
Related Manuals for Security Labs H.264


Summary of Contents for Security Labs H.264
-
Page 1: Customer Support
3G/4G Internet-Email H.264 16 CH DVR Owner’s Manual 15540 Herriman Blvd. Noblesville, IN 46060 Customer Support 1-800-774-0284... -
Page 2: Table Of Contents
16-channel H.264 DVR User Manual Chapter 1 Overview ..................4 1.1 Introduction ..................4 1.2 Packaging and Accessories ..............4 1.3 Main features ..................4 1.4 Technical Parameters ................5 1.5 Product appearance and interface descriptions ........6 1.6 Remote control ..................7 1.7 Mouse .................... - Page 3 16-channel H.264 DVR User Manual 3.7.6 PTZ Setup ..................28 3.7.7 Network setup .................29 3.8 DDNS account ...................32 3.9 Improving Internet Access ..............37 Port Forwarding ..................37 DMZ Setting .....................39 Chapter 4 DVR network ..................40 4.1 Functional characteristics ..............40 4.2 Installation and download of controls ..........40 4.3 Network log-in ..................41...
-
Page 4: Chapter 1 Overview
1.1 Introduction This highly featured DVR series is based on a space saving 1U Din Standard case that is loaded with the latest features and technology. H.264 dual-stream video compression increases the ability of this DVR to hold up to four times more video than previous models, and allows you to maximize the speed of your internet transmission at the same time. -
Page 5: Technical Parameters
16-channel H.264 DVR User Manual ◎ Versatile USB interface for mouse connection 1.4 Technical Parameters Features Description Operating system Embedded LINUX OS Video compression H.264 Video/Audio input 16 BNC Video / 2 RCA Audio Video/ Audio output 1 VGA, 1 BNC Video / 1 RCA Audio... -
Page 6: Product Appearance And Interface Descriptions
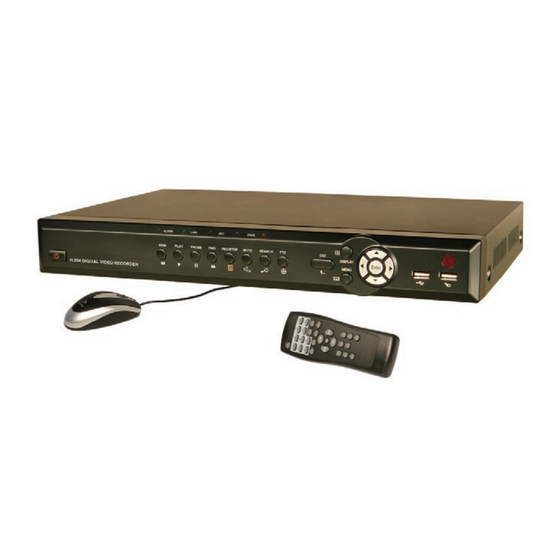
16-channel H.264 DVR User Manual 1.5 Product appearance and interface descriptions 1.5.1 Front panel ① ② ③ ④ ⑤ ⑥ ⑦ ⑧ ⑨ ⑩ Definition Definition Definition Power switch Mute PTZ control Rewind Video search ESC: Exit/Return DISPLAY: Display mode... -
Page 7: Remote Control
16-channel H.264 DVR User Manual 1.6 Remote control Functional definition Not used on this model Not used on this model Channel selection; number keys PTZ Control Single and multi-split screen Quit shortcut menu Shortcut menu Direction buttons: Next, on the left... -
Page 8: Mouse
16-channel H.264 DVR User Manual 1.7 Mouse This DVR incorporates a standard USB2.0 mouse to make menu and control functions as easy as operating a personal computer. Mouse Function Action Open the system menu, return to the search menu during playback, or Right button go to live screen view. -
Page 9: System Login
16-channel H.264 DVR User Manual 2.3 System login The DVR’s default login name is 000000 without any password. You can set up your own private password by following the directions in chapter 3.6.3. If a password has been initiated, the following login screen will appear when you attempt to operate the DVR. -
Page 10: Main Menu
16-channel H.264 DVR User Manual 2.4.1 MAIN MENU Click "Main Menu" to access the advanced settings area for your DVR (described in chapter 3.1). 2.4.2 KEYLOCK The front panel function buttons and mouse can be locked to keep unauthorized users from accessing control of the DVR. First, Admin and User passwords should be set up as in chapter 2.3. -
Page 11: Start Cruise
Activates a memorized tour (group of preset positions) on a motorized pan / tilt / zoom camera. Note: This feature can only be used after setting up a PTZ camera that is compatible with this type of function such as a Security Labs SLC-171C or Piczel 3505. 2.4.7 PTZ Activates the control menu below to operate your compatible PTZ camera. -
Page 12: Mute
16-channel H.264 DVR User Manual Step 5 Select the APPLY button to save your settings ----END More points can be added later by repeating steps 2-5. SLIP: The SLIP button allows you to go directly to a preset point. Stop the cruise function if it is active, enter the preset number you wish to view in the Current Point box, click <Enter>... -
Page 13: Chapter 3 Advanced Settings
16-channel H.264 DVR User Manual superimpose one or two other smaller channel views over the main channel view Chapter 3 Advanced settings 3.1 MAIN MENU main menu “PLAYBACK”, “RECORD”, “HDD”, “BASIC”, “ADVANCED” and “Exit” options, as shown below: Note: The setup of all the submenus below will not be effective until “Enter” is pressed. -
Page 14: Recording Mode
16-channel H.264 DVR User Manual of the screen. 3.2 Recording mode MAIN MENU / RECORD Enter the Recording Mode screen via MAIN MENU / RECORD: CHANNEL: Enables the record mode for the corresponding channel. REC.MODE: Two modes: “When powered up”, or “By Timer”. -
Page 15: Video Search
16-channel H.264 DVR User Manual of the day) you wish to apply the selected record function to. 00 = Midnight through 23 = 11:00PM. FROM-TO-COPY: Allows you copy the schedule you set up to “ALL” days or any specific day you select from the drop list. -
Page 16: Backup
16-channel H.264 DVR User Manual Click on “SEARCH” to show all available recordings to view, or enter the specific Channel, Date, and Time at the top of the page that you wish scan. Dates and times with available ALARM recordings will turn RED, and TIMED recordings will show as GREEN. -
Page 17: Hard Disk Management
16-channel H.264 DVR User Manual Insert a flash drive with available space into the USB port marked with the USB logo symbol (E shape with an arrow), select the check box next to the event to be copied, click on BACKUP. -
Page 18: Basic Setup
16-channel H.264 DVR User Manual ALL/FREE: Displays the total storage capacity and current remaining storage capacity of the hard disk. TIME LEFT: Displays the hours remaining for recording based on the current settings for picture resolution and quality set in the RECORD menu. -
Page 19: Time Setup
16-channel H.264 DVR User Manual highlighted to indicate selection), and press <Enter> or click the icon to enter the setup screen of this option, as shown below: The system has multiple languages to choose from. Select a language, and click the "Apply" button to save. Your changes will take effect after a system restart. -
Page 20: User Password
16-channel H.264 DVR User Manual 3.6.3 User password MAIN MENU / SETUP / PASSWORD You can setup a password by going to MAIN MENU / SETUP / PASSWORD, then click <ENABLE> from the drop list. First generate a USER password for others, then enter your own information in the ADMIN PASSWORD boxes, click <APPLY>. -
Page 21: Video/Audio
16-channel H.264 DVR User Manual Name: Move the cursor to each NAME box where a yellow alpha-numeric table will appear. Click on the letters/numbers that you need, then click the (left angle) ENTER icon. Click the top right corner of the yellow table to change the fonts from numbers to letters. -
Page 22: Advanced Options
16-channel H.264 DVR User Manual MONITOR RESOLUTION: Use the drop list to select: 1280*1024 (High), 1024*768 (Medium), and 800*600 (Low) to best match the capability of your monitor. Note: The system will restart when the monitor resolution is changed. CAMERA SYSTEM: Changes between the two camera sync systems of PAL and NTSC (NTSC is used in the USA). -
Page 23: Alarm
16-channel H.264 DVR User Manual The advanced functions include the 7 options of alarm setup, system information, motion detection, mobile phone monitoring, system maintenance, PTZ Setup and network setup. 3.7.1 Alarm MAIN MENU / ADVANCED / ALARM Move the cursor to the ALARM option (the icon is surrounded by a yellow frame to indicate selection), and press <Enter>... - Page 24 16-channel H.264 DVR User Manual Note: When an alarm is produced, a red letter “I” will be displayed above the corresponding channel. HDD LOSS: ON: When the system cannot identify the hard disk, an alarm will be generated, and a red mark “H” will be displayed at the bottom left corner of Channel 1 on the live view screen.
-
Page 25: System Info
16-channel H.264 DVR User Manual SEND PW: The password of the mailbox used to send mail. RECV EMAIL: The address used to receive the image transmitted from the DVR after an alarm. 3.7.2 System info MAIN MENU / ADVANCED / INFO Enter the system information screen shown below from MAIN MENU / ADVANCED / INFO. - Page 26 16-channel H.264 DVR User Manual SENSITIVITY: You can adjust the sensitivity of each channel. Select a level of 1 (low) through 4 (high). Click on APPLY to save your settings. MD AREA: Each channel has a corresponding motion detection area setting.
-
Page 27: Mobile Phone Monitoring
16-channel H.264 DVR User Manual 3.7.4 Mobile phone monitoring MAIN MENU / ADVANCED / MOBILE Apps for Android, Blackberry, Symbian, and Windows based mobile devices can be found on the included CD, or on our web site. iPhone users, download the free app kMEye from the App Store. -
Page 28: Ptz Setup
16-channel H.264 DVR User Manual AUTO RESET: When this option is set to “ON”, you can set the restart frequency and time for the DVR. Performing an occasional restart or reboot of the system is a good practice to insure against power surges or static discharges that may corrupt the DVR while you are away. -
Page 29: Network Setup
16-channel H.264 DVR User Manual Channel: Select the channel the dome camera is connected to (to select channels 5-8 click “Next Page”) and match the parameters in the drop boxes to the settings in your PTZ camera. Protocol: Pelco D and Pelco P are the most popular communication methods used to control a PTZ camera. - Page 30 16-channel H.264 DVR User Manual http://www.security-labs.com/ip.shtml Item 2 – Are you installing the DVR on a LAN connection (behind a router) or on a WAN (Internet) connection (direct to modem)? Glossary of terms: LAN – Local Area Network WAN – Wide Area Network (Internet) ISP –...
- Page 31 16-channel H.264 DVR User Manual STATIC : Use this option when entering a known IP address manually. A static IP address (one that never changes) can be supplied by your internet service provider, and offers the most reliable method of contacting your DVR from the internet.
-
Page 32: Ddns Account
16-channel H.264 DVR User Manual between the DVR and your PC. The default port is 9000. If this port is occupied by any other service on your PC, please change the number to an unused port. WEB port: The http port is 80 by default. If the administrator modifies the WEB port to any other port, such as 88, please add the IP the port number to the end of the IP address (i.e. - Page 33 16-channel H.264 DVR User Manual After confirmation, the system will prompt that the verification message has been sent to the designated mailbox, as shown below: Activate account your mailbox open confirmation link sent from support@dyndns.com, as shown below: Click the link below and enter the website to activate the account.
- Page 34 16-channel H.264 DVR User Manual below: Application for free domain name After entering the “Dynamic DNS Services” screen, click “Dynamic DNS Free” to apply for a free dynamic domain name, as shown below: Enter the “Dynamic DNS Free” screen, as shown below. Click “...
- Page 35 16-channel H.264 DVR User Manual Enter the hostname, select the service type and then enter the dynamic IP address (usually being the dynamic IP address of the network of the DVR host) to be tied in the Add New Hostname screen, as shown below. Complete the...
- Page 36 16-channel H.264 DVR User Manual MAIN MENU / ADVANCED / NETWORK / DDNS SETTINGS...
-
Page 37: Improving Internet Access
16-channel H.264 DVR User Manual DDNS: With the two options of “ON” and “OFF”; when DDNS operation is desired, please select DDNS "ON". SERVICE: You may select provider options of 3322, dyndns (most popular), and perfecteyes. Host name: Enter the host name registered with your chosen DDNS server. - Page 38 16-channel H.264 DVR User Manual Click “OK” to enter the main screen of the router, as shown below Click Applications& Gaming, as shown below:...
-
Page 39: Dmz Setting
16-channel H.264 DVR User Manual Fill in the IP and the port number in the corresponding boxes, and select “Both” in [Protocol]. In this case, 80 stands for the WEB port, 9000 for the media port and 6000 for the mobile phone port. -
Page 40: Chapter 4 Dvr Network
Chapter 4 DVR network 4.1 Functional characteristics A graphical user interface (GUI) based on an ActiveX control, can be downloaded from the DVR to your PC via Internet Explorer. This GUI will provide you with a screen display of menus and controls to operate your DVR over a network. -
Page 41: Network Log-In
16-channel H.264 DVR User Manual Click on Custom Level for Trusted Sites and click on “Prompt” for “Download unsigned ActiveX controls”, and “Initialize and script AciveX controls not marked as safe for scripting”. Further adjustments may be needed, but make all adjustments in the Trusted Sites section. -
Page 42: Live View
16-channel H.264 DVR User Manual Note: Selecting the LAN option when the DVR and PC are on the same local network will increase the viewing frame rate. 4.4 Live View Play control: : OPEN or CLOSE live viewing mode. : SNAPSHOT CAPTURE Clicking on the Snapshot icon during a live viewing session will save an image to your hard drive C:/DVR folder by default. -
Page 43: Playback
16-channel H.264 DVR User Manual 4.5 Playback Click Playback, then Refresh, to enter the screen shown below:... -
Page 44: Record Mode
16-channel H.264 DVR User Manual Click the date, channel, record type, and then click “Search”. The eligible recorded files will appear in the file list, with the highlighted calendar numbers denoting dates with record data, as shown in the figure above. Select the file to be played back, and double-click this file or click “Playback”... -
Page 45: Alarm Setup
16-channel H.264 DVR User Manual Chapter 3.2. Note: “Detail” can be set in 4-channel DVRs only. 4.7 Alarm setup Click “Setup” →“Alarm ” to enter the Alarm Setup screen, as shown below: Provides network setup access for each channel as described in Chapters 3.7.1 and 3.7.3. -
Page 46: Network Setup
16-channel H.264 DVR User Manual Provides network access to the PTZ setup as described in Chapter 3.7.6. 4.9 Network setup Click “Setup” →“Network Setup” to enter the Network Setup mode, as shown below: Provides network access to make changes to the network settings as described in Chapter 3.7.7. -
Page 47: Host Info
16-channel H.264 DVR User Manual INTERNET: Adjusts the data stream of the DVR to best match your internet connection speed. The highest setting (1024K) will produce the best picture quality, but some delay may be noticeable if the bandwidth of your connection is too low. -
Page 48: Chapter 5 Client Software & Player
16-channel H.264 DVR User Manual Chapter 5 Client Software & Player A CD containing client software and a file player is included with your DVR. The client software gives you all of the menu and control functions available to the DVR without the need to use Internet Explorer. -
Page 49: Video Player
16-channel H.264 DVR User Manual MEDIA PORT:Enter the port number, the default is 9000 PASSWORD:Enter network password if you created one earlier. NETWORK:Select LAN is the local area network, or INTERNET is the wide area network Note: After a successful login, the interface shown is the same as that of IE. - Page 50 16-channel H.264 DVR User Manual Select: Open Local File to play a video from your PC hard drive Select: 264 Files from the drop list at the bottom. Double click or OPEN the file you wish to view.
- Page 51 16-channel H.264 DVR User Manual After playback begins, an arrow icon appears at the bottom of the screen. Clicking on the arrow icon displays additional controls shown below. ① Function Definition Function Definition Icon Icon ① Recording Schedule All video...
- Page 52 16-channel H.264 DVR User Manual Pause, STOP Start Operation Backward /forward frame File Cut Slow/Normal/Fast File Deletion << >> Next Hour AVI Format transmission Capture bitmap Decrease video Volume Control Note:1.Double click a channel image to enlarge, double click again to return to quad view.
-
Page 53: Appendix: Hard Disk Space Used
16-channel H.264 DVR User Manual Appendix: Hard disk space used Unit: Megabyte /Channel/Hour Record quality best fine normal Capacity(MB/CH/HR) - Page 54 16-channel H.264 DVR User Manual Limited Product Warranty HARD DRIVE: MAY VARY WITH MODEL ONE YEAR PARTS AND LABOR; Should this product prove to be defective in material or workmanship under normal usage, we will provide without charge to the consumer, parts and/or labor necessary to remedy the defect for the period of ONE YEAR from the date of purchase.
Need help?
Do you have a question about the H.264 and is the answer not in the manual?
Questions and answers