Table of Contents
Advertisement
Quick Links
Advertisement
Table of Contents

Related Manuals for Akai AMP110


Summary of Contents for Akai AMP110
- Page 1 Microset: Radio / (MP3)CD-player with USB-port and card reader ALD1915H User manual Gebruiksaanwijzing NL 21 Manuel de l’utilisateur FR 41 Manual de instrucciones ES 60 Gebrauchsanleitung DE 79 Οδηγίες χρήσεως EL 99 Brugsanvisning DA 119...
-
Page 2: Table Of Contents
Table of contents Safety ................3 Intended use ..............3 Labels in this manual ............3 General safety instructions ..........3 Preparations for use ........... 4 Unpacking ................4 Package contents ............4 Installation ..............5 Installing the speakers .............6 Connecting random equipment ........7 Remote control..............8 Functions .............. -
Page 3: Safety
AMP110 Safety Intended use The Micro Music System plays music from USB, memory card, CD and radio. Read the manual carefully before first use. Due to the great variety of products with external memory connection (USB, SD/MMC, etc.) and their sometimes quite manufacturer-... -
Page 4: Preparations For Use
CAUTION Do not block the ventilation holes. This appliance is double insulated; therefore no earth wire is required. Always check that the mains voltage corresponds to the voltage on the rating plate. This appliance employs a laser system. To prevent direct exposure to the laser beam, do not open the appliance. -
Page 5: Installation
AMP110 If any item is missing, please contact your reseller. Installation ● Put the appliance on a horizontal flat surface. ● Connect the speakers to the appliance. Read the paragraph "Installing the speakers". ● Connect the random equipment to the appliance. -
Page 6: Installing The Speakers
Installing the speakers The cables and terminals are colour- coded: - Wires with markings connect to red terminals (+). - Wires without markings connect to black terminals (-). ● Place the speakers on a horizontal flat surface. Place the speakers close enough to the appliance to be able to connect the wires. -
Page 7: Connecting Random Equipment
AMP110 Connecting random equipment Audio connections (input) These connections allow you to receive audio signal from a connected CD/DVD player or amplifier. The appliance has the following audio inputs: ● AUX IN: Connect a suitable cable to the AUX IN jack (8). -
Page 8: Remote Control
Aerial connection (FM radio) ● Insert an FM aerial or a suitable cable into the FM ANTENNA connection. Aerial connection (AM radio) ● Insert an AM aerial or a suitable cable into the AM ANTENNA connection. ● Place the aerial on a horizontal flat surface. -
Page 9: Functions
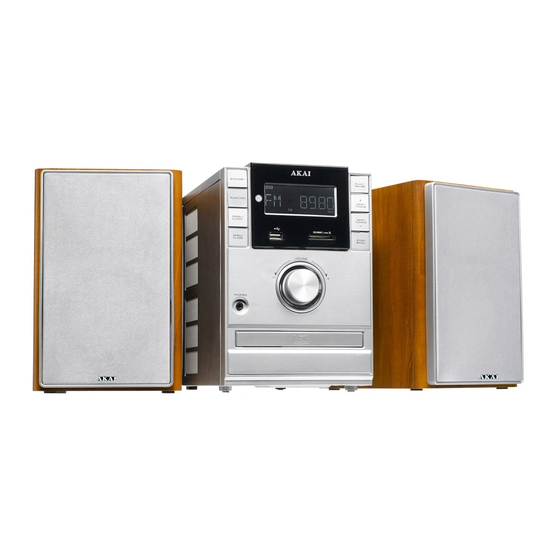
AMP110 Functions DVD Micro System Front panel STANDBY button Disc tray Remote control sensor 10 Volume dial FUNCTION button 11 Memory card slot Display 12 STOP/BAND button PROG/CLOCK button 13 SKIP/TUNING - button USB slot 14 SKIP/TUNING + button OPEN/CLOSE button... -
Page 10: Remote Control
Remote control 16 STANDBY button 17 FUNCTION button 18 ID3 button 19 PREV button 20 STOP/BAND button 21 PLAY MODE button 22 FOLDER/PRESET UP button 23 FOLDER/PRESET DN button 24 -10 button 25 CD button 26 TUNER button 27 ALARM1 button 28 ALARM2 button 29 SNOOZE button 30 ST/MO button... -
Page 11: Operation
AMP110 Operation All functions of the appliance are accessible using the remote control. All instructions refer to operation with the remote control, unless indicated otherwise. General functions ● To switch on the appliance, press the STANDBY button (16). To switch off the appliance, press the STANDBY button (16) again. -
Page 12: Alarm Functions
● Press the NEXT button (40) or the PREV button (19) to set the desired minutes. ● Press the CLOCK ADJ button (31) to store the setting and exit. Setting the alarm time Two time slots are available (ALARM1 and ALARM2). ●... -
Page 13: Using The Sleep Function
AMP110 Snooze alarm The default snooze time is: 5 minutes. ● To snooze the alarm, press the SNOOZE button (29) while the alarm sounds. The alarm sounds again after the snooze time has elapsed. ● To stop the alarm, press the STANDBY button (16) while the alarm sounds. -
Page 14: Cd Functions
● Press the PRESET UP button (22) or the PRESET DN button (23) to select the desired radio station. ● Press the PROG button (39) to confirm the selection. CD functions ● Switch on the appliance. Select the CD mode. ●... -
Page 15: Usb Functions
AMP110 ● To program an MP3 CD: • Press the STOP button (20). • Press the PROG button (39). • Press the FOLDER UP button (22) or the FOLDER DN button (23) to select a folder or a file. •... -
Page 16: Memory Card Functions
Memory card functions ● Switch on the appliance. Select the memory card mode. ● Insert the SD/MMC device in the slot (11). The device can only be connected one way. ● To start playback, press the PLAY/PAUSE button (41) once. ●... -
Page 17: Handle And Care Of A Disc
AMP110 Handle and care of a disc ● Hold the disc with fingers. Hold the disc outer edge and/or the centre spindle hole. Do not touch the disc surface. ● Do not bend or press the disc. Do not expose the disc to direct sunlight or heating sources. -
Page 18: Usb Playback
USB playback Trouble Action No playback USB device is not installed or installed incorrectly. Insert USB device into slot. Incompatible USB device used. Playback using any USB device cannot be guaranteed. Please try another USB device. Trouble Action No sound on the unit system Input source is low. -
Page 19: Technical Data
AMP110 Technical data Parameter Value Voltage 230 V ~ 50 Hz Power consumption 30 W Standby power consumption 1.5 W Max. power output 2x5 W (RMS) Disc size 5"/3" Radio bands AM/FM Dimensions (W x H x D) 15 x 22 x 23 mm Weight 1.92 kg... -
Page 20: Disposal Of Used Electrical And Electronic Equipment
For more detailed information about recycling of this product, please contact your local city office, your household waste disposal service or the shop where you purchased the product. For more information and warranty conditions, please visit: www.akai.eu... - Page 21 For more information, please visit www.akai.eu...
Need help?
Do you have a question about the AMP110 and is the answer not in the manual?
Questions and answers