Advertisement
ModeJ No. 831.295030
SedaJ No.
SeriaU Number
DecaU
. Assembly
. Operation
. Maintenance
. Part List and Drawing
,_ CAUTION
Read aH precautions
and instruc-
tions in this manuaJ before using
this equipment.
Save this manual
for future reference.
User's Manual
\
\
Sears,
Roebuck
and Co., Hoffman
Estates,
IL 60179
Advertisement

Related Manuals for Pro-Form 365s CROSSWALK


Summary of Contents for Pro-Form 365s CROSSWALK
- Page 1 ModeJ No. 831.295030 SedaJ No. User's Manual SeriaU Number DecaU . Assembly . Operation . Maintenance . Part List and Drawing ,_ CAUTION Read aH precautions and instruc- tions in this manuaJ before using this equipment. Save this manual for future reference. Sears, Roebuck and Co., Hoffman...
-
Page 2: Table Of Contents
TABLE OF CONTENTS iMPORTANT PRECAUTIONS ..............BEFORE YOU BEGIN ..............ASSEMBLY ................OPERATHON AND ADJUSTMENT ............HOW TO FOLD AND MOVE THE TREADMHLL ..........TROUBLESHOOTHNG ..............CONDHTHONHNGGUHDELHNES ............... ORDERHNG REPLACEMENT PARTS ..........Back Cover FULL 90 DAY WARRANTY ............Back Cover Note: An EXPLODED DRAWHNG and a PART LHSTare attached in the center of this manual... -
Page 3: Important Precautions
iMPORTANT PRECAUTIONS WARNING" " f..ytope , To reduce the risk of burns, ire, eJectric shock, or mjur rsons_ read the following important precau tions and information before operating the treadmill 1. it is the responsibility of the owner to ensure 12. - Page 4 maintenance and adjustment procedures When folding or movi ng the treadmill, make scribed in this manual Never remove the sure that the storage latch is fully closed. motor hood unJeee instructed to do so by an 22. inspect and properly tighten all parts of the authorized service representative.
-
Page 5: Before You Begin
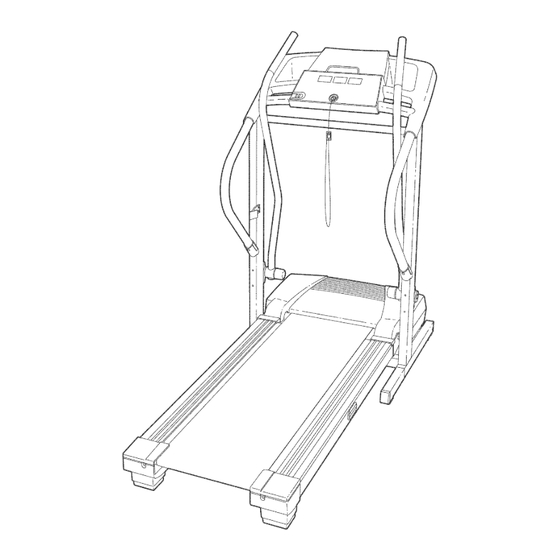
BEFORE YOU BEGIN Thank you for selecting the new PROFORM ®CROSS- this manual, call 1-800-4-MY-HOME ®(1-800-469-4663), WALK 365s treadmill, The CROSSWALK 365s treadmill To help us assist you, please note the product model number and serial number before calling, The model... -
Page 6: Assembly
ASSEMBLY Assembly requires two persons. Set the treadmHUin a cleared area and remove aH packing matedaUs, Do not dispose of the packing matedaUs until assemMy is compbted, Note: The underside of the treadmill walking belt is coated with high@erformance lubricant, During shipping, a small amount of lubricant may be transferred to the top of the walking belt or the shipping carton, This is a normal condition and does not affect treadmill performance, if there is lubricant on top of the walking belt, simply wipe off the lubricant with a soft cloth and a mild, non-abrasive cleaner,... - Page 7 2, With the heUpof another person, carefully Uower the Uprights (69) as shown, Note: Utmay be heUpfuU to pUace one foot on one of the Extension Legs (63) as you tip the Uprights, Make sure that the Extension Legs remain in the Uprights.
- Page 8 5, Attach the Left Upper Body Arm (24) to the UeftUpright Crossbar (69) with two 3 1/2" BoUts(45), two Washers (38), and two Star Washers (106) as shown, Make sure the Arm is on the indicated side of the crossbar, Attach the Right Upper Body Arm (not shown) to the other Upright (not shown) in the same way, Lower the Left Upper Body Arm (24) and the Right Upper...
- Page 9 8, Set the ConsoUeBase (47) on the Right Handrail (72) and the Left Handrail (71), Attach the ConsoUe Base with four 3/4" Screws (2), Start all four Screws before tightening them; do not overtighten the Screws. 9, Press the Upright Wire (42) into the sUotin the underside of the ConsoUe Base (47) in the indicated area, Cover the Upright Wire with the Right Grip Hate (36), Be carefut not to pinch the Upright Wire, Tighten three 1/2"...
-
Page 10: Operathon And Adjustment
OPERATmON AND ADJUSTMENT THE PERFORMANT LUBE WALKmNG BELT an equipment-grounding conductor and a grounding plug, Plug the power cord into a surge suppressor, Your treadmHUfeatures a waUking beUtcoated with and plug the surge suppressor into an appropriate PERFORMANT LUBE a high@erformance Uubrbant, outlet that is propedy installed and grounded... - Page 11 CONSOLE DIAGRAM Displays EART RATETRAININGZONES CALS. PULSE TUME DISTANCE SPEED TOUCH PULSE Pulse Sensor Note: ff there is a thin sheet of pUastb on the consob, remove the pUastb. Next, stand on the foot rails of the treadmill. Find the A CAUTION: Before operating clip attached to the key (see the drawing above), and slide the clip onto the waistband of your clothes.
- Page 12 To stop the walking belt, press the Stop button. while inserting the key into the console. An "E" The Time/%stance display will begin to flash. for English miles or an "M" for metric kilometers Note: During the first few minutes that the treadmill wiii appear in the Speed is used, inspect the alignment of the walking belt, display.
- Page 13 HOW TO USE THE UPPER BODY ARMS As you waUkon the treadmill you can either hoUdthe handrails or use the upper body arms, To exercise your arms, shouUders, and back for a totaUbody workout, move the upper body arms forward and back as you waUkon the treadmill To vary the intensity of your upper body exercise, the resistance of the upper body arms can be adjusted, To increase the resis- tance, turn the resistance knobs cUockwise;...
-
Page 14: How To Fold And Move The Treadmhll
HOW TO FOLD AND MOVE THE TREADMILL HOW TO FOLD THE TREADMmLL FOR STORAGE Before folding the treadmill, adjust the incline to the towest position, ff this is not done, the treadmill may be per- manently damaged. Next, unplug the power cord. CAUTmON: You must be able to safely tift 45 pounds (20 kg) to raise, tower, or move the treadmill. - Page 15 HOW TO LOWER THE TREADMmLL FOR USE 1, HoHdthe upper end of the treadmHHwith your right hand, Press the storage Hatchto the Heft.Pivot the treadmHHdown until the frame and foot rail are past the storage Hatch, 2, HoHdthe treadmHHfirmHywith both hands, and Howerthe tread° mHH to the floor, Do not drop the treadmill frame to the floor.
-
Page 16: Troubleshoothng
Most treadmill problems can be solved by following the simple steps below. Find the symptom that applies, and follow the steps listed, mf f urther assistance is needed, call totFfree 1-800-4-MY-HOME ® (1-800-469-4663). PROBLEM: The power does not turn on SOLUTION: Make sure that the power cord is plugged into a surge suppressor, and that the surge suppressor is plugged into a properly grounded outlet (see page 10), Use only a single-outlet surge suppres-... - Page 17 PROBLEM: The walking belt slows when walked on SOLUTION: a, Use only a single-outlet surge suppressor that meets all of the specifications described on page 10, if the walking belt is overtightened, treadmill perfor- mance may decrease and the walking belt may be- come damaged, Remove the key and UNPLUG THE POWER COBB, Using the allen wrench, turn both rear roller adjustment bolts counterclockwise,...
-
Page 18: Condhthonhngguhdelhnes
CONDiTiONiNG GUmDEUNES ergy, Only after the first few minutes does your body WARNJNG: Before beginning th s begin to use stored fat calories for energy, if your goal is to burn fat, adjust the speed and incline of the tread= or any exercise program, consult... - Page 19 SUGGESTED STRETCHES The correct form for several basic stretches is shown at the right, Move slowly as you stretch--never bounce, 1. Toe Touch Stretch Stand with your knees bent slightly and slowly bend forward from your hips, Allow your back and shoulders to relax as you reach down toward your toes as far as possible, Hold for 15 counts, then relax, Repeat 3 times, Stretches: Hamstrings, back of knees and back,...
- Page 20 PART LiST--Model No. 831.295030 Roso4B Qty. Description Qty. Description Qty. Description Hood 5/32" AHen Wrench Frame Releasable Tie 3/4" Screw Upright Wire Motor BeUt Consob Warning Decal Motor Tension BoUt Latch Spacer Cable Tie Clamp 3/8" Washer 3 1/2" BoUt Outlet Plate Motor Star Washer Book HoUder...
- Page 21 / // i _ // // / © . 22 106K...
-
Page 22: Full 90 Day Warranty
Your Home For repair - in your home - of all major brand appliances, lawn and garden equipment, or heating and cooling systems, no matter made it, no matter who sold For the replacement parts, accessories, and user's manuals that you need to do-it-yourself. For Sears professional installation of home appliances...
Need help?
Do you have a question about the 365s CROSSWALK and is the answer not in the manual?
Questions and answers
The tredmill is suddenly very loud when in operation. Will lubricating remedy it?