Roland R-26 Owner's Manual
R-26 portable recorder
Hide thumbs
Also See for R-26:
- Quick start manual (11 pages) ,
- Manual (5 pages) ,
- Brochure & specs (2 pages)
Table of Contents
Advertisement
Quick Links
Advertisement
Table of Contents

Related Manuals for Roland R-26


Summary of Contents for Roland R-26
-
Page 2: Using The Unit Safely
Copyright © 2011 ROLAND CORPORATION All rights reserved. No part of this publication may be reproduced in any form without the written permission of ROLAND CORPORATION. Roland is a registered trademark of Roland Corporation in the United States and/or other countries. - Page 3 Roland Service Center, or an authorized Be sure to use only the AC adaptor Roland distributor, as listed on the supplied with the unit. Also, make “Information” page when: sure the line voltage at the installation •...
- Page 4 Using the Unit Safely WARNING CAUTION Batteries must never be recharged, The unit and the AC adaptor should heated, taken apart, or thrown into fire be located so their location or position or water. does not interfere with their proper ventilation.
- Page 5 Using the Unit Safely CAUTION CAUTION If used improperly, batteries may If you remove the screw from the explode or leak and cause damage ground terminal, be sure to replace or injury. In the interest of safety, it; don’t leave it lying around where please read and observe the following it could accidently be swallowed by precautions (p.
-
Page 6: Important Notes
• With the factory settings, the R-26’s power will • Depending on the material and temperature automatically be switched off 30 minutes after of the surface on which you place the unit, its you stop playing or operating the unit. - Page 7 • Never touch the terminals of the SD card/SDHC the contents of data that was stored SD cards card. Also, avoid getting the terminals dirty. or SDHC cards once it has been lost. Roland • SD card/SDHC card are constructed using Corporation assumes no liability concerning precision components;...
- Page 8 * MP3 codec is Copyright © 1995-2010, SPIRIT. (the sound waveform data, style data, accompaniment patterns, phrase data, audio loops and image data) is reserved by Roland Corporation and/or Atelier Vision Corporation. • Purchasers of this product are permitted to...
-
Page 9: Table Of Contents
Overview of the R-26 . . . . . . . . . . . . . . . . . . - Page 10 R-26 Block Diagram . . . . . . . . . . . . . . . . . . .
-
Page 11: What You Can Do With The R-26
“Recording an Acoustic Instrument” (p. 52) Record a band Even a high-volume band in a rehearsal studio can be recorded clearly. You can let the R-26 automatically detect the optimal input level while you rehearse your performance. It’s even possible to record a high-quality WAV file for CD production while simultaneously recording a compact MP3 file for distribution. - Page 12 By using the internal mics and external mics in combination to record four channels simultaneously, you can record the sounds of the audience and the reverberation of the location at the same time. * Please do not use the R-26 at concerts where recording is prohibited. Reference “Recording a Concert” (p. 60)
-
Page 13: Overview Of The R-26
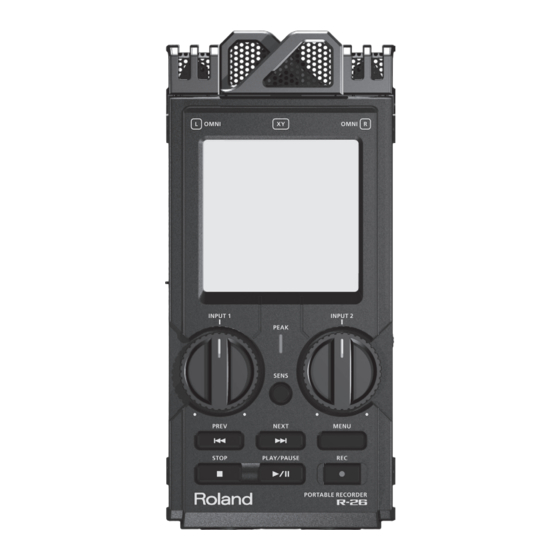
R-26, such as recording/playback settings and specifying the date and time Directional (XY) mic (p. 18). This is a stereo mic built into the R-26 (p. [STOP] button 42). This button stops playback or recording. Touch panel display... -
Page 14: Usb Connector
However, if you are concerned playback (p. 84). about this, connect the ground terminal You can also use the R-26 as a USB audio (see figure) with an external ground. When interface (p. 89). the unit is grounded, a slight hum may... - Page 15 * When using the tripod mounting socket, be sure to use a tripod that is capable of providing stable support of the R-26. 1: GND * In order to attach the R-26 to a mic 2: HOT stand, you’ll need a mic stand adaptor 3: COLD...
-
Page 16: Items In The Screen
* On the R-26, the data that you record and play back are handled in units called projects. For information on how the files in a project are organized, see”Project File Structure” (p. 86). - Page 17 Overview of the R-26 Tabs in the main screen MARK tab • During playback By touching a tab at the bottom of the You can assign a marker within the Playing/Stopped or Recording screens, you project (p. 65). Touch <SET> to assign a can view information about the project, marker at the current location.
-
Page 18: Menu Screen
Overview of the R-26 FINDER Menu screen This screen will appear when you press the [MENU] button. INPUT SETUP Touch the desired icon to enter the corresponding screen. * In this manual, a sequence of operations such as accessing the menu screen, choosing <Rec Setup>, and... - Page 19 Overview of the R-26 REC SETUP PLAY SETUP SYSTEM SETUP AUDIO I/F DATE & TIME FACTORY RESET...
-
Page 20: Getting Ready
Getting Ready Preparing the Power Supply The R-26 can operate using an AC adaptor, batteries, or an external power device. Installing Batteries Put your fingernail in the indentation at the top of the battery case cover, and pull toward yourself . - Page 21 In addition, avoid Power conservation function mixing different types of batteries. • The R-26 has a power conservation • Remove the batteries whenever function, which prevents the unit is to remain unused for an unnecessary battery consumption.
-
Page 22: Connecting The Ac Adaptor
Getting Ready Connecting the AC adaptor Connect the AC adaptor’s plug to the DC IN jack . Indicator Plug the AC adaptor into an electrical outlet . The AC adaptor’s indicator will light. * Place the AC adaptor so the side with the indicator (see illustration) faces upwards and the side with textual information faces downwards. -
Page 23: Using External Power Sources
Touch the final voltage value that you even when power is automatically cut want to specify . off, the R-26 starts within 30 seconds after power is turned back on. During this period, the final voltage settings can be changed. -
Page 24: Turning The Power On/Off
When you turn on the power, the startup screen will appear in the display, and then the main screen will appear. With the factory settings, the R-26’s power will automatically be switched off 30 minutes after you stop playing or operating the unit. If you don’t want the power to turn off automatically,... -
Page 25: Setting The Date And Time
Getting Ready When you’ve finished setting all Setting the Date and items, touch <OK> . Time Choose [MENU] <DATE & TIME> . Ú The calendar and clock setting screen will appear. Date Time * By touching <CANCEL> you can return to the previous screen without making settings. -
Page 26: Preparing An Sd Card
R-26, the screen will indicate “SD the left side of the R-26 . Unformatted. ” Removing an SD card Switch off the R-26’s power (p . 24) . * The cover may break if you use excessive force. Open the SD cover . -
Page 27: Formatting An Sd Card
Formatting an SD Card If you’re using an SD card other than the included one, you must first format the SD card before it can be used with the R-26. NOTE • The included SD card contains demo songs and driver software. If you format this card, the demo songs and driver software it contains will be lost. -
Page 28: About Sd Cards
• Some SD card types or memory cards from some manufacturers may not record or play back properly on the R-26. • Carefully insert the SD card/SDHC card all the way in—until it is firmly in place. • The R-26 supports SDHC cards. The SD card write protect feature (LOCK) Write protect switch The contents of the SD card can be protected by write protecting it. -
Page 29: Connecting Headphones Or Speakers
Connect the speakers . You’ll need to use speakers that have a built-in amplifier. Use an audio cable to connect the R-26’s PHONES jack to the line input jacks of your speaker system. Switch on the R-26’s power(p . 24) . -
Page 30: Recording
Recording Work Flow for Recording This diagram describes the procedure for recording on the R-26. Select the REC MODE Select the number of channels you’ll be recording (p. 31). Select the REC SOURCE Select either the internal mics, analog input, plug-in mics, or a combination of these (p. -
Page 31: Recording Settings
Internet. Touch <REC SOURCE> . Selecting the REC MODE The R-26 can record from one channel up to a maximum of six channels simultaneously. Use REC MODE to specify the number of channels that you want to record. - Page 32 Recording REC SOURCE choices for each REC REC MODE: 4 CHANNEL MODE Stereo x 2 Setting Description REC MODE: 1 CHANNEL Selects the directional internal mics (stereo) and the XY+OMNI omnidirectional internal mics Monaural x 1 (stereo). Selects the internal mics (a Setting Description mix of the directional internal...
-
Page 33: Setting The Sampling Rate
Recording REC MODE: 6 CHANNEL Setting the Sampling Rate Stereo x 3 Choose the sampling rate that’s appropriate Setting Description for the intended purpose of the recorded data. Selects the internal mics (a mix of the direc- Choose [MENU] <REC SETUP> Ú... -
Page 34: Setting The Recording Format
Recording Setting the Recording Pre-recording Settings Format The R-26 provides a PRE-REC function that lets you capture the two seconds of sound that preceded the moment you press the Choose the file format that’s appropriate for record button. Even for situations in which the intended purpose of the recorded data. -
Page 35: Choosing The Project Naming
Recording Using the AUTO START Choosing the Project Function Naming Method By using the AUTO START function, you can You can choose whether project names will have recording start automatically when be assigned in the form of a consecutive a specified time has elapsed, or when the number or a date. -
Page 36: Setting The File Type
BWF format, which embeds information will be supplied. about the recording time and the recording device (Roland R-26) into the WAV file. BWF Internal Mic Settings format files can be used by audio editing software that supports BWF. - Page 37 Recording Touch <ON> . Touch <LCF SW> . Touch <ON> . Setting Touch <BACK> twice to return to the main screen (p . 16) Cutting the low-frequency range If you have problems with low-frequency noise, such as the wind noise that is often present in outdoor recordings, the rumble from automobiles or machines, or vibration, Touch <LCF CUTOFF>...
-
Page 38: Analog In Settings
Recording Choose the upper boundary of the Touch the <LOW CUT> or <LIMITER> frequency range to be cut . icon to turn it on/off . ANALOG IN Settings Here you can make settings for the ANALOG IN 1/L jack and ANALOG IN 2/R jack input Setting type, phantom power supply, and MS mic. - Page 39 Recording Supplying phantom power Select the type . Here’s how to supply phantom power to the mics connected to the ANALOG IN 1/L jack and ANALOG IN 2/R jack. Choose [MENU] <INPUT Ú SETUP> <ANALOG IN> . Ú Touch <INPUT1 PHANTOM> or <INPUT2 PHANTOM>...
- Page 40 Recording * Always turn the phantom power off to adjust the stereo width . when connecting any device other than When you’ve specified the value, condenser microphones that require touch <OK> . phantom power to the XLR connector. You risk causing damage if you mistakenly supply phantom power to dynamic microphones, audio playback devices, or other devices that don’t...
-
Page 41: Plug-In Mic Settings
Recording Select the type . Plug-in Mic Settings Here you can specify the input type and plug-in power settings of a stereo mini-type external mic. Set the limiter and low-cut filter settings in the same way as for the internal mic (p. 36). Setting the input type Choose [MENU] <INPUT... -
Page 42: Setting The Recording Level And Mic
(XY) and omnidirectional mic (OMNI). The R-26 lets you choose one of three pre-adjusted modes optimized Touch <ON> . for different types of recording. In... -
Page 43: Manual Mode
Recording In the display, touch <MIC MODE> . Touch <OK> . Touch <BACK> to return to the main screen (p . 16) . Adjusting the mix balance in manual mode Here’s how to manually adjust the balance between the directional mics and omnidirectional mics. -
Page 44: Setting The Input Sensitivity
Recording Touch <OK> to exit from the MIC Touch to adjust the MODE SETUP . sensitivity . Touch <BACK> return to the main screen (p . 16) . Setting the Input Sensitivity and Input Level Here’s how to adjust the sensitivity and input level of the recording source. -
Page 45: Setting The Input Level
Produce sound on the source you’re recording . The level meter will move according to the loudness of the sound being input to the R-26. Turn the [INPUT 1] knob, [INPUT 2] knob, and the touch panel to adjust the input level . - Page 46 Recording REC MODE REC SOURCE [INPUT 1] knob [INPUT 2] knob Touch Pael INTERNAL MIC XY + OMNI + INT (shared by XY and – – OMNI) INTERNAL MIC XY + OMNI + (shared by XY and ANALOG IN 1/L, 2/R –...
-
Page 47: Automatically Setting The Sensitivity And Indicate The Optimal Input Level
Indicate the Optimal Input Level With the 4 CHANNEL and 6 CHANNEL recording modes, some of the input levels The R-26 is capable of automatically are adjusted using the touch panel. setting the input sensitivity. The unit will automatically set the sensitivity so it is... -
Page 48: Recording
(p. 47). Touch <OK> to return to the input sensitivity setting screen (p . 42) . Touch <BACK> return to the main The R-26 will enter recording-standby screen (p . 16) . mode; the indication in the upper left of the screen will blink. - Page 49 REC SETUP, the date of recording will inadvertently operate the input level be the project name. knobs. “Settings for the R-26” (p. 95) * It’s not possible to turn off the power during recording. You must first stop recording before you can turn off the power.
-
Page 50: Assigning A Marker During Recording
Assigning a Marker Specifying the Interval or Level for Automatic Marking During Recording You can make the R-26 automatically assign Here’s how to assign a marker to the project markers to the project being recorded, during recording. either at specified intervals of time, or Once you’ve assigned markers, you’ll be... -
Page 51: Splitting The Project During Recording
At the moment you want to assign a 256 MB marker, touch <SPLIT> . Size at which project will be automatically split 512 MB 1 GB 2 GB * The maximum size of file that the R-26 can handle is 2 GB. -
Page 52: Using The R-26
Recording Using the R-26 This section introduces how you can use the R-26 in various situations, and describes various examples of appropriate recording settings. Recording an Acoustic Instrument Recording vocals, acoustic guitar, or wind instruments Using the internal mics When using the internal mics, point the mics directly at the instrument to be recorded, taking care that the recording is not skewed toward the left or right channel. - Page 53 Recording Using external mics You can connect a commercially available dynamic mic or condenser mic to the ANALOG IN 1/L jack or ANALOG IN 2/R jack. If you’re recording an individual instrument, use one mic and record in monaural. * If the REC MODE is set to one channel, only the ANALOG IN 1/L jack can be used. External Mic MENU Item...
- Page 54 You can use a combination of external input mics and the internal mics to simultaneously record the sound captured near the instrument (close miking) and the ambient sound of the room captured farther away (distant miking). External Mics R-26 MENU Item Setting...
- Page 55 Using the internal mics To capture a good balance of the overall instrument’s resonance, place the R-26 at a slight distance from the S-shaped bend in the grand piano’s body. By changing the angle at which the mic is pointed, you can adjust the balance between the sound of the strings and the sound from the soundboard.
- Page 56 Recording Using external mics Adjust the angle and distance of the two dynamic mics or condenser mics connected to the ANALOG IN 1/L jack and the ANALOG IN 2/R jack in the same way as when using the internal mics (p.
- Page 57 By mixing down the sound recorded from each mic position, you can obtain a piano sound that’s ideal for the style of music being performed. External Mics R-26 External Mics R-26 Use the internal mics to capture the sound of the strings, and use two condenser mics connected to the ANALOG IN 1/L jack and ANALOG IN 2/R jack to capture the sound from the soundboard.
-
Page 58: Recording A Band
Drums Place in the middle Guitar Amp R-26 Bass Amp PA Speakers for Vocals and Keyboard MENU Item... -
Page 59: Recording Outdoors
By adjusting the directionality of the internal mic mode, you can capture the overall soundscape or pinpoint just the desired sound. You can also take advantage of the R-26’s ability to simultaneously record six channels, and record different types of internal mics and external mics on separate channels. -
Page 60: Recording A Concert
Recording Recording a Concert During a rehearsal before the actual performance, adjust the levels suitably for the loudest passages that will occur. If you use the AUTO SENS function (p. 47), the input sensitivity will be automatically set to the optimal point, and a recommended setting for the input level will also be displayed. - Page 61 MENU INPUT SETTUP MENU Item Setting INPUT TYPE LINK INPUT ANALOG IN ON if using a condenser mic, SETTUP PHANTOM POWER OFF if using a dynamic mic * Do not use the R-26 during concerts for which recording is prohibited.
-
Page 62: Playback
Playback Basic Playback Selecting the Playback Mode Operation You can specify how the projects will be played. In addition to playing projects Rewind / Move Fast-forward / consecutively from the first project, you to previous song Move to next can play just the selected project, or play (beginning of song) song projects in an automatically determined... -
Page 63: Repeat Playback
Playback Combination of PLAY Repeat Playback MODE and REPEAT Here’s how to make the project play repeatedly for the selected play mode. The following table shows how the Choose [MENU] <PLAYER Ú PLAY MODE and REPEAT settings can be SETUP> <REPEAT>... -
Page 64: Monitor Settings
Playback Adjusting a channel’s volume Monitor Settings In the main screen, touch the MON You can make various settings for playback tab . monitoring, such as turning each channel on/off and adjusting the volume. Turning a channel on/off In the main screen, touch the MON tab . -
Page 65: Assigning Markers In A Project
Playback The number of markers will be shown. Assigning Markers in a Markers are numbered sequentially starting at the beginning of the project. Project A maximum of 99 markers can be assigned. Repeat steps 2 and 3 to assign markers at You can assign markers to the desired the desired locations. -
Page 66: Repeatedly Playing A Portion
Playback Specify the end of the repeat (point Repeatedly Playing a B) . Portion of a Project During playback, touch < >. That point will be the end (point B) of the The AB Repeat function lets you repeatedly repeated portion, and repeat playback play a specified portion of a project. -
Page 67: Changing The Playback Speed
Types of Files that can be Speed Played You can make the playback faster or slower The R-26 can play back the following types without changing the pitch. of files. * You can’t change the playback speed when playing a project with a sampling •... -
Page 68: Managing Projects And Folders
Managing Projects and Folders The R-26 stores recorded projects on the Reference SD card. “Adding/Deleting a Voice Memo to a The “Finder” screen provides various Project” (p. 77) functions for listing, deleting, or copying these projects. You can also create folders... - Page 69 CONV MP3 Converts a WAV file into MP3. p. 80 Repairs the project. REPAIR p. 80 * This menu item is shown only if the R-26 has detected a damaged project. Folder operations Icon Function Procedure SELECT Selects the folder and moves to the main screen.
-
Page 70: Opening A Project
Managing Projects and Folders Opening a Project Copying a Project Here’s how to select and play a project from Choose [MENU] <FINDER> . Ú the list of recorded projects. Touch the name of the project that When you select a folder, the current you want to copy . -
Page 71: Moving A Project
Managing Projects and Folders Moving a Project Deleting a Project or a Folder Choose [MENU] <FINDER> . Ú Touch the folder into which you want Choose [MENU] <FINDER> . Ú to move the project . Touch the name of the project or Touch <MOVE>... -
Page 72: Renaming A Project Or A Folder
Managing Projects and Folders While project is being deleted Renaming a Project or a Folder Choose [MENU] <FINDER> . Ú Touch the name of the project or folder that you want to rename . Touch <RENAME> . While folder is being deleted Touch the arrow keys to move the cursor to the location at which you want to insert a character . -
Page 73: Dividing, Combining, Or Trimming A
Touch <DEL> to delete the character at the cursor location. MEMO • On the R-26, you can only rename file names that consist of ASCII characters (single-byte alphanumeric characters). • You cannot rename a file name that contains double-byte characters such as Japanese. -
Page 74: Dividing A Project
Managing Projects and Folders When you’ve specified the location, Dividing a Project touch <SET POINT> . The screen will indicate the location at which the project will be divided. In the edit menu, touch the <DIVIDE> icon . Use [ ]/[ ] and [ ] to play, fast-forward, and rewind through the... -
Page 75: Combining Projects
Managing Projects and Folders Deleting Unwanted Combining Projects Portions of a Project (Trim) In the edit menu, touch <COMBINE> . Touch the name of the project that In the edit menu, touch <TRIM> . you want to combine . Use [ ]/[ ] and [ ] to find The projects will be combined. -
Page 76: Viewing Information About The Project
Managing Projects and Folders When you’ve specified the location, Viewing Information touch <SET POINT> . about the Project The screen will indicate the region of the project to be kept. Choose [MENU] <FINDER> . Ú Touch the name of the project whose information you want to view . -
Page 77: Adding/Deleting A Voice Memo To A
Managing Projects and Folders Touch <REC MEMO> . Adding/Deleting a Voice Memo to a Project You can add a voice memo of up to 30 seconds to a recorded project. The voice memo will play when you touch beside the project name in the finder screen. This can be used as a convenient reminder of take numbers during the recording session. - Page 78 Managing Projects and Folders When you’ve finished recording the The voice memo will be attached, and the memo, touch <STOP> . symbol will appear. Recording will stop automatically after 30 seconds have elapsed since the start of the memo recording, even if you don't touch <STOP>.
-
Page 79: Deleting A Voice Memo
Managing Projects and Folders Touch <YES> . Deleting a Voice Memo Choose [MENU] <FINDER> . Ú Touch the name of the project for which you want to delete the voice memo . symbol is shown beside projects that contain a voice memo. Memo has been deleted, and you will return to the finder screen. -
Page 80: Creating An Mp3 File
Managing Projects and Folders Creating an MP3 File Repairing a Project A project that was recorded at 44.1 kHz or If you inadvertently disconnect the 48.0 kHz as a two-channel recording can be adaptor or remove the SD card during converted to an MP3 file. -
Page 81: Creating A Folder
Managing Projects and Folders Touch <YES> . Creating a Folder Here’s how to manage projects by creating a folder within the SD card. Creating a Folder at the Root Level Here’s how to create a folder at the highest (Root) level of the SD card. Choose [MENU] <FINDER>... -
Page 82: Creating A Folder Within A Folder
Managing Projects and Folders Touch <NEW> . Creating a Folder Within a Folder Here’s how to create a new folder within an existing folder. Choose [MENU] <FINDER> . Ú Move into the folder in which you want to create the new folder . Touch at the right of the move- destination folder name. -
Page 83: Connecting To Your Computer Via Usb
USB cable, you can specify whether it will operate as a storage device Projects in the R-26’s SD card can be backed or as an audio interface. If you choose up to your computer, and WAV files or MP3 “SELECTABLE”... -
Page 84: Exchanging Files With Your Computer (Storage)
Make sure that an SD card is inserted in the R-26’s SD card slot . “Preparing an SD Card” (p. 26) If the R-26 is connected to your computer in Switch on the R-26’s power (p . 24) . storage mode, the R-26’s display will show the “USB Storage”... - Page 85 • The R-26 will not be recognized if you connect it to your computer when playback or recording. Disconnect the USB cable that’s between the R-26 and your computer, and perform the procedure again from step 3.
-
Page 86: Project File Structure
Connecting to Your Computer via USB Project File Structure If you connect the R-26 to your computer, you can see how these folders and files are organized. REC MODE Structure A folder with the name of the project and an extension of .PJT will be created. Inside that 1 channel folder, a monaural WAV file named “project name_1.WAV”... -
Page 87: Disconnecting From Your
NOTE choose the item corresponding to the R-26 . Do not switch off the R-26’s power, disconnect the USB cable, or remove the SD card while the R-26 is connected to your Indication computer. Windows Vista USB mass storage device... - Page 88 USB cable that’s between the R-26 and your computer. Alternatively, you can switch off the R-26’s power. * While under most conditions, a computer similar to the above will permit normal operation of the R-26, Roland cannot guarantee compatibility solely on these factors.
-
Page 89: Using The R-26 As An Audio Interface
* You won’t be able to play projects that have a different sampling frequency than the sampling frequency that is set for the audio interface. * Projects that are played back by the R-26 will be output from the PHONES jack. The output of such project playback won’t be available on your computer. -
Page 90: Installing The Usb Driver
Connecting to Your Computer via USB Installing the USB Driver Specifying the Sampling Rate In order to use the R-26’s AUDIO I/F mode, you must first install the USB driver in your computer. Select the sampling rate that’s appropriate for the way you’ll be using the recorded Install the USB driver in your data. -
Page 91: Connecting The R-26 To Your
Touch the desired sampling rate . Connecting the R-26 to Your Computer Start up your computer . Switch on the R-26’s power (p . 24) . Use the included USB cable to connect the R-26 to your computer . USB Connector SAMPLE RATE 44.1 kHz... -
Page 92: Specifying The Input Device
PLUG-IN PLUG IN MIC jack. In the audio recording software on your computer, switch the audio input to the R-26 . For details on how to switch the audio input, refer to the manual for the software you’re using. Select the input . -
Page 93: Simultaneous Recording On
Simultaneous Recording Using Direct Monitor on the R-26 Itself If the Direct Monitor function is turned on, the sound being input to the R-26 can be monitored through headphones or The audio being input to the R-26 can speakers. also be recorded on the R-26 itself while simultaneously recording into software on Touch the <AUDIO IF>... -
Page 94: Listening To The Computer's
Using Loop Back Playback Through the R-26 The R-26’s Loop Back function allows you to mix the R-26’s own input with the sound being played back by your Audio played back by your computer computer software, and send this back to can be heard via USB through the output the computer. -
Page 95: Settings For The R-26
Settings for the R-26 Category Menu item / Effect Value (default value: bold) REC MODE Specifies the number of channels to record (p. 31). 1 CHANNEL ,2 CHANNEL , 4 CHANNEL ,6 CHANNEL * 2 CHANNEL is the only option with Audio Interface Mode. - Page 96 Settings for the R-26 Category Menu item / Effect Value (default value: bold) PLAY MODE SINGLE , SEQUENTIAL , SHUFFLE Specifies the order in which files will play (p. 62), PLAY SETUP REPEAT OFF, ON Specifies whether Repeat will be enabled (p. 98)
- Page 97 Settings for the R-26 Category Menu item / Effect Value (default value: bold) MIC TYPE STEREO, MONO Specifies the type of plug-in mic. PLUG-IN POWER OFF, ON Specifies whether power will be supplied to the plug-in mic. LIMITER PLUGIN INPUT SETUP OFF, ON MIC (p .
- Page 98 Displays information about the SD card. SD CARD FORMAT – Formats the SD card (p. 27). FACTORY Resets the R-26 to the factory-set condition (p. 99). – RESET DATE & TIME Specifies the date and time. – INT MIC, PLUG-IN LOW, MID, HIGH...
-
Page 99: Restoring The R-26 To Its Factory-Set State (Factory Reset)
Settings for the R-26 Restoring the R-26 to its Factory-set State (FACTORY RESET) Here’s how to restore the various settings of the R-26 to their factory-set state. Press the [MENU] button to access To execute the Factory Reset operation, the MENU screen . -
Page 100: Error Messages
The name is too long. Shorten the name of the file. Name Too Long There is a problem with the SD card. Format the SD card on the R-26. File System Error The SD card has not been formatted. Format the SD card on the SD Card Unformatted R-26. -
Page 101: Troubleshooting
27 display will indicate “SD Unformatted. ” Please format the SD card. The SD card will not work properly unless it was formatted on the R-26. If the card was formatted using a computer, it might have the wrong Can’t record... -
Page 102: Problems With Playback
R-26 is not recognized If no SD card is inserted in the R-26, it won’t be correctly recognized by the when connected to computer. If no icon appears on your computer’s desktop, make sure that p. - Page 103 Your settings return to their original value If the R-26’s power is turned off without using its power switch (e.g., by a battery failure or disconnected AC adaptor), the settings you made will – return to their original values. Please make the desired settings again.
-
Page 104: Main Specifications
Main Specifications Roland R-26: Portable Recorder Recorder Part Tracks 6 (3 stereo) AD/DA conversion: 24 bits Signal Processing 96.0, 88.2, 48.0, 44.1 (kHz) Sampling Rate 96.0, 88.2, 48.0, 44.1 (kHz) WAVE/BWF Bit Depth 24, 16 (bits) Sampling Rate 48.0, 44.1 (kHz) - Page 105 Main Specifications Input/Output Omnidirectional (OMNI) mic Internal Stereo Microphone Directional (XY) mic Audio Inputs XLR type (phantom powered) Analog Input 1/L, 2/R (XLR/ TRS Combo type) 1/4-inch TRS phone type (balanced/unbalanced) Plug-in powered mic Input Stereo miniature phone type Audio Output Phones (Stereo miniature phone type) +4, -2, -8, -14, -20, -26, -32, -38, -44, -50, -56, -62 Analog Input 1/L, 2/R...
-
Page 106: R-26 Block Diagram
R-26 Block Diagram Recording PHANTOM SENSE (XLR ONLY) LEVEL INPUT 1/L PHANTOM SENSE (XLR ONLY) LEVEL INPUT 2/R SENSE LEVEL INT MIC XY-L SENSE LEVEL MONITOR INT MIC XY-R PHONES INT MIC SENSE OMNI-L LEVEL VOLUME MONITOR LEVEL SENSE INT MIC... -
Page 107: Index
Index Input device ........92, 98 input level . - Page 108 Index RENAME ........69, 72 Repairing a Project .
- Page 109 Information When you need repair service, call your nearest Roland Service Center or authorized Roland distributor in your country as shown below. TAIWAN ECUADOR POLAND KUWAIT AFRICA EUROPE ROLAND TAIWAN ENTERPRISE Mas Musika ROLAND POLSKA SP. Z O.O. EASA HUSAIN AL-YOUSIFI & Rumichaca 822 y Zaruma ul. Kty Grodziskie 16B CO., LTD.
- Page 110 For China For EU Countries...
-
Page 111: Declaration Of Conformity
Compliance Information Statement Model Name : R-26 Type of Equipment : Portable Recorder Responsible Party : Roland Corporation U.S. Address : 5100 S. Eastern Avenue, Los Angeles, CA 90040-2938 Telephone : (323) 890-3700 For EU Countries This product complies with the requirements of EMC Directive 2004/108/EC.
Need help?
Do you have a question about the R-26 and is the answer not in the manual?
Questions and answers