Table of Contents
Advertisement
Quick Links
Advertisement
Table of Contents

Subscribe to Our Youtube Channel
Related Manuals for Digitus DS-12800


Summary of Contents for Digitus DS-12800
- Page 1 DVI Desktop 4-Port Audio-Combo-KVM Switch User’s Manual (DS-12800)
-
Page 2: Table Of Contents
4 Ports USB 2.0 DVI KVM Switch with HUB and Audio User’s Manual Index INTRODUCTION ............................ 2 ......................... 2 EATURES ......................3 HYSICAL IAGRAM ......................3 ACKAGE ONTENTS SPECIFICATIONS ........................... 4 .......................... 4 ENERAL LED I ......................5 NDICATORS INSTALLATION ............................6 .................... -
Page 3: Introduction
4 Ports USB 2.0 DVI KVM Switch with HUB and Audio User’s Manual 1 Introduction Thank you for purchasing of 4 Ports USB 2.0 DVI KVM Switch with USB 2.0 HUB and Audio. You now have a high quality and durability system to control multiple computers/servers from one console (Mouse, Keyboard, Monitor, Microphone and Speaker). -
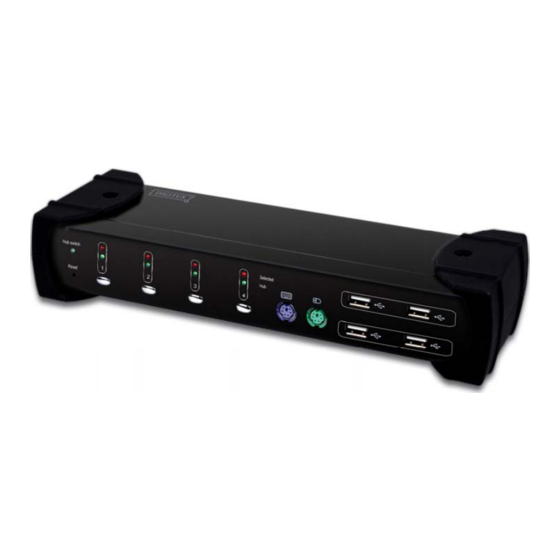
Page 4: Physical Diagram
4 Ports USB 2.0 DVI KVM Switch with HUB and Audio User’s Manual 1.2 Physical Diagram 1.3 Package Contents The product you purchased should contain the equipment and accessories shown as follows: 1 x 4 Ports USB 2.0 DVI KVM Switch with USB 2.0 HUB and Audio. 2 x USB cable. -
Page 5: Specifications
4 Ports USB 2.0 DVI KVM Switch with HUB and Audio User’s Manual 2 Specifications 2.1 General Specification Number Of Computer Controlled Selection Method Push Button/Hot Key Host Selected LED (RED) LEDs HUB Selected LED (Green) Auto Switch & Auto Scan LED (Green) Compliant with USB Version USB1.0 / USB1.1 / USB2.0 Compliant with HID Version... -
Page 6: Led Indicators
4 Ports USB 2.0 DVI KVM Switch with HUB and Audio User’s Manual 2.2 LED Indicators Host Selected Indicators (RED) ON: Indicates which PC is available and selected. Flash: Indicates which Host PC is selected but is not available Hub Selected Indicators (GREEN) ... -
Page 7: Installation
4 Ports USB 2.0 DVI KVM Switch with HUB and Audio User’s Manual 3 Installation 3.1 System Requirements Computer: PC with 1 spare USB port and 1 DVI port. Operating system: Windows 98/98SE/2000/ME/XP/Vista, Mac OS9/OSX, Linux Kernel 2.3 or later, Solaris 8 or later, Sun Micro OS. DVI cable to computer: 1 DVI-I or DVI-D male-to-male cable per computer. -
Page 8: Firmware Download Connector
4 Ports USB 2.0 DVI KVM Switch with HUB and Audio User’s Manual Apply DC 5V power adaptor to power this KVM Switch. Connect the DVI cable between the DVI port on the computer’s display card and the DVI input port of KVM. Make sure that the USB function of your computer is enabled and working properly. -
Page 9: Driver Installation
4 Ports USB 2.0 DVI KVM Switch with HUB and Audio User’s Manual will see the system show up keyboard detected failed message, screen go to blank for few minutes, then the login screen will come out. Since Sun Micro system does not support multiple keyboard and mouse, please make sure only one set of keyboard and mouse on your KVM and your Sun Micro computer. - Page 10 4 Ports USB 2.0 DVI KVM Switch with HUB and Audio User’s Manual B. Tick “Search for the best driver for your device” and press “Next” to continue. C. Please insert the “Windows 98” CD into your CD-ROM drive. Tick “CD-Rom drive”...
- Page 11 4 Ports USB 2.0 DVI KVM Switch with HUB and Audio User’s Manual E. Sometimes Windows cannot locate the necessary driver automatically. So you need to choose “Browse” to specify the location of the driver on your “Windows 98” CD manually. F.
-
Page 12: Operations
4 Ports USB 2.0 DVI KVM Switch with HUB and Audio User’s Manual 4 Operations 4.1 Host Selection 4.1.1 Host Switch by Push Button You can switch to any desired USB host connection by pushing the push button on the front panel of KVM Switch. 4.1.2 Hot Key Support The hot key function is working on both PS/2 and USB keyboard which is plugged... -
Page 13: Usb Hub Selection
4 Ports USB 2.0 DVI KVM Switch with HUB and Audio User’s Manual 4.1.5 Channel Shift Function Switch control to previous host: [Hot Key] + [Hot Key] + [Left Arrow] Switch control to next host [Hot Key] + [Hot Key] + [Right Arrow] or [Hot Key] + [Hot Key] + [Enter] 4.1.6 [ALT] Channel Shift Function... -
Page 14: Audio Selection
4 Ports USB 2.0 DVI KVM Switch with HUB and Audio User’s Manual switching time is one second later after port switch, the reason to delay the USB hub switch is to decrease USB enumeration loading if user changes active port very fast. -
Page 15: Auto-Scan Function
4 Ports USB 2.0 DVI KVM Switch with HUB and Audio User’s Manual 4.4 Auto-Scan Function: 4.4.1 Activate Auto-Scan Press [Hot Key] + [Hot Key] + [S] will activate Auto-Scan function, and the KVM will shift the display through all the ports sequentially. 4.4.2 Auto-Scan time Interval The default time interval of Auto-Scan is 5 seconds. -
Page 16: Hot Key Summary
4 Ports USB 2.0 DVI KVM Switch with HUB and Audio User’s Manual 4.7 Hot Key Summary Step 1 Step2 Action Set leading hot key to [Scroll Lock] Set leading hot key to [Caps Lock] Set leading hot key to [Num Lock] Enable/Disable USB HUB Auto-Switch Switch to host 1 Switch to host 2... - Page 17 4 Ports USB 2.0 DVI KVM Switch with HUB and Audio User’s Manual Start to Auto-Scan Auto-Scan time interval is 5 seconds (Available only when Auto-Scan function is ON) Auto-Scan time interval is 10 seconds (Available only when Auto-Scan function is ON) No [Hot Key] needed Auto-Scan time interval is 15 seconds...
-
Page 18: Sun Micro System Function Key Emulation
4 Ports USB 2.0 DVI KVM Switch with HUB and Audio User’s Manual 4.8 Sun Micro System Function Key Emulation: There are 16 special functions on the Sun Micro system keyboard, the KVM Switch can emulate these function keys. Here is the mapping table for Sun Micro function key emulation. To active these emulation, you have to press the LEFT Window KEY first (this key usually is located between the left [Ctrl] and left [Alt]), then choice the second relative key. -
Page 19: Display Interface Connection
4 Ports USB 2.0 DVI KVM Switch with HUB and Audio User’s Manual 5 Display Interface Connection 5.1 Display Interface Introduction As well as digital signals, the DVI connector includes pins providing the same analog signals found on a VGA connector, allowing a VGA monitor to be connected with a simple plug adapter. -
Page 20: Connect To Dvi Monitor (Digital Interface)
4 Ports USB 2.0 DVI KVM Switch with HUB and Audio User’s Manual 5.2 Connect to DVI Monitor (Digital Interface) monitor’s DVI port If you connect the KVM switch to with DVI-D cable, then the video signal from display card MUST be in digital interface. You can connect KVM switch with your display card of each computer via DVI-I or DVI-D cable. -
Page 21: Fcc Statement
4 Ports USB 2.0 DVI KVM Switch with HUB and Audio User’s Manual Disclaimer Information in this document is subject to change without notice. The manufacturer does not make any representations or warranties (implied or otherwise) regarding the accuracy and completeness of this document and shall in no event be liable for any loss of profit or any other commercial damage, including but not limited to special, incidental, consequential, or other damages.
Need help?
Do you have a question about the DS-12800 and is the answer not in the manual?
Questions and answers