
Related Manuals for urmet domus 540 TVL 230Vac


Summary of Contents for urmet domus 540 TVL 230Vac
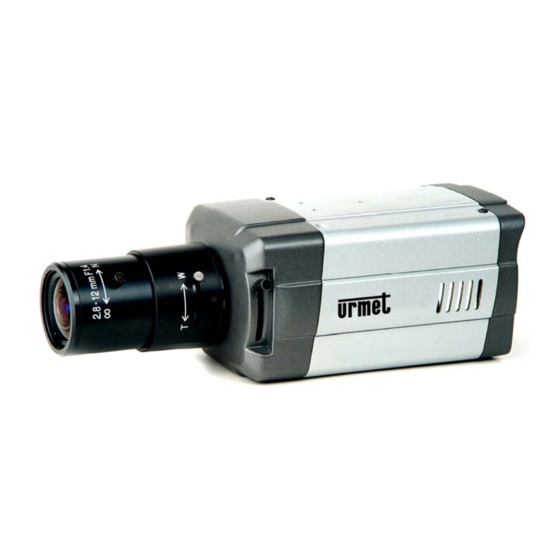
- Page 1 Mod. 1092 DS1092-073 TELECAMERA DAY & NIGHT 540 TVL 230Vca DAY & NIGHT CAMERA 540 TVL 230Vac TAG & NACHT KAMERA 540 TVL 230V AC Sch./Ref./Typ 1092/122 MANUALE D’USO USER MANUAL GEBRAUCHSANLEITUNG...
-
Page 2: Caratteristiche Tecniche
ITALIANO PRECAUZIONI D’USO • Assicurarsi dell’integrità dell’apparecchio dopo averlo tolto dall’imballo. • Prima di effettuare qualsiasi operazione di pulizia o di manutenzione disinserire l’apparecchio dalla rete di alimentazione elettrica. Non usare prodotti spray per la pulizia dell’apparecchio. • Controllare che la temperatura d’esercizio sia nei limiti indicati e che l’ambiente non sia particolarmente umido. -
Page 3: Identificazione Delle Parti
IDENTIFICAZIONE DELLE PARTI Fori di montaggio supporto staffa Supporto per montaggio staffa Regolazione di easy back-focus Coperchio CCD Connettore AUTO-IRIS Led di segnalazione accensione Uscita video Regolazione Level Connettore AUTO-IRIS Alimentazione 230Vca Dip Switch NORME D’INSTALLAZIONE • LA TELECAMERA DEVE ESSERE COLLEGATA A TERRA. I conduttori del cavo d’alimentazione di rete devono essere cablati secondo la seguenti colorazione: VERDE/GIALLO: ........... -
Page 4: Precauzioni Per L'installazione
PRECAUZIONI PER L’INSTALLAZIONE • Non installare la telecamera in ambienti esposti alla pioggia o all'umidità. In questi casi utilizzare le apposite custodie. • Quando si usa la telecamera in ambienti in cui l’illuminazione varia, è necessario prevedere l’uso di un obiettivo con AUTO-IRIS. •... - Page 5 PROCEDURA DI MESSA A FUOCO PER OTTICHE AUTO-IRIS Posizionare il selettore ELC/ALC del dip-switch sulla posizione ELC (utilizzando lenti tipo Dc driver). Puntare la telecamera sul campo da riprendere assicurandosi che la luce sia sufficiente per la ripresa; ruotare il trimmer LEVEL sino ad ottenere un’immagine totalmente bianca. Questa procedura provoca la massima apertura del diaframma dell’obbiettivo con il minimo campo focale in modo da ottimizzare la messa a fuoco del punto desiderato.
- Page 6 USO DEI DIP SWITCH Controllo automatico dell’esposizione (ELC-ALC) Per mezzo del commutatore ELC/ALC è possibile selezionare 2 tipi di obiettivi: • Obiettivi DC driver (senza amplificatore): posizionare il commutatore sulla posizione ALC. La velocità dell’otturatore elettronico viene automaticamente variata in funzione delle condizioni di illuminazione ambientale;...
-
Page 7: Pulizia Del Dispositivo
La telecamera 1092/122 è predisposta per il montaggio mediante staffa di supporto. • Fissare il supporto di fissaggio con le tre viti alla telecamera. • E’ possibile posizionare tale supporto su entrambi i lati della telecamera. Fori di montaggio supporto staffa •... -
Page 8: Technical Specifications
ENGLISH PRECAUTIONS • Make sure that the device is intact after removing it from the package. • Disconnect the device from the mains before cleaning or maintenance. Do not use spray products to clean the device. • Check that the working temperature is within the indicated range and that the environment is not particularly humid. -
Page 9: Elements Identification
GREEN/YELLOW: ........Ground BLUE:............Neutral BROWN: ............Phase See Urmet Domus “Closed circuit TV technical installation manual” for further information. • Avoid pointing the lens directly towards the sun or intense sources of light also when the camera is off. The subject must not be backlit. -
Page 10: Installation Precautions
INSTALLATION PRECAUTIONS • Never install the CCTV camera where it is exposed to rain or moisture. In these cases, use the specific housings. • When the CCTV camera is used in variable lighting conditions, an Auto-Iris lens must be used. •... - Page 11 FOCUSING PROCEDURE FOR AUTO-IRIS LENSES Set the dip-switch ELC/ALC selector to ELC position (using Dc driver lenses). Point the camera at the field to be shot and make sure light is sufficient for shooting; rotate the trimmer LEVEL until the image is totally white. This procedure causes the maximum f-stop aperture, with the minimum focus field, in order to optimize the focusing of the desired point.
- Page 12 DIP SWITCHES USE Exposure automatic control (ELC-ALC) 2 kinds of lenses can be chosen by means of ELC/ALC switch: • DC driver lenses (without amplifier); put the switch on position ALC. The electronic shutter speed is automatically changed according to environment lighting conditions; if the obtained image is not clear and sharp it is possible to change camera LEVEL adjustments.
-
Page 13: Cleaning The Device
CLEANING THE DEVICE • Rub delicately with a dry cloth to remove dust and dirt. • Dip the cloth in neutral detergent if dirt cannot be eliminated with a dry cloth alone. • Do not use volatile liquids (such as petrol, alcohol, solvents, etc.) or chemically treated clothes to clean the device to prevent deformation, deterioration or scratches to the paint finish. -
Page 14: Technische Eigenschaften
DEUTSCH VORSICHTSMASSNAHMEN • Nach dem Auspacken des Gerätes muss sichergestellt werden, dass es sich in einwandfreiem Zustand befindet. • Ausführen jeglicher Reinigungs- oder Wartungsarbeiten, Gerät Stromversorgungsnetz trennen. Für die Reinigung des Geräts keine Sprays verwenden. • Wenn extern installiert, ist die Positionierung in einer geschützten Umgebung vorzuziehen, d.h., nicht in direktem Kontakt mit großen Witterungseinflüssen (Regenfälle oder erhöhte Temperaturen). -
Page 15: Identifizierung Der Teile
IDENTIFIZIERUNG DER TEILE Befestigung Halterungsfußes Fuß für Befestigungshalter Einfache CCD Abdeckung Schärfeeinstellung AUTO-IRIS Verbinder Videoausgang LEVEL Einstellung AUTO-IRIS Anschluss 230V AC Versorgung Dip Switch INSTALLATION • DIE CCTV KAMERA MUSS GEERDET WERDEN. Die Versorgungsleitung muss wie folgt angeschlossen werden: GRÜN-GELB:..........Erde BLAU: ............Nullleiter BRAUN: ............ - Page 16 INSTALLATIONSBESTIMMUNGEN • Die Kamera nicht in Regen oder Feuchtigkeit ausgesetzten Umgebungen installieren. In diesen Fällen die dafür vorgesehenen Gehäuse verwenden. • Wird die Kamera in Umgebungen mit wechselndem Lichteinfall eingesetzt, muss die Verwendung mit AUTO-IRIS Objektiven vorgesehen werden. • Zum Schutz der Überhitzung bitte das Gerät in gut klimatisierten Bereichen montieren. •...
- Page 17 VORGANG DER SCHARFEINSTELLUNG MIT AUTO-IRIS OPTIKEN Den DIP-Switch ELC/ALC auf ELC positionieren (bei Einsatz von DC gesteuerten Objektiven). Ausrichtung der Kamera auf den gewünschten Bildausschnitt und dafür sorgen dass gute Lichtverhältnisse im gewünschten Bildausschnitt vorhanden sind; den LEVEL-Regler drehen, bis ein weißes Bild erscheint.
-
Page 18: Dip Switche
DIP SWITCHE Steuerung der AUTO-IRIS (ELC-ALC) Mittels des Dip-Switches ELC/ALC ist es möglich, zwei Objektivtypen auszuwählen: • DC gesteuerte Objektive (ohne Verstärker); den Schalter auf die Position ALC Stellen. Die Geschwindigkeit des elektronischen Shutters passt sich automatisch den gegebenen Lichtverhältnissen an; sollte kein klares und sauberes Bild erzielt werden können die LEVEL- Einstellungen der Kamera verwendet werden. -
Page 19: Reinigung Des Gerätes
REINIGUNG DES GERÄTES • Um Staub und Schmutz zu entfernen, Gerät mit einem trockenen Tuch abreiben. • Sollte der Schmutz mit einem trockenen Tuch nicht zu entfernen sein, Gerät mit einem feuchten Lappen und Neutralreiniger abwischen. • Um Verformungen, Beschädigungen oder Kratzer im Lack zu verhindern, keine flüchtigen Flüssigkeiten wie Benzin, Alkohol, Lösungsmittel etc. - Page 20 Prodotto in Cina su specifica URMET Domus DS1092-073 Made in China to URMET Domus specification FILIALI SEDE 20151 MILANO – V.Gallarate 218 Tel. 02.380.111.75 - Fax 02.380.111.80 URMET DOMUS S.p.A. 00043 CIAMPINO (ROMA) V.L.Einaudi 17/19A 10154 TORINO (ITALY) Tel. 06.791.07.30 - Fax 06.791.48.97 VIA BOLOGNA 188/C 80013 CASALNUOVO (NA) V.Nazionale delle Puglie 3...
Need help?
Do you have a question about the 540 TVL 230Vac and is the answer not in the manual?
Questions and answers