Table of Contents
Advertisement
Quick Links
Advertisement
Table of Contents

Subscribe to Our Youtube Channel
Related Manuals for Hawking H-BR49


Summary of Contents for Hawking H-BR49
- Page 1 H-BR49 4-Port Broadband Router...
- Page 2 Trademarks & Copyright Windows 95/98/ME and Windows NT/2000/XP are registered trademarks of Microsoft Corp. All other brands and product names are trademarks of their respective companies. No part of this publication may be reproduced in any form or by any means or used to make any derivative (such as translation, transformation or adaptation) without the express written consent of the manufacturer as stipulated by the United States Copyright Act of 1976.
- Page 3 Hawking Customer Service in order to obtain a Return Authorization number. Warranty is for repair or replacement only. Hawking Technology does not issue any refunds. BE SURE TO HAVE YOUR PROOF OF PURCHASE.
- Page 4 Introduction……………………………………………………………………………5 Factory Default Settings…………………………………………………………….10 Configuration via the Web………………………………………………………...13 Changing Passwords…………………………………………………………………42 Configuration via GUI……………………………………………………………….43 FAQ…………………………………….…………………………………………….57 Appendix……………………………………………………………………………. 65...
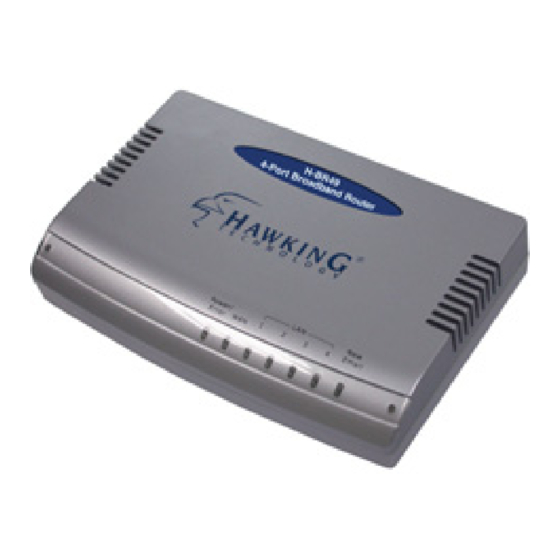
- Page 5 The H-BR49 Broadband Router is an integrated Internet IP sharing device with a built-in 4-port 10/100Mbps N-Way Fast Ethernet switch. It has superb throughput of up to 35Mbps between Internet and LAN, making it the perfect solution to connect a small group of PCs to a high-speed broadband Internet connection.
- Page 6 Figure : Sample Application...
- Page 7 Features • Superb performance with throughput of up to 35Mbps between Internet and LAN. • Web and GUI management. • Supports PPPoE. • Supports VPN. (PPTP, IP- Sec pass thru) • Supports Auto MDI/MDIX for the LAN and WAN ports. •...
- Page 8 Part Names and Functions LED Indicators on the Front Panel 1 2 3 4 5 Figure 2: LED Indicators and Ports Indicator Power /Error 1 (LAN) 2 (LAN) 3 (LAN) 4 (LAN) New E-Mail Ports on the Rear Panel Color Status Color Solid...
- Page 9 Port/button 5V DC Internet Local (1-4) (Factory) RESET Functions Connects the power adapter plug. Connects to a Cable/xDSL modem. Four RJ-45 dual-speed (10/100Mbps) auto-sensing ports for connecting with either 10Mbps or 100Mbps Ethernet connections. Press for at least 5 seconds to restore to factory settings. Performing the Factory Reset will erase all previously entered device settings.
-
Page 10: Information From Isp
Password Default setting: No password. Setting up a password: When configuring the device, press Enter to login the configuration for the first time. It is recommended that you set a password for security and management purposes. Password forgotten? If you forget the password, you can reset the device to the factory setting. -
Page 11: For Catv Dynamic Mode
For CATV dynamic mode: Adapter Address Device/Computer Name (or Host Name by some ISP.) Domain Name Some Internet Service Providers (ISP) require that you register the MAC address of your network card/adapter, which was connected to your cable or DSL modem during installation. - Page 12 For DSL dynamic mode: PPPoE Account Info Username Password Service Name Static IP Address Static DNS Server For Static Mode: ISP-assigned IP address Subnet mask Gateway DNS server #1 DNS server #2 Provided by your ISP Provided by your ISP. Provided by your ISP.
- Page 13 Before you start setting up IP Sharing via browser-based web configuration, make sure that: • Assuming the workstation’s TCP/IP is set to obtain IP automatically and the IP Sharing Device’s Local Port is set to “Distribute IP” (default), and all the cables are connected correctly, you are now ready to configure this device via Web Browser.
-
Page 14: Wan Port
List), Factory Reset, Save Configuration, or Firmware Upgrade. Click on the desired setup item to expand the page in the main navigation pane. The setup pages covered in this utility are described below. WAN Port The opening screen contains settings for the Global (Internet connection) interface. -
Page 15: Device Information
Device Information Adapter Address Device/Computer Name Domain Name IP Config Figure 5 This field is grayed out because the Adapter Address is not supposed to be entered randomly. Do Not alter the content unless you are sure it is necessary to modify your MAC address. - Page 16 PPPoE (DSL dynamic Mode) If this mode is selected and settings are saved, this IP sharing device will be connected to the Internet over an always-on connection by a method provided by PPPoE. PPPoE offers simulated dial-up software like Microsoft Dial-Up Networking, which saves the time and effort required to run the program from a PC.
- Page 17 Device Information Adapter Address Device/Computer Name Domain Name PPPoE Account Username Password This field is grayed out because the Adapter Address is not supposed to be entered randomly. Do Not alter the content unless you are sure it is necessary to modify your MAC address.
- Page 18 For identification purposes: if it is required, your ISP will provide you with the information. Max packet size (TCP MSS): Click the down arrow to select the most appropriate MSS (maximum segment Service Name size; the default value is 1452) for your application.
-
Page 19: Device Configuration
Note that there may be more than one IP address from your ISP; select one address and enter it in the corresponding field. Device Configuration Adapter Address Figure 7 This field is grayed out because the Adapter Address is not supposed to be entered randomly. -
Page 20: Lan Port
Device/Computer Name Domain Name IP Address Subnet Mask Gateway Primary/Secondary SAVE UNDO LAN Port This screen contains settings for the LAN interface corresponding to the local network. You can change the setting to distribute the IP address to local PCs, if desired. -
Page 21: Private Network
Private Network IP Address Subnet mask DHCP Server Do not distribute IP address to local computers Distribute IP addresses to local computers Figure 8 Default: 192.168.1.254 (this is the local address of this IP Sharing device) Default: 255.255.255.0 Check this radio button to disable this IP Sharing device from distributing IP Addresses (DHCP Server disabled) Check this radio button to enable this... - Page 22 Start IP address Number of IP addresses Static DHCP IP & MAC address WINS server SAVE UNDO The starting address of this local IP network address pool. The pool is a piece of continuous IP address segment. Keep the default value at 192.168.1.1, which should work for most cases.
-
Page 23: Advanced Setup
Advanced Setup Management In this management page, you can: 1. Change Administrator’s password: change the password for the device. 2. Limit Management: Enables two stations to manage this IP Share through Web configuration. Enter the MAC addresses of the stations you selected for management. - Page 24 Change Administrator’s password: 1. Click the checkbox to enable this change. 2. Enter the new password. 3. Re-enter the new password for confirmation. Limit Management 1. Click the checkbox to enable this function. 2. Enter the network adapter MAC address for Station 1. 3.
-
Page 25: Virtual Server
Modify the Configuration Port: 1. Click the checkbox to enable this function. 2. Input the port number for web configuration. The default web port for configuration is set to 80. If you want to change the default setting, input the appropriate port number. - Page 26 Add Server Method: You can select to set up a virtual server either by name or by port By Name number. By Port Select and click ▼ to scroll down. Select from the most popular Application server applications for the Virtual Server. (Port) Please select the port type (TCP or UDP) for the port number that Port Type...
-
Page 27: Packet Filters
UNDO Click UNDO to clear all the settings on this page. Each time you finished setting, click ADD and the added servers will appear on the Server List. DELETE ALL Click to delete all the servers on the list. DELETE Click the Index drop-down menu to select the desired server number and then click DELETE to delete only the selected server. - Page 28 Network Adapter Address Filter IP Address Filter Single/Range IP Range Direction TCP/UDP Port Filter Filter/Forward Please note that performing the Factory Reset will erase all previously entered device settings. Single/Range Port Number Port Type Filter according to the local computer’s network adapter MAC address (also known as the adapter card’s Physical Address).
-
Page 29: Static Router
Every time you finish setting the filters, click the ADD button and the added filter will appear on the Filter List Click UNDO to clear all the settings in this category UNDO Filter List Displays all the Packet Filters. DELETE ALL Click to delete all the filters on the list. - Page 30 To set the static routers: 1. Select “Static Route #1” or “Static Route #2”. 2. Enter the settings. 3. You can refer to the following two example applications for settings. When finished, click SAVE to save settings. Click UNDO to clear all entries.
- Page 31 Figure 17 Figure 18...
-
Page 32: Check E-Mail
Check E-Mail Check E-Mail: You may input your mail account on this IP Share and the device will check e-mails at the frequency that you previously set for the desired interval time. 1. Select the LED number and enter the account name, password, the name of the incoming mail server (POP3: i.e. -
Page 33: Dynamic Dns
Dynamic DNS The Dynamic DNS (Domain Name Server) allows you to alias a dynamic IP address to a static hostname, enabling your device to be more easily accessed by specific name. When this function is enabled, the IP address in the Dynamic DNS Server will be automatically updated with the new IP address provided by the ISP. -
Page 34: Network Status
Check to enable the Wildcard function. To learn more about Enable Wildcard Wildcard, please refer to the FAQ section. To learn more about MX (Mail Exchanger), please refer to the FAQ Mail Exchanger section. Check to have the Backup MX service enabled. Backup MX? Displays the results of the action. - Page 35 RELEASE/DISCONNECT RENEW/CONNECT Sessions List Displays active Internet sessions through this device. REFRESH IP Client/ Port Client Port Fake Click on this button to disconnect from the ISP and release all the IP information on the WAN port. Click on this button to reconnect to the ISP and renew all IP information on the WAN port.
- Page 36 IP Remote/Port Remote Idle Users List Displays the current active users. Click the REFRESH button to refresh the list. The outside network IP address/port number for the other end of the session. The idle time of the session. If the idle time is too long (more than 15 minutes), the device will disconnect the idled session.
- Page 37 Others Factory Reset To reset to factory default setting, click the GO button. Please note that performaing the Factory Reset will erase all previously entered device settings. Figure 24 Save Configuration This function enables users to always save the current configurations as a file (i.e. config.sav), so that no re-entry is required when users want to switch between various configurations.
- Page 38 Figure 26 Figure 27 When prompted in the upper left screen, select “Save this file to disk”, and the upper right screen will prompt you a dialog box to enter the file name and the file location. Please not that the configuration file is in .sav format. Load Configuration from File File Path/Name: If you want to load a configuration file, enter the file name with the correct path and then click on LOAD.
- Page 39 Firmware Upgrade 1. Download the latest firmware from your distributor and save the file on the hard drive. 2. Make sure all computers in the network are off, or connect the Broadband Router directly to the PC that has the new firmware. 3.
- Page 40 The device has no password by default. It is recommended that you set a password to ensure that no one can adjust the device’s settings. 1. On the setup home page, select Detail Setup at the left panel. 2. Click on Advanced Setup and the click on Management. 3.
- Page 41 Getting Started Note: • To use this GUI, you must have IE 4.01 or above preinstalled. • Before using this GUI program, be sure you have properly configured your computer by following the instructions in the quick installation guide. (For the first installation, insert the provided setup CD-ROM in your CD drive;...
- Page 42 1. To configure this Broadband Router via the setup program, click Basic Setup Tool. You will enter the setup screen. 2. When the opening screen appears, you will be prompted a list of the current active devices in the network. The configure dialog box is categorized into several tabs that are detailed in the following sections.
- Page 43 Click Management The current firmware version (Read-only) Firmware Version Change Administrator In this dialog box, you can set the administrator’s password. Password Enter the new password. New Password Confirm New Password Enter the password again to confirm. on the tool bar to configure the selected device. Figure 32...
- Page 44 Check to enable the modification for the web configuration port Modify the number setting. In the corresponding field, enter the port number for configuration port Web Configuration. Click to save the setting. SAVE Click to cancel the setting. CANCEL LAN Port Figure 33...
- Page 45 IP Address • Default: 192.168.1.254 SubNet mask • Default: 255.255.255.0 Do not distribute IP address to local computers Checking this radio button to disable this Broadband Router from distributing IP addresses to the local network. Distribute IP addresses to local computers Click this radio button to enable this Broadband Router to distribute IP addresses.
- Page 46 CATV dynamic Mode Figure 34: CATV Dynamic Mode...
- Page 47 Adapter Address Device/Computer Name Domain Name IP Config DNS Server Dynamic Static PPPoE (DSL dynamic Mode) It is necessary for some ISPs to identify the device by its IP. Adapter Address Device/Computer Enter a descriptive name for identification purpose. Name Domain Name For example: yourcompany.com.
- Page 48 Figure 35 PPPoE Account Active Profile You can set up to three PPPoE accounts (only one account can be enabled at a time). To set the profile, select the profile number, enter all the information,...
- Page 49 and then click SAVE. The device will save the information, restart and return to the previous menu page. If you don’t see the saved information on the screen from the menu on the left, click on the “Global Port” to refresh the screen. The maximum input is 52 alphanumeric characters (case sensitive).
-
Page 50: Static Mode
Static Mode Adapter Address Device/Computer Name Figure 36 It is necessary for some ISPs to identify the device by its Enter a descriptive name for identification purposes. - Page 51 Domain Name IP Config. Dynamic Static IP Address Subnet Mask Gateway DNS Server Dynamic Static Primary/Secondary Upgrade 1. Ask your local distributor to get the latest firmware's updated version. 2. Download and store the updated program into the server's hard disk. 3.
- Page 52 Factory Reset To reset to factory default setting, click the reset button on the tool bar. A warning message appears to advise you that you will lose your settings for the device. Click OK to continue or Cancel to exit. WAN IP Displays the current Internet connection status.
- Page 53 User List Displays the current active users. Refresh: Click this button to refresh the list. Figure 39...
- Page 54 Session List Displays active Internet sessions through this device. Refresh: Click on this button to refresh the list and get the latest session list. Figure 40...
- Page 55 When Should I modify the MAC address for WAN/global port settings? Some ISPs identify their clients by accessing the MAC address and the host names. Therefore, this information is required for identification purposes. The MAC address required for WAN/global port settings is the adapter address for the IP Sharing you are now configuring.
- Page 56 on the Internet. You must register with a Dynamic DNS Client to use this service. Please go to HTTP://WWW.DYNDNS.ORG for more information. What is a Wild card ? A wildcard alias is a method that is used to give your hostname multiple identities.
-
Page 57: Cannot Access The Internet
How do I know if I am using PPPoE? If you are using a broadband connection and you are asked to login a user name and password in order to connect, you are using PPPoE. Or, if you are still unsure, please contact your ISP or call Hawking Tech Support. - Page 58 If the LED indicator for the broadband signal is not lit, please contact your ISP. Check the status of your H-BR49. After checking the cabling, you should also check to see if you have entered the correct user name and password provided by your ISP.
- Page 59 Check the logical connectivity from your computer to the Internet. Refer to the section "PING.EXE" in the "TCP/IP Network diagnosis" chapter. Follow the steps described in that chapter to determine the source of the problem. Diagnosis TCP/IP Network Diagnosis Execute WINIPCFG.EXE or PING.EXE for TCP/IP network diagnosis. WINIPCFG The WINIPCFG program (for Win95, 98, and ME) is used to gather information about the TCP/IP connections that are active on your system.
- Page 60 Note: Under “Ethernet Adapter Information”, select the correct Ethernet adapter that is installed on your computer. Figure 43: IP Configuration Click the More Info button to get detailed configuration information.
- Page 61 Figure 44: IP Configuration On the top, the computer’s “Host Name” and “DNS server” are configured to call when it is looking for a named resource. The default gateway is the server through which the client connects to the Internet. The DHCP Server identifies the network server that assigns IP addresses to computers on the network.
- Page 62 If the product is working properly, the following should be apparent from this screen: 1. The Client should have an IP address within the prescribed range (default 192.168.1. #; where # is from 1 ~ 253). The “DHCP” and “Default Gateway” should list the product’s local port address (the device’s IP address;...
-
Page 63: Internet Connectivity Checkup
4. The server (IP address) is online if the following message appears: Reply from 192.168.0.1: bytes=32 time=3ms TTL=100 5. The destination device is not reachable if the following message appears: Reply from 192.168.0.1: Destination host unreachable or Request timed out. ISP Connectivity Checkup Issue a PING command to the IP address of your ISP’s gateway or DNS server. -
Page 64: Appendix A: Specifications
Appendix A: Specifications Standards Ports Cabling type Protocols Supported Management LED indicators Input power specifications Physical Dimension Weight Agency and Regulatory Operating Temperature Operating Humidity IEEE 802.3 10Base-T Ethernet IEEE 802.3u 100Base-TX Fast Ethernet IEEE 802.3x Flow Control WAN: One 10/100Mbps RJ-45 port for Cable/DSL Modem LAN: Four 10/100Mbps switched ports UTP Category 3 or better (10Base-T) UTP Category 5 or better (100Base-TX) -
Page 65: Appendix B: Supported Internet Applications
Appendix B: Supported Internet Applications Application Settings for Outgoing Connection ICQ98a, 99b None ICQ2000b, DMZ function enabled ICQ2001b NetMeeting None 2.1 & 3.0 2300-2400 (tcp) 2300-2400 (udp) 47624 (tcp) None VDO Live MIRC None Cu-Seeme 7648 (tcp) 7648 (udp) 24032 (udp) 5632 (udp), 22 (udp), PCAnywhere 5631(tcp), 65301(tcp) -
Page 66: Appendix C: Wan Port Link Status
Appendix C: WAN PORT LINK STATUS PPPoE link status “PPPoE offline. Ready to connect.” "Connecting to server." "Server found." "Start PPP negotiation." "Authentication (PAP)." "Authentication (CHAP)." "Obtaining WAN IP address." "Connect successfully." "Can not find server." "Fail on LCP stage." "Authentication (PAP) failure."... -
Page 67: Dhcp Link Status
DHCP link status "DHCP already claimed" "DHCP under claiming" Static IP assignment link status “Static assigned” The device obtained the IP address from the DHCP server. The device is trying to obtain the IP address from the DHCP server. The IP address succeeds in setting up manually.
Need help?
Do you have a question about the H-BR49 and is the answer not in the manual?
Questions and answers