Table of Contents
Advertisement
Quick Links
USER'S MANUAL
TELEPHONE
888.990.1236
805.988.0215
www.planetaudiousa.com
FAX
805.988.0275
TECHNICAL SUPPORT
www.planetaudiousa.com/support
P350UA
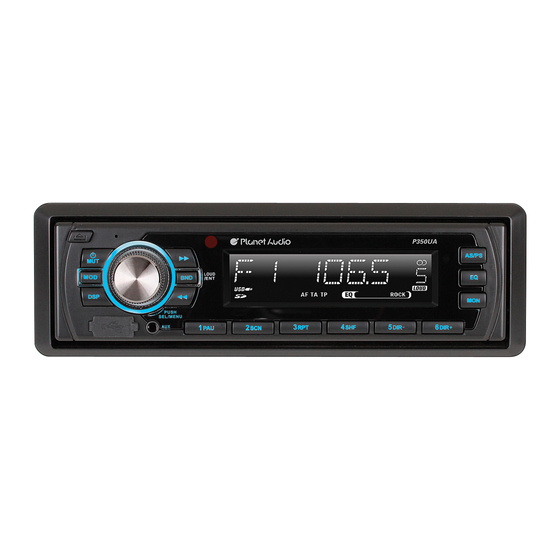
MP3-Compatible Digital Media AM/FM Receiver
with USB and SD Memory Card Ports and Front Panel AUX Input
P350UA 02.2012
all specifications subject to change without notice
© 2012 Planet Audio
Advertisement
Table of Contents

Summary of Contents for Planet Audio P350UA
- Page 1 USER’S MANUAL TELEPHONE 888.990.1236 805.988.0215 www.planetaudiousa.com 805.988.0275 TECHNICAL SUPPORT www.planetaudiousa.com/support P350UA MP3-Compatible Digital Media AM/FM Receiver with USB and SD Memory Card Ports and Front Panel AUX Input P350UA 02.2012 all specifications subject to change without notice © 2012 Planet Audio...
- Page 2 P350UA OWNER’S MANUAL Mobile Audio System PLL Synthesizer Stereo Radio Automatic Memory Storing Detachable Panel Preset Equalization Memory Card Interface USB Interface Auxiliary Input Function Remote Control...
-
Page 3: Table Of Contents
CONTENTS Installation ........... 3 Previewing all tracks......8 DIN Front-Mount (Method A)....3 Repeating the same track ....8 Playing all tracks in random....8 Installing the unit ....... 3 Selecting tracks by AS/PS button ..8 Removing the unit ......3 Display information......8 DIN Rear-Mount (Method B) .... -
Page 4: Installation
INSTALLATION Notes: After inserting the holder into the dashboard, Choose the mounting location where the unit select the appropriate tab according to the will not interfere with the normal driving thickness of the dashboard material and bend function of the driver. them inwards to secure the holder in place. -
Page 5: Using The Detachable Control Panel
USING THE DETACHABLE CONTROL PANEL Precautions when handling To Detach the Control panel Do not drop the control panel. 1. Press the release button ( ) on the front Do not put pressure on the display or control panel and pull off the control panel. buttons when detaching or re-installing the control panel. -
Page 6: Wiring Connection
WIRING CONNECTION FOR 4X50W SYSTEM... -
Page 7: Operation
OPERATION LOCATION OF KEYS Tune/seek/track up button Release button /MUT button 4. Volume knob (when rotated) SEL button (when pressed) 5. EQ button 6. DSP button 7. MON button 8. MOD button 9. AS/PS/Navi-SCH button Tune/seek/track down button 11. Remote sensor 12. -
Page 8: Mute
OPERATION activate automatic seek function. Press for MUTE several seconds until “MANUAL” appears on the Press /MUT button (3) to mute down the display, the manual tuning mode is selected. If sound instantly. Press again to resume the both buttons have not been pressed for several sound. -
Page 9: Pausing Playing
OPERATION PAUSING PLAYING MEMORY CARD OPERATION Press PAU button (14) to pause the playing. There is a memory card interface (24) on the Press it again to resume play. housing the unit. When you insert a memory card in the memory PREVIEWING ALL TRACKS card interface, the unit will search the MP3 files Press SCN button (15) to play first several... -
Page 10: Remote Control
REMOTE CONTROL 1. VOL+: Volume Up Button (MUTE): Power On/Off/MUTE Button 3. SEL: Sound Mode Select Button 4. TUNE/SKIP : Tune/Seek Down Button 5. DISP: Display Button 6. VOL-: Volume Down Button 7. 1 PAU: Pause Button 8. 1-6: Preset Buttons 9. -
Page 11: Trouble Shooting
TROUBLE SHOOTING Before going through the checklist, check wiring connection. If any of the problems persist after checklist has been made, consult your nearest service dealer. Symptom Cause Solution The car ignition switch is not If the power supply is connected No power.


Need help?
Do you have a question about the P350UA and is the answer not in the manual?
Questions and answers