OKIDATA ML320 User Manual
Hide thumbs
Also See for ML320:
- Service manual (294 pages) ,
- Quick manual (2 pages) ,
- Instructions (1 page)
Table of Contents
Advertisement
Quick Links
Advertisement
Table of Contents

Related Manuals for OKIDATA ML320


Summary of Contents for OKIDATA ML320
- Page 1 User's Guide ML320/321 Turbo...
- Page 2 Every effort has been made to ensure that the information Year 2000 Compliance in this document is complete, accurate, and up-to-date. All products currently sold by Okidata are Year 2000 OKIDATA assumes no responsibility for the results of Compliant. Each product contains information technology errors beyond its control.
- Page 3 Your OKIDATA printer has been carefully designed to give • The printhead can get quite hot when it has been printing you years of safe, reliable performance. As with all electrical for a length of time. Do not touch the printhead until it has equipment, there are a few basic precautions you should take had a chance to cool off.
- Page 4 • If you’re using an extension cord or power strip with the • If anything happens that indicates that your printer is not printer, make sure that the total of the amperes required by working properly or has been damaged, unplug it immedi- all the equipment on the extension is less than the ately and follow the procedures in Section 6 for having extension’s rating.
-
Page 5: Table Of Contents
Features ................1 Selecting a Printer Driver ..........12 Optional Accessories ............1 Printer Drivers ............. 12 OKIDATA Drivers ............12 Unpacking ................1 Getting to Know Your Printer ..........2 Section 2: Maintaining your Printer Removing the Shipping Restraints ........3 Replacing the Ribbon Cartridge ........ - Page 6 Section 6: Service Material Safety Data Sheet ............53 Getting Service and Support ..........37 Your Dealer ..............37 The Okidata Customer Support Center ....... 37 Okidata Automated Information Service ....37 Okidata Customer Support Representatives ... 37 Okidata Faxable Facts ..........38 Okidata Service Locations ..........
-
Page 7: Section 1: Getting Started
(0.79 mm) thick through the bottom feed path using the optional push and/or pull tractor. • Cut Sheet Feeder which takes up to 100 sheets • Roll Paper Stand (ML320 Turbo only) • Advanced paper handling, with built-in rear push tractor and zero-tear forms capability See Section 6 for ordering information. -
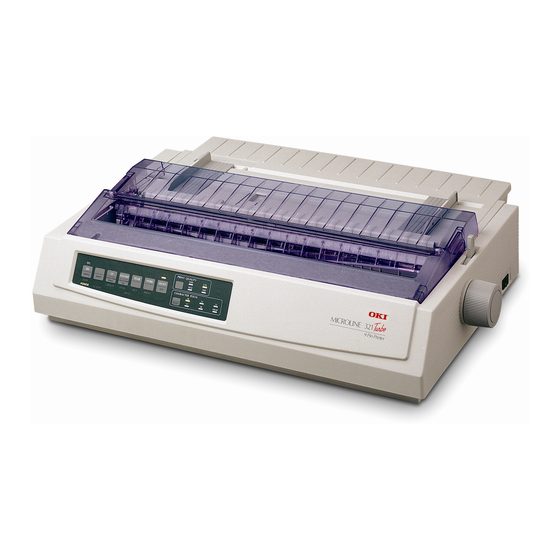
Page 8: Getting To Know Your Printer
Getting to Know Your Printer Acoustic Cover (Open) Paper Guides Acoustic Cover Access Cover Paper Separator Paper separator Access Cover On-Off Switch On-Off Switch Control Panel Control Panel Platen Knob Paper Lever Platen Knob Paper Lever Set up for Rear Feed of Continuous Forms Set up for Single-Sheet Feed E-2 Section 1... -
Page 9: Removing The Shipping Restraints
3. Replace the paper separator . Removing the Shipping Restraints 1. Open the access cover ( ) and remove the printhead shipping retainer ( ). Note: Save the shipping retainers and the packing material in case you ever need to ship the printer. 2. -
Page 10: Installing/Replacing The Ribbon Cartridge
4. Unpack the ribbon cartridge. Installing/Replacing the Ribbon Cartridge 1. Make sure the printer is turned OFF. Grip points Ribbon shield 2. Center the printhead ( ). Take-up knob Important! Do NOT remove the ribbon shield from the ribbon! 5. Install the new ribbon cartridge. 3. -
Page 11: Connecting To The Computer
Connecting to the Computer Connecting to the Power 1. Make sure both the printer and the computer are OFF. Note: FCC regulations require the use of a shielded cable 2. Plug the power cord into the back of the printer ( ), no longer than 6 ft. -
Page 12: Loading Paper
2. Grasp the paper separator by the tabs and lift it off the Loading Paper printer. Loading Continuous Forms (Rear Feed) We recommend the rear-feed path for printing reports, etc., on single-thickness, continuous-form paper. For graphics or charts, it's best to use the single-sheet path (top feed). Note: If you have paper in the paper path, be sure to remove it before installing rear-feed paper. - Page 13 5. Place the first two holes in the paper over the tractor pins 7. Fine-tune the position of the right tractor to center the on either side and close the tractor covers. holes in the paper on the pins, and push back the right lock lever.
-
Page 14: Loading Single Sheets (Top Feed)
4. Make sure the wire feed Loading Single Sheets (Top Feed) guide ( ) is secured Use the single-sheet path for letterhead stationary, memos, in the sheet guide. and individual envelopes. Note: If you have continuous-form paper in the path, press to remove it before loading single sheets. -
Page 15: Setting The Top Of Form (Tof)
Setting the Top of Form (TOF) Temporarily Changing the Print Start Position When setting the Top of Form, use the red line ( ) on the paper shield as a reference: To change the print start position lower for one page only: 1. -
Page 16: Setting The Printhead Gap
( ) to the recommended setting from the table. pull tractor), the printhead gap range can be expanded to take forms up to 0.031" (0.79 mm) thick. For more information, call Okidata Faxable Facts (1-800-654-6651) and follow the recorded message to have document # 2361 faxed to you. -
Page 17: Running The Self Tests
FX (ESC/P) ® • IBM Proprinter III (PPSII) — factory setting To run the test: To run the test: ® ® • OKIDATA MICROLINE Standard Turn the printer Turn the printer off, then press off, then press Changing Emulations and hold the... -
Page 18: Selecting A Printer Driver
The drivers below are listed by decreasing compatibility and higher, through any of the following means: with your printer: use one as close to the top of the list as possible. Contact the Okidata WorldWide Web site at http://www.okidata.com Epson FX IBM Proprinter III ®... -
Page 19: Section 2: Maintaining Your Printer
Note: Make sure the printer is turned off before you the Ribbon Cartridge” in Section 1. For the best results, use open the access cover. genuine OKIDATA ribbons, Part. No. 52102001. Clearing Paper Jams Rear-Feed Jams 1. Turn the printer OFF and use the platen knob to back the paper all the way out. - Page 20 4. Remove the paper separator and reload paper. 6. Turn the printer on. 7. Press FF/LOAD 5. Replace the the paper separator, replace the pull-up roller assembly, and close the access cover. FF/LOAD Micro Feed ITEM E-14 Section 2...
-
Page 21: Correcting Repetitive Rear-Feed Jams
4. Fold some continuous-form paper over three times to Correcting Repetitive Rear-Feed Jams make a page four sheets thick, load it on the tractors and If the paper keeps jamming, you probably have bits of close the covers. paper stuck in the paper path. 1. - Page 22 6. Remove the paper pieces, and use the platen knob to 8. Replace the pull-up roller assembly, and close the back the paper out. access cover. 9. Turn the printer on. 7. Reload regular paper and reinstall the paper separator. 10.
-
Page 23: Single-Sheet Jams
4. Remove any torn pieces from around the carriage. Single-Sheet Jams 5. Reinstall the pull-up roller assembly, and close the 1. Turn the printer off. access cover. 2. Use the platen knob to back the jammed paper out. 7. Turn the printer on, and reload paper. 3. -
Page 24: Cleaning The Housing
4. Reinstall the pull-up roller assembly, and close the Cleaning the Housing access cover. You should clean the printer every six months (or after about 300 hours of operation). Note: Never use solvents or strong detergents on the cabinet: they could damage the housing. 1. -
Page 25: Section 3: Using Your Printer
ection 3: Using Your Printer Print Mode: Indicator Lights PRINT QUALITY FF/LOAD TEAR PARK QUIET Micro Feed Micro Feed MENU SHIFT CHARACTER PITCH Down ITEM PRINT EXIT GROUP PROP POWER ALARM MENU ALARM : Glows = error condition exists: SEL: Glows = printer selected, ready to receive data out of paper (no other lights blinking) Flashes = printer in Print Suppress Mode... -
Page 26: Print Mode: Control Panel Keys
Print Mode: Control Panel Keys PRINT QUALITY FF/LOAD TEAR PARK QUIET Micro Feed Micro Feed MENU SHIFT CHARACTER PITCH Down ITEM PRINT EXIT GROUP PROP POWER ALARM MENU SEL: Selects/deselects printer. When held on power PRINT QUALITY : Selects print quality and font. up, or with SHIFT key, engages Menu Mode: FF/LOAD : Loads/ejects single sheet of paper;... -
Page 27: Selecting The Print Quality
HSD: High Speed Draft Selecting the Print Quality • Lower quality, faster speed Important! • Gothic font only Front panel settings for print quality and character pitch • Recommended for drafts. are overridden by software commands. The lights will always reflect the printer's state. SSD: Super Speed Draft •... -
Page 28: Selecting The Character Pitch
Menu Mode: Control Panel Selecting the Character Pitch In the Menu mode, you can use the front panel buttons to Press to select the width of CHARACTER PITCH/RESET change the defaults for the printer parameters. The changes characters in characters per inch, or Proportional: you make in the Menu mode are automatically saved when CHARACTER PITCH you exit the Menu mode and are retained even if you turn... -
Page 29: Entering And Exiting The Menu Mode
Entering and Exiting the Menu Mode Changing the Menu Settings To enter or exit the Menu Mode, hold while pressing 1. Press to enter the Menu Mode. SHIFT SHIFT 2. Use the keys to make your GROUP ITEM changes: Resetting the Menu Press until the Group you wish to change GROUP... -
Page 30: Summary Of Menu Settings
Summary of Menu Settings The table below shows the items which may appear in the menu. Settings which are engaged at the factory (defaults) are set in bold italic. Some groups or entries will only appear when a specific emulation is engaged, as noted. Group Item Setting... - Page 31 Group Item Settings Bottom Feed Line Spacing 6 LPI, 8 LPI Form Tear-Off Off, 500 mS, 1 sec, 2 sec Skip Over Perforation No, Yes Page Width (wide model only) 13.6", 8" Page Length 11", 11-2/3", 12", 14", 17", 3", 3.5", 4", 5.5", 6", 7", 8", 8.5" Top Feed Line Spacing 6 LPI, 8 LPI...
- Page 32 Group Item Settings Set-Up Reset Inhibit No, Yes (continued) Print Suppress Effective Yes, No Auto LF No, Yes Auto CR No, Yes Print DEL Code* No, Yes SI Select Pitch (10 cpi) 17.1 cpi, 15 cpi SI Select Pitch (12 cpi) 20 cpi, 12 cpi Time Out Print Valid, Invalid...
-
Page 33: Explanations Of Menu Items
Buffer Clear printing narrow columns. Select Mode 1 for Model dumps the buffer contents immediately. Invalid causes the ML320; select Mode 1 or Mode 2 for Model ML321. printer to ignore the I-Prime command. Using Your Printer E-27... - Page 34 Language Set. Replaces certain standard symbols with Print Mode. Choose the quality and speed of printing. special characters used in foreign languages. Print Registration. Change the setting as required to Line Spacing. Change to 8 lines per inch to get more lines obtain the best registration for bi-directional printing.
-
Page 35: Using The Printer's Features
Skip Over Perforation. Change to Yes if you want the Using the Printer's Features printer to go to the next page when it comes within 1" (25 Tear Feature mm) of the bottom of the page. Keep it set to No if your software has its own page formatting controls. -
Page 36: Forms Tear-Off Feature
3. Press ( ) until the time interval you wish to select Forms Tear-Off Feature appears in the third column. Important! Never engage Forms Tear-Off when printing on 4. Press ( ) + ( ) to exit Menu Mode and save SHIFT labels! the setting. - Page 37 ection 4: Troubleshooting Problem: Problem: Nothing happens when I turn on the printer. I'm getting strange symbols, incorrect fonts, etc., when I try to print a document. Solution: Check the power cord connection to the outlet. If you are Solutions: using a power strip, make sure it is turned on, and that the 1.
- Page 38 Problem: Problem: I've installed a new ribbon and the printing is smeared and The ALARM light is blinking. streaked. Solution: Solution: Try turning the printer off and then back on again. If the The ribbon shield is either loose or missing. Remove the light still blinks, call for service.
-
Page 39: Section 4: Troubleshooting
Problem: My word processor files do not print the way I have the menu and front panel set. Solution: Before sending a file to the printer, many word processors send either an “initialization string” or an I-Prime signal to the printer. The initialization string contains codes that override the panel and menu settings. - Page 40 5: Specifications Print Method: Impact dot matrix Emulations: Epson FX (ESC/P), IBM Proprinter III(PPSII), and OKIDATA Microline Printhead: 9 pins, 0.34 mm diameter, Standard co-resident thermal protection Print Speed: Interface: Standard: Centronics parallel, IEEE-284 compliant Mode Characters per second...
-
Page 41: Section 5: Specifications
Ribbon Life (on average, 3 million characters non-overlap 10 cpi utility) Card stock Bottom 120 lb. max. N.A. Transparencies — 8.5" x 11" NM = Narrow Model, ML320 Turbo WM = Wide Model, ML321 Turbo Selectable through software only. Specifications E-35... - Page 42 5 to 95% RH Dimensions (W x D x H) Electrical Requirements 120 volts ac (+5.5%, -15%), ML320 Turbo: 15.7 x 13.6 x 4.6 inches 60 Hz (±2%) (389 x 355 x 116 mm) Also available for 230 or 240 ML321 Turbo: 21.7 x 13.6 x 4.6 inches...
-
Page 43: Section 6: Service
Consult the store where you purchased your printer, or call a printout of your printer menu handy (see page 23). Please 1-800-OKIDATA for the location of the nearest Authorized call from a telephone close to your printer, so you can refer Okidata Service Dealer. -
Page 44: Okidata Faxable Facts
Av. Leonardo da Vinci, 1178/1182 have information faxed to you automatically through 1048 Buenos Aires, Argentina Jabaquara Okidata's Faxable Facts on-line document retrieval system: Sao Paulo, Brazil • Pricing & information on ribbons and other consumables Phone/Fax: (541) 371-4123 Phone: (5511) 5589-1518 Fax: (5511) 5584-0267 •... -
Page 45: Purchasing Replacement Parts & Accessories
• Order toll-free by phone at 1-800-OKIDATA, using VISA, MasterCard, or American Express. • Check office supply catalogs or your local stationery store. Most carry Okidata brand ribbons. Be sure to ask for genuine Okidata ribbons! • In Canada, call 905-602-6400 to order parts: VISA and American Express are accepted. -
Page 46: Accessories
Manu a l s u a l s u a l s u a l s u a l s Manual Order No. Service Manual ............59272601 User's Guide ............59270102 Reference Manual ........... 59258304 Accessories Accessories Accessories Accessories Accessories Accessory Order No. -
Page 47: Section 7: Commands
ASCII Decimal commands. For a listing of all the commands, along with Delete information on their use, request a copy of the OKIDATA MICROLINE Reference Manual by filling out the Reference Double Height On ESC w 1 27 119 49... - Page 48 Epson Command ASCII Decimal Epson Command ASCII Decimal Print Quality/Font Horizontal Tab Select HSD/SSD, Justification depending on Menu Left ESC a 0 27 97 48 setting for Draft Mode ESC ( 0 27 40 48 Center ESC a 1 27 97 49 Select NLQ ESC x 1 27 120 49...
-
Page 49: Ibm Proprinter Iii Commands
Epson Command ASCII Decimal IBM Command ASCII Decimal Subscript/Superscript Off ESC T 27 84 Character Sets IBM Set I ESC 7 27 55 Underline On ESC - 1 27 45 49 IBM Set II ESC 6 27 54 Underline Off ESC - 0 27 45 48 Publisher... - Page 50 IBM Command ASCII Decimal IBM Command ASCII Decimal Line Feed, Execute Print Quality, Select HSD ESC # 0 27 35 48 w/ Carriage Return Print Suppress On, ML320T ESC Q ETX 27 81 3 n/144" (n = 1 to 127) ESC % 5 n 27 37 53 n Print Suppress On, ML321T...
-
Page 51: Microline Standard Commands
OKIDATA MICROLINE Standard Commands Okidata Command ASCII Decimal Enhanced Printing On ESC H 27 72 Okidata Command ASCII Decimal Enhanced Printing Off ESC I 27 73 Backspace Form Feed Carriage Return Horizontal Tab, Execute Character Pitch Italic On ESC ! /... - Page 52 Okidata Command ASCII Decimal Okidata Command ASCII Decimal Paper Out Sensor Off ESC E 1 27 69 49 Superscript Printing On ESC J 27 74 Superscript Printing Off ESC K 27 75 Paper Out Sensor On ESC E 0 27 69 48...
- Page 53 Changes or modifications not expressly approved by a residential installation. This equipment generates, uses and OKIDATA may void your authority to operate this device. can radiate radio frequency energy and, if not installed and used in accordance with the instructions, may cause harmful interference to radio communications.
-
Page 54: Fcc/Ic/Ce Statements
FCC regulations. Changes or modifications not expressly approved by OKIDATA may void your authority to operate this device. IC RI Statement for 230/240-Volt Models This OKIDATA apparatus complies with the Class A limits for radio interference as specified in the Industry Canada Radio Interference Regulations. -
Page 55: Warranty
IMPLIED, INCLUDING, BUT NOT LIMITED TO, ANY PARTICULAR PURPOSE, SHALL EXTEND BEYOND Okidata will repair (or at its option, replace) at no charge, any THE RESPECTIVE WARRANTY PERIOD DESCRIBED defective component(s) of the MICROLINE printer for one ABOVE OF ONE (1) YEAR. - Page 56 Megatech Fax: (02) 781.9390 Tel: (541) 371-4123 Fax: (541) 371-4123 (Touch-Tone® needed) This Limited Warranty applies to this Okidata printer. How- BRAZIL ever, the procedure for obtaining service may vary outside the Oki Data do Brasil, Ltda Tel: (5511) 5589-1518 continental United States.
- Page 57 ndex Code page menu setting ..27 Envelope specifications ..35 Commands, ....41-46 Environmental Accessories ....1, 40 Humidity requirements ..36 Computer connection ..5 requirements ..... 36 ASCII test ......11 Continuous-form paper Epson commands ..41-43 Auto jams, clearing ...
-
Page 58: E-52 Index
Temperature requirements . 36 Print mode menu setting ..28 Rolling ASCII test ..... 11 Testing the printer ....11 Okidata service locations ... 38 Print quality ....... 21 Time out print menu Okidata commands ..45-46 Print registration menu setting ....... -
Page 59: Material Safety Data Sheet
For Black Ribbon (P/N 52102001) Carbon Black Nylon 6-6 Fabric CAS# 1333-86-4 CAS# Not applicable For more information, contact Okidata at: OSHA PEL 3.5 mg/m OSHA TWA Not applicable 2000 Bishops Gate Blvd. ACGIH TLV 3.5 mg/m ACGIH TLV Not applicable... - Page 60 Physical Data Spill Cleanup and Disposal Melting Point: N/A Spill Cleanup: If the ribbon is inadvertently pulled out, it should be rewound on the reel using the take-up knob. Boiling Point: N/A Vapor Pressure: N/A Waste Disposal: Follow appropriate federal, state and local regulations.
Need help?
Do you have a question about the ML320 and is the answer not in the manual?
Questions and answers