Table of Contents
Advertisement
COMPACT HI-FI COMPONENT SYSTEM
R-K731
INSTRUCTION MANUAL
Declaration of Conformity with regard to
Decla
the EMC Directive 2004/108/EC
Manufacturer:
JVC Kenwood Corporation
3-12 Moriya-cho, Kanagawa-ku, Yokohama-shi, Kanagawa, 221-0022 Japan
EU Representative's:
Kenwood Electronics Europe BV
Amsterdamseweg 37, 1422 AC UITHOORN, The Netherlands
© B60-5877-08/00 (E) LVT2280-002A
Advertisement
Chapters
Table of Contents

Related Manuals for Kenwood R-K731


Summary of Contents for Kenwood R-K731
- Page 1 INSTRUCTION MANUAL Decla Declaration of Conformity with regard to the EMC Directive 2004/108/EC Manufacturer: JVC Kenwood Corporation 3-12 Moriya-cho, Kanagawa-ku, Yokohama-shi, Kanagawa, 221-0022 Japan EU Representative’s: Kenwood Electronics Europe BV Amsterdamseweg 37, 1422 AC UITHOORN, The Netherlands © B60-5877-08/00 (E) LVT2280-002A...
-
Page 2: Safety Precautions
QUALIFIED SERVICE PERSONNEL. The marking of products using lasers CLASS 1 LASER PRODUCT The marking this product has been classifi ed as Class 1. It means that there is no danger of hazardous radiation outside the product. Location: Back panel R-K731... -
Page 3: Important Safety Instructions
Safety Precautions IMPORTANT SAFETY INSTRUCTIONS Caution: Read this page carefully to ensure safe operation. Read These Instructions 5. Ventilation – All the safety and operating instructions should – Slots and openings in the cabinet are provided be read before the product is operated. for ventilation and to ensure reliable operation of the product and to protect it from overheating. - Page 4 15. Safety Check – Upon completion of any service or repairs to this product, ask the service technician to perform safety checks to determine that the product is in proper operating condition. R-K731...
- Page 5 Safety Precautions Safety Precautions Notes: Information on Disposal of Old Electrical Item 7 is not required except for grounded or and Electronic Equipment and Batteries polarized equipment. (applicable for EU countries that have adopted separate waste collection systems) Products and batteries with the symbol (crossed-out wheeled bin) cannot be disposed as household waste.
-
Page 6: Disc Playback
The system supports the playback of a USB flash memory and USB mass storage class compliant digital audio player. In addition, as well as analog input terminals for cassette decks and PC input terminal for playing its contents, the R-K731 also features a sampling rate converter compliant digital input terminal for digital tuners etc. -
Page 7: Table Of Contents
Contents To ensure safety, read the items by this mark carefully. Procedures by Input Source P.25 Before Using the This chapter explains how to connect and use System the system with the diff erent input sources. • CD Be sure to read these precautions. •... -
Page 8: Accessories
If any accessories are missing, or if the unit is damaged or fails to operate, notify your dealer immediately. If the unit was shipped to you directly, notify your shipper immediately. Kenwood recommends that you retain the original carton and packing materials in case you need to move or ship the unit in the future. -
Page 9: Installing The System
Installing the System Notes on installing the system Always install the system on a fl at, stable surface. When installing the system on a stand of some sort, be sure to check the strength of the stand. The magnets used in the speakers may cause color irregularities on TV or PC screens. Do not set up the speakers too close to a TV or PC. -
Page 10: Connecting The System
Since antenna installation requires skill and experience, always consult your dealer Caution for outdoor antenna before installation. The antenna should be located away from power lines. If the installation antenna falls over, contact with a power line creates the risk of electric shock. R-K731... -
Page 11: Connecting The Speakers
Connecting the System If the system is connected correctly and still does not operate Microcomputer malfunctions normally or shows display errors, reset the microcomputer. (P.73) Connecting the AM loop antenna The antenna supplied with the system is for indoor use. Place it as far as possible away from the main unit, your TV set, the speaker cords and the power cord and point it in the direction that gives the best reception. - Page 12 [PC IN] terminal. Use a commercially available USB cable (Type A – Type B) for the connection. USB cable Use a USB cable with a length of no (commercially available) more than 3 m. Types of USB Connectors TypeA TypeB Mini-B R-K731...
- Page 13 Connect digital audio players to the [D.AUDIO] terminal on the front panel of the main unit. If you connect a Kenwood player that supports digital audio link using the dedicated cable PNC-150 (sold separately), you can control the player from the main unit and the remote control.
-
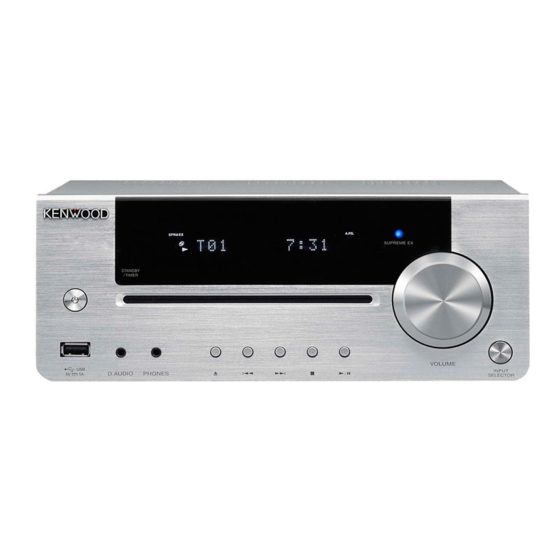
Page 14: Component Names And Functions
This is called Standby mode. When keys will turn on system power: [TUNER/BAND], the main unit is in this mode, you can turn it on using the [CDE], [USBE], [D.AUDIOE], [PC IN], [D- remote control. IN1/2], or [AUX] of the remote control. R-K731... - Page 15 Component Names and Functions Displays shown in this manual Display may diff er from the actual displays. Lights to indicate the type of the audio fi le Lights when settings, such as the sound being played (WAV/WMA/MP3/AAC) quality, are completed. D-BASS Lights when a super-bass (D-BASS) level is selected.
-
Page 16: Remote Control
Selects tracks or radio stations. (P.27, 30, 31, 36, 38, 41) Switches the information Clears settings. (P.31, 37) shown on the display. Performs PTY search. (P.43) (P.27, 33, 35, 39, 42, 49) DIMMER (P.67) Sets the brightness of the display. R-K731... -
Page 17: Using The Remote Control
Component Names and Functions Using the remote control After plugging the main unit into an AC wall outlet, press the power [K] key on the remote control to turn the system on. After the system powers up, press the key for the function you want to use. -
Page 18: How To Use This Manual
Stop playback and press the [CD EJECT] key on the remote control manual may differ from the actual or the [ ] key on the main unit. displays. Track numbers may not be displayed correctly when the following types of discs are played. – Discs recorded in multiple sessions R-K731 R-K731... - Page 19 How to Use This Manual Operation icons Explains the procedure for CDs. Explains how to operate the Explanations of main unit system when an iPod/iPhone is procedures connected. Explains how to operate the Explanations of remote system when a USB device is control procedures connected.
-
Page 20: Basic Operation
CD, iPod/iPhone, PC IN, USB and a D.AUDIO. Check the connections. (P.10-13) Preparations Have the remote control ready. (P. 17) Adjusting the volume level Lowers the Increases the volume volume Increases the volume Lowers the volume Mute Press this key again to unmute the sound. R-K731... - Page 21 Basic Operation Turn the system on (off ). P r e s s i n g t h e [ T U N E R / B A N D ] , [ C D E ] , [USBE], [D.AUDIOE], [PC IN], [AUX] or [D-IN1/2] key on the remote control also turns on the power.
-
Page 22: Important Information
USB mass storage class compliant digital audio player or iPod/ USB fl ash memory iPhone to the [ USB] terminal. Note that Kenwood will not be held liable for any losses related to malfunction, damage, or data loss due to connection of any other type of device. - Page 23 Important Information Supported Audio Files On this system, you can play the audio fi le types listed below (MP3, WMA, AAC and WAV). MP3 fi les (CD/USB) WAV fi les (USB only) Extension: .mp3 Extension: .wav Sampling frequency: 32/44.1/48 kHz Sampling frequency: Bit rate: 32 k –...
-
Page 24: Handling Discs
USB device to be lost. Please Note that even where audio files comply with the note that Kenwood will not be held liable for any losses above standards, playback may fail due to factors such arising out of loss of stored data. -
Page 25: Ipod/Iphone
Procedures by Input Source This chapter explains the operation procedures for each input source. This manual explains the operations assuming that you will use the remote control. Some buttons on the main unit are the same as those on the remote control. You can use either button in this case. -
Page 26: Playing A Cd
Stop playback and press the [CD EJECT] key on the remote control or the [L] key on the main unit. Track numbers may not be displayed correctly when the following types of discs are played. – Discs recorded in multiple sessions R-K731... -
Page 27: Stopping Playback
Audio Settings R P.51 onwards Related Related Information Information Operations during CD playback Pausing and resuming playback Press the [CDE] key. Stopping playback Press the [F] key. For information on the Resume function, see below. Skipping forward/back Hold down the [I] key or [J] key. Skipping tracks, skipping back, skipping to the start To skip to the next track: Press the [H] key. - Page 28 "01" to "99" at the beginning of each folder and fi le name before you record the fi les onto the disc. (A (ROOT) folder that does not contain any fi le will be counted as one folder.) R-K731 R-K731...
-
Page 29: Selecting Folder Playback Mode
• RPage XX Supported Audio Files R P.23, 24 Related Related Related Audio Settings R P.51 onwards • RPage XX Information Information Information Selecting Folder Playback Mode MP3/WMA/AAC This mode plays only the fi les in the selected folder. If the CD is already playing, press the [F] key to stop playback. Press the [P.MODE] key to select the folder playback mode. -
Page 30: Cd Program Playback Mode
To select folder number 3, press the [3] key and then press the [ENTER] key. For folder number 17, press the [1], [7] keys and then press the [ENTER] key. For folder number 123, press the [1], [2], and then the [3] key. R-K731 R-K731... - Page 31 • RPage XX CD Repeat Playback ModeR P.29 Related Related Related • RPage XX Information Information Information Press the [A ] or [B ] key to select the track or fi le you want to listen to. MP3/WMA/AAC When Track 10 is selected as When folder number 5 and fi le number 58 are program track 1.
-
Page 32: Playing From An Ipod/Iphone
” on the display lights up. When you switch the input source to “USB” and start playback, “ ” will light up. USB cable for iPod/iPhone (Supplied with iPod/iPhone or commercially available) Press the [USBE] key to begin playback. Simply pressing the [USBE] key turns on the system and begins playback. R-K731... - Page 33 iPod/iPhone Supported Audio Files R P.23, 24 Related Related Audio Settings R P.51 onwards Information Information Operations during iPod/ iPhone playback You can also perform these Pausing and resuming playback operations on the Press the [USBE] key. Press the [E] key. iPod/iPhone.
-
Page 34: Playing Back From A Usb Device
HDD. The Resume function is cancelled if you switch to another input source during playback. When you connect/disconnect a USB device, make sure the system is not per- forming any operation or that the power is turned off . R-K731... -
Page 35: Usb Device Playback
Supported Audio Files R P.23, 24 Related Related Audio Settings R P.51 onwards Information Information Operations during USB device playback Pausing and resuming playback Press the [USBE] key. Press the [E] key. Stopping playback Press the [F] key. Press the [F] key. Skipping forward/back Press the [I] or [J] key. -
Page 36: Program Playback Mode Of Audio Files In The Usb Device
If you enter the wrong information, press the [CLEAR] key before you proceed to step 3. Then enter the information again. Proceed to step 3 within 20 seconds after selecting a track or fi le. Press the [ENTER] key. R-K731... - Page 37 To select two or more tracks, repeat steps 1- 2 to 3. You can select up to 30 tracks. If you attempt to select more tracks, the “Program Full” message is displayed. Press the [USBE] key to begin playback. To cancel program mode Stop playback and press the [P.MODE] key so that "PGM"...
-
Page 38: Receiving Radio Broadcasts
To run through the sequence of stored stations at intervals of roughly 0.5 seconds: Press and hold the [G] or [H] key. Selecting with the number keys To select P03, press the [0], and [3] keys. Press the [ENTER] key. To select P17, press the [1], and [7] keys. R-K731... - Page 39 Receiving Radio Broadcasts Presetting Stations Automatically (Auto Memory) R P.40 Related Related Presetting Stations Manually (Manual Preset) R P.41 Information Information Audio Settings R P.51 onwards Choosing from stations that are not preset (Auto/ Manual Tuning) 1 Press the [AUTO/MONO] key to select Auto tuning or Manual tuning.
-
Page 40: Presetting Stations Automatically (Auto Memory)
Radio Data System stations are given priority during auto presetting. If there is memory left after presetting, this unit continues presetting regular FM and AM stations. A broadcast station that cannot be preset with Auto Memory should be set with Manual preset. (P.41) R-K731 R-K731... -
Page 41: Presetting Stations Manually (Manual Preset)
Receiving Radio Broadcasts Receiving Radio Broadcasts • RPage XX Related • RPage XX Information Presetting Stations Manually (Manual Preset) Use this procedure to make the station you are currently listening to a preset number. If the selected preset number is already assigned a station, the existing station is overwritten by the new station. -
Page 42: Ps (Program Service) Name Display
To switch the displays Press the [DISPLAY] key. The mode changes as shown below each time you press the key. Clock Frequency (Program Service Name) Some stations may not be provided or be given diff erent names depending on countries or areas. R-K731... -
Page 43: Searching For A Desired Program Type (Pty Search)
Radio Data System Searching for a Desired Program Type (PTY Search) The tuner automatically searches for a station which is currently broadcasting a specified program type (genre). Press the [PTY] key. W h e n a R a d i o D a t a S y s t e m b r o a d c a s t i s received, the program type is shown on the... -
Page 44: Connecting A Pc And Playing Its Contents
This system is compatible with 32 kHz/44.1 kHz/48 kHz sampling frequencies. It can receive 16-bit stereo/monaural data. The [PC IN] terminal of this system is used exclusively for input. It is not possible to record the audio played on this system into the PC. R-K731... -
Page 45: Adjusting The Volume Using A Pc
Connecting Other Accessories (Commercially Available Units) R P.12, 13 Related Audio Settings R P.51 onwards Information Adjusting the Volume Using a PC If the audio is not heard or is very low, check the Windows settings as described below. Windows XP Windows Vista Open the [Start] menu, select [Control Panel] and Open the [Start] menu, select [Control Panel] and... -
Page 46: Playback From External Components
The system will play PCM (32, 44.1, 48, 88.2, 96 kHz) digital signals. Begin playback on the connected external component. Perform the required operation on the connected external component to start playback. Adjust the volume level. R-K731... -
Page 47: Adjusting The External Component Input Level
External Components Connecting Other Accessories (Commercially Available Units) R P.12, 13 Related Related Audio Settings R P.51 onwards Information Information Adjusting the External Component Input Level Use the procedure below to adjust the input level for the external component connected to the [AUX PLAY IN] terminal. Use this adjustment when the volume from an external component is noticeably higher or lower than other input sources at the same vol- ume setting. -
Page 48: Playing From A Digital Audio Player
D.AUDIO You can connect a Kenwood digital audio player (referred to hereafter simply as "digital audio player") to the system and use it to play tracks. Playing from a Digital Audio Player Use this procedure to connect a digital audio player to the system and play tracks. - Page 49 D.AUDIO Adjusting the Digital Audio Player Input Level R P.50 Related Related Audio Settings R P.51 onwards Information Information Operations during digital audio player playback Pausing and resuming playback Press the [D.AUDIOE] Press the [E] key. key. Stopping playback Press the [F] key. Press the [F] key.
-
Page 50: Adjusting The Digital Audio Player Input Level
Press the [A] or [B] key. You can adjust the input level in a range from -3 to 5. Press the [ENTER] key. If you adjust the input level for D.AUDIO, the output level from the [AUX REC OUT] terminal will also change. R-K731 R-K731... - Page 51 Audio Settings Use the procedures in this chapter to specify the sound quality settings for your stereo system. You can use the system's sound quality function to customize the sound to your own preferences. Digital Signal Processor • Adjusting Super-Bass Tones (D-BASS)…………………………… 52 •...
-
Page 52: Digital Signal Processor
0 (Off ) to 10. Higher numbers give more pronounced super- bass tones. The “D-BASS” flashes while setting is in progress. Press the [ENTER] key. If you set level 1 or higher, the “D-BASS” lights. R-K731... -
Page 53: Adjusting The Range Levels (Tone)
Digital Signal Processor Adjusting the Range Levels (TONE) You can adjust the low-, mid- and high-range tones to match your preferences (TONE). Press the [TONE] key, and then select [Bass] from the range levels (Bass: low-range tones, Mid: mid-range tones, Treble: high-range tones). Press the [A] or [B] key to adjust the low tones (Bass) level. - Page 54 Press the [A] or [B] key to adjust the mid tones (Mid) level. The "TONE" fl ashes while set- ting is in progress. While the "TONE" is fl ashing, you can ad- just the level in a range from -8 to +8. R-K731 R-K731...
- Page 55 Digital Signal Processor Press the [TONE] key, and then select [Treble]. Press the [A] or [B] key to adjust the high tones (Treble) level. The "TONE" flashes w h i l e s e t t i n g i s i n progress.While the "TONE"...
-
Page 56: Supreme Ex
Supreme EX Supreme EX is Kenwood's original sound quality enhancement technology and is used for playing CDs and audio fi les or for playback using components connected to a digital input terminal. Setting Supreme EX Press the [MODE] key. Select “SPRM Set”. -
Page 57: Balance
Balance Related Information Use this procedure to adjust the volume balance for the left and right speakers. Adjusting the Speaker Volume Balance Press the [MODE] key. Select "Balance". Press the [C] or [D] key. Press the [ENTER] key. Adjust the balance. Press the [A] or [B] key. -
Page 58: Rec Out Level
Select “Rec Out Level”. Press the [C] or [D] key. Press the [ENTER] key. Adjust the recording output level. Press the [A] or [B] key. You can adjust the level in a range from -5 to +3. Press the [ENTER] key. R-K731... - Page 59 Component Settings This chapter explains basic timekeeping settings, as well as settings for the timer, display, and other functions which provide more extensive usage of this product. Setting the System Clock ……………………………………60 Setting the Timer • Setting the Sleep Timer (SLEEP) ………………………………… 61 •...
-
Page 60: Setting The System Clock
If the system clock time setting is not correct, the Program Timer will not start playback at the correct time. As a certain margin of error is allowed for the clock, it is recommended that you check and adjust the clock at regular intervals. R-K731... -
Page 61: Setting The Timer
Setting the Timer Related Information A Sleep Timer automatically turns the system off after a set interval, while a Program Timer starts playback at a specifi ed time. Setting the Sleep Timer (SLEEP) This function automatically turns the system off after a set interval. You can set an interval from 10 to 120 minutes. -
Page 62: Setting The Program Timer (Timer Set)
When you want to return to the previous step during the setting procedure, press the [C] key. Press the [MODE] key. Select "Timer Set". Press the [C] or [D] key. Press the [ENTER] key. Select "Program 1 Set" or "Program 2 Set”. Press the [A] or [B] key. Press the [ENTER] key. R-K731 R-K731... - Page 63 Setting the Timer Setting the Timer RP.XX Setting the System Clock R P.60 Related Related RP.XX Information Information Select "On" or "Off ". Press the [A] or [B] key. Selecting "Off " ends t h e p r o c e d u r e a n d restores the original display.
- Page 64 Specify the "Off " (end time) setting. Use the [A] or [B] key to set the "hour". The "hour" fl ashes. Press the [ENTER] key. Use the [A] or [B] key to set the "minute". The "minute" fl ashes. Press the [ENTER] key. R-K731 R-K731...
- Page 65 Setting the Timer Setting the Timer RP.XX Related RP.XX Information Select "Play" or "AI Play". Press the [A] or [B] key. Playback is at the vol- ume set in step 10. Playback begins at the specified time and the volume gradually in- creases to the level set in step 10.
- Page 66 To modify the program settings, reconfi gure the timer settings from the begin- ning. When the system is in Standby mode, you can confi rm the timer setting (on or off ) for 5 seconds by pressing the [F] key. R-K731 R-K731...
-
Page 67: Display Settings
Display Settings Related Information Use these settings to adjust the brightness of the display. Setting the Display Brightness (DIMMER) Use this procedure to adjust the display brightness. Adjust the brightness according to your preferences and the conditions in the room. Press the [DIMMER] key. -
Page 68: Auto Power Save (A
If the input source is “TUNER“, “D.AUDIO”, “D-IN1”, “D-IN2”, “AUX”, “iPod” or “PC IN”, Auto Power Save operates when the volume is set to 0 (VOLUME 0) or MUTE is set to on. When recording on external components, turn A.P.S. off or adjust volume to above 1. R-K731... - Page 69 Maintenance This chapter explains what to do when error messages appear on the display or when problems arise. It also describes how to store and maintain the system so it continues to give pleasure for many years to come. Messages ……………………………………………………70 Glossary of Terms ……………………………………………70 Troubleshooting ……………………………………………71 Care and Storage ……………………………………………74...
-
Page 70: Messages
A standard for computer control of a USB device. It also makes it possible for a com- puter to recognize a connected USB device as an external storage device. class An abbreviation for the "Windows Media™ Audio" audio compression and encoding system developed by Microsoft Corporation of the U.S. R-K731... -
Page 71: Troubleshooting
Troubleshooting Whenever the system is not operating as expected, check the following tables to see if you can resolve the problem yourself before requesting service. Amplifi er/ Speakers Symptoms Solution Ref. page No sound output Check all connections as described in <Connecting the 10-13 System>. - Page 72 Ref. page The main unit and remote Connect the player using the dedicated cable PNC-150. Check whether the connected model is compatible. control cannot control a Kenwood digital audio player. Remote control Symptoms Solution Ref. page The remote control does Load new batteries.
- Page 73 Troubleshooting Symptoms Solution Ref. page The PC does not recognize Connect the PC and this system properly using a USB cable. this system. If a USB hub is used in the connection, check if the hub is functioning properly. Alternatively, change the connected port.
-
Page 74: Care And Storage
Do not affi x paper, stickers or labels to CDs. When the front panel or case gets dirty, wipe it with a soft dry cloth. Never use lacquer thinner, benzine, alcohol or contact revitalizer, which will cause discoloration or deformation. R-K731... -
Page 75: Specifi Cations
Main unit [Amplifi er] Notes: Eff ective output power during STEREO operation ..50 W+50 W Kenwood follows a policy of continuous advancements in RMS (1kHz, 10%T.H.D., 6 Ω) development. For this reason specifi cations may be changed Tone control characteristics without notice. - Page 76 For your records Record the serial number, found on the back of the unit, in the spaces designated on the warranty card, and in the space provided below. Refer to the model and serial numbers whenever you call upon your dealer for information or service on this product.
Need help?
Do you have a question about the R-K731 and is the answer not in the manual?
Questions and answers