Table of Contents
Advertisement
Quick Links
Download this manual
See also:
User Manual
Advertisement
Table of Contents

Related Manuals for CyberPower PDU15SW8FNET


Summary of Contents for CyberPower PDU15SW8FNET
- Page 1 User Manual Power Distribution Unit www.CPSww.com K01-0000181-02...
-
Page 2: Table Of Contents
Unattended/Automatic Shutdown........19 Firmware Upgrade..........19 Troubleshooting...........20 Frequently Ask Questions (FAQ)......20 Conformance Approvals........20 Customer Service & Warranty......21 Product Registration............. CyberPower International............21 Limited Warranty ..............21 Appendix A-Hyper Terminal........22 Appendix B-Power Device Network Utility..23 Overview................23 Installation................23 Launch Program..............24 Getting Started...............24... -
Page 3: Model List
Introduction Model List Package Contents 1U Switched Series 0U Monitored Series (For 0U Series 16 Outlets/24 Outlets) PDU15SW8FNET PDU15MV16FNET PDU15SWHVIEC8FNET PDU20MVT24FNET PDU20SW8FNET PDU20MVHVT24FNET PDU20SWT8FNET PDU30MVT24FNET PDU20SWHVIEC8FNET PDU30MVHVT24FNET 1U Monitored Series 2U Switched Series PDU15M8FNET PDU30SWT16FNET PDU15MHVIEC8FNET PDU30SWHVT16FNET PDU20M8FNET 2U Monitored Series... -
Page 4: For 2U Series
Before using, please check to ensure the package contains all the items shown above. If there Nominal Voltage 100-120V 200-240V 100-120V 200-240V are missing parts, please contact CyberPower technical support at tech@cpsww.com or call Derated Output 12A(UL)/10A(CE) 12A(UL)/10A(CE) Current 1-877-297-6937 when you are US customers. For European customers, please contact... -
Page 5: Product Features
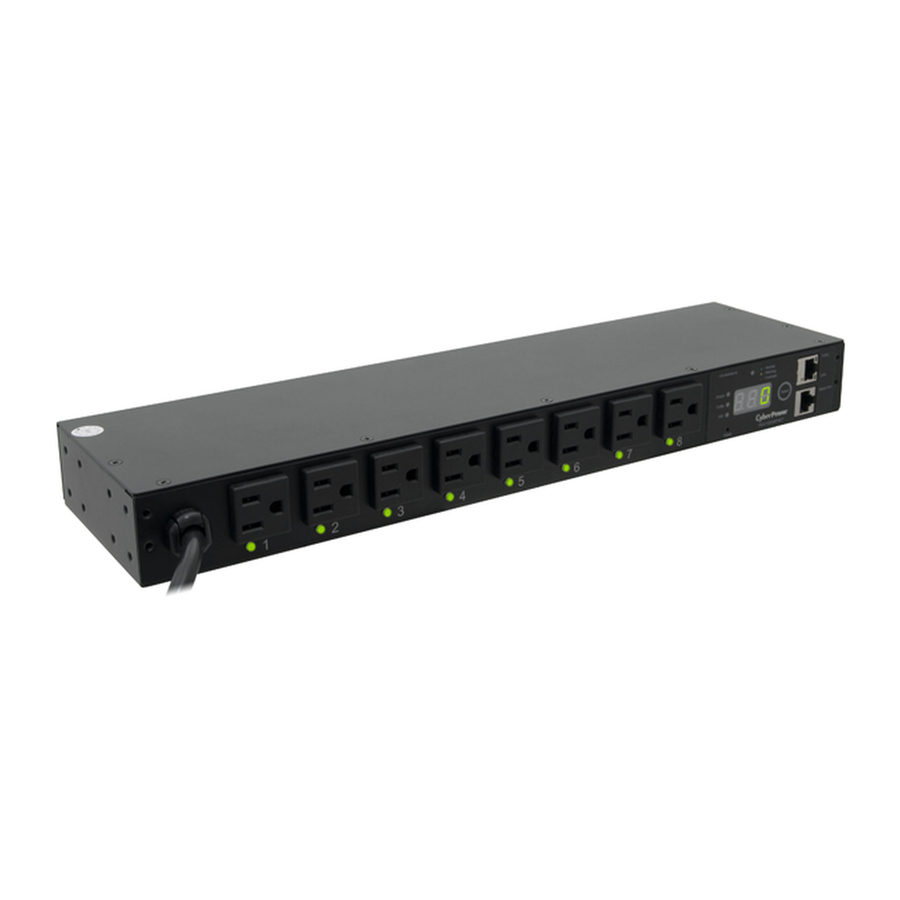
Product Features (1U 20A Series) Product Features (0U 15A Series) Front panel description Front panel description Rear panel description NEMA Type A. Power Cord B. AC Output Outlets - Normal Tx/Rx - Warning - Overload Amps Link C. Current Level Volts Select D. -
Page 6: Technical Specification
Product Features (0U 20A Series) Product Features (0U 30A Series) Front panel description Front panel description Rear panel description Rear panel description NEMA Type NEMA Type IEC Type IEC Type A. Power Cord A. Power Cord B. AC Output Outlets B. -
Page 7: Technical Specification
Installation Guide Product Features (2U Series) Front panel description NEMA Type CAUTION!! Please use only the provided screws through the entire installation process. Bank 1 , 20A 100-120VAC Horizontal Installation 50/60 Hz 24A MAX Bank 2 , 20A YU0-0000028-00 - Normal Tx/Rx For 1U Model - Warning... -
Page 8: For 2U Model
Installation Guide Installation Guide Step 3. Cord Retention Tray Installation (optional) Step 2. PDU Mounting Attach the Cord Retention Tray to the PDU with the 4 supplied Use the supplied Washers (4) and Screws (4) to secure the PDU to Cord Retention Tray Mounting Screws. -
Page 9: Vertical Installation
Installation Guide Installation Guide Vertical Installation (1U, 0U Model Only) For 1U Model Step 2. PDU Mounting Step 1. Mounting Bracket Installation Use the supplied Washers (2) and Screws (2) to secure the PDU Use the provided Mounting Bracket Screws (8) to attach the SHORT to your existing rack system. -
Page 10: For 0U With Keyhole Mount
PDU, and the other end to a network port. Step 2 – Establish the PDU IP address Assigning an IP address to the CyberPower PDU requires the user to have Step 2. PDU Mounting an available IP address that is valid on the respective network. -
Page 11: Operation
To reset all the settings to default, press and hold the Reset Button for 6 seconds. Remote Management The remote management function of the CyberPower PDU provides for monitoring the PDU vitals, controlling outlets, and utilizing SNMP functionality. Remote management is performed via the web interface. To access the web interface, please follow the instructions below: 1. -
Page 12: Unattended/Automatic Shutdown
Operation Troubleshooting Unattended/Automatic Shutdown PDU outlets do not PowerPanel Business Edition software automatically saves open files and 1. Breaker tripped Reset Breaker, check if plug is completely provide power to gracefully shuts down the operating system in an intelligent and orderly fashion. connected. -
Page 13: Customer Service & Warranty
If the Product is defective in material or workmanship, CyberPower will repair or [Account Setting] replace it at CyberPower's expense, or, if CyberPower is unable to or decides not to 1. Administrator repair or replace the Product (if defective) within a reasonable time, CyberPower will 2. -
Page 14: Appendix B-Power Device Network Utility
Appendix B-Power Device Network Utility Overview Launch Program The CyberPower Power Device Network Utility is an easy-to-use interface which is To launch the Power Device Network Utility and get started, select Programs from the used for establishing IP addresses on CyberPower PDU devices. -
Page 15: Advanced Settings
Appendix B-Power Device Network Utility Step 2. Assign a valid IP Address to the PDU Option 1: Assisted Setup (recommended) With the appropriate device selected from the Equipment List, open the Network Settings menu (Shown in Figure 6.). [Tools=>Device Setup]. In the Device Network Setting Menu, enter a valid IP address, subnet mask, and gateway address to setup the PDU device.
Need help?
Do you have a question about the PDU15SW8FNET and is the answer not in the manual?
Questions and answers