Table of Contents
Advertisement
Advertisement
Table of Contents

Related Manuals for Philips voice dect


Summary of Contents for Philips voice dect
- Page 1 PHILIPS...
-
Page 2: Description Of The Machine
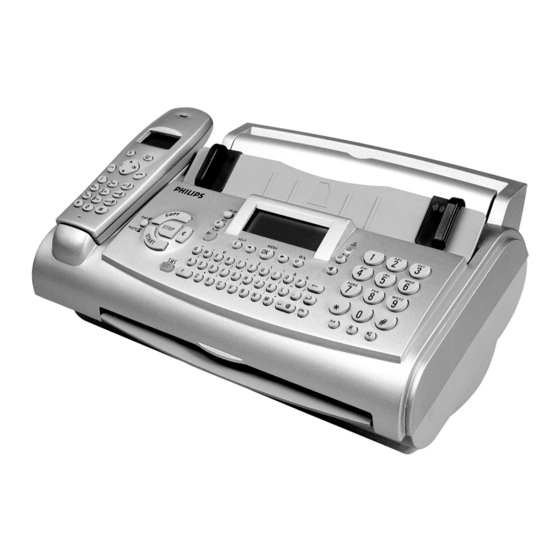
Description of the machine 1 Power supply cable with power plug 8 Printer roller 2 Paper feed fl ap 9 Scanner lid 3 Document guide 10 Holder for “Plug’n’Print” card 4 Paper tray 11 Front ink fi lm compartment 5 Cordless handset 12 Rear ink fi... -
Page 3: Key Assignment On The Fax Machine
Key assignment on the fax machine ON/OFF to activate / HELP/w press twice briefl y: to print operating instructions for the most important deactivate answering ma- functions (with references to additional help pages); press and hold (for two seconds): chine to start the automatic installation of your fax machine / printout of Easy Install REC press briefl... - Page 4 Key assignment for cordless handset Display symbols R press briefl y: to call the last à if the à symbol lights up the number dialled, long press: call up battery is charged. If the ì symbol recently received calls with calling appears on the display the battery is party identifi...
-
Page 5: Table Of Contents
Contents Fax & Copy......22 Feeding documents in ........22 Sending faxes ............22 Installation .......8 Fax reception ............22 Broadcast..............23 Packaging...............8 Image quality............23 Connection............8 Contrast ..............23 Ink fi lm ..............9 Transmission and error reports ......23 Loading paper............10 Transmission speed..........24 Removing paper ..........11 Size compression..........24 Additional devices..........11 Fax journal ............24 Easy Install ............12... -
Page 6: Safety Instructions
If you want to use another cordless phone, en- Safety sure that the fax machine and the base station of the other cordless phone are at least 15 cm apart instructions otherwise you may get acoustic interference in your handset. Pease read all warning notices and instructions Ensure safe cable laying (danger of stumbling, and follow them precisely. - Page 7 Explanation of the safety instructions on the cordless handset: v General warning ! Do not touch contacts ? Further information in the operating instruc- tions...
-
Page 8: Installation
In the UK Installation Packaging The following items are included in the packag- ing: 1 user manual 2 installation guide 3 paper tray 4 cordless handset 5 fax machine (with loaded ink fi lm) For all other countries 6 mains cable with plug 7 telephone cable with plug 8 rechargeable batteries for the cordless hand- Cordless handset... -
Page 9: Ink Film
This could per- manently damage the handset. Power supply v For use with Philips ink fi lms only! Removing the ink film 1 Lift the rear ink fi lm roll holding both sides with your index fi ngers upwards, in order to remove it out of its seat and place it next to the front ink fi... -
Page 10: Loading Paper
3 Remove the old Plug’n’Print card from the 4 Turn small roll forward to tension the ink fi lm. slot to the left of the ink fi lm compartment Make sure that the ink fi lm is not creased. (only the initial free ink fi lm does not have a Plug’n’Print card). -
Page 11: Removing Paper
1 Insert the paper tray in the slots provided be- Removing paper hind the paper feed mechanism. To remove the paper, open the paper feed fl ap and carefully pull out the paper. Close the fl ap again. 2 To prevent several sheets being drawn into the machine at once, fi... -
Page 12: Easy Install
Same socket Easy Install (not in all countries) Easy Install ensures that your fax machine will set itself up perfectly according to your own per- You can connect additional devices to the same sonal circumstances. telephone socket. Make sure the fax machine is the fi... - Page 13 5 Press OK. 6 Use u to select CHECK: YES and press Your machine will then check that the outside line can be obtained. If the check is successful, the following message appears briefl y: check OK. If the check is successful, the following message check NOT OK.
-
Page 14: Basic Settings
Basic settings 2a For devices with SMS function: Enter your name using the alphabetic keypad. If you want to keep a note of the factory settings v When entering a name, you can use + to on your machine for later, we recommend print- type capital letters (press and hold the + key ing out a function list before you change any of and type the desired key). -
Page 15: Display Language
Display language for the cordless handset 1 Select function 32 by pressing /, 32 and for the fax machine OK on the cordless handset. 1 Select function 11 by pressing MENU, 11 2 You can now use / to set the volume you and OK on your fax machine. -
Page 16: Fax Switch
Fax switch Set SM mode Display Possible settings The built-in fax switch enables you to phone and tAM rings: 0, 1, 2, 3, 4, 5, 6, 7, fax from the same telephone connection and use additional devices. The fax switch separates fax fax rings: 0, 1, 2, 3, 4, 5, and voice messages. - Page 17 Manual fax reception If you select MANUAL RECEPTION faxes will not be automatically received by your fax ma- chine unless you activate fax reception yourself. Lift the handset and press START. This may be sensible for example, if you wish to receive your faxes by modem at your computer.
-
Page 18: Telephone
Telephone Telephone book a on the fax machine Making a call The memory in your fax machine can store about 200 names and number. The precise number de- 1 To make a call, press the ( button on the pends on the length of the entries. cordless handset and key in the number. -
Page 19: Telephone Book M On The Cordless Handset
4 All numbers saved in the telephone book of Telephone book m on your fax machine will be displayed. Select the the cordless handset entry you want to save using u and con- fi rm with OK. You can also store telephone numbers in the 5 The saved entry will appear on the screen. -
Page 20: Easylink
If a call had been received during your absence or while you were on a phone call, the symbol I will appear on the display of your fax machine. The telephone numbers of the last ten received calls are stored. 1 Press PP on your fax machine for two sec- onds. - Page 21 Incoming call Cordless handset Fax machine Other telephone You want to accept a Depending on the type Press ( both for an Press z. call. of telephone. external call and for a call that is forwarded If you lift the handset by your fax machine and hear the recorded or another cordless...
-
Page 22: Fax & Copy
Fax & Copy 3 Move the document guide so that it rests on the document. Write clearly and legibly. Only use pens with dark ink (black or dark-blue, not yellow, orange or light green). The following points are the most common causes of errors when sending faxes: v Don’t send ... -
Page 23: Broadcast
3 Use u to select SEND FAX? and press Fax reception without paper START. The document will be sent to all If there is no more paper in the feeder or if the persons in the group. ink fi lm is empty, an incoming fax will be stored in memory (storage capacity approx. -
Page 24: Transmission Speed
Quick polling 1 Press MENU, 28 and OK on your fax machine. 1 Dial the desired number with the handset re- placed. 2 Select with u and confi rm with OK. 2 Press and hold START. Transmission speed 3 In case you want to enter a sub address or a code as well (see Polling with code) enter the Your fax machine automatically adjusts its trans- telephone number fi... -
Page 25: Send Later
1 Place your documents face to the front in the Polling codes work in accordance with the document feeder. You can load up to 10 pages ITU international standard. However, there at once. are manufacturers who use other processes and whose machines are therefore not com- patible. -
Page 26: Sms W
5 Enter the NO. for recept. Confi rm with SMS W * The NO. for transm. and the NO. for (not available in all countries) recept. are needed in order to use SMS serv- ices. In some countries these numbers may be You can send and receive SMS (Short Message identical. -
Page 27: Sending Sms Messages
PRINT: inbox You can also read SMS messages by pressing MENU, 62 and OK on your fax machine. PRINT: NEW 5 Press OK. The messages will be printed out. Sending SMS messages You can also print SMS messages by pressing MENU, 63 and OK on your fax machine. -
Page 28: Disable Sms Reception
Disable SMS reception If you operate another SMS-compatible cordless phone on the same line there is no guarantee that a particular SMS will be received on your fax ma- chine or on the other cordless handset. However, you can only receive SMS messages on one device at any one time. -
Page 29: Answering Machine B
Answering Listening to messages 1 If the PLAY button fl ashes on your fax ma- machine b chine, this means that messages have been recorded for you. New messages are indicated on your cordless handset by the b symbol. The recording capacity is 30 minutes. Press PLAY to listen to the fi... -
Page 30: Forwarding Messages
Forwarding messages Recording a conversation Your fax machine can automatically forward all You can record a telephone conversation with incoming messages to another telephone number. your fax machine. Enter the telephone number to which you wish 1 Press REC during a telephone conversation. recorded calls to be forwarded. -
Page 31: Remote Control On The Fax Machine
Internal memo 3 Then you can enter commands as usual or terminate the remote control by replacing the You can record a personal message with this handset. function. Messages can be heard on the fax machine itself or by remote control from a tel- Overview of commands ephone. -
Page 32: Remote Control On The Cordless Handset
Remote control on the cordless handset You can control the answering machine functions of your fax machine from your cordless handset. Preparing the cordless handset for remote access 1 Press /, until you get to option 6. Press The following functions are available for you to listen to your messages. -
Page 33: Hints And Tips
5 Close the panel so that it also clicks into place. Delivery service You can order ink fi lms and cleaning accessories at your local dealer or directly from PHILIPS (free delivery) on Freefone 0800 358 08 07 (Unit- ed Kingdom). Paper jam 6 Insert paper (see Installation / Loading pa- 1 The display shows Paper jam. -
Page 34: Service Code
The following codes are at your disposal: 4 Carefully remove the document either from the front or the back. Code No. 7117 This code erases all your modifi cations to the fac- tory settings. The fax machine will therefore react in exactly the same way as on fi... -
Page 35: Care
2 Open the operation panel by lifting in the v The four-digit pin code must match on middle. When you hear a soft click, the panel your fax machine and on the additional is engaged. cordless handset. When your fax machine establishes a con- nection to the additional cordless handset you have to quickly enter the pin code on the cordless handset. -
Page 36: Troubleshooting
6 Close the panel so that it also clicks into place. 7 Insert paper (see Installation / Loading pa- per). Troubleshooting If you cannot fi x the problem based on the in- structions below, you should proceed as follows: 1 Disconnect the mains. 2 Wait at least ten seconds and reconnect. - Page 37 Problems when faxing or printing Faxes are of poor quality. Change the resolution setting to F or f. Check the document or set a higher contrast with function 47 (see chapter Fax & Copy / Con- trast). Test the fax machine by making a copy. If your copy is faultless the correspondent’s fax machine might be defective.
-
Page 38: Appendix
34 Easylink............20 Appendix (codes for use with additional telephones) 35 Ringer types............ 15 (selection between ten ringer types) Functions Others To print a list of functions, press MENU three times. 44 Dialling list ............. 18 (print out of stored names and numbers) Setup 45 Service code ..........28, 34 11 Set language............ -
Page 39: Technical Data
DECT Technical data 71 Register ............34 Compatibility ITU Group 3 (Registering a cordless handset on the fax ma- Connection type outside line (PSTN) chine) extension (PABX) 72 Deregister ............35 Flash times outside line (PSTN): (Deregistering a cordless handset from the fax 100 ms machine) extension (PABX):... -
Page 40: Guarantee
At the beginning of April 2002, SAGEM SA letter < 20 W bought the PHILIPS fax business unit. SAGEM SA is now the European Number 1 in fax and receiving a standard offers a complete range of fax terminals with In- letter <... - Page 41 - repair or maintenance of the equipment by provisions or parts of this guarantee. persons not authorised by SAGEM Commu- Please note that only Philips ink fi lms should be nication Austria GmbH; or used. Your Philips guarantee does not cover dam- •...
-
Page 42: Index
Delete Fax reception 22 Index answering machine Feeding documents Calling line identifi ca- messages 29 in 22 tion 19 Entry from a group Function list 38 Care 35 Activate answering Image quality 23 Clean the scanner glass machine 29 SMS messages 27 Manual fax recep- Additional devices 11 Telephone book en-... - Page 43 Service code 34 Deleting 27 Troubleshooting 36 Disable printing 26 Name Quick polling 24 Disable reception Correction 14 Enter your name Image quality 23 Display symbol 2 Reading SMS messages Ink fi lm Key 3 Night 16 Display symbol 2 Other SMS func- Receive faxes 22 Display symbol 2...
- Page 44 Display symbol 2 Key assignment 3 Time and date 14 Tips and hints 33 Care 35 Delivery service 33 Document jam 33 Paper jam 33 Register and deregister cordless handsets 34 Service code 34 Troubleshooting 36 Transmission report 23 speed 24 Troubleshooting 36 Telephone book en- try on the cordless...
- Page 48 E-Mail: dti.faxinfoline@sagem.com DECLARATION OF CONFORMITY (DoC) Hereby, SAGEM Communication Austria GmbH, United Kingdom declares that this PHILIPS PPF 581 or PPF 585 is Tel.: 0870 1243 737 in compliance with the essential requirements and other relevant provisions of Directive 1999/5/EC.
Need help?
Do you have a question about the voice dect and is the answer not in the manual?
Questions and answers