Table of Contents
Advertisement
Quick Links
DigiCorder T1
I I n n t t e e g g r r a a t t e e d d
v v i i d d e e o o r r e e c c o o r r d d e e r r
P P V V R R
Digital receiver
with
integrated hard disk drive
Operating Manual
With integrated Premiere decoding system and
PCMCIA interface for installing a CI module.
For the reception of free-to-air and encrypted
programmes broadcast via satellite,
(e.g.. VIACCESS, IRDETO, SECA ,etc. )
DVB-T Programmes
Advertisement
Table of Contents

Subscribe to Our Youtube Channel
Related Manuals for TechniSat DigiCorder T1


Summary of Contents for TechniSat DigiCorder T1
- Page 1 DigiCorder T1 I I n n t t e e g g r r a a t t e e d d v v i i d d e e o o r r e e c c o o r r d d e e r r...
-
Page 2: Table Of Contents
1 Contents Contents ......2 Illustrations ..... . .5 Please read this first . - Page 3 Additional programme information ..29 7.10 Transponder information ... . .29 7.11 Freeze frame ..... .30 7.12 Video text .
- Page 4 Your unit carries the CE logo, and complies with all relevant EU standards. Subject to change without notice, not responsible for printing errors. Correct as at 11/03 TechniSat and DigiCorder T1 are registered trade-marks of TechniSat Digital GmbH P.O. Box 560 D-54541 Daun •...
-
Page 5: Illustrations
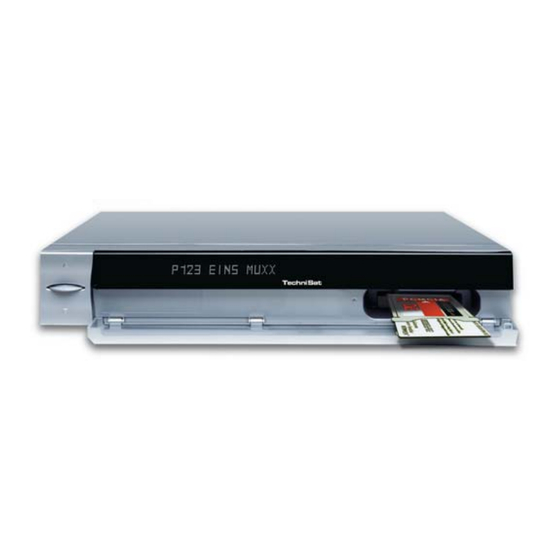
Video text Remote control option: In order to operate 2 TechniSat receivers with identical coding, television sets as well as an additional future option, (e.g. VCR). Use these keys to select the remote control option Sat 1 and use this to operate your digi- tal receiver, if you have not set this differently as described in Point 6.2.3:... - Page 6 Alpha-numeric On/Standby display LED display Eject button for CI Slot for CI module Programme select module up/down Inserting the CI module: > Please note the manufacturer’s instructions for both the CI module and card. > Insert the appropriate smart card into the corresponding CI module.
- Page 7 For this reason you should occasionally visit the TechniSat homepage on the Internet, where you can download the most current version of the operating manual. We wish you many years of enjoyment with your TechniSat DigiCorder T1! Yours truly, TechniSat Team...
-
Page 8: Please Read This First
3 Please read this first > Before operating your unit for the first time, please check that you have received all the components. The package should contain: 1 digital receiver, 1 mains power cable, 1 remote control, 1 operating manual, 1 guarantee card, 2 batteries (1,5V microcell). -
Page 9: Safety Notes
Disposal information The packaging of this product consists entirely of recyclable materials. Please separate the components accordingly, and dispose of them via the “Dual System” or other local recycling programmes. Please ensure that discarded batteries from the remote con- trol, as well as any other discarded electronic components, are not disposed of in your regular household waste, but are dsiposed of through the appropriate channels, either trough your specialist retailer, or via the appropriate system of your... - Page 10 Connecting the DVB receiver a. Connect the antenna to the input terrestrial antenna on the DVB-T receiver. b. Connect the DVB receiver with the television set, using a Scart connection. c. Connect the antenna output of the DVB-T receiver with the antenna input of the television set.
-
Page 11: Connections
4 Connections The items a b c etc. mentioned below refer to the illustration on page 10. 4.1 External unit Connect the cable originating from the terrestrial anten- na with the terrestrial antenna input of the receiver. Where possible, please use a roof-mounted antenna. Under favourable reception conditions an internal room antenna may be sufficient. -
Page 12: Analogue
4.4 HiFi Amplifier 4.4.1 Analogue To achieve the best possible sound quality, you may connect the digital receiver to a HiFi amplifier. To do this, use a suitable cable to connect the cinch sok- kets Audio R and Audio L of the digital receiver with an input on your HiFi amplifier (e.g. -
Page 13: Initial Installation
5 Initial installation Once you have read the safety notes, and have connected the unit as described in Chapter 4, you may switch on the unit as described in Chapter 7. When the unit is switched on for the first time, the start window of the installation assistant is displayed: AutoInstall. -
Page 14: Settings
> Confirm your selection by pressing OK, the unit will perform an automatic programme search. All the satel- lites selected during the antenna configuration prove- dure will be scanned for programmes. This procedure may take several minutes. Please note any messages displayed on screen. -
Page 15: Time Difference To Gmt (Hours)
Basic Settings. > Confrim by pressing OK. The menu Basic Settings will be displayed. (Fig. 6-3) > Use the up/down arrow keys to move the marker around within the menu, and to change any of the individual positions. When selecting a menu item, please note any additional messages displayed on screen. -
Page 16: Audio/Video Settings
6.3 Audio/Video settings To optimize your digital receiver in conjunction with your tele- vision set, you can make further settings in the menu Audio /Video settings. > Press the Menu key to display the Main Menu. > Use the up/down arrow keys to mark the line Settings. -
Page 17: Dolby Digital (Ac3)
6.3.6 Dolby Digital (AC3) A number of movie films are broadcast in the Dolby Digital format. This will be indicated by the dolby symbol ( ) in the information window once you have saelected the programme. If you have a Dolby Digital 5.1 channel amplifier, you can enjoy the appropriate films in 5.1 channel Dolby-Digital sound, where broadcast. -
Page 18: Adjusting The Antenna
Adjusting the antenna In order to turn the antenna to its optimal position, your recei- ver is equipped with a signal strength indicator. > Use the Menu key to display the Main Menu > Now select the menu line Settings. >... - Page 19 you have approx. 3 seconds time after pressing a key to complete the entry. If you wish to enter a number consisting of only one or two digits, you can speed up the switching procedure by holding down the key a little longer on the last digit. 7.2.3 Using the Navigator (Programme list) >...
-
Page 20: Reception Of Encrypted Programmes
7.2.4 Accessing blocked programmes If a programme is selected that is blocked by the parental control function, the message Unit PIN will be displayed on screen. (Fig. 7-4) > Use the numeric keys to enter your PIN code. The (Fig. 7-4) selected programme can now be viewed. -
Page 21: Multifeed Options
7.3.1 Multifeed options Some programmes provide a multifeed option. This function allows you to select from among several camera viewpoints in the case of sports coverage (e.g. Formula 1), or of choo- sing one of several sports locations (e.g. National League soccer). -
Page 22: Dolby Digital (Ac3 Mode)
7.5 Selecting another language Where a programme is broadcast in several languages, or with several sound channels, this will be indicated on screen (Fig. 7-10). You can then proceed as follows to select another language or another sound channel: (Fig. 7-10) >... -
Page 23: Display Time And Programme Info
7.8 Display time and programme information This function allows you to view programme information rela- ted to the programme currently being viewed. > Press the Info key to display information related to the current programme (Fig. 7-12). The lower half of the screen will now show the current time, the name of the channel selected, the name of the current (Fig. -
Page 24: Video Text
7.12.2 Using the internal video text decoder Alternatively, you may use the integrated TOP teletext decoder to display the information. The TOP teletext system groups all text pages thematically in groups and blocks, making use of the function more easy and convenient. >... -
Page 25: Electronic Programme Guide Sfi
language/video text page. > Confirm by pressing OK. The sub-titles will now be displayed. Please note that these functions are only available when sub- titles are actually being broadcast. This setting is not stored in memory when programmes are switched. 7.14 Electronic Programme Guide SFI (SiehFern Info) Your digital receiver is equipped with an electronic program-... -
Page 26: Now (Table With Current Programme Contents)
> Press the SFI key on the remote control of the digital receiver. The electronic programme guide will be displayed on screen (Fig. 7-16). The display will show either the current programmes of the channels selected by you, or those included in the ex factory pre-programming (see also Point 8.2). -
Page 27: Sfi Functions
Press the green function key to page backwards through the tables. The individual days of the week are shown along the bottom of the screen. If information relating to the fol- lowing days is available, the appropriate fields will be highlighted. -
Page 28: Sfi Programme Overview
accidental premature interruption of the recording. When the unit is in standby mode, an active timer will be indicated by a clock symbol shown next to the time on the display. Deleting an SFI timer event > If you wish to delete a timer event programmed via SFI, proceed as described above to mark the selected programme. -
Page 29: Hard Drive Operation
> Press the blue function key SFI Menu to open a selection window. > Use the up/down arrow keys to mark the line Genres. > Confirm by pressing OK. > Use the green function key Genres to open a win- dow showing the available programme categories. - Page 30 8.1.1 Instant recording Start and end recording manually Option 1: > Switch to the channel that carried the programme you wish to record. > Press the Record key to record the currently broad- cast programme. You can continue to watch the pro- gramme on screen while the recording is in progress.
-
Page 31: Timer Recordings
the screen while the recording is running. > Press the On/Standby key A prompt will appear on screen, asking you whether you wish to record the current programme to the end. > Use the left/right arrow keys to select Yes in order to record the current programme to the end. - Page 32 Manual timer programming > Press the Menu key to call up the Main Menu. > Use the up/down arrow keys to mark the line Timer organizing. > Confirm by pressing OK. The sub-menu Timer organizing will be displayed. (Fig. 8-1) >...
- Page 33 function. > Press OK to accept the setting into memory. Accepting data into memory > When you have completed the programming, press the yellow function key Accept, to accept the data into memory. If under the heading Programme you have selected a programme that is blocked in terms of Point 8.3, you will first have to enter the PIN code before the data will be accepted into memory.
-
Page 34: Timeshift Function
showing the available timer types. > Use the up/down arrow keys to select the desired timer type. > To accept the timer type into memory, confirm by pres- sing OK. > When you have completed the programming, press the yellow function key Accept to accept the data into memory. -
Page 35: Pause/Freeze Frame
> To facilitate going to a specific point of a recording in progress, you can use the functions Play, Pause as well as Fast Search, as described under Point 7.15.2. > Press the Info key to display the information box, sho- wing a progress bar indicating the recording and play- ing time. -
Page 36: Managing The Hard Drive
> Once you have found the desired place in the recor- ding, press the yellow function key to revert to nor- mal Play operation. 8.2.4 Ending Play > If you wish to stop playing a recording, press the green function key. The playback function is termina- ted and your receiver reverts to normal operation. -
Page 37: Hard Drive Information
An updated version of this manual, reflecting the current func- tions, can be downloaded at a later stage from the Internet, at www.technisat.de. 8.3.2 Hard drive information >... -
Page 38: Changing Basic Programming
9 Changing basic programming 9.1 Configuring the Favourites list This chapter describes how you can change the pre-program- ming of your digital receiver, as well as the Favourites list in line with your preferences. This function is also required to sort newly found programmes into the list after a programme scan. - Page 39 display all available programmes in the Total list, or All new, to display only the new programmes found during the last scan, or All English, to display only English-language programmes. > Confirm by pressing OK. Now, depending on your selection, a programme list will be displayed showing, for example, all programmes, all new or all English-language programmes.
- Page 40 > Press the yellow function key Remove. The following prompt will be displayed on screen:“Remove programme(s) from list?”. > Use the left/right arrow keys to select Yes or No. > Confirm by pressing OK. > To remove several programmes simultaneously, pro- ceed as described in 8.1.2 (Marking blocks of pro- grammes).
-
Page 41: Programming The Electronic Programme Guide
desired position in the programme list at which you wish to place it. > Press the yellow function key Sort to move the pro- gramme block to the new position, and store the posi- tion in memory. > When you have completed configuring the programme list according to your preferen ces, press the Menu key to revert to normal operation. - Page 42 programme guide simultaneously, mark these as des- cribed in 8.1.2 (Marking blocks of programmes). > When you have marked the desired programmes in this manner, press the yellow function key SFI to include the marked programmes in the electronic pro- gramme guide.
-
Page 43: Parental Control Function
is to be carried out. > To start the download of updated SFI data manually, press the red function key Start now. If you do not wish to reeceive the additional data, or if you cannot receive it because of your location, you can switch off the data receiving function: >... -
Page 44: Programme Search/Scan
key. The parental control symbol will appear next to the programme selected. > To block several programmes simultaneously, mark these as described in Point 8.1.2 (Marking blocks of programmes) and block them by pressing the yellow function key. > When you have completed configuring the programme list according to your preferences, press the Menu key to revert to normal operation. - Page 45 list, as per Point 8.1. > To perform a programme scan, first call up the Main Menu. (Fig. 9-13) > Use the up/down arrow keys to mark the line Scan. > Confirm by pressing OK. The sub-menu Scan will be displayed. (Fig. 9-14) >...
- Page 46 you wish to include encrypted programmes as well (All Programmes). > Now press the red function key Start Search to begin the scan/search. The search will now begin. Please note any messages displayed on screen > You can terminate the scan at any time by pressing the red function key Terminate.
-
Page 47: Service Settings
Favourites list, and will be added only to the Total list. > Use the left/right arrow keys to select whether you wish to include the programmes in sorted or unsorted order. > Confirm by pressing OK. Please note any further messages displayed on screen. -
Page 48: Delete All Programmes
9.5.2 Delete all programmes This function will delete all programme memory. > Use the up/down arrow keys to mark the line Delete all programmes. > Press OK. The following prompt will appear:“Do you really want to delete all programmes?”. > Use the left/right arrow keys to select Yes or Abort. -
Page 49: Copying Settings
9.5.4 Copying the settings You have the facility to copy all the settings of your digital receiver (transmitter), such as programme lists, antenna set- tings, etc. to another digital receiver (receiver) of the same type, and equipped with the same version of the operating system software. -
Page 50: Technical Terms
10 Technical Terms Antenna cable: Connecting cable between the modulator of the satellite recei- ver and the antenna input of the television set. Used as an alternative where no SCART socket is availabe AV: see SCART Data compression/MPEG1/MPEG2: The current television standard (625 lines and 50 Hz picture repeat frequency) provides a digital data volume of 216 MBit/s. -
Page 51: Technical Data
by the television set. They are processed in the receiver so that audio and video signals (AV) are made available at the receiver outputs which are passed on to the television set in a form the TV set can use. SCART: A standard plug-in connection used in satellite receivers, video recorders, television sets and other home electronics... - Page 52 Audio decoding: Audio compression MPEG-1 & MPEG-2 Layer I and II Audio Mode Dual (main/sub), Stereo Sampling frequencies 32 kHz, 44.1 kHz, 48 kHz Audio parameters: Output analogue: Output level L/R 0,5 V r.m.s. (nominal) Output impedance 600 Ohm > 60 dB ( 1 kHz ) >...
- Page 53 Serial interface RS 232: Type RS 232, bidirectional Bit rate 115,2 kBit/s max. Connection D-SUB socket, 9 pin Function Update for operating software and pre-programming Programme memory: No. of programmes Favourites list TV: 999 TV programmes No. of programmes Favourites list Radio: 999 Radio programmes Number of programmes: Total list TV/Radio:...
-
Page 54: Troubleshooting Guide
12 Troubleshooting guide P P r r o o b b l l e e m m P P o o s s s s i i b b l l e e c c a a u u s s e e S S o o l l u u t t i i o o n n Various programmes not shown in Wrong programme list selected... -
Page 55: Initial Installation
Index ......19, 28 Autofocus 67 Automatic scan ......56 Language, operating . - Page 56 Updating software ......60 Special functions ......26 Language .
- Page 58 C C o o - - o o r r d d i i n n a a t t e e s s o o f f s s o o m m e e G G e e r r m m a a n n c c i i t t i i e e s s ( ( 1 1 ) ) T T o o w w n n / / c c i i t t y y G G e e o o g g r r .
- Page 59 C C o o - - o o r r d d i i n n a a t t e e s s o o f f s s o o m m e e G G e e r r m m a a n n c c i i t t i i e e s s ( ( 2 2 ) ) T T o o w w n n / / c c i i t t y y G G e e o o g g r r .
- Page 60 For everyday operation Switching on and off > Use the On/Standby key either on the unit or on the remote control to switch on the digital receiver. > Press the key again to switch the unit off. > The unit is now in standby mode, and the current time is shown on the display.
- Page 61 DigiCorder T1...
Need help?
Do you have a question about the DigiCorder T1 and is the answer not in the manual?
Questions and answers