Table of Contents
Advertisement
Advertisement
Table of Contents

Related Manuals for Powerline Powerline PHG-1000X


Summary of Contents for Powerline Powerline PHG-1000X
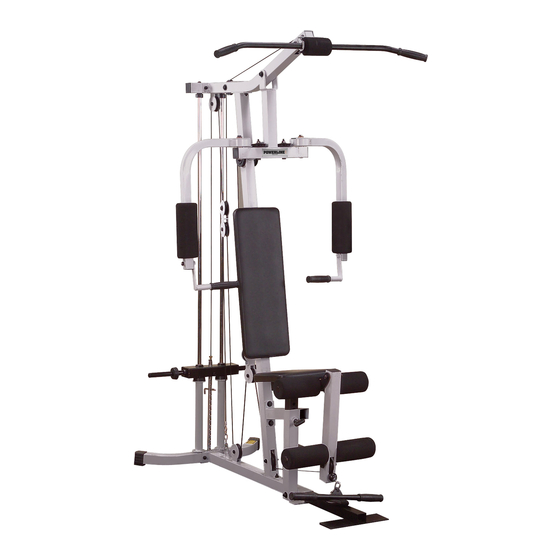
- Page 1 PHG-1000X HOME GYM Owner’s Manual WWW.BODYSOLID.COM © Best Company srl...
-
Page 2: Best Company Srl
THERE IS A RISK ASSUMED BY INDIVIDUALS WHO USE THIS TYPE OF EQUIPMENT. TO MINIMIZE RISK, YOU MUST FOLLOW THESE RULES: WARNING Safety and Maintenance of Cables IMPORTANT: Cables are wear items. It is your responsibility to prevent unexpected breakage. Cable inspection should be performed daily. -
Page 3: Table Of Contents
PHG-1000X TABLE OF CONTENTS • SAFETY INSTRUCTIONS....... PAGE 4 • PREPARATION........PAGE 5 • HARDWARE LIST........PAGE 6 • HARDWARE ILLUSTRATION....PAGE 8 • PART LIST / ILLUSTRATION....PAGE 14 • ASSEMBLY INSTRUCTIONS....PAGE 18 • EXPLODED VIEW........PAGE 32 •... -
Page 4: Safety Instructions
Powerline dealer or a Powerline factory-authorized • Never drop or insert objects into any opening in the service company or contact Body-Solid customer equipment. service at one of the following: • Always check the unit and its cables before each use. -
Page 5: Preparation
PHG-1000X PREPARATION Required tools Assembly Tips The basic tools that you must obtain before assembling Read all “Notes” on each page before beginning each step. the PHG-1000X include but are not limit to: While you may be able to assemble the PHG-1000X using the •... -
Page 6: Hardware List
PHG-1000X HARDWARE LIST PART # SIZE DESCRIPTION QUANTITY © Best Company srl... - Page 7 PHG-1000X HARDWARE LIST CONT. PART # SIZE DESCRIPTION QUANTITY © Best Company srl...
- Page 8 PHG-1000X HARDWARE ILLUSTRATION Part #1 M10X115mm hex head bolt QTY. 1 Part #2 M10X110mm hex head bolt QTY. 1 Part #3 M10X90mm hex head bolt QTY. 2 Part #4 M10X70mm hex head bolt QTY. 12 Part #5 M10X40mm hex head bolt QTY.
- Page 9 PHG-1000X HARDWARE ILLUSTRATION CONT. Part #7 M8X12mm hex head bolt QTY. 2 Part #8 M10X16mm washer QTY. 4 Part #9 5/16”X2 3/4” hex head bolt QTY. 4 Part #10 M10X70mm carriage bolt QTY. 2 Part #11 M10X90mm threaded shaft QTY. 1 Part #12 3/8”X3 1/2”...
- Page 10 PHG-1000X HARDWARE ILLUSTRATION CONT. Part #13 M10 nylon lock nut QTY. 28 Part #14 1/2” lock nut QTY. 1 Part #15 M10 washer QTY. 20 Part #16 M8 washer QTY. 6 Part #17 M8 spring washer QTY. 4 Part #18 1/2”...
- Page 11 PHG-1000X HARDWARE ILLUSTRATION CONT. Part #19 1/2” spring washer QTY. 1 Part #20 M10X19mm washer QTY. 2 Part #21 1/2” bolt cap QTY. 2 Part #22 50X50mm foot cap QTY. 2 Part #23 50X50mm end cap QTY. 8 Part #24 45X45mm end cap QTY.
- Page 12 PHG-1000X HARDWARE ILLUSTRATION CONT. Part #25 38X38mm end cap QTY. 2 Part #26 25mm flat round cap QTY. 5 Part #27 74mm pulley QTY. 14 Part #28 selector shaft QTY. 1 Part #29 64X26mm rubber donut QTY. 2 Part #30 25mm rubber stopper QTY.
-
Page 13: Hardware Illustration
PHG-1000X HARDWARE ILLUSTRATION CONT. Part #31 6mm snap link QTY. 3 Part #32 16mm steel bushing QTY. 8 Part #33 25X135mm rubber grip QTY. 2 Part #34 3 1/2”X8” foam roller QTY. 4 Part #35 4”X10” foam roller QTY. 2 Part #36 2 1/2”X3/4”... - Page 14 PHG-1000X PART LIST Part A Part B Part C mainframe front frame angled frame [1pcs] [1pcs] [1pcs] Part D Part E Part F top frame lat holder leg frame [1pcs] [1pcs] [1pcs] Part G Part H Part I seat frame pulley frame fly frame [1pcs]...
- Page 15 PHG-1000X PART LIST CONT. Part J Part K Part L left fly frame right fly frame weight rods [1pcs] [1pcs] [2pcs] Part M Part N Part O handle top plate guide rods [2pcs] [1pcs] [2pcs] Part P Part Q Part R top pulley holder bottom pulley holder rod frame...
- Page 16 PHG-1000X PART LIST CONT. Part S Part T Part U base frame lat bar row bar [1pcs] [1pcs] [1pcs] Part V Part W Part X roller rod stopper rod back pad [2pcs] [1pcs] [1pcs] Part Y Part Z Part AA seat pad flat plate fly rod...
- Page 17 PHG-1000X NOTES © Best Company srl...
-
Page 18: Assembly
PHG-1000X STEP 1 BE CAREFUL TO ASSEMBLE ALL COMPONENTS IN THE SEQUENCE THAT THEY ARE PRESENTED. NOTE: finger tighten all hardware in this step. DO NOT wrench tighten until the last step. some components may be pre-assembled. nylon lock nuts will not fully screw onto bolts, must wrench tighten. LEFT, RIGHT, BOTTOM, TOP, FRONT, AND REAR ARE REFERENCED FROM YOUR BACK TO MACHINE. - Page 19 PHG-1000X STEP 1 Above shows STEP 1 assembled and completed T-PIN handle © Best Company srl...
- Page 20 PHG-1000X STEP 2 BE CAREFUL TO ASSEMBLE ALL COMPONENTS IN THE SEQUENCE THAT THEY ARE PRESENTED. NOTE: finger tighten all hardware in this step. DO NOT wrench tighten until the last step. some components may be pre-assembled. nylon lock nuts will not fully screw onto bolts, must wrench tighten. 2A.
- Page 21 PHG-1000X STEP 2 Above shows STEP 2 assembled and completed © Best Company srl...
- Page 22 PHG-1000X STEP 3 BE CAREFUL TO ASSEMBLE ALL COMPONENTS IN THE SEQUENCE THAT THEY ARE PRESENTED. NOTE: finger tighten all hardware in this step. DO NOT wrench tighten until the last step. some components may be pre-assembled. nylon lock nuts will not fully screw onto bolts, must wrench tighten. IMPORTANT: in this step you have the option of installing a weight stack if one was purchased.
- Page 23 PHG-1000X STEP 3 Above shows STEP 3 assembled and completed ↑ optional weight stack (SP150) © Best Company srl...
- Page 24 PHG-1000X STEP 4 BE CAREFUL TO ASSEMBLE ALL COMPONENTS IN THE SEQUENCE THAT THEY ARE PRESENTED. NOTE: finger tighten all hardware in this step. DO NOT wrench tighten until the last step. some components may be pre-assembled. nylon lock nuts will not fully screw onto bolts, must wrench tighten. 4A.
- Page 25 PHG-1000X STEP 4 left shows STEP 4 assembled and completed T-PIN handle © Best Company srl...
- Page 26 PHG-1000X STEP 5 BE CAREFUL TO ASSEMBLE ALL COMPONENTS IN THE SEQUENCE THAT THEY ARE PRESENTED. NOTE: finger tighten all hardware in this step. DO NOT wrench tighten until the last step. some components may be pre-assembled. nylon lock nuts will not fully screw onto bolts, must wrench tighten. 5A.
- Page 27 PHG-1000X STEP 5 left shows STEP 5 assembled and completed © Best Company srl...
- Page 28 PHG-1000X STEP 6 BE CAREFUL TO ASSEMBLE ALL COMPONENTS IN THE SEQUENCE THAT THEY ARE PRESENTED. NOTE: finger tighten all hardware in this step. DO NOT wrench tighten until the last step. some components may be pre-assembled. nylon lock nuts will not fully screw onto bolts, must wrench tighten. important: this step is to show you where each pulley should be assembled and what hardware to use.
- Page 29 PHG-1000X STEP 6 left shows STEP 6 assembled and completed © Best Company srl...
- Page 30 PHG-1000X STEP 7 BE CAREFUL TO ASSEMBLE ALL COMPONENTS IN THE SEQUENCE THAT THEY ARE PRESENTED. NOTE: finger tighten all hardware in this step. DO NOT wrench tighten until the last step. some components may be pre-assembled. nylon lock nuts will not fully screw onto bolts, must wrench tighten. *the directions below are for routing the cables for the row bar, lat bar, and the right and left fly frames.
- Page 31 PHG-1000X STEP 7 © Best Company srl...
-
Page 32: Exploded View
PHG-1000X EXPLODED VIEW © Best Company srl... - Page 33 PHG-1000X NOTES © Best Company srl...
- Page 34 Copyright 2011. Body-Solid. All rights reserved. Body-Solid reserves the right to change design and speci cations when we feel it will improve the product. Body-Solid machines maintain several patented and patent pending features and designs. All rights reserved on all design patents and utility patents.
Need help?
Do you have a question about the Powerline PHG-1000X and is the answer not in the manual?
Questions and answers