Advertisement
Model No. WLEX1776.0
Serial No.
Serial Number
QUESTIONS?
As a manufacturer, we are com-
mitted to providing complete
customer satisfaction. If you
have questions, or if a part is
damaged or missing, PLEASE
CONTACT OUR CUSTOMER
SERVICE DEPARTMENT
DIRECTLY.
CALL TOLL-FREE:
1-866-699-3756
Mon.–Fri., 6 a.m.–6 p.m. MST
(closed on holidays)
ON THE WEB:
www.wesloservice.com
CAUTION
Read all precautions and instruc-
tions in this manual before using
this equipment. Keep this manual
for future reference.
Decal
USER'S MANUAL
Visit our website at
www.weslo.com
new products, prizes,
fitness tips, and much more!
Advertisement
Table of Contents

Related Manuals for Weslo Pursuit 4.0 Bike


Summary of Contents for Weslo Pursuit 4.0 Bike
- Page 1 (closed on holidays) ON THE WEB: www.wesloservice.com CAUTION Visit our website at Read all precautions and instruc- tions in this manual before using www.weslo.com this equipment. Keep this manual new products, prizes, for future reference. fitness tips, and much more!
-
Page 2: Table Of Contents
TABLE OF CONTENTS IMPORTANT PRECAUTIONS ..............2 BEFORE YOU BEGIN . -
Page 3: Before You Begin
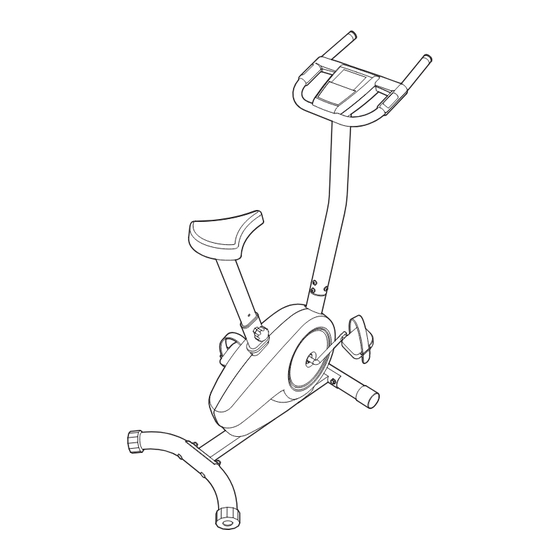
BEFORE YOU BEGIN Congratulations on selecting the new WESLO ® model number and serial number before contacting us. PURSUIT 4.0 exercise cycle. Cycling is one of the The model number is WLEX1776.0. The serial number most effective exercises for increasing cardiovascular can be found on a decal attached to the exercise cycle fitness, building endurance, and toning the body. -
Page 4: Assembly
ASSEMBLY To hire an authorized service technician to assemble the exercise cycle, call toll-free 1-800-445-2480. Assembly requires two persons. Place all parts of the exercise cycle in a cleared area and remove the packing materials. Do not dispose of the packing materials until assembly is completed. Assembly requires the included tools and your own adjustable wrench and Phillips screwdriver... - Page 5 2. While another person lifts the front of the Frame (1), attach the Front Stabilizer (6) with two M10 x 70mm Carriage Bolts (16), two M10 x 1.5mm Washers (54), and two M10 Nylon Locknuts (44). Next, press two Acorn Covers (35) onto the Nylon Locknuts. 3.
- Page 6 4. While another person holds the Upright (2) in the posi- tion shown, connect the Upper Wire Harness (56) to the Reed Switch Wire (57). Be careful to Gently pull the excess Upper Wire Harness (56) avoid pinching upward from the top of the Upright (2), and then slide the wires.
- Page 7 6. While another person holds the Console (5) near the Upright (2), connect the console wire harness to the Upper Wire Harness (56). Push the excess wire downward into the Upright (2). Attach the Console (5) to the Upright with four M6 x 12mm Button Screws (52).
-
Page 8: How To Operate The Exercise Cycle
HOW TO OPERATE THE EXERCISE CYCLE HOW TO ADJUST THE SEAT POST HOW TO ADJUST THE PEDAL STRAPS For effective exer- To adjust the pedal cise, the seat should straps, first pull the be at the proper ends of the straps off height. - Page 9 CONSOLE DIAGRAM HOW TO USE THE MANUAL MODE Turn on the console. To turn on the console, press the On/Reset button or begin pedaling. The entire display will light for a moment; the console will then be ready for use. Select the manual mode.
- Page 10 The upper display Measure your heart rate if desired. is the priority dis- play. The priority Note: If there are display can show sheets of clear Metal the elapsed time, Contacts plastic on the the distance that metal contacts of you have pedaled, your pedaling speed, or the the handgrip approximate number of calories you have burned.
- Page 11 adjust to the resistance level programmed for the HOW TO USE A PERSONAL TRAINER PROGRAM second segment. Note: You can manually over- ride the programmed resistance level by pressing Turn on the console. the Resistance increase and decrease buttons. However, when the current segment ends, the See step 1 on page 9.
-
Page 12: Maintenance And Troubleshooting
MAINTENANCE AND TROUBLESHOOTING Inspect and tighten all parts of the exercise cycle reg- PULSE SENSOR TROUBLESHOOTING ularly. Replace any worn parts immediately. Avoid moving your hands or squeezing the metal con- To clean the exercise cycle, use a damp cloth and a tacts too tightly while using the pulse sensor;... -
Page 13: Conditioning Guidelines
CONDITIONING GUIDELINES During the first few minutes of exercise, your body WARNING: uses easily accessible carbohydrate calories for energy. Only after the first few minutes of exercise does your body begin to use stored fat calories for Before beginning this or any exercise pro- energy. -
Page 14: Part List
PART LIST—Model No. WLEX1776.0 R1006A Key No. Qty. Description Key No. Qty. Description Frame Magnet Upright M5 x 16mm Screw Resistance Motor Seat Post Seat Acorn Cover Console Eye Bolt Front Stabilizer “U” Bracket Rear Stabilizer M6 Nylon Locknut Front Endcap M10 Flange Nut Rear Endcap M10 Washer... -
Page 15: Exploded Drawing
EXPLODED DRAWING—Model No. WLEX1776.0 R1006A 40 41... -
Page 16: Ordering Replacement Parts
• the MODEL NUMBER of the product (WLEX1776.0) • the NAME of the product (WESLO PURSUIT 4.0 exercise cycle) • the SERIAL NUMBER of the product (see the front cover of this manual) •...
Need help?
Do you have a question about the Pursuit 4.0 Bike and is the answer not in the manual?
Questions and answers