Advertisement
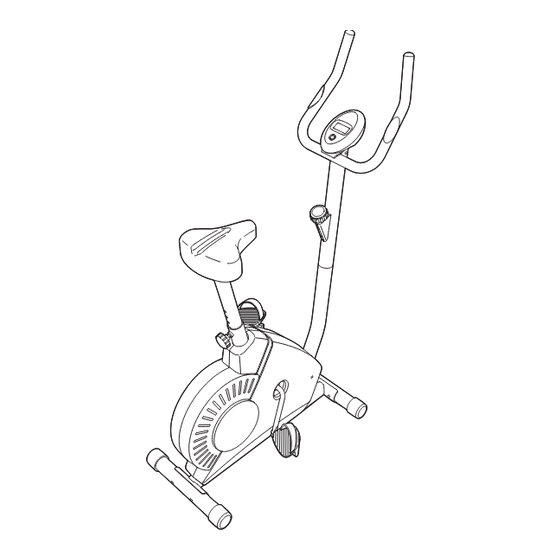
Model No. WLEX11040
Serial No.
QUESTIONS?
As a manufacturer, we are com-
mitted to providing complete
customer satisfaction. If you
have questions, or if there are
missing parts, we will guarantee
complete satisfaction through
direct assistance from our factory.
TO AVOID DELAYS, PLEASE
CALL DIRECT TO OUR TOLL-
FREE CUSTOMER HOT LINE. The
technicians on our customer hot
line will provide immediate assis-
tance, free of charge to you.
CUSTOMER HOT LINE:
1-866-699-3756
Mon.–Fri., 6 a.m.–6 p.m. MST
CAUTION
Read all precautions and instruc-
tions in this manual before using
this equipment. Keep this manual
for future reference.
Serial
Number
Decal
USER'S MANUAL
Visit our website at
www.weslo.com
new products, prizes,
fitness tips, and much more!
Advertisement
Table of Contents

Related Manuals for Weslo Pursuit 4.0 Dx


Summary of Contents for Weslo Pursuit 4.0 Dx
- Page 1 CUSTOMER HOT LINE: 1-866-699-3756 Mon.–Fri., 6 a.m.–6 p.m. MST CAUTION Visit our website at Read all precautions and instruc- tions in this manual before using www.weslo.com this equipment. Keep this manual new products, prizes, for future reference. fitness tips, and much more!
-
Page 2: Table Of Contents
TABLE OF CONTENTS IMPORTANT PRECAUTIONS ..............2 BEFORE YOU BEGIN . -
Page 3: Before You Begin
Congratulations for selecting the new WESLO ® Monday through Friday, 6 a.m. until 6 p.m. Mountain PURSUIT 4.0 DX exercise cycle. Cycling is one of the Time (excluding holidays). To help us assist you, most effective exercises for increasing cardiovascular please note the product model number and serial fitness, building endurance, and toning the body. -
Page 4: Assembly
ASSEMBLY Assembly requires two persons. Place all parts of the exercise cycle in a cleared area and remove the packing materials. Do not dispose of the packing materials until assembly is completed. Assembly requires the included tools and your own adjustable wrench , Phillips screw- driver , and pliers... - Page 5 3. The Console (16) requires two AA batteries; alkaline batteries are recommended. Remove the battery cover Battery from the back of the Console. Insert two batteries into Cover the battery compartment; make sure that the batter- ies are oriented as shown by the markings inside Batteries of the battery compartment.
- Page 6 6. While another person holds the Upright (13) in the position shown, connect the Extension Wire (40) to the Reed Switch Wire (43). Next, connect the Resistance Cable (19) to the Lower Cable (45) in the following way: Be careful to avoid pinching •...
- Page 7 8. Turn the Seat Knob (9) counterclockwise and remove it. Insert the Seat Post (5) into the Frame (1). Align one of the adjustment holes in the Seat Post with the indi- cated hole in the Frame. Insert the Seat Knob into the Frame and the Seat Post, and turn the Seat Knob clockwise until it is tight.
-
Page 8: How To Operate The Exercise Cycle
HOW TO OPERATE THE EXERCISE CYCLE HOW TO ADJUST THE SEAT POST HOW TO ADJUST THE PEDALING RESISTANCE For effective exer- To increase the cise, the seat resistance of the should be at the pedals, turn the proper height. As resistance knob Seat you pedal, there... - Page 9 FEATURES OF THE CONSOLE mode arrow will Mode Arrows show that the The easy-to-use console features seven modes that scan mode is provide instant exercise feedback during your work- selected, and a outs. The modes are described below. second mode arrow will show which mode is currently dis-...
-
Page 10: Maintenance And Troubleshooting
MAINTENANCE AND TROUBLESHOOTING Inspect and tighten all parts of the exercise cycle reg- Next, turn the resistance knob to the lowest setting. ularly. Replace any worn parts immediately. With the left side shield removed, locate the Reed Switch (43). Turn the Crank (21) until the Magnet (38) To clean the exercise cycle, use a damp cloth and a is aligned with the Reed Switch. -
Page 11: Conditioning Guidelines
CONDITIONING GUIDELINES The following guidelines will help you to plan your During the first few minutes of exercise, your body exercise program. Remember that proper nutrition uses easily accessible carbohydrate calories for ener- and adequate rest are essential for successful results. gy. - Page 12 SUGGESTED STRETCHES The correct form for several basic stretches is shown at the right. Move slowly as you stretch—never bounce. 1. Toe Touch Stretch Stand with your knees bent slightly and slowly bend forward from your hips. Allow your back and shoulders to relax as you reach down toward your toes as far as possible.
- Page 13 NOTES...
-
Page 14: Part List
PART LIST—Model No. WLEX11040 R0704A Key No. Qty. Description Key No. Qty. Description Frame M10 x 75mm Carriage Bolt Stabilizer Eyebolt M4 x 16mm Round Head Screw M6 Nut Stabilizer Endcap M10 Nylon Locknut Seat Post M8 x 15mm Button Screw C-Magnet Bracket Belt Handlebar Endcap... -
Page 15: Exploded Drawing
EXPLODED DRAWING—Model No. WLEX11040 R0704A... -
Page 16: Ordering Replacement Parts
• The MODEL NUMBER of the product (WLEX11040) • The NAME of the product (WESLO PURSUIT 4.0 DX exercise cycle) • The SERIAL NUMBER of the product (see the front cover of this manual) • The KEY NUMBER and DESCRIPTION of the part(s) (see the PART LIST on page 14) WESLO is a registered trademark of ICON IP, Inc.
Need help?
Do you have a question about the Pursuit 4.0 Dx and is the answer not in the manual?
Questions and answers