Planet WNAP-1110 User Manual
802.11n wireless access point
Hide thumbs
Also See for WNAP-1110:
- User manual (112 pages) ,
- Quick manual (2 pages) ,
- Quick installation quide (2 pages)
Table of Contents
Advertisement
Quick Links
Advertisement
Table of Contents

Related Manuals for Planet WNAP-1110


Summary of Contents for Planet WNAP-1110
- Page 1 WNAP-1110 802.11n Wireless Access Point User's Manual...
-
Page 2: Federal Communication Commission Interference Statement
Copyright Copyright © 2010 by PLANET Technology Corp. All rights reserved. No part of this publication may be reproduced, transmitted, transcribed, stored in a retrieval system, or translated into any language or computer language, in any form or by any means, electronic, mechanical, magnetic, optical, chemical, manual or otherwise, without the prior written permission of PLANET. - Page 3 Federal Communication Commission (FCC) Radiation Exposure Statement This equipment complies with FCC radiation exposure set forth for an uncontrolled environment. In order to avoid the possibility of exceeding the FCC radio frequency exposure limits, human proximity to the antenna shall not be less than 20 cm (8 inches) during normal operation. R&TTE Compliance Statement This equipment complies with all the requirements of DIRECTIVE 1999/5/CE OF THE EUROPEAN PARLIAMENT AND THE COUNCIL OF 9 March 1999 on radio equipment and telecommunication...
- Page 4 WEEE regulation To avoid the potential effects on the environment and human health as a result of the presence of hazardous substances in electrical and electronic equipment, end users of electrical and electronic equipment should understand the meaning of the crossed-out wheeled bin symbol.
-
Page 5: Table Of Contents
CONTENTS Package Contents ....................1 Conventions ......................1 Chapter 1 Introduction................... 2 Product Overview....................2 Main Features ....................3 Appearance....................... 4 1.3.1 The Front Panel ....................4 1.3.2 The Rear Panel....................5 Chapter 2 Hardware Installation ................6 Before You Begin....................6 Basic Requirements .................. - Page 6 4.7.6 Ping Watch Dog....................53 4.7.7 Reboot ......................54 4.7.8 Password ......................55 4.7.9 System Log......................55 Appendix A: Application Example ................ 57 Appendix B: Factory Defaults ................60 Appendix C: Troubleshooting ................61 Appendix D: Specifications................... 62 Appendix E: Glossary .................... 63...
-
Page 7: Package Contents
Conventions The AP or WNAP-1110, or device mentioned in this User’s Manual stands for WNAP-1110 802.11n Wireless Access Point without any explanations. Parameters provided in the pictures are just references for setting up the product, which may differ... -
Page 8: Chapter 1 Introduction
It supports an easy, web-based setup for installation and management. Even though you may not be familiar with the Access Point, you can easily configure it with the help of this Manual. Before installing the AP, please look through this Manual to get the full information of the WNAP-1110 802.11n Wireless Access Point. -
Page 9: Main Features
1.2 Main Features Features Benefits Make use of IEEE 802.11n wireless technology Allows the AP to transmit wireless data at the rate of up to 150Mbps Provides multiple encryption security Types Secures your data while the data packets are including: 64/128/152-bit WEP WPA/WPA2 being transmitted WPA-PSK/WPA2-PSK Supports Built-in DHCP server... -
Page 10: Appearance
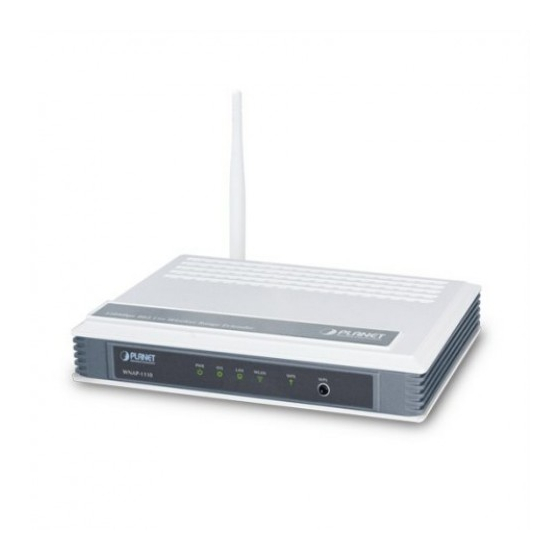
1.3.1 The Front Panel Figure 1-1 The front panel of the WNAP-1110 consists of several LED indicators, which is designed to indicate connections. View from left to right, Table 1-1 describes the LEDs on the front panel of the device. -
Page 11: The Rear Panel
1.3.2 The Rear Panel Figure 1-2 Viewed from left to right, the following parts are located on the rear panel of WNAP-1110. POWER: The power port connects to the power adapter provided with the WNAP-1110 Wireless Access Point. LAN: One LAN 10/100Mbps RJ45 port connects to a network device, such as a switch or a router. -
Page 12: Chapter 2 Hardware Installation
Web browser, such as Microsoft Internet Explorer 5.0 or above, Netscape Navigator 6.0 or above Operating temperature: 0℃~40℃ (32℉~104℉) Operating Humidity: 10%~90%RH, Non-condensing 2.3 Connecting the Device Figure 2-1 is an example of the typical application of WNAP-1110 in the infrastructure network. An Infrastructure network contains an access point or a wireless router. - Page 13 Adjust the direction of the antenna. Normally, upright is a good direction. Connect the Ethernet Broadband Router to the WNAP-1110 Access Point. Power on the AP. Then you can connect a desktop PC or laptop to your network. (Make sure your computer or laptop is equipped with a Wireless Adapter.)
-
Page 14: Chapter 3 Configure The Pc
Chapter 3 Configure the PC This chapter will guide you to configure your PC to communicate with the AP. The wireless adapter-equipped computers in your network must be in the same IP address range without overlap with each other. Manually configure the IP address as 192.168.1.* (* is any integer between 2 to 254), the Subnet mask as 255.255.255.0, and the Default gateway as 192.168.1.1 for your PC by following the instructions below. - Page 15 Figure 3-2 In the General tab of Internet Protocol (TCP/IP) Properties window, highlight Internet Protocol (TCP/IP) and click Properties. Figure 3-3...
- Page 16 Configure the IP address manually. Select Use the following IP address. Enter 192.168.1.* (* is any integer between 2 to 254) into the IP address filed, 255.255.255.0 into the Subnet mask filed and 192.168.1.1 into the Default gateway filed. Click Ok to keep your settings. Figure 3-4 Verify the network connection between your PC and the AP via the Ping command.
- Page 17 If the result displayed is similar to that shown as Figure 3-6 below, it means that your PC has not connected to the AP. Figure 3-6 Please check following these steps: Check to see if your PC and the AP are right connected. The LED of LAN port which you link to on the device and the LED on your PC’s adapter should be lit up.
-
Page 18: Chapter 4 Configure The Device
Chapter 4 Configure the Device This Chapter describes how to configure your Access Point via the web-based management page. The WNAP-1110 802.11n Wireless Access Point is easy to configure and manage with the ® Web-based (Internet Explorer, Netscape Navigator, Firefox, Safari, Opera or Chrome) management page, which can be launched on any windows, Macintosh or UNIX OS with a web browser. -
Page 19: Status
4.2 Status Selecting Status will enable you to view the AP’s current status and configuration, all of which is read-only. Figure 4-3 Device Status Firmware Version - This field displays the current firmware version of the AP. Hardware Version - This field displays the current hardware version of the AP... -
Page 20: Wps
Wired - This field displays the current settings or information for the Network, including the MAC address, IP address and Subnet Mask. Wireless - This field displays basic information or status for wireless function, including Operating Mode, SSID, Channel, Mode, Channel Width, Max Tx Rate and MAC Address. Traffic Statistics - This field displays the AP's traffic statistics. - Page 21 Operation Mode - Displays the current operation mode of the AP. WPS Status - To enable or disable the WPS function here. Current PIN - The current value of the AP's PIN is displayed here. Restore PIN - Restore the PIN of the AP to its default. Gen New PIN - Click this button, and then you can get a new random value for the AP's PIN.
- Page 22 Step 3: Click "PBC" button of utility now to start to establish wireless connection by WPS, and please be patient (This may require several seconds to one minute to complete). When you see "WPS status is connected successfully" message, it means the connection is successfully connected by WPS, and the information about AP will be displayed.
- Page 23 Figure 4-5 Add A New Device Step 2: Choose “Press the button of the new device in two minutes” and click Connect. Step 3: Set "Config Mode" to "Enrollee" and click "PBC" button of utility now to start to establish wireless connection by WPS, and please be patient (This may require several seconds to one minute to complete).
- Page 24 example) of WNL-U554A Wireless USB Adapter in the field after PIN as shown in the figure above. Then click Connect. Note: The PIN code of the adapter is always displayed on the WPS configuration screen as shown in the following figure. Note: In this example, the default PIN code of this adapter is 04583691 as the above figure shown.
-
Page 25: Network
You will see the following screen when the new device has successfully connected to the network. Note: The WPS LED on the AP will light green for five minutes if the device has been successfully added to the network. The WPS function cannot be configured if the Wireless function of the AP is disabled. Please make sure the Wireless function is enabled before configuring the WPS. -
Page 26: Wireless
255.255.255.0 as the subnet mask. Gateway - The gateway should be in the same subnet as your IP address. MAC Address - The physical address of the AP. The value can't be changed. Note: If you change the IP Address, you must use the new IP Address to log in the AP. If the new LAN IP Address you set is not in the same subnet with the IP Address pool of DHCP sever, the IP Address pool will not take effect until it is re-configured accordingly. - Page 27 1) Access Point: This mode allows wireless stations to access this device. Figure 4-8 Wireless Settings in Access Point mode SSID (Set Service Identifier) - Identifies your wireless network name. Create a name up to 32 characters and make sure all wireless points in the wireless network with the same SSID. The default SSID is default.
- Page 28 Enable Wireless Radio - Select or deselect this check box to allow or deny wireless stations to access the AP. Enable SSID Broadcast - Select or deselect this check box to allow or deny the AP to broadcast its name (SSID) on the air. If it’s allowed, when wireless clients survey the local area for wireless networks to associate with, they will detect the SSID broadcast by the AP.
- Page 29 IEEE802.1Q frames. The wireless stations connecting to the SSID of a specified VLANID can communicate with the PC connecting to the port with the same VLANID on the Switch. Channel - Determines the operating frequency to be used. It is not necessary to change the wireless channel unless you notice interference problems with another nearby access point.
- Page 30 3) Client: This mode allows the AP to act as a wireless station to enable wired host(s) to access an AP. Figure 4-10 Wireless Settings in Client mode Enable WDS - The client can connect to AP with WDS enabled or disabled. If WDS is enabled, all traffic from wired networks will be forwarded in the format of WDS frames consisting of four address fields.
- Page 31 Figure 4-11 Wireless Settings in Repeater mode MAC of AP - Enter the MAC address of the root AP of which you want to expand wireless range. Channel Width - Determines the channel width to be used. It is unnecessary to change the default value unless required.
- Page 32 5) Universal Repeater: This mode allows the AP with its own BSS to relay data to a root AP to which it is associated with WDS disabled. The wireless repeater relays signal between its stations and the root AP for greater wireless range. Figure 4-12 Wireless Settings in Repeater mode MAC of AP - Enter the MAC address of the root AP of which you want to expand wireless range.
- Page 33 6) Bridge with AP: This mode can bridge the AP and up to 4 APs also in bridge mode to connect two or more wired LANs. Figure 4-13 Wireless Settings in Repeater mode SSID (Set Service Identifier) - Identifies your wireless network name. Create a name up to 32 characters and make sure all wireless points in the wireless network with the same SSID.
-
Page 34: Wireless Security
Max Tx Rate - Specifies the maximum transmit rate of the AP through this field. Enable Wireless Radio - Select or deselect this check box to allow or deny wireless stations to access the AP. Enable SSID Broadcast - Select or deselect this check box to allow or deny the AP to broadcast its name (SSID) on the air. - Page 35 1) Access Point Figure 4-14 Wireless Security - Access Point Operation Mode - Shows the current operation mode. Disable Security - Check this box radio button to disable wireless security. If disabled, the wireless stations will be able to connect this AP without encryption. It is strongly recommended that you choose one of the security types to enable security.
- Page 36 • WEP Key Format - You can select ASCII or Hexadecimal format. ASCII format stands for any combination of keyboard characters in the specified length. Hexadecimal format stands for any combination of hexadecimal digits (0-9, a-f, A-F) in the specified length. •...
- Page 37 • Group Key Update Period - Specify the group key update interval in seconds. The value can be either 0 or at least 30. Enter 0 to disable the update. Be sure to click the Save button to save your settings on this page. Note: You will be reminded to reboot the device after clicking the Save button.
- Page 38 WPA2 - WPA version 2. • Encryption - You can select either Automatic, TKIP or AES. • Radius Server IP - Enter the IP address of the Radius Server. • Radius Port - Enter the port used by radius service. •...
- Page 39 3) Client Figure 4-16 Wireless Security – Client Operation Mode - Shows the current operation mode. Disable Security - Check this box radio button to disable wireless security. If disabled, the wireless stations will be able to connect this AP without encryption. It is strongly recommended that you choose one of the security types to enable security.
- Page 40 • Key Type - You can select the WEP key length (64-bit, or 128-bit, or 152-bit.) for encryption. "Disabled" means this WEP key entry is invalid. For 64-bit encryption - You can enter 10 hexadecimal digits (any combination of 0-9, a-f, A-F, zero key is not permitted) or 5 ASCII characters.
- Page 41 4) Repeater Figure 4-17 Wireless Security – Repeater Operation Mode - Shows the current operation mode. Disable Security - Check this box radio button to disable wireless security. If disabled, the wireless stations will be able to connect this AP without encryption. It is strongly recommended that you choose one of the security types to enable security.
- Page 42 • Key Type - You can select the WEP key length (64-bit, or 128-bit, or 152-bit.) for encryption. "Disabled" means this WEP key entry is invalid. For 64-bit encryption - You can enter 10 hexadecimal digits (any combination of 0-9, a-f, A-F, zero key is not permitted) or 5 ASCII characters.
- Page 43 5) Universal Repeater Figure 4-18 Wireless Security – Universal Repeater Operation Mode - Shows the current operation mode. Disable Security - Check this box radio button to disable wireless security. If disabled, the wireless stations will be able to connect this AP without encryption. It is strongly recommended that you choose one of the security types to enable security.
- Page 44 • Key Type - You can select the WEP key length (64-bit, or 128-bit, or 152-bit.) for encryption. "Disabled" means this WEP key entry is invalid. For 64-bit encryption - You can enter 10 hexadecimal digits (any combination of 0-9, a-f, A-F, zero key is not permitted) or 5 ASCII characters.
- Page 45 6) Bridge with AP Figure 4-19 Wireless Security – Universal Repeater Operation Mode - Shows the current operation mode. Disable Security - Check this box radio button to disable wireless security. If disabled, the wireless stations will be able to connect this AP without encryption. It is strongly recommended that you choose one of the security types to enable security.
-
Page 46: Wireless Mac Filtering
For 128-bit encryption - You can enter 26 hexadecimal digits (any combination of 0-9, a-f, A-F, zero key is not permitted) or 13 ASCII characters. For 152-bit encryption - You can enter 32 hexadecimal digits (any combination of 0-9, a-f, A-F, zero key is not permitted) or 16 ASCII characters. - Page 47 Figure 4-21 Add or Modify Wireless MAC Address Filtering entry MAC Address - Enter the wireless station's MAC address that you want to control. Description - Give a simple description of the wireless station. Status - Select a status for this entry, either Enabled or Disabled. To set up an entry, follow these instructions: First, you must decide whether the unspecified wireless stations can access the AP or not.
-
Page 48: Wireless Advanced
stations cannot access the device, you should configure the Wireless MAC Address Filtering list by following these steps: 1. Click the Enable button to enable this function. 2. Select the radio button: Deny the stations not specified by any enabled entries in the list to access for Filtering Rules. -
Page 49: Throughput Monitor
Tx Power - Specifies the transmit power of the AP. You can select High, Middle or Low which you would like. High is the default setting and is recommended. Beacon Interval - Specifies a value between 20-1000 milliseconds. The beacons are the packets sent by the AP to synchronize a wireless network. -
Page 50: Wireless Statistics
Figure 4-23 Throughput Monitor Rate - The Throughput unit. Run Time - How long this function is running. Transmit - Wireless transmit rate information. Receive - Wireless receive rate information. Click the Start button to start wireless throughput monitor. Click the Stop button to stop wireless throughput monitor. 4.5.6 Wireless Statistics Selecting Wireless >... -
Page 51: Dhcp
Figure 4-24 Statistics of the device attached wireless stations Operation Mode - Shows the current operation mode. If Multi-SSID is selected, all connected wireless stations will be shown here MAC Address - Shows the connected wireless station's MAC address Current Status - The connected wireless station's running status, one of STA-AUTH / STA-ASSOC / STA-JOINED / WPA / WPA-PSK / WPA2 / WPA2-PSK / AP-UP / AP-DOWN / Disconnected Received Packets - packets received by the station... -
Page 52: Dhcp Settings
4.6.1 DHCP Settings Selecting DHCP > DHCP Settings will enable you to set up the AP as a DHCP (Dynamic Host Configuration Protocol) server, which provides the TCP/IP configuration for all the PCs that are connected to the system on the LAN. The DHCP Server can be configured on the page (shown as Figure 4-26): Figure 4-26 DHCP Settings DHCP Server - Selecting the radio button before Disable/Enable will disable/enable the... -
Page 53: Dhcp Clients List
Note: 1 When the device is working on Dynamic IP mode, the DHCP Server function will be disabled. 2 To use the DHCP server function of the device, you should configure all computers in the LAN as "Obtain an IP Address automatically" mode. This function will not take effect until the device reboots. -
Page 54: System Tools
IP address. Reserved IP Address - Here displays the IP address that the AP is reserved. Status - Here shows whether the entry is enabled or not Modify - To modify or delete an existing entry. To Reserve IP addresses: Click the Add New... -
Page 55: Snmp
4.7.1 SNMP Selecting System Tools > SNMP to enable this function will allow the network management station to retrieve statistics and status from the SNMP agent in this AP. Simple Network Management Protocol (SNMP) is a popular network monitoring and management protocol, used to refer to a collection of specifications for network management that include the protocol itself. -
Page 56: Diagnostic
Set Source - Set source defines the IP address or subnet for management systems that can control this 'set' community device. Note: A restricted source can be a specific IP address (e.g. 10.10.10.1), or a subnet - represented as IP/BITS (e.g. 10.10.10.0/24). If an IP Address of 0.0.0.0 is specified, the agent will accept all requests under the corresponding community name. -
Page 57: Firmware Upgrade
decrement the TTL in an IP packet by at least 1 before forwarding it. Effectively, the TTL is a maximum link counter. When the TTL on a packet reaches 0, the gateway is expected to return an ICMP Time Exceeded response to your AP. Traceroute determines the path by sending the first Echo Request message with a TTL of 1 and incrementing the TTL by 1 on each subsequent transmission until the target responds or the maximum number of hops is reached. -
Page 58: Factory Defaults
Figure 4-33 Firmware Upgrade New firmware versions are posted at http://www.planet.com.tw/ and can be downloaded for free. Firmware Version - Here displays the current firmware version. Hardware Version - Here displays the current hardware version. The hardware version of the upgrade file must accord with the current hardware version. -
Page 59: Backup & Restore
• Default Password: admin • Default IP Address: 192.168.1.1 • Default Subnet Mask: 255.255.255.0 Note: Any settings you have saved will be lost when the default settings are restored. 4.7.5 Backup & Restore Selecting System Tools > Backup & Restore allows you to save all configuration settings to your local computer as a file or restore the AP's configuration on the screen shown in Figure 4-35. -
Page 60: Reboot
Figure 4-36 Ping Watch Dog Utility Enable - Turn on/off Ping Watch Dog. IP Address - The IP address of the target host where the Ping Watch Dog Utility is sending ping packets. Interval - Time internal between two ping packets which are sent out continuously. Delay - Time delay before first ping packet is sent out when the device is restarted. -
Page 61: Password
4.7.8 Password Selecting System Tools > Password allows you to change the factory default user name and password of the device on the screen shown in Figure 4-38. Figure 4-38 Password It is strongly recommended that you change the factory default user name and password of the AP. All users who try to access the AP's web-based management page or Quick Setup will be prompted for the AP's user name and password. - Page 62 The AP can keep logs of all traffic. You can query the logs to find what happened to the AP. Log Type - By selecting the log type, only logs of this type will be shown. Log Level - By selecting the log level, only logs of this level will be shown. Click the Refresh button to show the latest log list..
-
Page 63: Appendix A: Application Example
Appendix A: Application Example The WNAP-1110 allows you to connect a wireless device to the wired network. Providing that you want to connect your computer equipped with wireless adapter to a wired network wirelessly, you can take the following instructions. - Page 64 3. Configure your PC to connect to the network wirelessly. Click Start (in the lower left corner of the PC’s screen), right-click My Network Connections and choose Properties. On the My Network Connections window, right-click Wireless Network and choose Enable to enable wireless network function.
- Page 65 Right-click the wireless connection icon “ ” on the screen of the PC and then select View Available Wireless Networks. Highlight the SSID of the AP(Here is “PE Test”) and click Connect to add to the network. Then the following page will display, which indicates you have been successfully added to the network wirelessly.
-
Page 66: Appendix B: Factory Defaults
Appendix B: Factory Defaults Item Default Value Common Default Settings Username admin Password admin IP Address 192.168.1.1 Subnet Mask 255.255.255.0 Wireless SSID default Wireless Security Disable Wireless MAC Address Filtering Disable DHCP DHCP Server Disable Start IP Address 192.168.1.100 End IP Address 192.168.1.199 Address Lease Time 120 minutes (Range:1 ~ 2880 minutes) -
Page 67: Appendix C: Troubleshooting
Appendix C: Troubleshooting No LEDs are lit on the access point. It takes a few seconds for the Power LED to light up. Wait a minute and check the status of Power LED. If there the LED is still off, check the following items. Make sure the power cord is connected to the Access Point. -
Page 68: Appendix D: Specifications
Appendix D: Specifications General Standards and Protocols IEEE 802.3, 802.3u, 802.11n, 802.11b and 802.11g, TCP/IP, DHCP Safety & Emission FCC, CE Ports One 10/100M Auto-Negotiation LAN RJ45 port 10BASE-T: UTP category 3, 4, 5 cable (maximum 100m) EIA/TIA-568 100Ω STP (maximum 100m) Cabling Type 100BASE-TX: UTP category 5, 5e cable (maximum 100m) EIA/TIA-568 100Ω... -
Page 69: Appendix E: Glossary
Appendix E: Glossary 802.11b - The 802.11b standard specifies a wireless networking at 11 Mbps using direct-sequence spread-spectrum (DSSS) technology and operating in the unlicensed radio spectrum at 2.4GHz, and WEP encryption for security. 802.11b networks are also referred to as Wi-Fi networks. - Page 70 provides an authentication alternative to an expensive RADIUS server. WPA-PSK is a simplified but still powerful form of WPA most suitable for home Wi-Fi networking. To use WPA-PSK, a person sets a static key or "passphrase" as with WEP. But, using TKIP, WPA-PSK automatically changes the keys at a preset time interval, making it much more difficult for hackers to find and exploit them.
Need help?
Do you have a question about the WNAP-1110 and is the answer not in the manual?
Questions and answers