Table of Contents
Advertisement
Advertisement
Table of Contents

Related Manuals for Grizzly G1012


Summary of Contents for Grizzly G1012
-
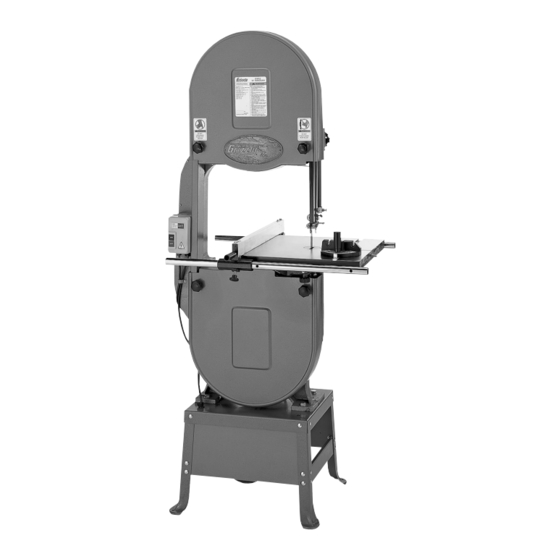
Page 1: Instruction Manual
18" HEAVY-DUTY BANDSAW MODEL G1012 INSTRUCTION MANUAL COPYRIGHT © 1992 BY GRIZZLY INDUSTRIAL, INC. REG.# TX 3170 590 WARNING: NO PORTION OF THIS MANUAL MAY BE REPRODUCED IN ANY SHAPE OR FORM WITHOUT THE WRITTEN APPROVAL OF GRIZZLY INDUSTRIAL, INC. - Page 2 WARNING Some dust created by power sanding, sawing, grind- ing, drilling, and other construction activities contains chemicals known to the State of California to cause cancer, birth defects or other reproductive harm. Some examples of these chemicals are: • Lead from lead-based paints. •...
-
Page 3: Table Of Contents
SAFETY ...2 SAFETY RULES FOR ALL TOOLS ...2-3 ADDITIONAL SAFETY INSTRUCTIONS FOR BANDSAWS...4 CIRCUIT REQUIREMENTS ...5 220V OPERATION ...5 FUSING ...5 GROUNDING ...6 EXTENSION CORDS ...6 GENERAL INFORMATION ...7 UNPACKING...8 PIECE INVENTORY ...8-9 HARDWARE BAGS ...9 HARDWARE RECOGNITION CHART ...10 CLEAN UP ...11 SITE CONSIDERATIONS ...11 ASSEMBLY ...12... -
Page 4: Safety Instructions For Power Tools
G1012 18" Bandsaw VISITORS... - Page 5 14. MAINTAIN TOOLS WITH CARE. Keep tools sharp and clean for best and safest performance. Follow instructions for lubri- cating and changing accessories. G1012 18" Bandsaw 15. USE RECOMMENDED ACCESSORIES. 16. REDUCE THE RISK OF UNINTENTION- 17. MANY WOODWORKING TOOLS CAN...
-
Page 6: Additional Safety Instructions For Bandsaws
The time you invest before you begin to use the Model G1012 18" Bandsaw will be time well spent. DO NOT operate this machine until you are complete- ly familiar with the contents of this manual or serious personal injury may occur. -
Page 7: Section 2: Circuit Requirements
SECTION 2: CIRCUIT REQUIREMENTS 220V Operation The Model G1012 has a 2 H.P. motor which oper- ates at 220V. If you do not intend to use a mobile base, you have the option of wiring this bandsaw directly to a dedicated circuit. However, you will need to have an in-line electrical disconnect located near the machine. -
Page 8: Grounding
These requirements are not nec- actually essarily comprehensive. You must be sure that your particular electrical configuration complies with local and state codes. Ensure compliance by checking with your local plug municipality or a licensed electrician. G1012 18" Bandsaw... -
Page 9: Section 3: General Information
3450 R.P.M., 2 H.P. capacitor start motor, a magnetic safety switch and a cord set. We are also pleased to provide this manual with the Model G1012. It was written to guide you through assembly, review safety considerations, and cover general operating procedures. It repre- sents our latest effort to produce the best docu- mentation possible. -
Page 10: Unpacking
Unpacking The Model G1012 Bandsaw is shipped from the manufacturer in a carefully packed carton. If you discover the machine is damaged after you have signed for delivery, please call Customer Service immediately for advice. Save the containers and all packing materials for possible inspection by the carrier or its agent. -
Page 11: Hardware Bags
Figure 3. Stand components. Figure 4. Bandsaw components. G1012 18" Bandsaw Hardware Bags Inside Bags Carriage Bolts ⁄ " - 18 x Flat Washers ⁄ " Nuts ⁄ " - 18 Hex Head Bolts ⁄ " - 18 x Hex Head Bolts ⁄... -
Page 12: Hardware Recognition Chart
Hardware Recognition Chart Use this chart to match up hardware pieces during the assembly process! -10- G1012 18" Bandsaw... -
Page 13: Clean Up
Floor Load: Your Model G1012 18" Bandsaw represents a moderate weight load in a small footprint. Most commercial floors are suitable for the Model G1012. Some res- idential floors may require additional build up to support both machine and operator. -
Page 14: Section 4: Assembly
Order of Assembly We have organized the assembly process of the Model G1012 into steps listed below. Please fol- low them in sequence. The inventory photos and lists, hardware recognition chart, parts list and exploded diagram have been provided to make assembly as easy as possible. - Page 15 "-18 x " carriage bolts, wash- ers and nuts provided. Do not tighten down bolts completely at this time. G1012 18" Bandsaw ⁄ " hex head bolts, Figure 7. Legs, braces, and one stand side ⁄ "-20 x As an option, you may attach the other stand side to the stand at this time.
- Page 16 ⁄ "-18 hex nut Figure 11. Bandsaw unit mounted to stand. The Model G1012 can be awkward to handle without assistance. The bandsaw unit is also very unstable until it is permanently mounted to the stand. Failure to use caution during assembly could lead to serious per- sonal injury.
-
Page 17: Pulleys
Insert one of the ⁄ "-20 x the wheel pulley and tighten to the shaft as shown in Figure 13. G1012 18" Bandsaw Figure 13. Securing wheel pulley to shaft. ⁄ " setscrews into Install the stepped pulley through the open- ing in the bandsaw unit, directly below the wheel pulley. -
Page 18: V-Belts
B. The three-step pulley can be adjusted away from the base by doubling up a washer. C. The motor pulley can be turned around and repositioned on the motor shaft. Remember, the motor should remain level after any adjustments. G1012 18" Bandsaw... -
Page 19: Belt Guard
Figure 17. Figure 17. V-belts mounted on pulleys. G1012 18" Bandsaw Belt Guard When all belts are installed, aligned, and tightened, fasten the last stand side to the stand legs. -
Page 20: Table
Figure 20. -18- Trunnion Pointer Figure 20. Table mounted on trunnion casting. The Model G1012 includes a positive stop bolt for quick table adjustments. Locate the ⁄ "-16 x 3" hex bolt from your hardware bag and thread it into the trunnion casting as shown in Figure 21. -
Page 21: Blade Guides
Figure 23. Blade Guides Figure 23. Blade guide assembly. G1012 18" Bandsaw The last item to install is the rip fence. Notice on the front and back edge of the table there are (4) ⁄... -
Page 22: Section 5: Adjustments
TRACKING KNOB — Tilts the upper wheel forward/backward. blade guide post to raise/lower blade guides and blade guard. blade guides and rear support bearing. G1012 18" Bandsaw... -
Page 23: Blade Tracking
Be careful when turning the band wheels by hand. The aluminum spokes may have sharp edges and the blade teeth may extend beyond the edge of the wheel. G1012 18" Bandsaw Blade Tension To adjust the tension: Loosen the upper and lower guide blocks and raise the upper guide block as high as it will go. -
Page 24: Guide Post
To set the guide-blocks within the guide- block holder: Guide-Block Holder Space .004" Each Side Blade Figure 28. Proper guide block adjustment. Loosen the setscrews locking the guide- blocks in the guide-block holder. G1012 18" Bandsaw disconnect making adjust- Guide-Blocks... - Page 25 Figure 29. Retighten the shaft setscrew. Figure 30. Dollar folded twice for support bearing adjustment. G1012 18" Bandsaw LOWER BLADE GUIDE ASSEMBLIES The lower blade guide assemblies should be adjusted to the same tolerances as the upper guide assemblies.
-
Page 26: Table Adjustments
Figure 31. Position the table to the desired angle of tilt. Refer to the angle gauge on the front table trunnion for the tilting angle. Retighten both plastic knobs. Figure 31. Plastic trunnion knobs. G1012 18" Bandsaw... - Page 27 Figure 33. The distance you measure should be the same at both the front and the back of the table. G1012 18" Bandsaw Figure 33. Squaring table to blade. Adjust the table in the desired direction and secure in position by retightening the trun- nion bolts.
-
Page 28: Fence Adjustment
You may need to readjust the fence locking mechanisms to gain maximum adjustment. While maintaining the skew, tighten the cap screws. Blade Lead ⁄ " thick x 3" wide x 17" long. On a G1012 18" Bandsaw... -
Page 29: Blade Lead
NOTICE Lead adjustments will change when new blades are mounted on the saw. G1012 18" Bandsaw Wheel Alignment Wheel alignment is one of the easiest ways to ensure you get optimal performance from your bandsaw. When wheels are aligned, or coplanar, the bandsaw is more likely to cut straight without wandering;... - Page 30 When wheels are properly coplanar, the blade may not be centered on the crown of the wheel, but it will be balanced. See Figure 39 to better understand coplanarity. Figure 39. Coplanar diagram. G1012 18" Bandsaw...
-
Page 31: Section 6: Operations
WE STRONGLY RECOMMEND that you read books, trade magazines, or get formal train- ing to maximize the potential of your machine. G1012 18" Bandsaw loose clothing Once the assembly is complete and the adjust- ments are done to your satisfaction, you are ready to test the machine. -
Page 32: Blade Information
Blade Length Measured by the circumference, blade lengths are usually unique to the brand of your bandsaw and the wheel diameter. The Model G1012 is designed for blades that are 124" long. However, the tension adjustment will accommodate blades up to a maximum length of 125" and down to a minimum of approximately 123"... - Page 33 (fine pitch) will cut slower, but smoother; while fewer teeth per inch (coarse pitch) will cut rougher, but faster. As a general rule, choose G1012 18" Bandsaw blades that will have at least three teeth in the material at all times. Use fine pitched blades on harder woods and coarse pitched blades on soft- er woods.
-
Page 34: Ripping
For plywood and other processed wood, ripping simply means cutting down the length of the workpiece. To rip with the Model G1012: Using a straightedge or other accurate guide, lightly pencil the workpiece along the desired path of cut. -
Page 35: Crosscutting
Maximum cutting height for this bandsaw is 9 The Model G1012 18" Bandsaw is capable of resawing, provided the saw is set up properly. Use common sense when resawing. Attempting... -
Page 36: Cutting Curves
Radius the operator. Be extremely careful of where ⁄ you are cutting when performing this oper- ⁄ ation. ⁄ Figure 44. Cutting multiple pieces at once. G1012 18" Bandsaw... -
Page 37: Section 7: Maintenance
The table and other non-painted surfaces on the Model G1012 should be protected against rust and pitting. Wiping the saw clean after every use ensures that wood dust is not allowed to trap moisture against bare metal surfaces. -
Page 38: Wire Diagram
-36- G1012 18" Bandsaw... -
Page 39: Section 8: Closure
Washington location using the address in the General Information section. The specifications, drawings, and photographs illustrated in this manual represent the Model G1012 as supplied when the manual was prepared. However, due to Grizzly’s policy of continuous improvement, changes may be made at any time with no oblig- ation on the part of Grizzly. -
Page 40: Machine Data
Customer Service #: (570) 546-9663 • To Order Call: (800) 523-4777 • Fax #: (800) 438-5901 GRIZZLY MODEL G1012 18" BANDSAW Design Type:...Floor Model Overall Dimensions: Table ...18" x 18" x 1 Height from Floor to Table...38" Height Overall ...71"... -
Page 41: Parts Breakdown And Parts Lists
G1012 18" Bandsaw -39-... - Page 42 -40- G1012 18" Bandsaw...
- Page 43 G1012 18" Bandsaw -41-...
- Page 44 -42- G1012 18" Bandsaw...
- Page 45 FLAT WASHER 035 PN06 HEX NUT ⁄ 036 PR21M INT. RETAINING RING 35MM 037 PW06 FLAT WASHER G1012 18" Bandsaw 038 P1012038 PIN 039 P1012039 HEX BOLT 5/8"-11 X 2 040 PW14 041 P1012041 BASE ⁄ " I.D. 042 PN04 ⁄...
- Page 46 106 P1012106 LOWER WHEEL GUARD 107 P1012107 UPPER HINGE ASSEMBLY 108 P1012108 LOWER BEARING HOUSING 110 P1012110 RAIL PLUG -44- 111 PLABEL-8 GRIZZLY LOGO PLATE 112 P1073171 DO NOT OPEN LABEL 113 P1073170 HANDS/BLADE LABEL 114 P1012114 WARNING/ID LABEL 115 PTS006 117 PLN01 ⁄...
-
Page 47: Troubleshooting
1. Rubber pads not installed under stand. Excessive vibration. 2. Wheels not coplanar. 3. Tires incorrectly installed. 4. Worn out V-belt. 5. Bent or worn out blade. 6. Wheels out of balance. G1012 18" Bandsaw connections. connections. appliances, and other motors. company facilities. restricted. connections. -
Page 48: Warranty And Returns
WARRANTY AND RETURNS Grizzly Industrial, Inc. warrants every product it sells for a period of 1 year to the original purchaser from the date of purchase. This warranty does not apply to defects due directly or indirectly to misuse, abuse, negligence, accidents, repairs or alterations or lack of maintenance. -
Page 49: Warranty Card
Do you think your purchase represents good value? ___Yes Would you recommend Grizzly Industrial to a friend? ___Yes Would you allow us to use your name as a reference for Grizzly customers in your area? Note: We never use names more than three times. ___Yes Comments:__________________________________________________... - Page 50 FOLD ALONG DOTTED LINE FOLD ALONG DOTTED LINE Send a Grizzly Catalog to a friend: GRIZZLY INDUSTRIAL, INC. P.O. BOX 2069 BELLINGHAM, WA 98227-2069 Name_______________________________ Street_______________________________ City______________State______Zip______ TAPE ALONG EDGES--PLEASE DO NOT STAPLE Place Stamp Here...
Need help?
Do you have a question about the G1012 and is the answer not in the manual?
Questions and answers