Table of Contents
Advertisement
Quick Links
Advertisement
Table of Contents

Related Manuals for Grizzly G1012


Summary of Contents for Grizzly G1012
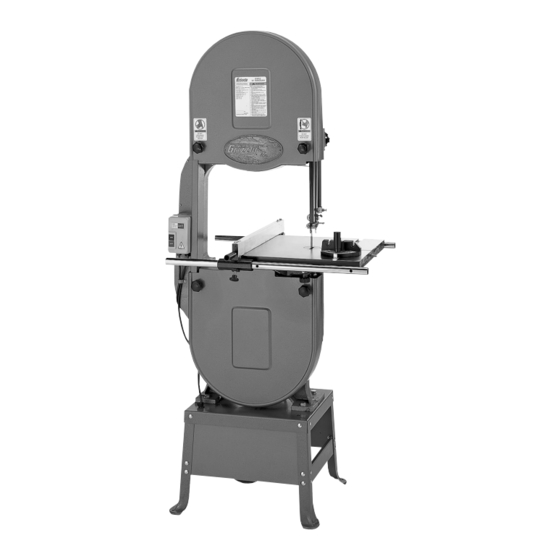
- Page 1 18" BANDSAW MODEL G1012 INSTRUCTION MANUAL COPYRIGHT © 1992 BY GRIZZLY INDUSTRIAL, INC. REG.# TX 3 170 590 WARNING: NO PORTION OF THIS MANUAL MAY BE REPRODUCED IN ANY SHAPE OR FORM WITHOUT THE WRITTEN APPROVAL OF GRIZZLY INDUSTRIAL, INC.
-
Page 2: Table Of Contents
BLADE GUIDES....................16-17 TABLE ADJUSTMENTS................17-18 TEST RUN......................18 OPERATIONS ......................19 OVERVIEW ......................19 BLADE INSTALLATION ..................19 BLADE INFORMATION ..................20 RESAWING ......................20 CUTTING CURVES....................21 STACKED CUTS ....................21 MAINTENANCE ......................22 GENERAL ......................22 LUBRICATION ....................22 TABLES ......................22 V-BELT........................22 CLOSURE........................23 WARRANTY AND RETURNS ................27 G1012 18" Bandsaw... -
Page 3: Safety
USE RIGHT TOOL. Don’t force tool or MENT. Don’t use power tools in damp or attachment to do a job for which it was not wet locations, or where any flammable or designed. noxious fumes may exist. Keep work area well lighted. G1012 18" Bandsaw... - Page 4 20. NEVER LEAVE TOOL RUNNING UNAT- operate tool. TENDED. TURN POWER OFF. Don’t leave tool until it comes to a complete stop. 13. DON’T OVERREACH. Keep proper footing and balance at all times. G1012 18" Bandsaw...
-
Page 5: Additional Safety Instructions For Bandsaws
Always consider safety first, as it applies to your individual working conditions. Use this and other machinery with caution and respect. Failure to do so could result in seri- ous personal injury, damage to equipment or poor work results. G1012 18" Bandsaw... -
Page 6: Circuit Requirements
220V Operation Standard Locking The Model G1012 has a 2 HP motor which oper- ates at 220V/240V. If you do not intend to use a mobile base, you have the option of wiring this bandsaw directly to a dedicated circuit. However,... -
Page 7: Introduction
Grizzly Industrial, Inc. is proud to offer the Model any time with no obligation on the part of Grizzly. G1012 18" Bandsaw. This bandsaw is a part of Whenever possible, though, we send manual Grizzly’s growing family of fine woodworking... -
Page 8: Unpacking
We would like to point out that the quantities given here are the minimum The G1012 is a very heavy machine with a needed to do the job; it is possible that there will shipping weight of 350 lbs. DO NOT over- be some extra parts. -
Page 9: Clean Up
Most commercial floors paint thinner (mineral spirits) and paper towels. are suitable for the Model G1012. Some residen- Do not use gasoline or other petroleum based tial floors may require additional build up to sup- solvents because of their extremely low flash port both machine and operator. -
Page 10: Assembly
Order of Assembly Stand To begin stand assembly, locate all the stand Assembly of the G1012 is straightforward. We parts so they are within easy reach. To ease have organized the assembly process into steps. assembly, build the stand upside down on a Please follow them in sequence. -
Page 11: Pulleys And V-Belt
Belt deflec- tion should be approximately " when you push on the center of the belt with your index The G1012 can be awkward to handle with- finger. out assistance. The bandsaw unit is also very unstable until it’s permanently mount- Place the three-sheave drive pulley on the ed to the stand. - Page 12 The weight of the motor is sufficient for the amount of tension required. Lock the motor into position by tightening the nuts against the motor plate. -12- G1012 18" Bandsaw...
-
Page 13: Belt Guard
Inspect all work up to this point Figure 8. Location of star knobs. and ensure that all fasteners are tight. Always keep the tapered table pin (Part # 4) in place when operating the bandsaw. G1012 18" Bandsaw -13-... -
Page 14: Fence
Table lead to serious operator injury or damage to the machine or workshop. Spacer Rail ® 1/4" - 20 Allen Bolt Figure 9. Attachment of fence rail to the table. G1012 18" Bandsaw G1012 18" Bandsaw... -
Page 15: Adjustments
These two setscrews are used to secure the steel guide-blocks in place. The guide-blocks stabilize the blade from side to side. Figure 11. Tension knob (1) and tracking knob (2). G1012 18" Bandsaw G1012 18" Bandsaw... -
Page 16: Blade Guides
.004" from the blade. See Figure 13. The making adjustments that require contact guide-block holder (Part #7) should be adjusted between the bandsaw blade and your hand. so the front blocks are " behind the saw gul- lets. -16- G1012 18" Bandsaw... - Page 17 Bandsaw blades are dangerously sharp. Use extreme caution when adjusting guides NOTICE or making any other adjustments which require handling the bandsaw’s blade. If setting table tilt to the left, it will be nec- essary to remove the positive stop. G1012 18" Bandsaw -17-...
-
Page 18: Test Run
The table should also be 90° to the back of the blade. If the table is not perpendicular to the back of the blade, shim the table in the desired direc- tion by placing washers between the table and -18- G1012 18" Bandsaw... -
Page 19: Operations
Remember, the blade does the cutting with the operator’s guid- ance. Replace blades as necessary and make adjustments periodically to keep the saw always running in top condition. G1012 18" Bandsaw G1012 18" Bandsaw... -
Page 20: Blade Information
". width and temper for the various types of cutting operations. The G1012 bandsaw is capable of resawing, pro- vided the saw is set up properly. Use common Always use the widest blade possible. Use nar- sense when resawing. Attempting to resaw too... -
Page 21: Cutting Curves
NOTICE The table below lists blade widths and cor- responding minimum radii each blade will cut. Width Radius ⁄ '' ......1 ⁄ ⁄ '' ......2 ⁄ ⁄ '' ......5 ⁄ 1'' ........6'' ⁄ '' ......8'' G1012 18" Bandsaw -21-... -
Page 22: Maintenance
Table The table and other non-painted surfaces on the Make a habit of inspecting your Bandsaw each Model G1012 should be protected against rust time you use it. Check for the following conditions and repair or replace when necessary. and pitting. Wiping the saw clean after every use ensures that moisture from wood dust isn’t... -
Page 23: Closure
Washington location using the address in the Introduction. The specifications, drawings, and photographs illustrated in this manual represent the Model G1012 as supplied when the manual was prepared. However, due to Grizzly’s policy of continuous improvement, changes may be made at any time with no obligation on the part of Grizzly. -
Page 24: Warranty And Returns
WARRANTY AND RETURNS Grizzly Industrial, Inc. warrants every product it sells for a period of 1 year to the original purchaser from the date of purchase. This warranty does not apply to defects due directly or indirectly to misuse, abuse, negligence, accidents, repairs or alterations or lack of maintenance.
Need help?
Do you have a question about the G1012 and is the answer not in the manual?
Questions and answers